| View previous topic :: View next topic |
| Author |
Message |
jonc
Joined: 21 Sep 2010
Posts: 584
Location: Cheshire, UK
|
 Posted: Mon Jul 06, 2015 3:07 pm Post subject: Binnacle interface Posted: Mon Jul 06, 2015 3:07 pm Post subject: Binnacle interface |
 |
|
I am planning on making a new interface box for 13008 which will be converted back to touch switches. In order to do this, I have reverse-engineered the box from 13277. See also this thread for more info: http://lagondanet.com/bb/viewtopic.php?t=518
Price currently quoted for a replacement box is £820+VAT.
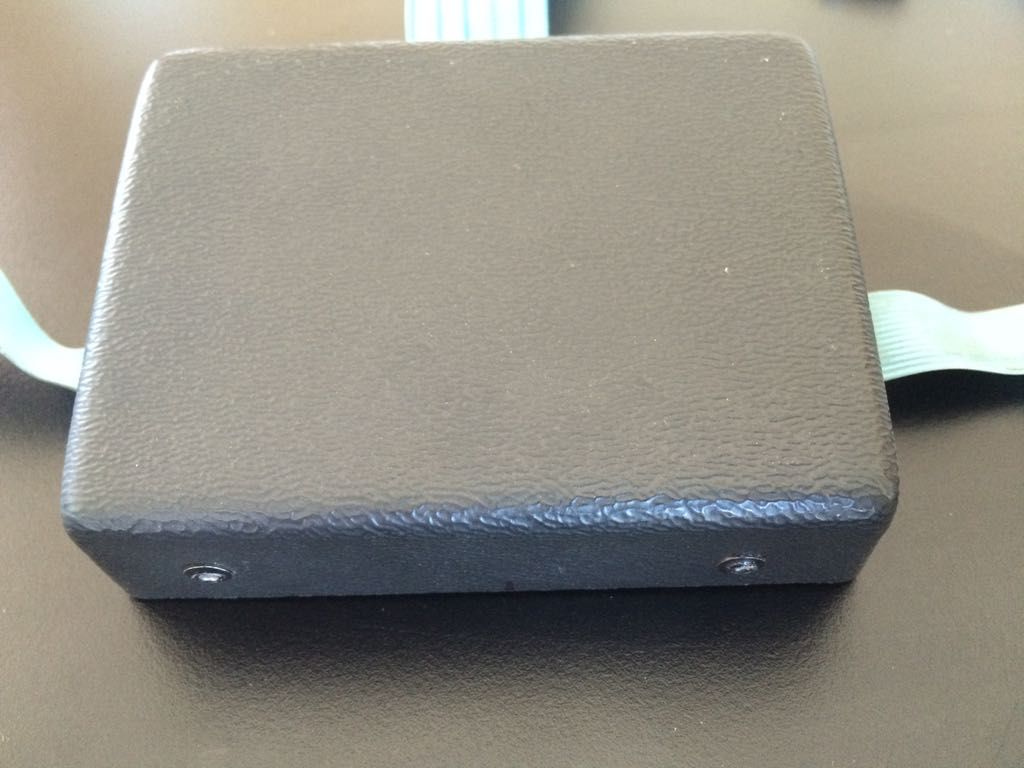
Here it is from 277:
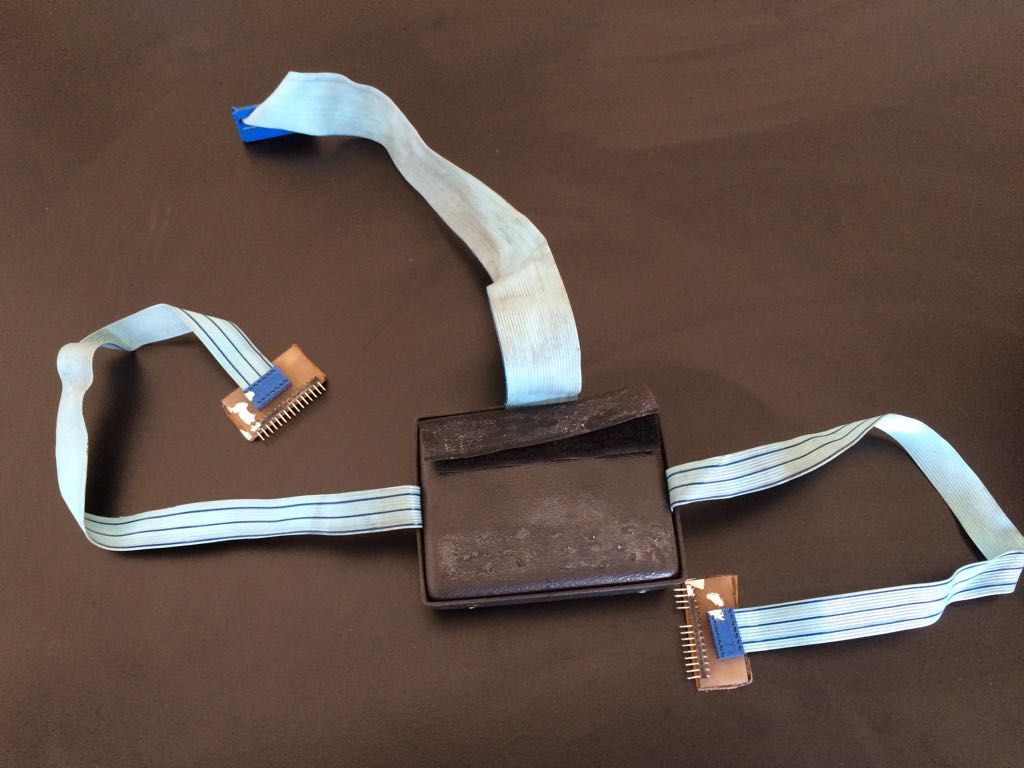
Mine is a plain black ABS box which is riveted together. There are no external markings.
There are two 16-way ribbon cables which lead to little circuit boards with SIL (single in-line) connectors which connect onto the touch switch panels flying leads.
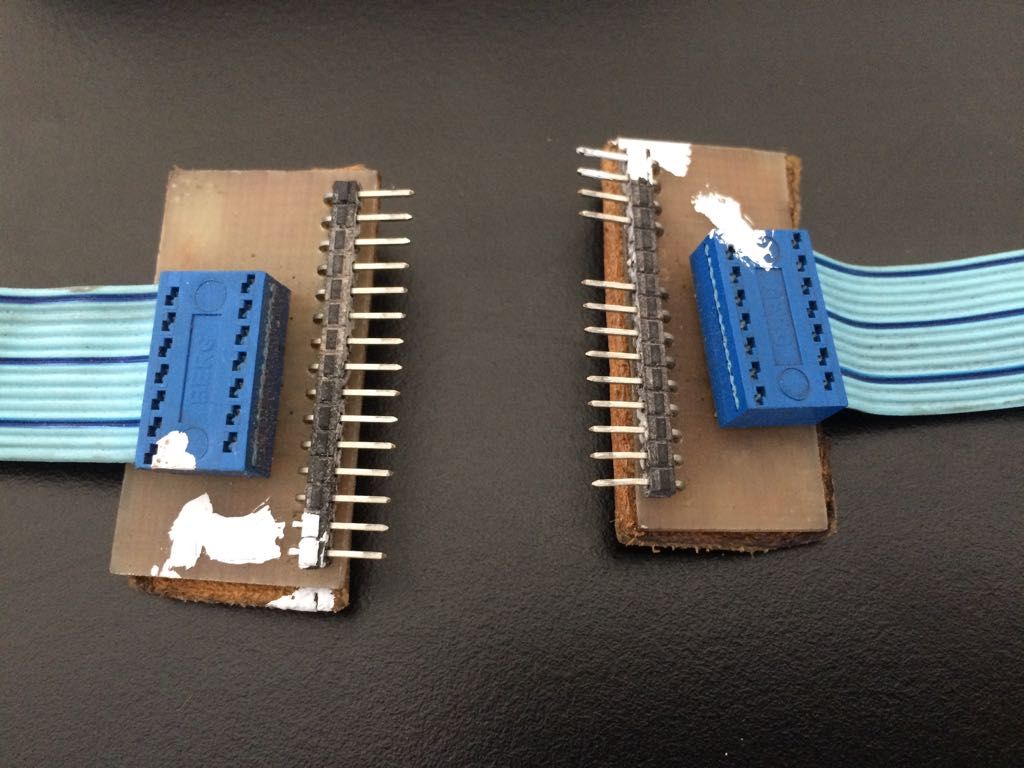
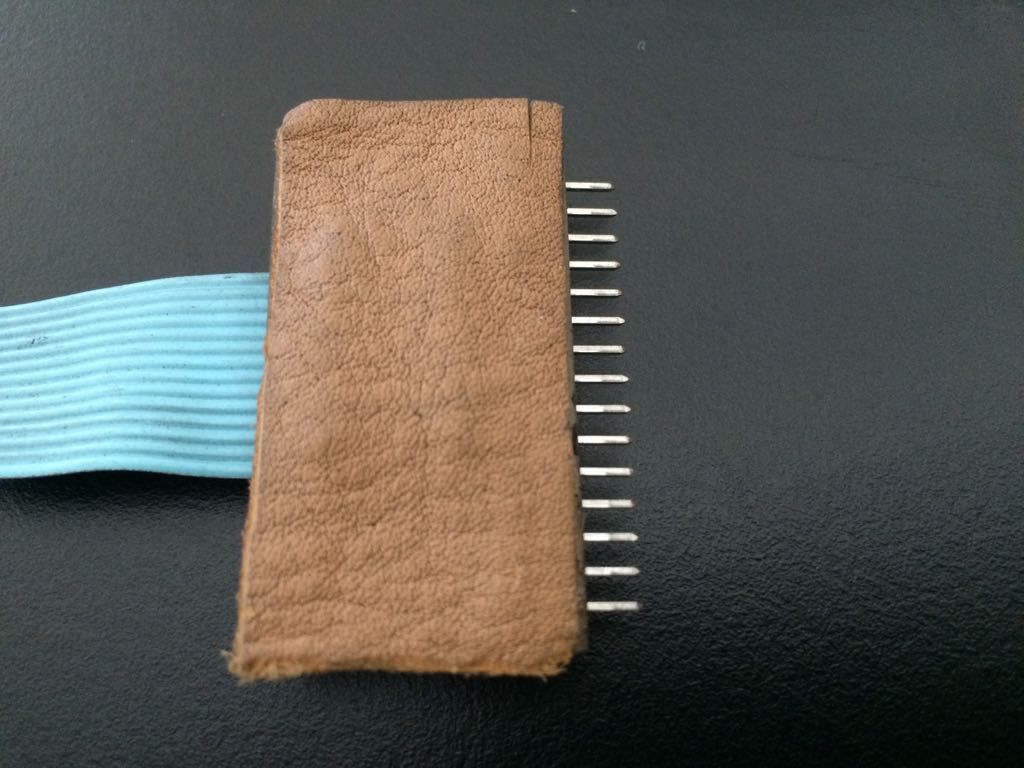
and each of these has been via the trimming department to have a piece of leather fitted to the read to provide insulation:
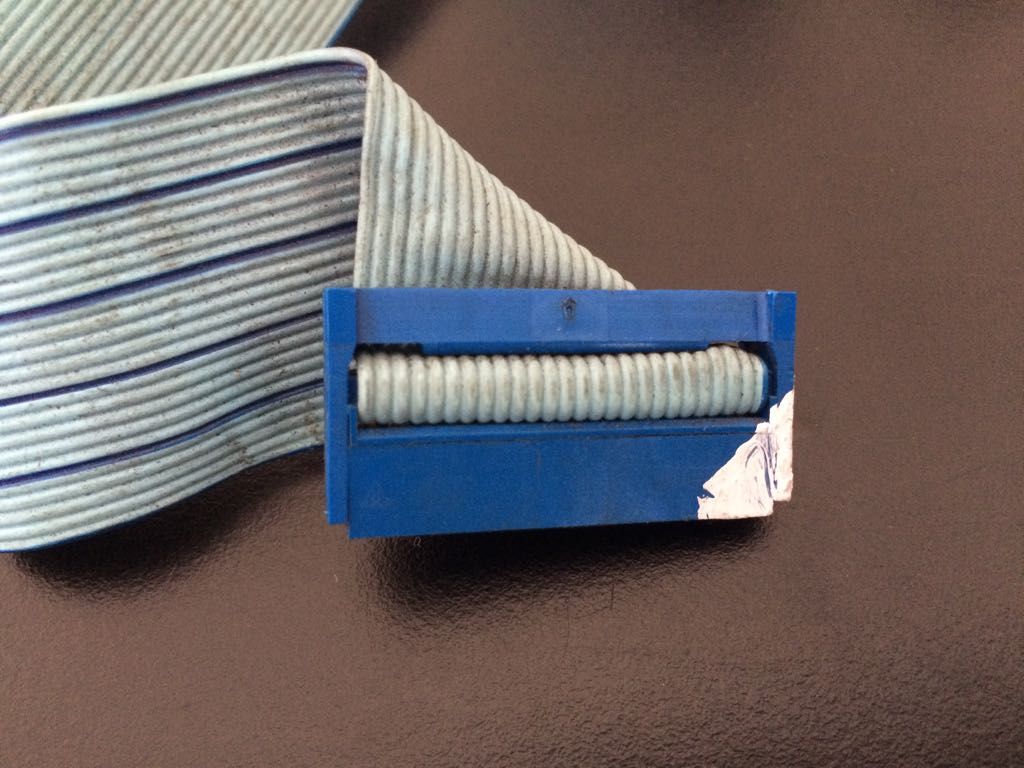
The output is a 26-way 2x13 0.1 inch IDC connector:
To open up the box you need to drill out the four rivets.
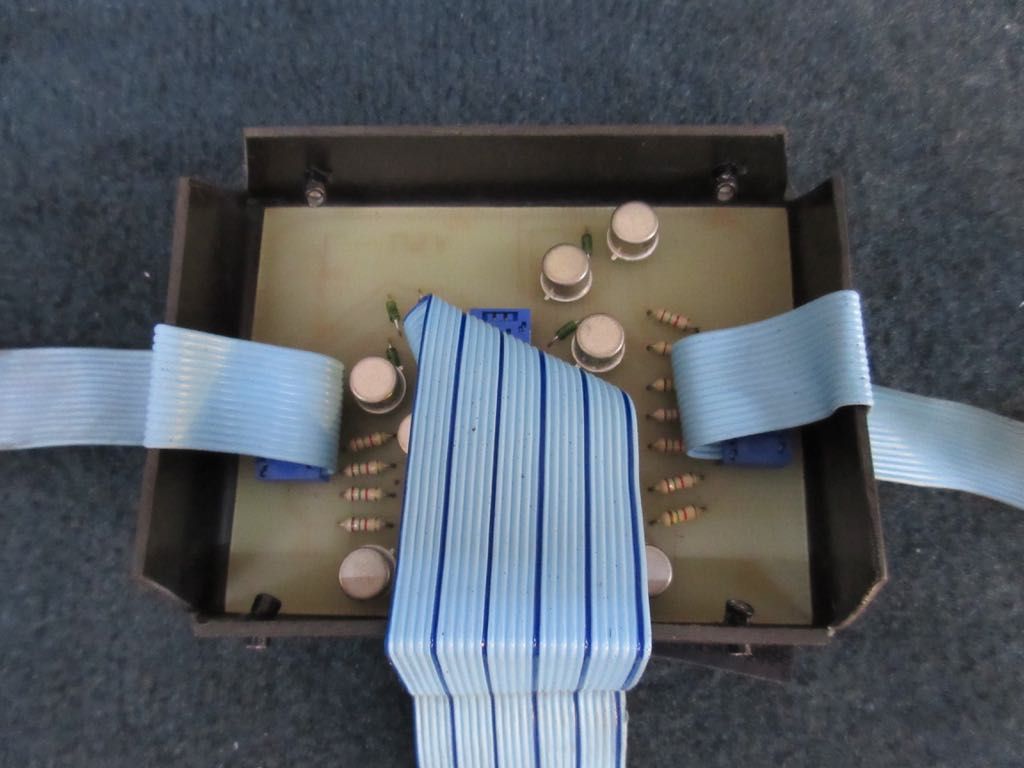
Inside is a plain single-sided circuit board. Like the LED dash boards, there is no silk-screen legend. The strain-relief on the ribbon cables is provided by the pressure of the box sides.
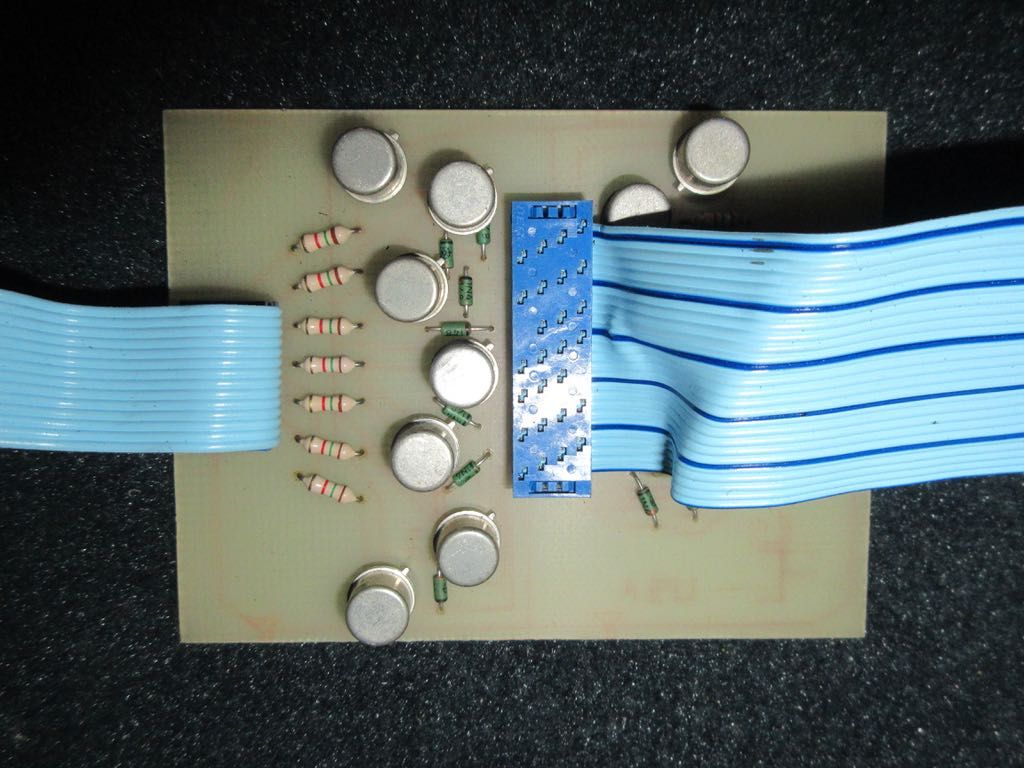
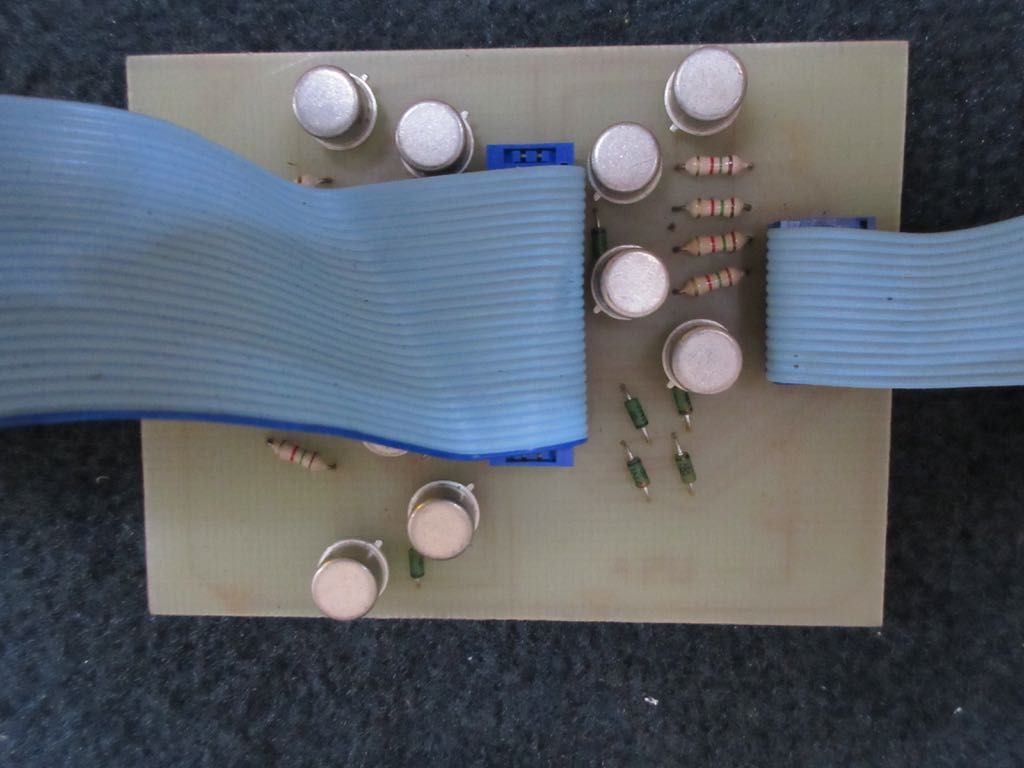
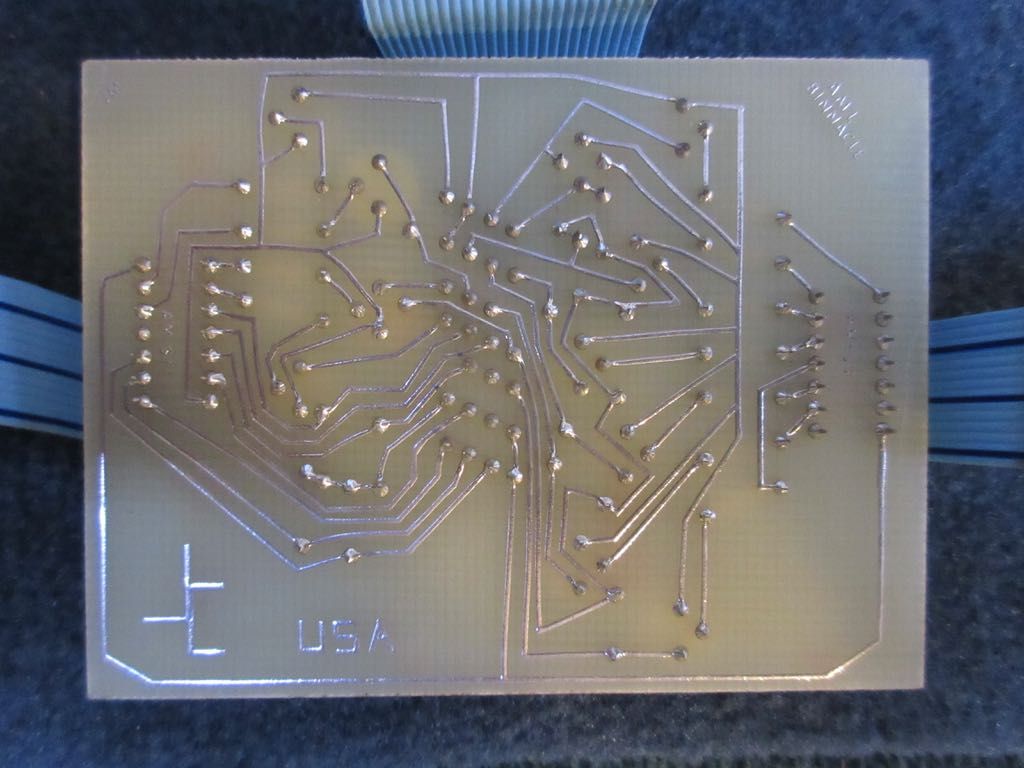
As you can see it says JC USA - Javelina Corporation. |
|
| Back to top |
|
 |
jonc
Joined: 21 Sep 2010
Posts: 584
Location: Cheshire, UK
|
 Posted: Mon Jul 06, 2015 3:18 pm Post subject: Posted: Mon Jul 06, 2015 3:18 pm Post subject: |
 |
|
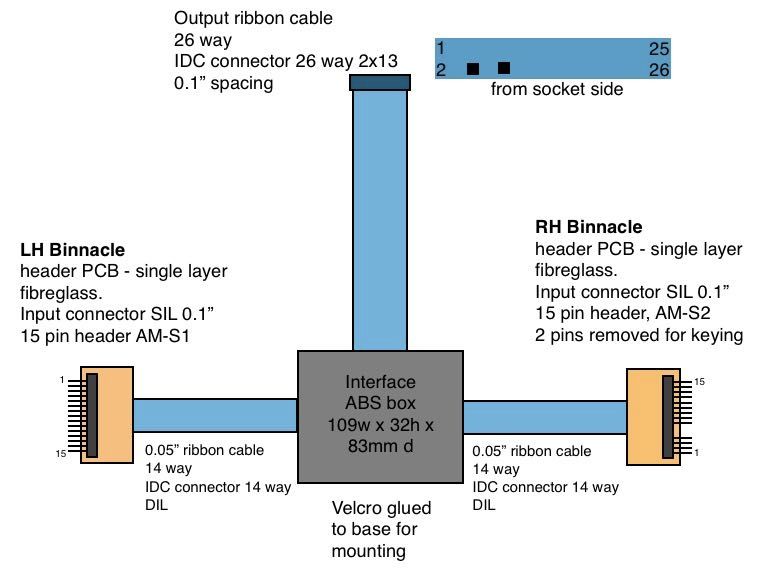
So, 11 resistors, 11 transistors, 12 diodes.
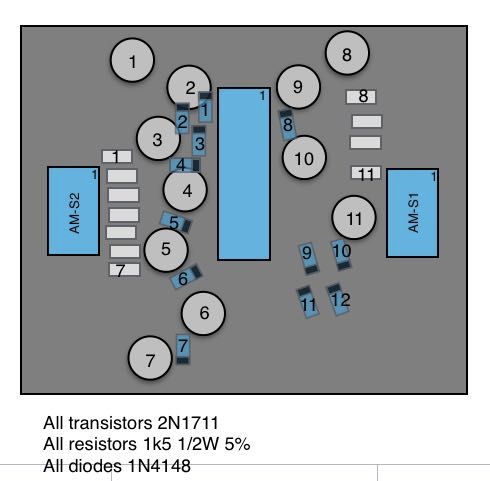
The 11 resistors and transistors are for the 11 relay-controlled functions. The diodes are to feed the two buzzers to indicate when the button is pressed, but not all buttons operate the buzzers (of the four lighting ones, its only the sidelights which buzz).
This is the basic circuit for a relay operated button:
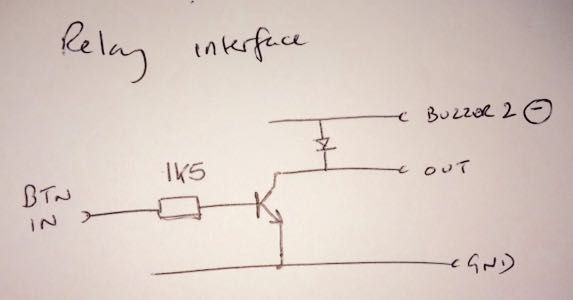
The other buttons connect to the LED dash. Four operate a buzzer, but not the clock functions.
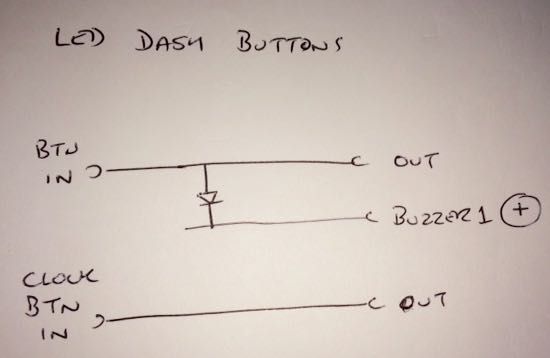
All you need now are the pin-outs of the connectors. Input ones first:
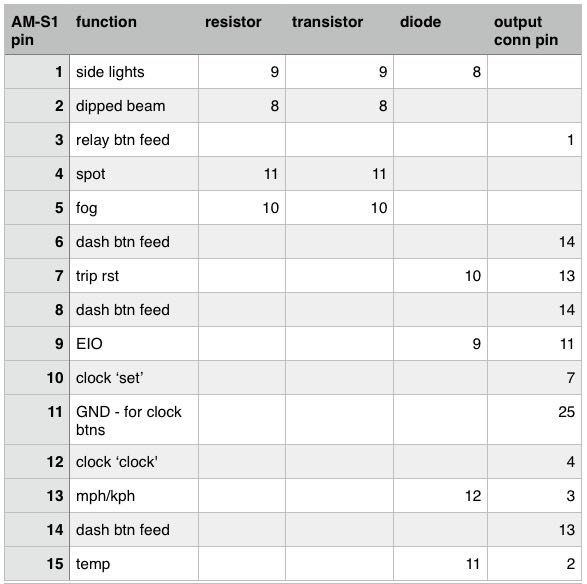
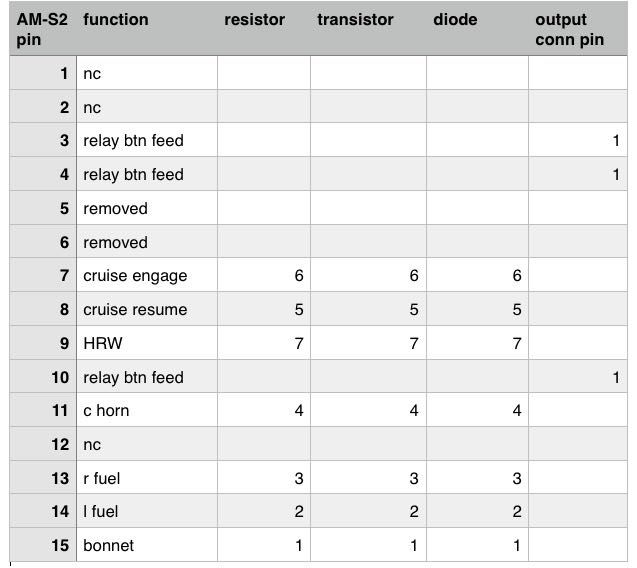
And the output one:
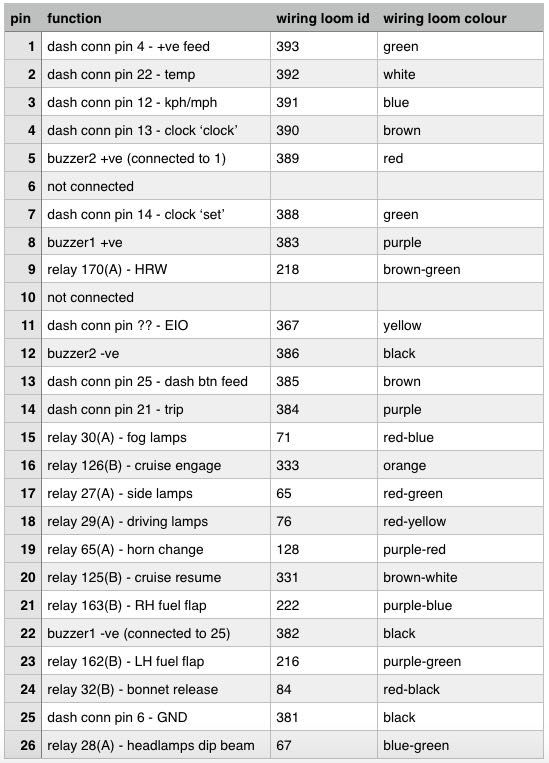
Incidentally, I think the only reason the other light touch-switches don't buzz is because the circuit board layout would have been more complex, probably needing jumper wires on it. The reason there are two buzzers is because the relays are negative switched (so their buzzer has a permanent +12v feed) whereas the buttons for the LED dash control are positive switched.
Last edited by jonc on Thu Jul 09, 2015 3:00 pm; edited 2 times in total |
|
| Back to top |
|
 |
Vrije
Joined: 23 Nov 2007
Posts: 440
|
 Posted: Tue Jul 07, 2015 6:07 am Post subject: Posted: Tue Jul 07, 2015 6:07 am Post subject: |
 |
|
Some boxes run 11transistors,some run 12 !! Also diffs in ribboncables exist as in male and female connector.  |
|
| Back to top |
|
 |
Lagondanet
Administrator

Joined: 03 Jan 2007
Posts: 3110
Location: UK
|
 Posted: Tue Jul 07, 2015 10:39 am Post subject: Posted: Tue Jul 07, 2015 10:39 am Post subject: |
 |
|
| Great work Jonathan. |
|
| Back to top |
|
 |
jonc
Joined: 21 Sep 2010
Posts: 584
Location: Cheshire, UK
|
 Posted: Thu Jul 09, 2015 3:08 pm Post subject: Posted: Thu Jul 09, 2015 3:08 pm Post subject: |
 |
|
Thanks.
My replacement uses ribbon cables, but I don't need to have a circuit board for the touch membrane inputs. I am soldering the ribbon end to a SIL connector which is strong enough on its own:
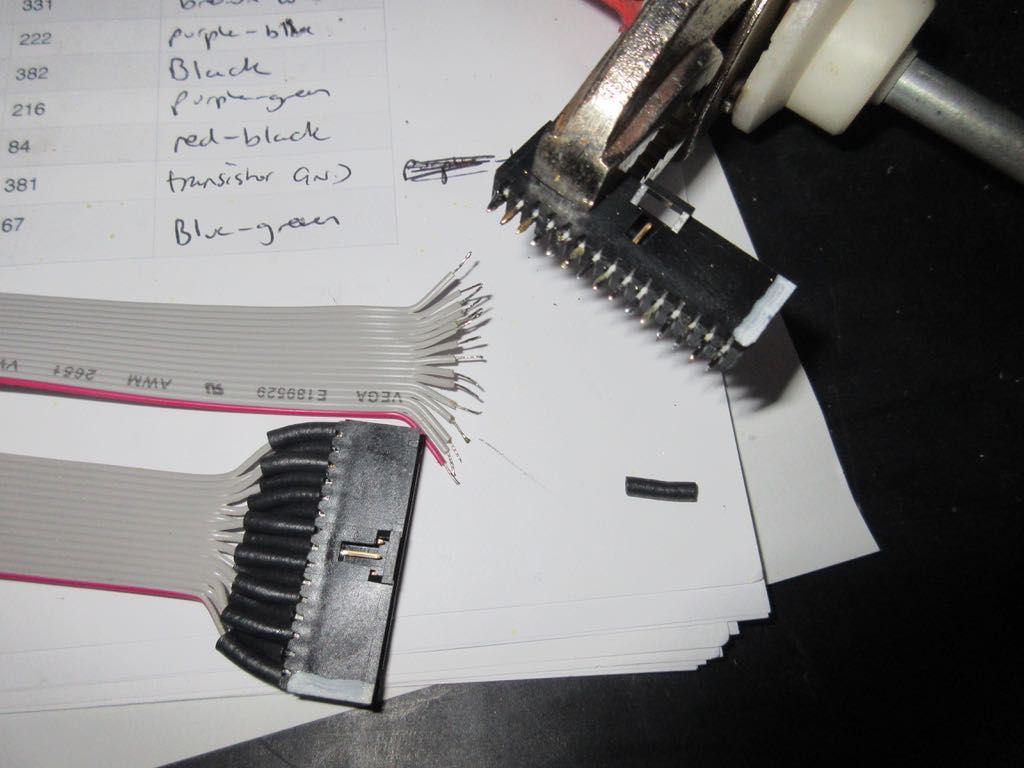
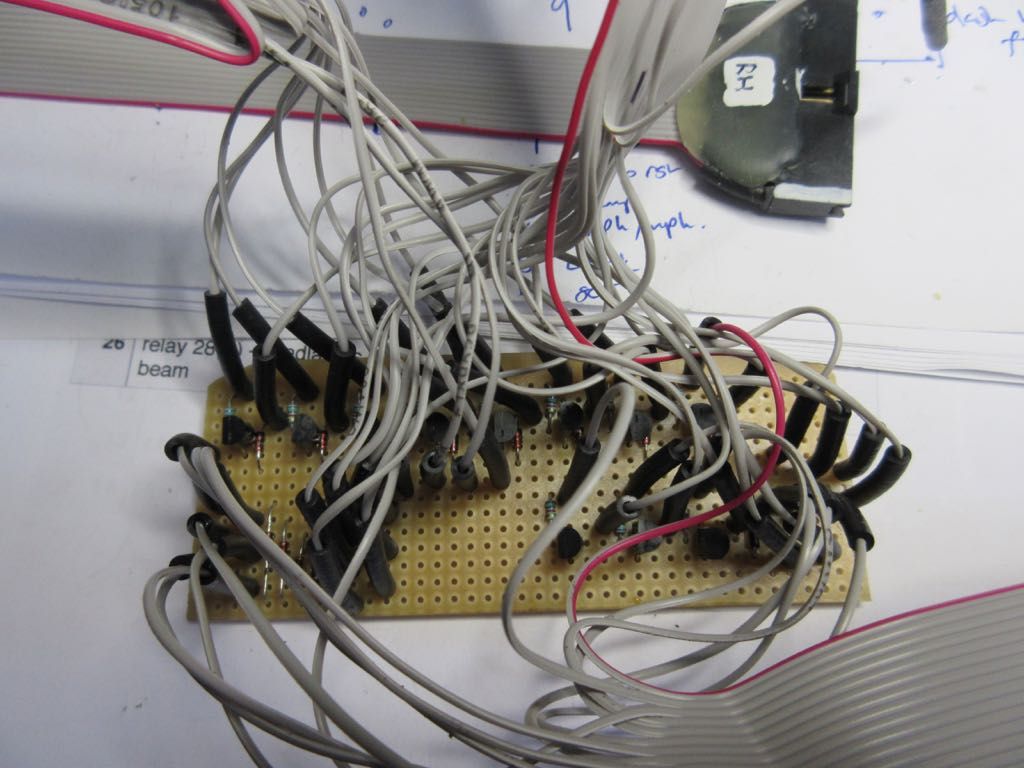
Without the ribbon cable headers, the internal circuit board is smaller too. I am using a BC337 which is a (very cheap) general purpose switching NPN transistor. The original 1N1711 is no longer available, and was over the top anyway. As you can see, soldering the ribbon cable wire by wire is both fiddly and messy. Each wire is soldered to a Vero pin sticking out of the circuit board and protected with a Hellermann neoprene sleeve. This is ok for my one-off, but would be slow and prone to error in production quantities.
The finished interface:
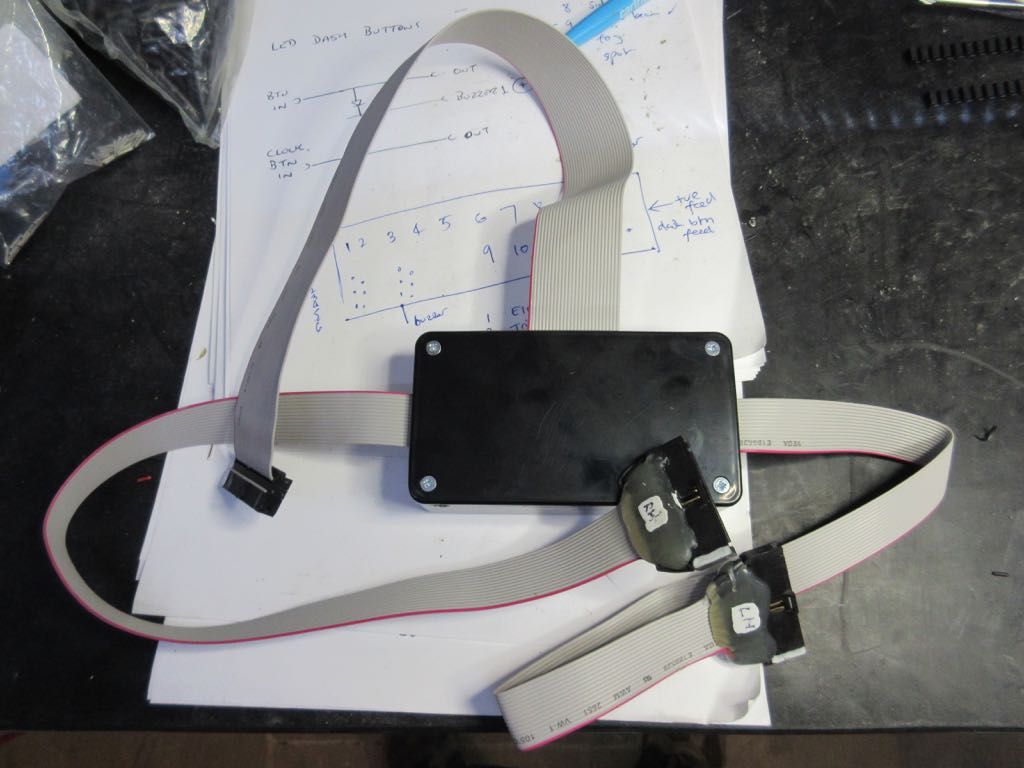
The input connectors have a layer of hot glue to protect the cable end from damage during connection and disconnection. All finished and tested. |
|
| Back to top |
|
 |
|


