 |
LagondaNet
|
| View previous topic :: View next topic |
| Author |
Message |
jonc
Joined: 21 Sep 2010
Posts: 584
Location: Cheshire, UK
|
 Posted: Fri Mar 30, 2012 12:55 pm Post subject: Posted: Fri Mar 30, 2012 12:55 pm Post subject: |
 |
|
I thought about leaving the stainless screws unpainted as I have seen this on other cars. However, the original is painted as far as I can tell, and it would be awkward with the sealant. So, painted it is:
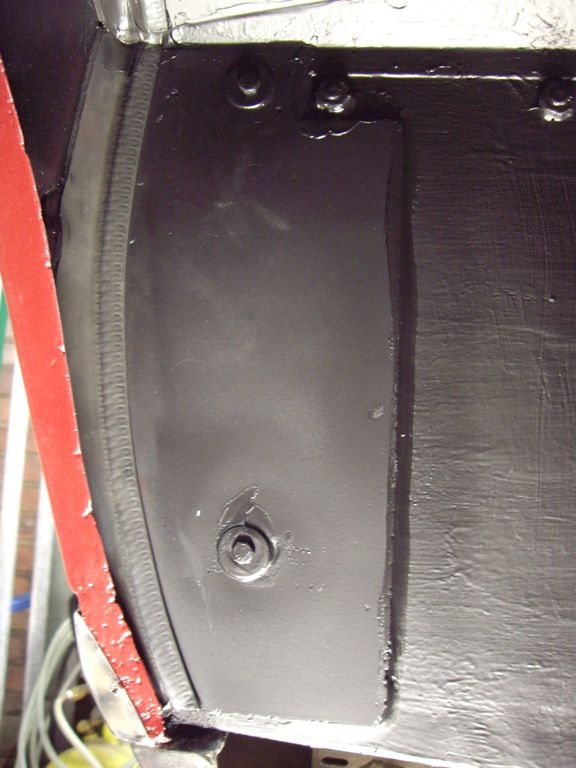
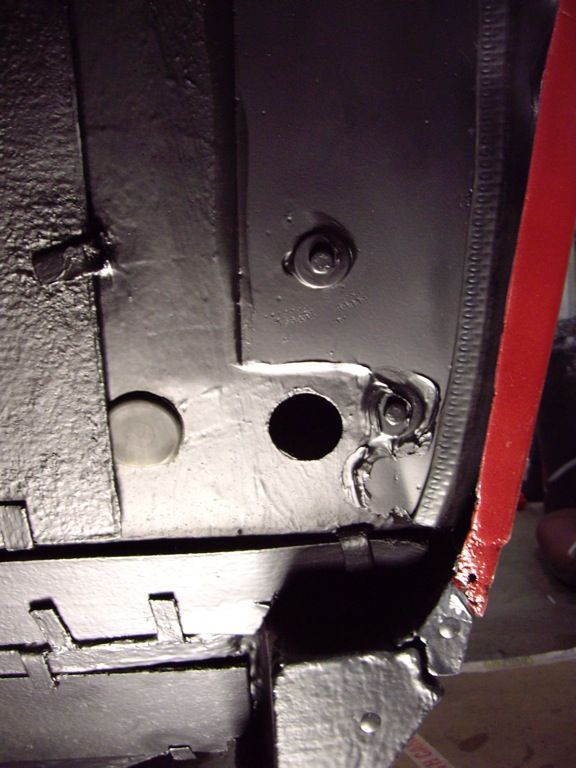
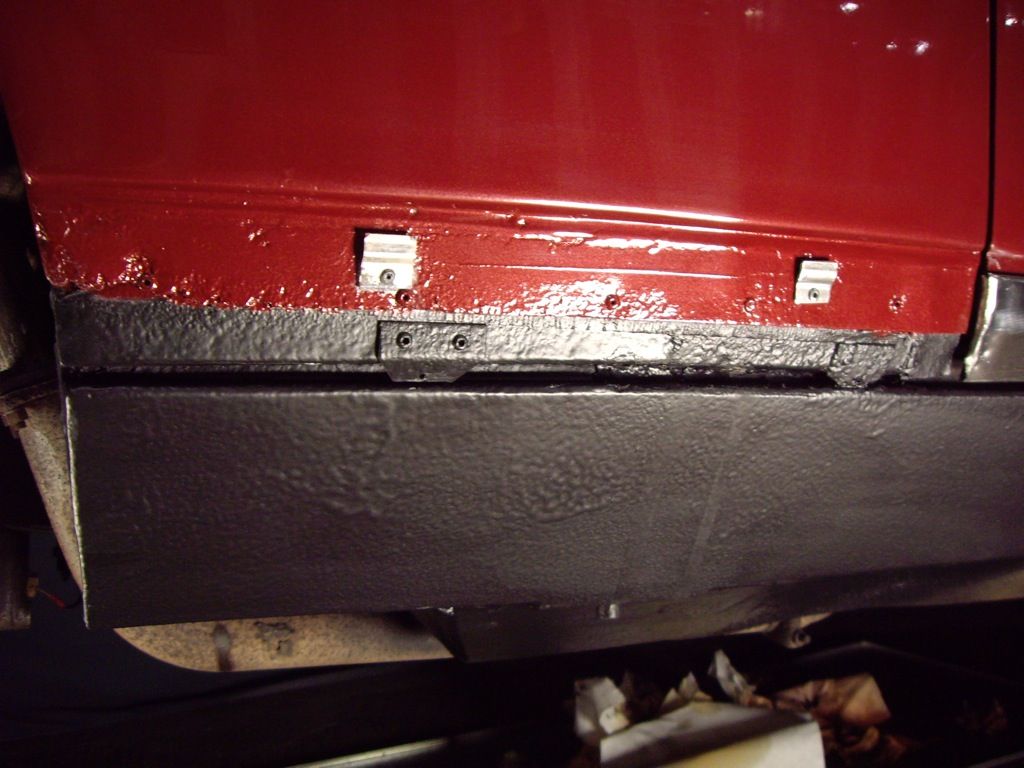
Now I repainted the wheel arch edge, and the bottom of the wing where it meets the sill. Actually, I did it before the last two photos..
 |
|
| Back to top |
|
 |
jonc
Joined: 21 Sep 2010
Posts: 584
Location: Cheshire, UK
|
 Posted: Fri Mar 30, 2012 1:07 pm Post subject: Posted: Fri Mar 30, 2012 1:07 pm Post subject: |
 |
|
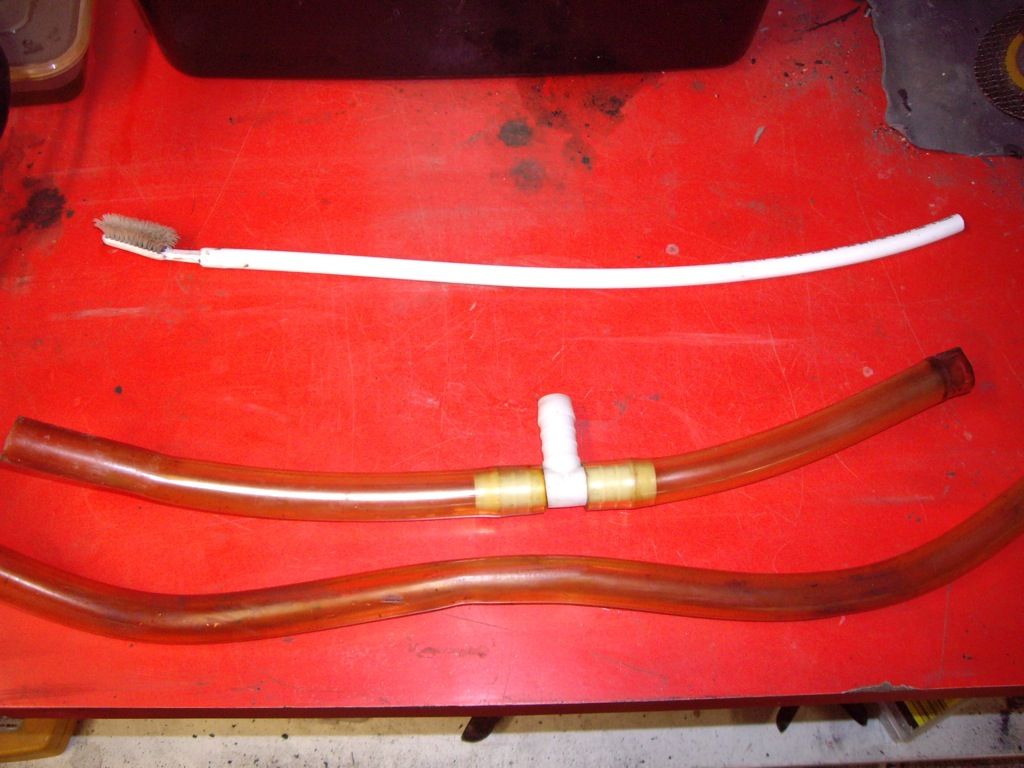
Right, time to put the scuttle drain tubes back. These needed a good clean. Here you can see the difference in the first one:
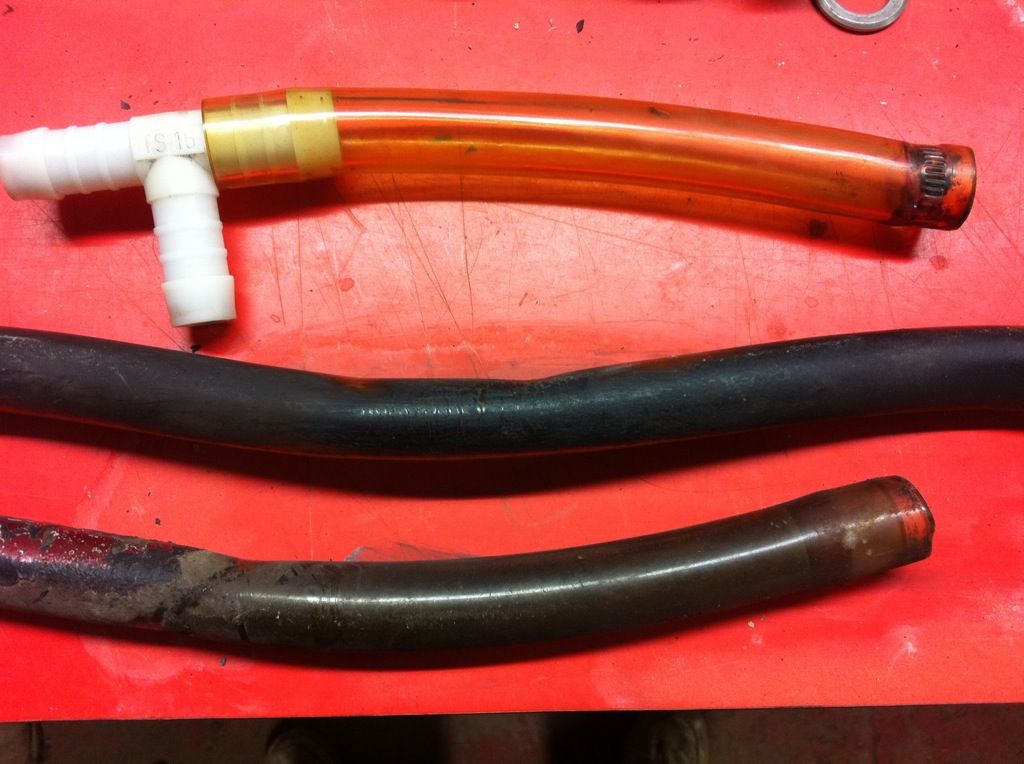
And now all done, plus you can see how I scrubbed the inside of the tubes:
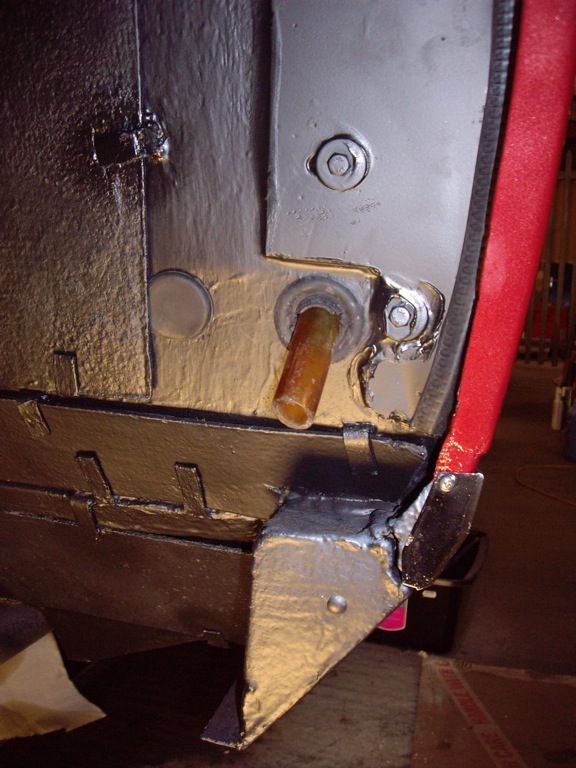
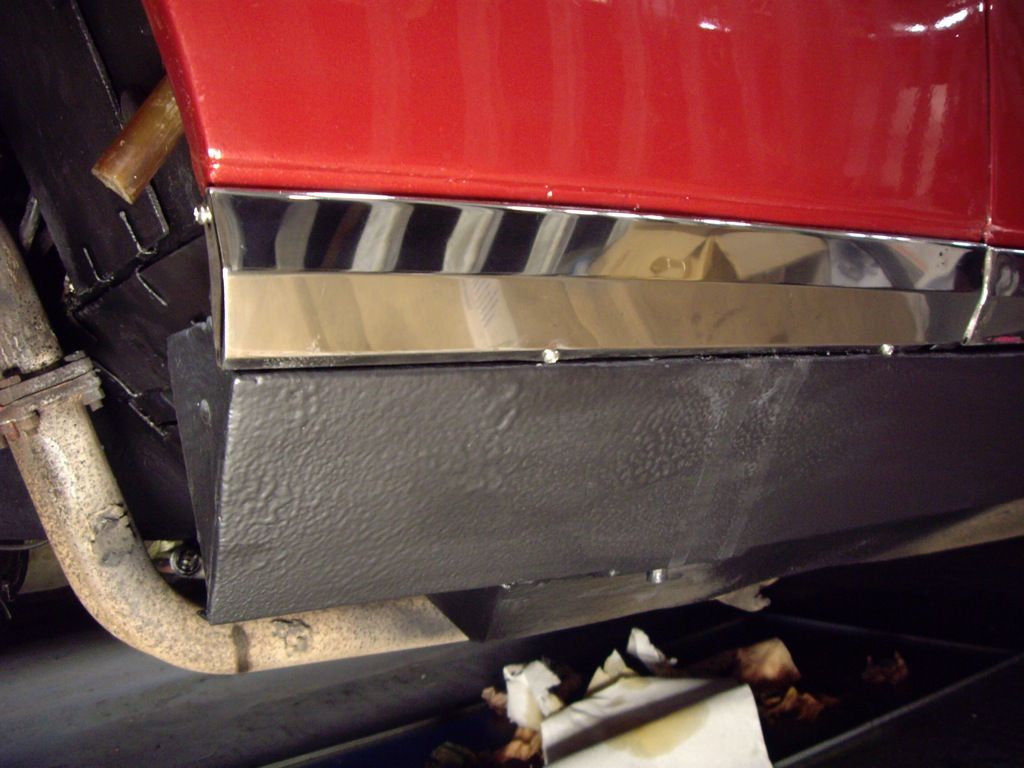
And back in place, and finally the trim goes back on (after a polish):
Now just need to finish up under the bonnet where I removed the release mechanism. Updates to follow in a few weeks.. |
|
| Back to top |
|
 |
Lagondanet
Administrator

Joined: 03 Jan 2007
Posts: 3110
Location: UK
|
 Posted: Fri Mar 30, 2012 8:04 pm Post subject: Posted: Fri Mar 30, 2012 8:04 pm Post subject: |
 |
|
| An awesome job Jonathan. When can you start on mine? |
|
| Back to top |
|
 |
jonc
Joined: 21 Sep 2010
Posts: 584
Location: Cheshire, UK
|
 Posted: Thu Apr 18, 2013 7:44 pm Post subject: Posted: Thu Apr 18, 2013 7:44 pm Post subject: |
 |
|
Well, its been a long few weeks. I actually did this work last year, but never got round to updating here.
So, the bonnet release was removed and needed refitting:
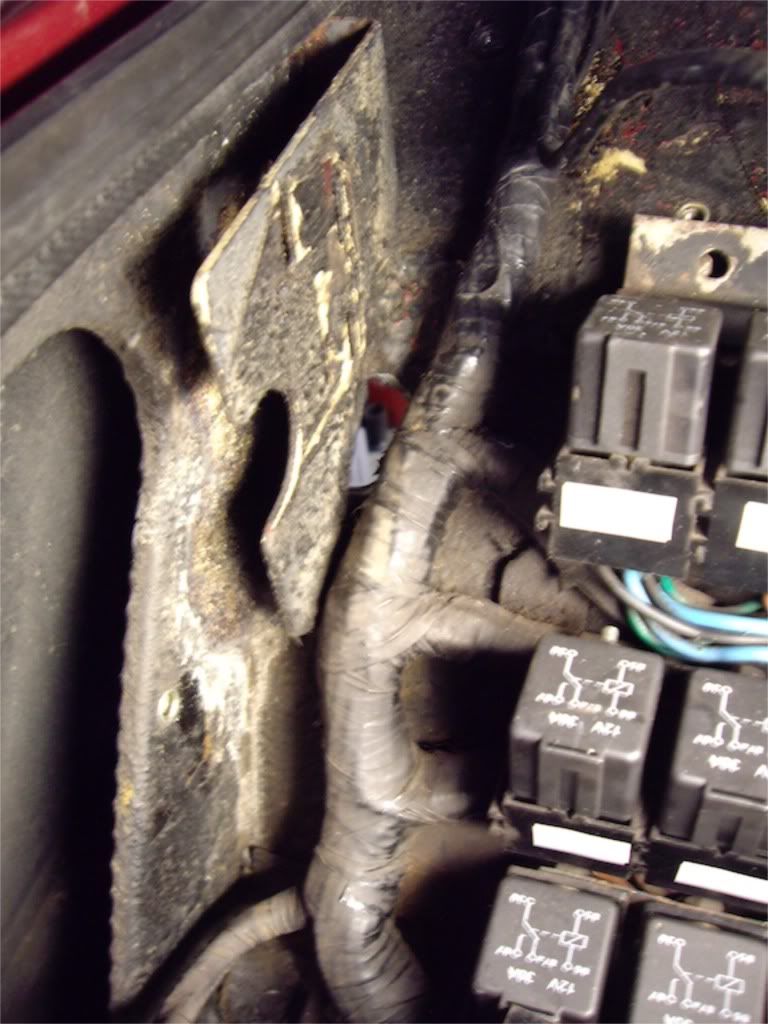
But, there was also some tidying to do. There was some flakey paint on the top of the inner wing:
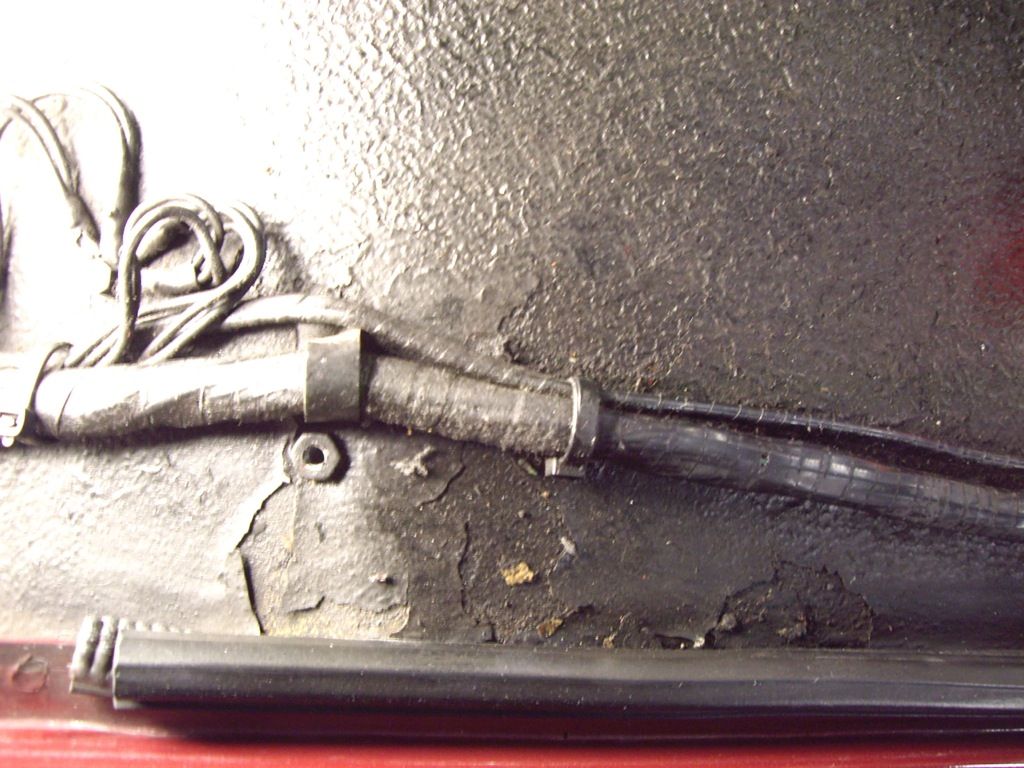
..which I thought was due to rust. It turns out it was just because of overspray, and different paint finishes at different times:
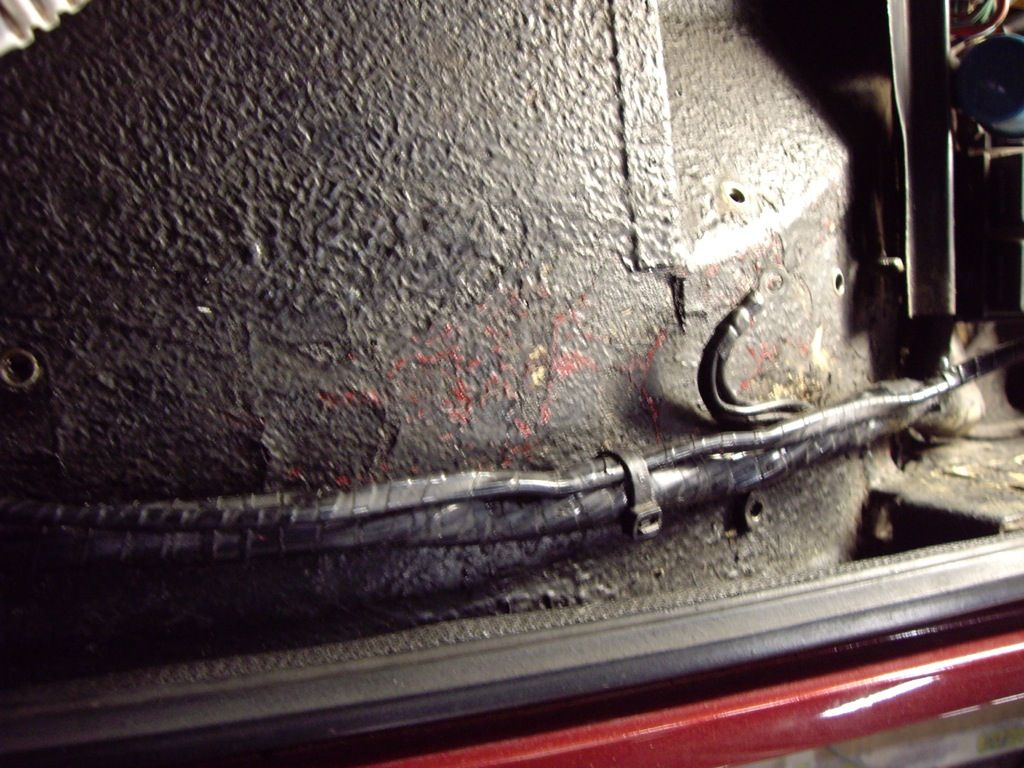
So I decided to clean it all up at the same time. |
|
| Back to top |
|
 |
jonc
Joined: 21 Sep 2010
Posts: 584
Location: Cheshire, UK
|
 Posted: Thu Apr 18, 2013 7:53 pm Post subject: Posted: Thu Apr 18, 2013 7:53 pm Post subject: |
 |
|
The loom was cleaned first to remove the overspray. I also removed the P clips and resprayed them. Then the inner wing top was resprayed where needed, and the loom refitted.
Next, the timer for the heated lamp glasses needed attention. It had lost its mounting bracket, and some of the wiring had been modified.
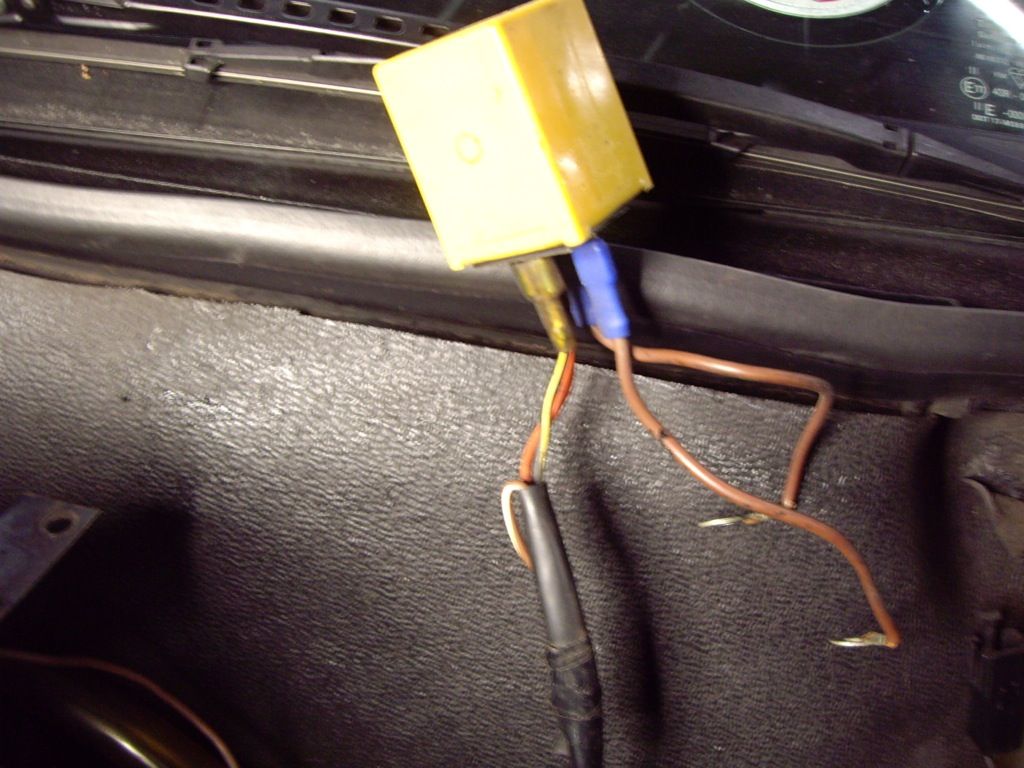
Those brown wires are earths and so should be black. Also, there are the nasty blue crimps.
I made some new wires, in an AML style with proper crimps on one end, and rings with a hellermann sleeve on the other:
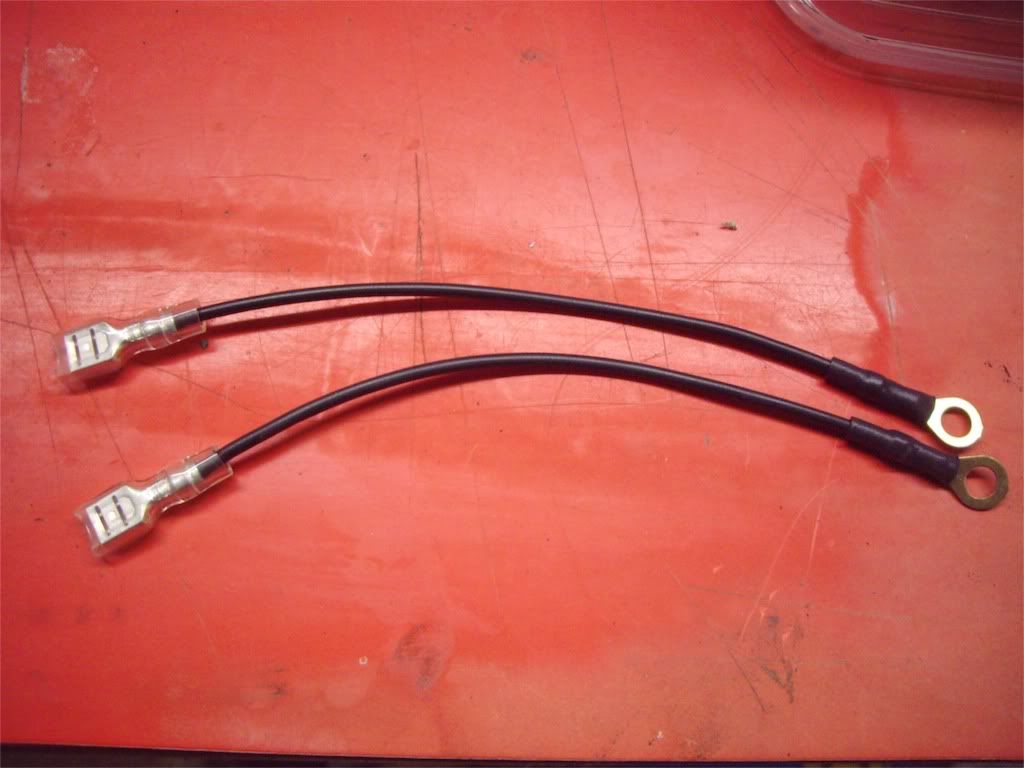
I also had to make a new bracket from a piece of stainless-steel plate to mount it back on the leg of the fuse box. But before I could put that back in place, I needed to fit the bonnet release motor. |
|
| Back to top |
|
 |
jonc
Joined: 21 Sep 2010
Posts: 584
Location: Cheshire, UK
|
 Posted: Thu Apr 18, 2013 7:57 pm Post subject: Posted: Thu Apr 18, 2013 7:57 pm Post subject: |
 |
|
Here is the release mechanism once removed:
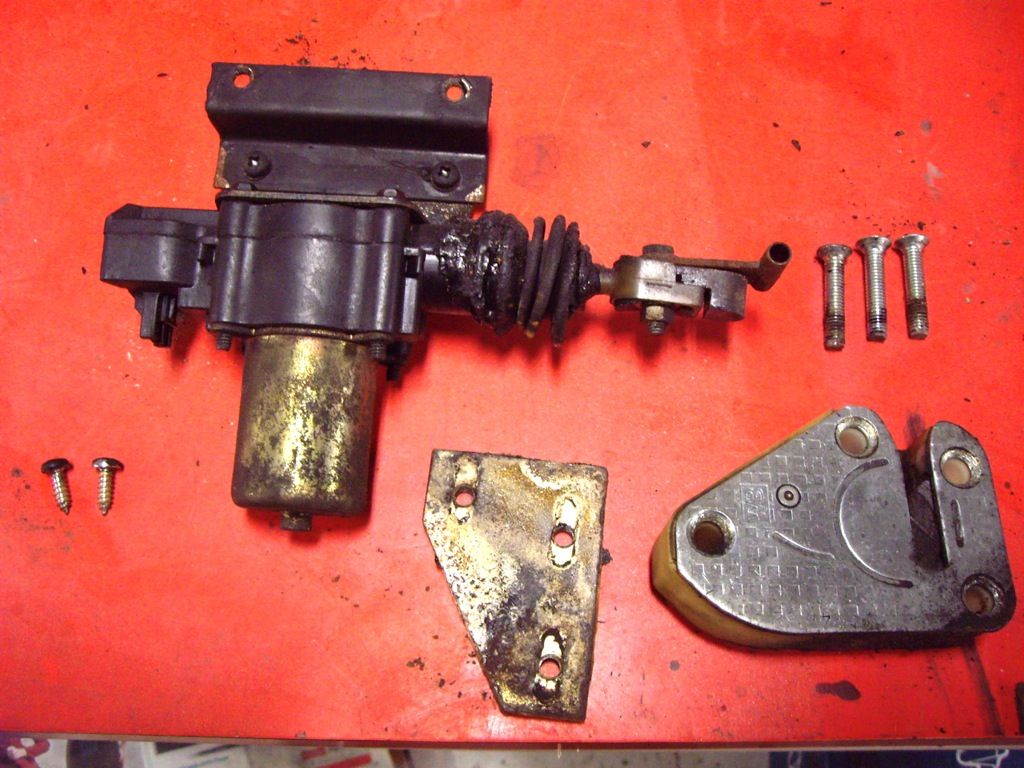
The brackets and screws have been plated and painted, and the whole thing has been cleaned and reassembled:
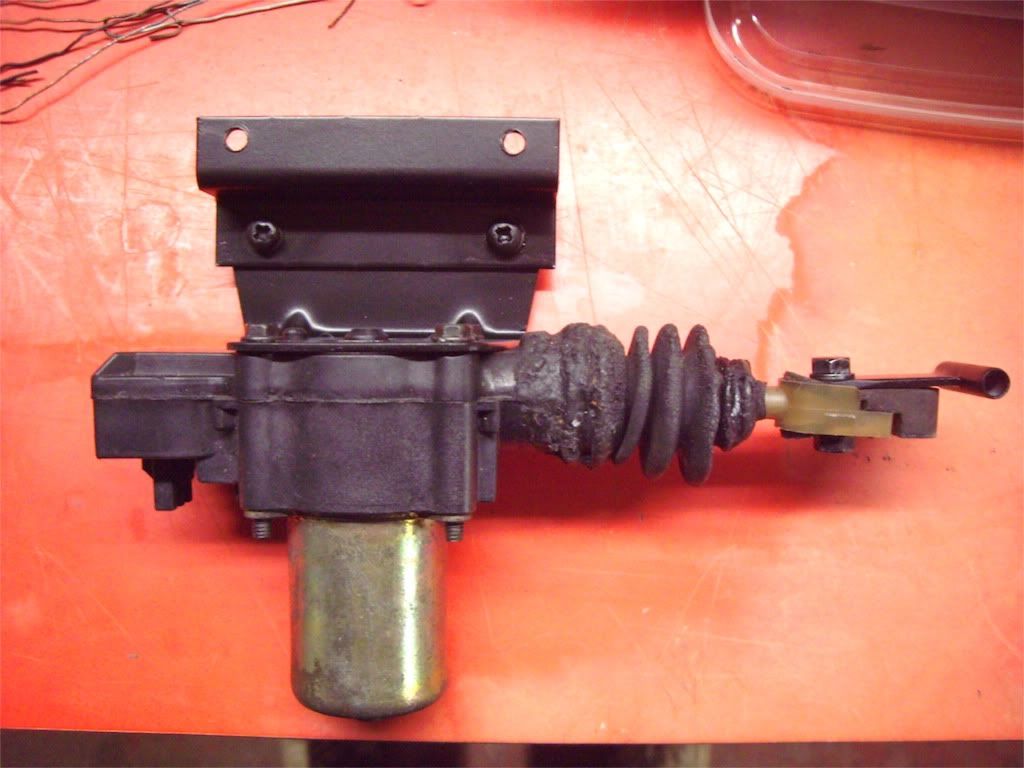
And then fitted:
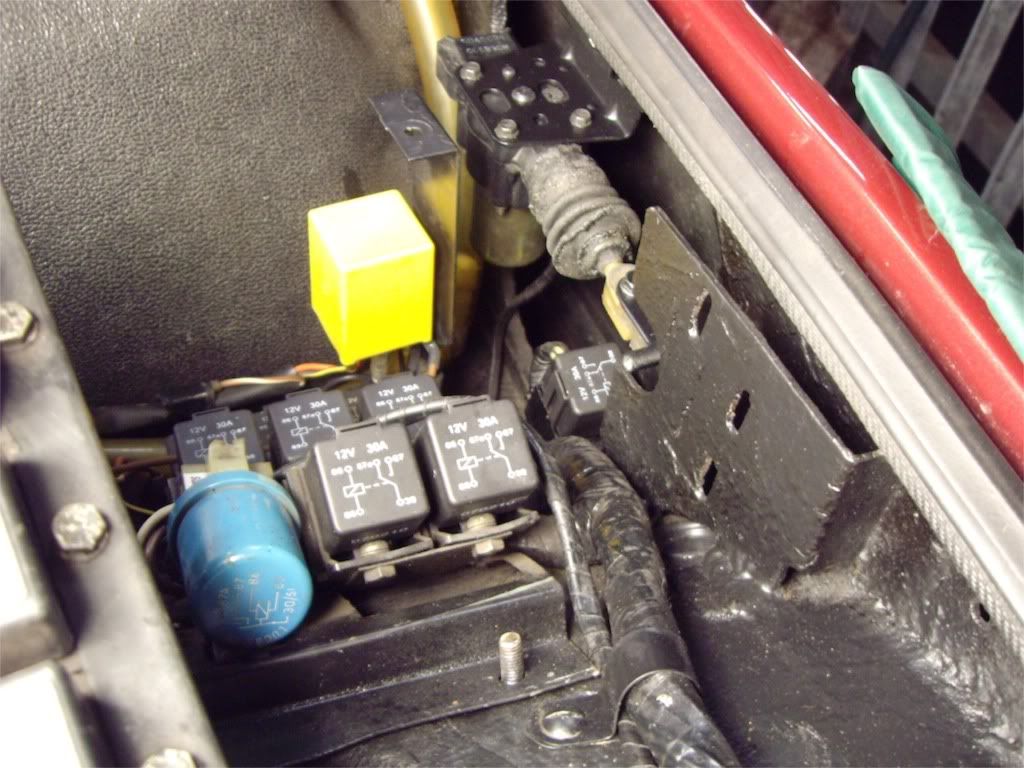 |
|
| Back to top |
|
 |
jonc
Joined: 21 Sep 2010
Posts: 584
Location: Cheshire, UK
|
 Posted: Thu Apr 18, 2013 8:13 pm Post subject: Posted: Thu Apr 18, 2013 8:13 pm Post subject: |
 |
|
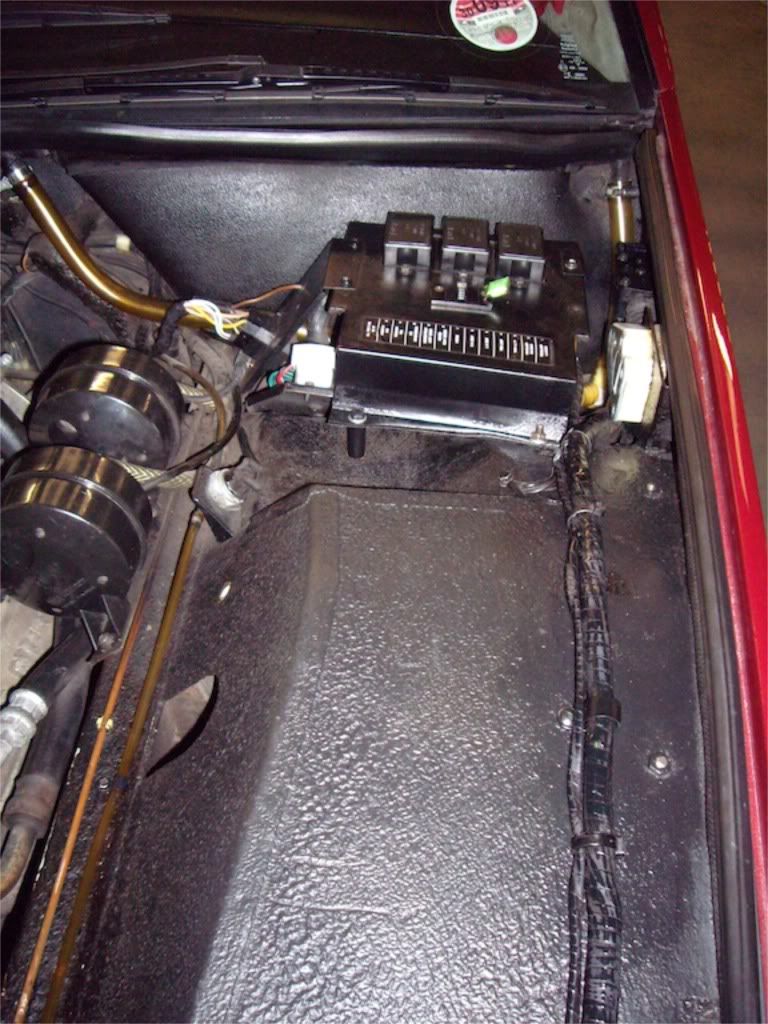
Now the lock (also cleaned and replated) is refitted. Now the fusebox can go back:
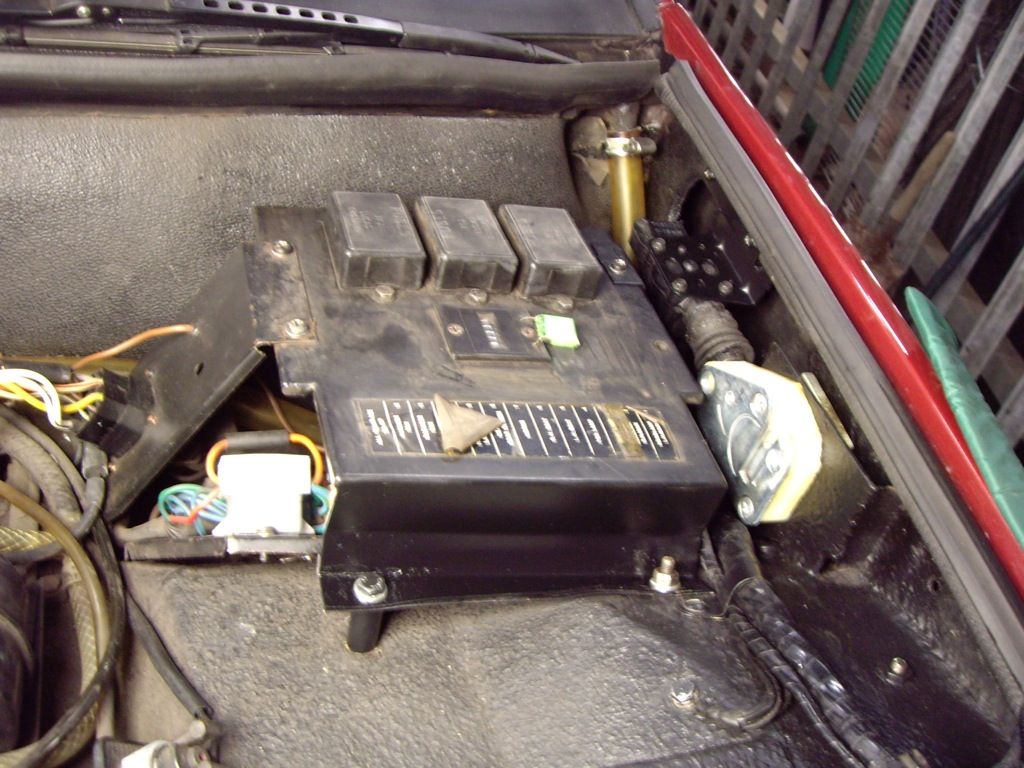
..but it looked a bit tatty, so I decided to clean and touch it up a bit:
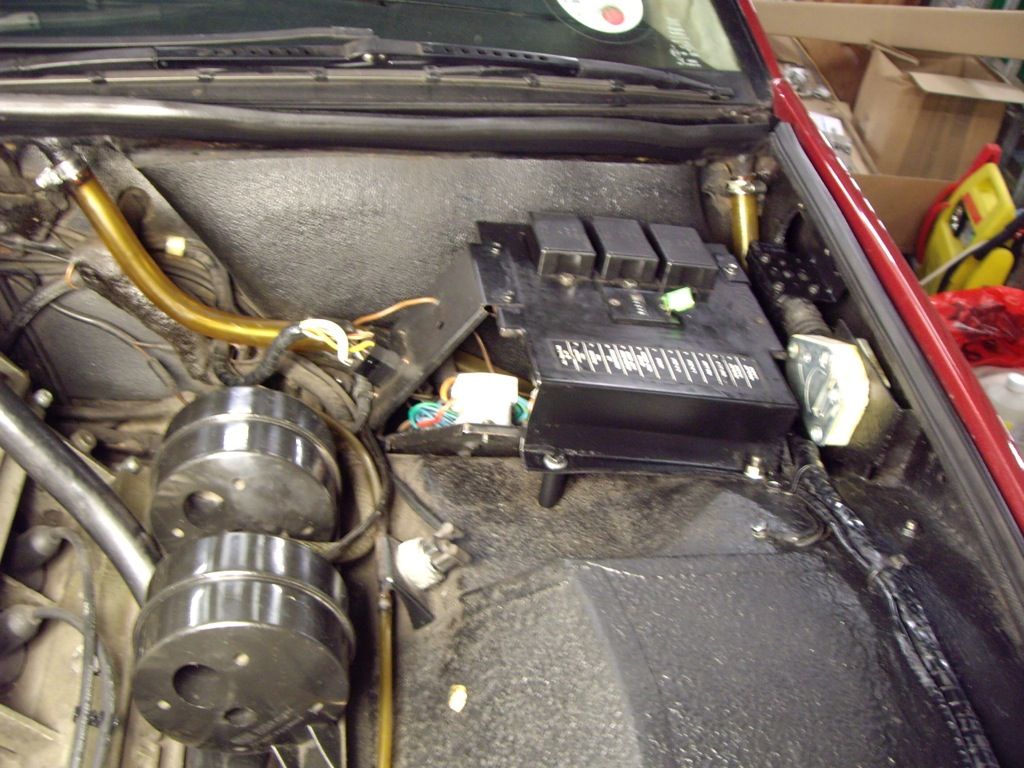
And finally, the rest of the inner wing top got a good clean and I removed the crud from the brake and washer pipes:
 |
|
| Back to top |
|
 |
Lagondanet
Administrator

Joined: 03 Jan 2007
Posts: 3110
Location: UK
|
 Posted: Thu Apr 18, 2013 8:32 pm Post subject: Posted: Thu Apr 18, 2013 8:32 pm Post subject: |
 |
|
| Marvellous (as usual). |
|
| Back to top |
|
 |
Lagonda87
Joined: 18 Dec 2007
Posts: 315
|
 Posted: Fri Apr 19, 2013 8:56 pm Post subject: Posted: Fri Apr 19, 2013 8:56 pm Post subject: |
 |
|
Well done!
- I always enjoy reading your updates. It's a real pleasure to see the attention to detail. Both your Lagondas will look fantastic once you are done!
Keep those updates coming!
Best regards,
Soren |
|
| Back to top |
|
 |
jonc
Joined: 21 Sep 2010
Posts: 584
Location: Cheshire, UK
|
 Posted: Tue Apr 23, 2013 7:24 pm Post subject: Posted: Tue Apr 23, 2013 7:24 pm Post subject: |
 |
|
Thanks 
I have a job to do on both cars. They both have batteries with round terminal posts and on both cars, the connections are less than satisfactory.
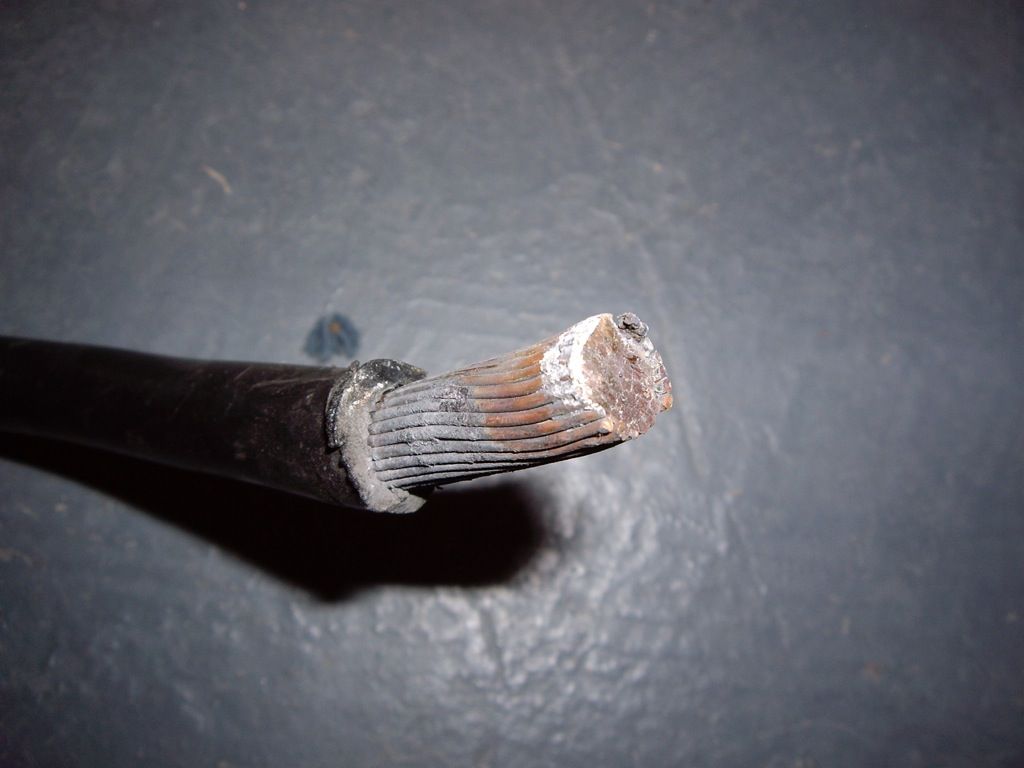
In fact, in the first week of me driving this car, I thought the battery was flat, but it turned out to be a bad connection to the battery.
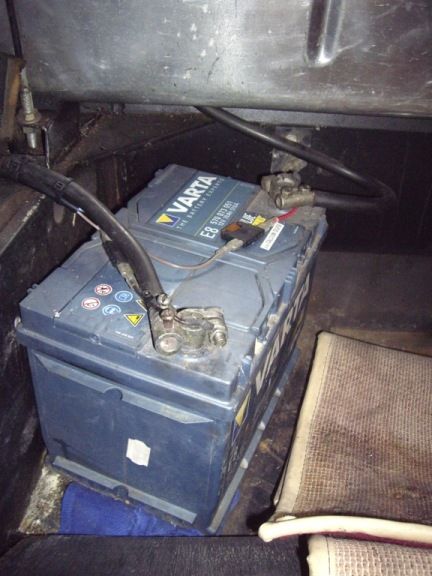
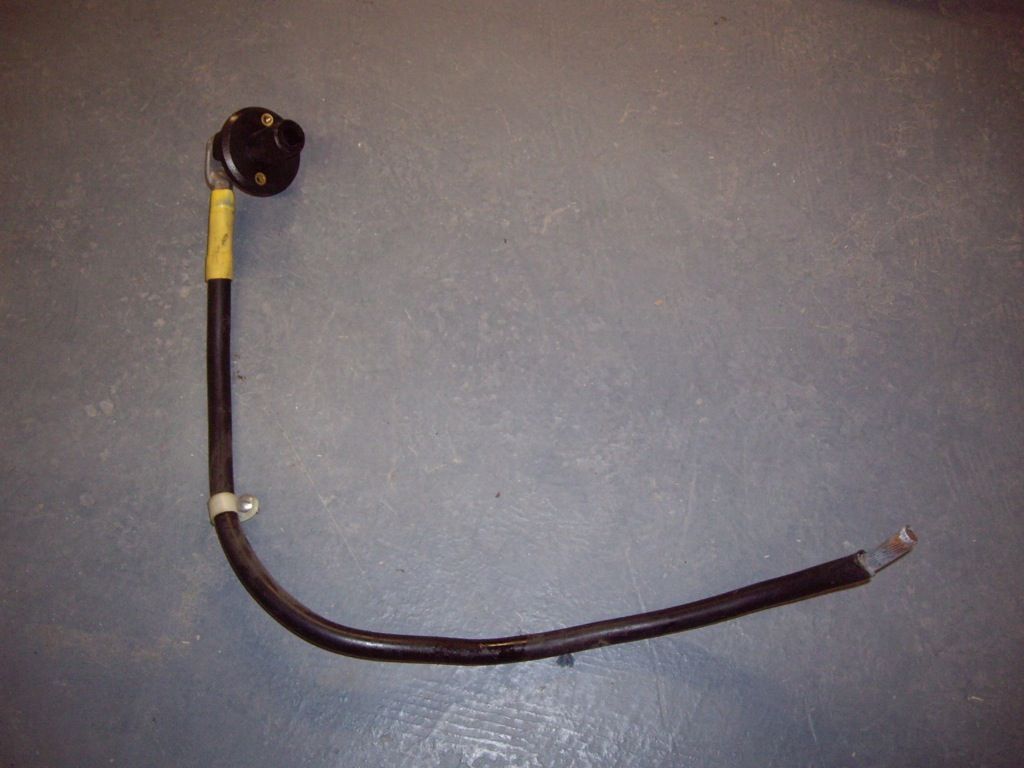
The original terminals on the end of the thick battery wires have been cut off and clamps fitted. The negative (nearest the rear of the car) is the one with the problem.
There is another feature of this car which has been bothering me:
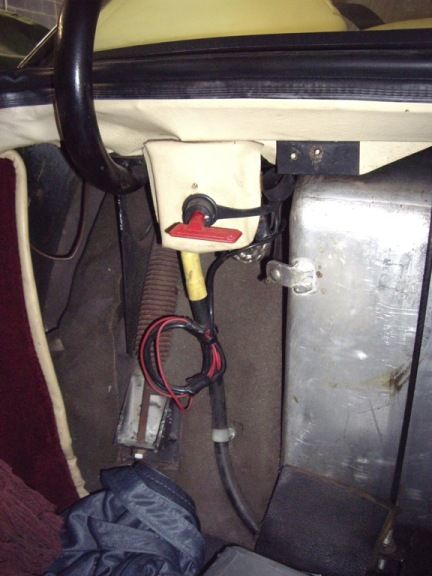
The battery cut-off is the wrong type - it should be a black toggle but is the competition type with a removable key. This has either been changed as a security feature, or because there was a time when the Lucas part - SSB106 - was unavailable.
Well, it is now, and I have one to fit. Two jobs to do at the same time. |
|
| Back to top |
|
 |
jonc
Joined: 21 Sep 2010
Posts: 584
Location: Cheshire, UK
|
 Posted: Tue Apr 23, 2013 7:27 pm Post subject: Posted: Tue Apr 23, 2013 7:27 pm Post subject: |
 |
|
So.. earth cable removed:
And now you can see why I had trouble starting the car, and thought the battery needed replacing - the wire is corroded so the electrical connection between it and the battery clamp would be poor:
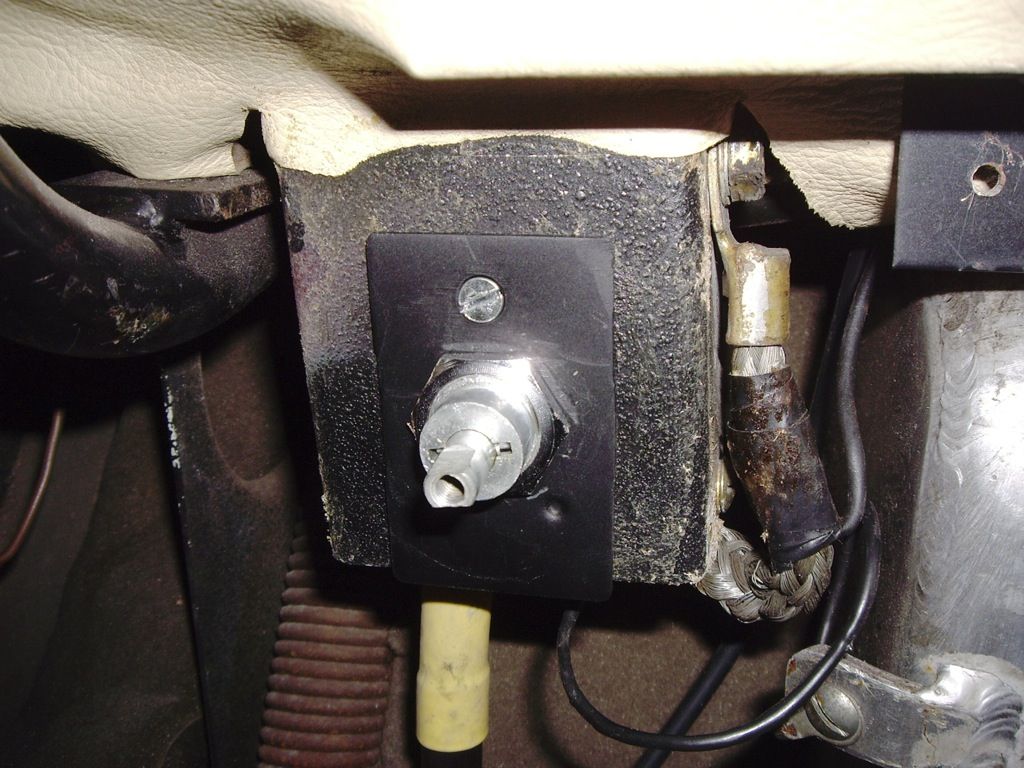
The other end has a lug where it fits on the M10 stud of the isolator switch:
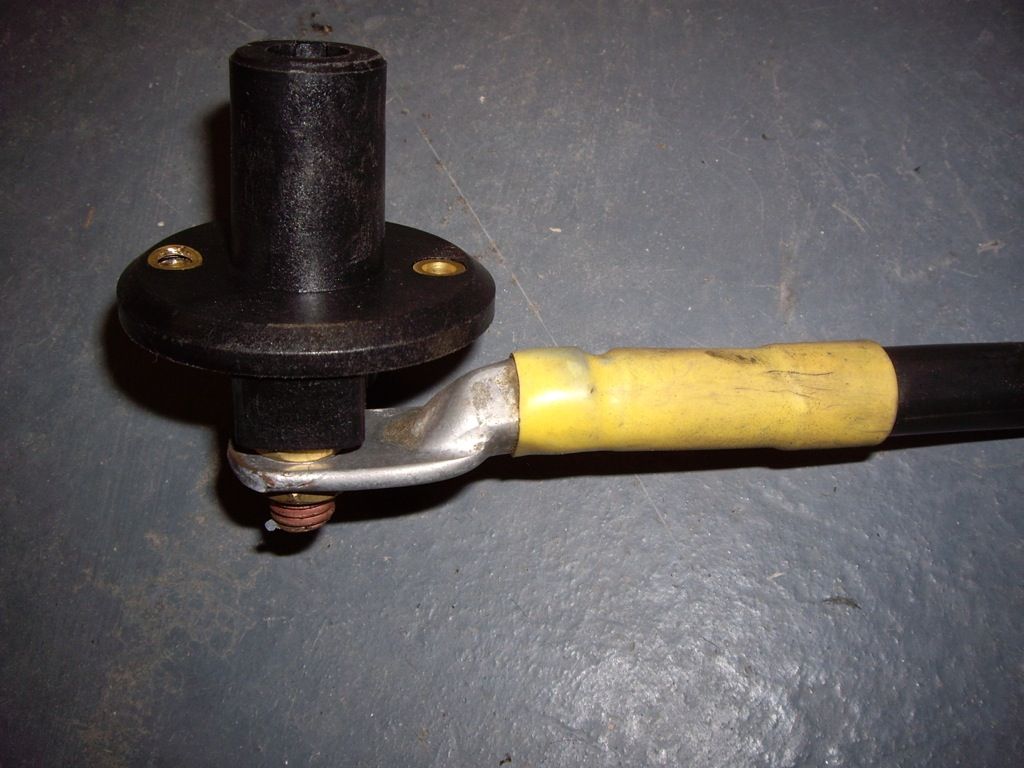
The yellow sleeve is silicone, and the lug is soldered to the wire. |
|
| Back to top |
|
 |
jonc
Joined: 21 Sep 2010
Posts: 584
Location: Cheshire, UK
|
 Posted: Tue Apr 23, 2013 7:33 pm Post subject: Posted: Tue Apr 23, 2013 7:33 pm Post subject: |
 |
|
Before I can fit the new isolator, I need to sort out the mounting hole. The replacement isolator needed a larger hole for it to fit through, and a small hole above to hold it in place:
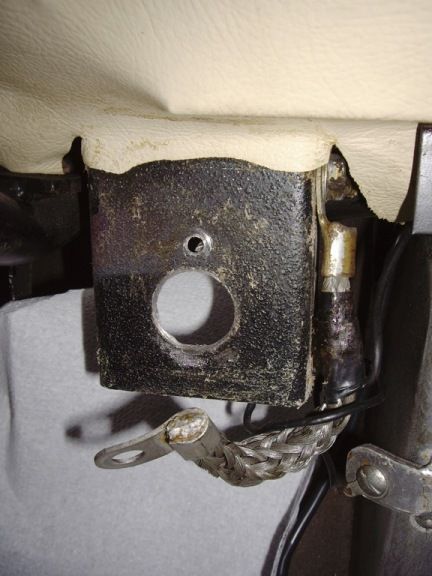
However, the SSB106 mounts only through the large hole, which has a flat on one side to stop it spinning round. I need to make a plate so the mounting hole is the correct size:
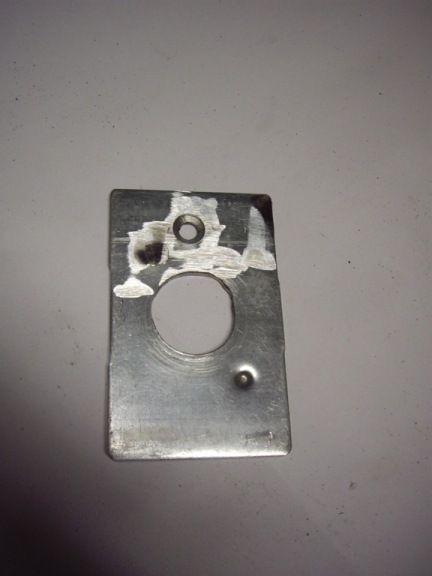
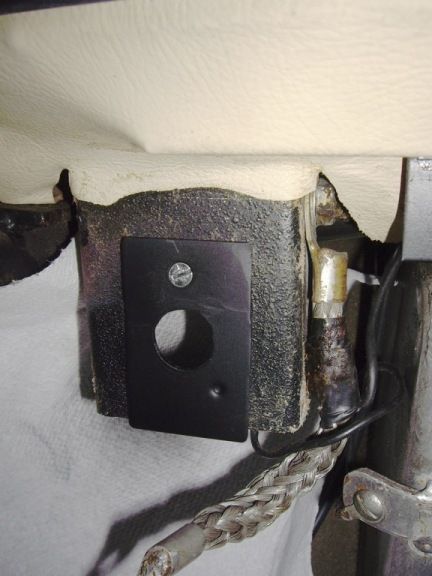
I am using the small hole drilled for the old switch to stop this plate from spinning round, and here it is, fitted with a countersunk M4 screw with a nyloc nut on the back so it never works loose:
 |
|
| Back to top |
|
 |
jonc
Joined: 21 Sep 2010
Posts: 584
Location: Cheshire, UK
|
 Posted: Tue Apr 23, 2013 7:40 pm Post subject: Posted: Tue Apr 23, 2013 7:40 pm Post subject: |
 |
|
Now back to the cable. The crusty end has been shortened, and cleaned. I cleaned it with a combination of concentrated orthophosphoric acid and acidic cleaner in my ultrasound bath:
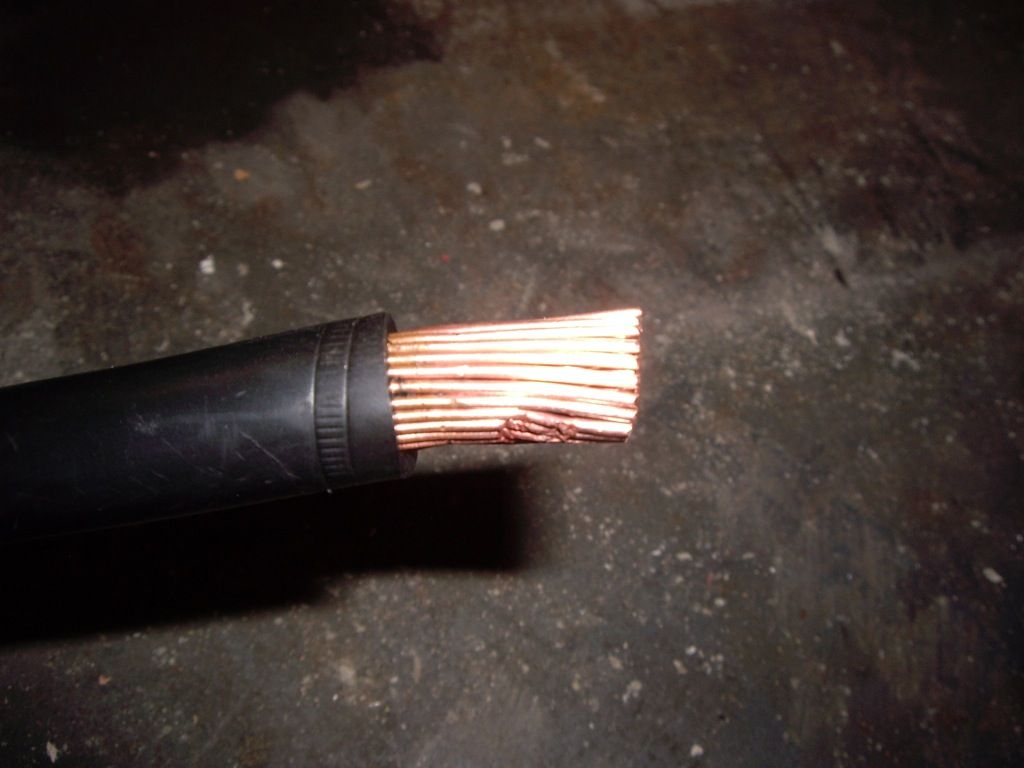
I am fitting an M8 lug on the end to fit to a special battery clamp.
I bought two sizes of crimp or solder-on lug. One is for 50 sqmm and the next size up is for 70. They came from Vehicle Wiring Products and require a very hefty crimp tool.
Unfortunately, the 50 square mm one is slightly too small. The cable must be around 55 to 60 sqmm. So, I have to use the 70sqmm crimp. Here it is crimped in place:
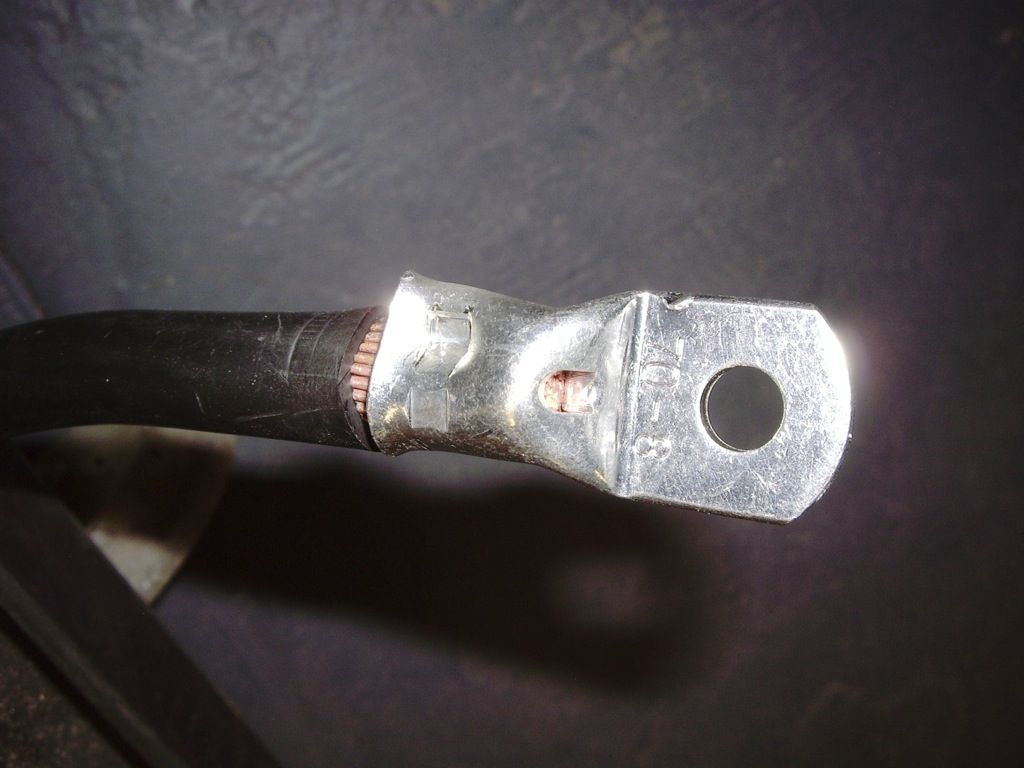
Not perfect, but very secure.
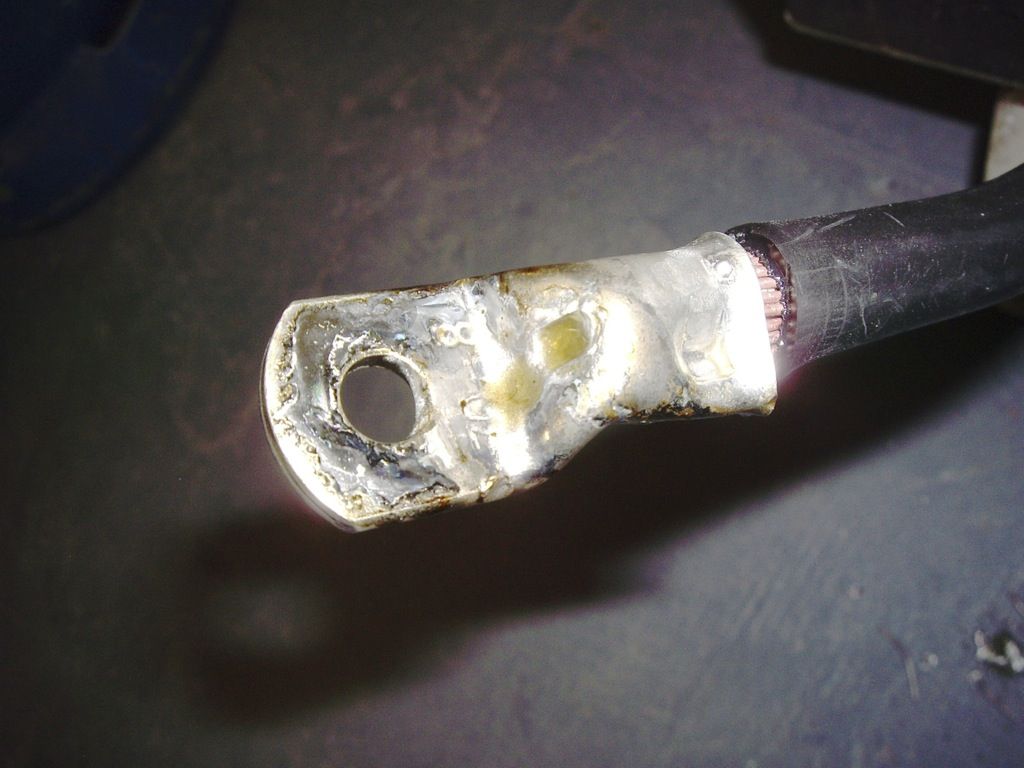
Now, I decided to solder as well. The original was soldered and soldering the crimp will make sure it lasts for ever. There is so much metal that I had to use a blow lamp which risked damaging the insulation on the cable. Fortunately, little damage:
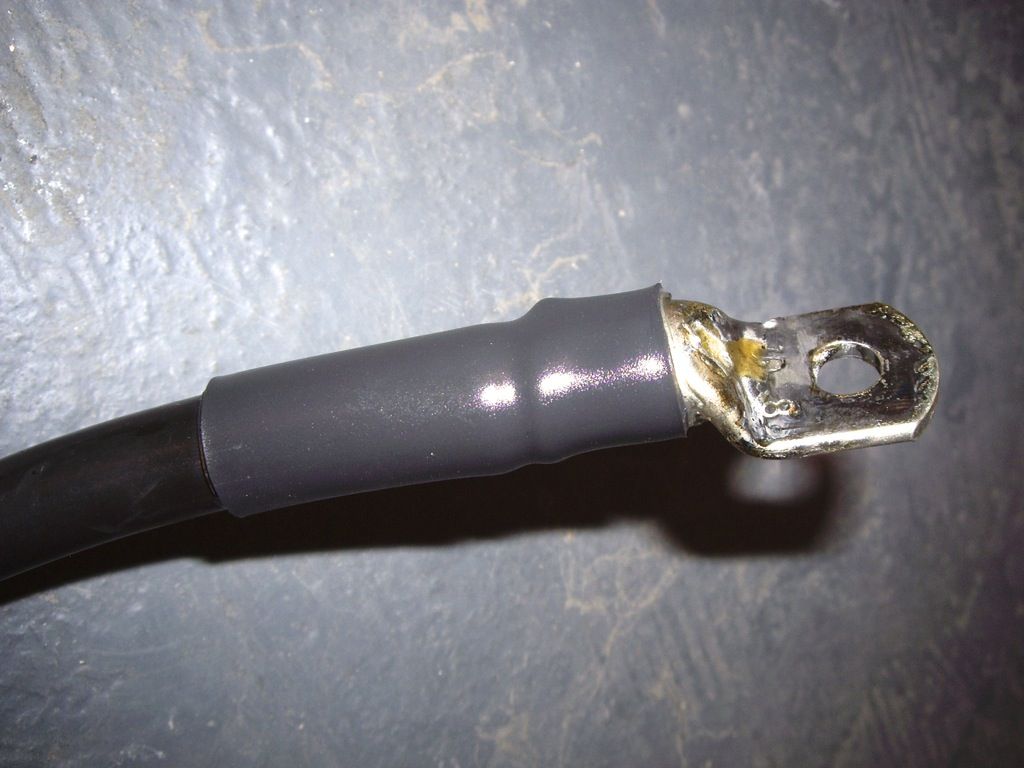
Finally, adhesive-lined heat-shrink finishes off the job:
 |
|
| Back to top |
|
 |
jonc
Joined: 21 Sep 2010
Posts: 584
Location: Cheshire, UK
|
 Posted: Tue Apr 23, 2013 7:48 pm Post subject: Posted: Tue Apr 23, 2013 7:48 pm Post subject: |
 |
|
Now, the cable can be fitted on the new battery isolator and fitted to the car:
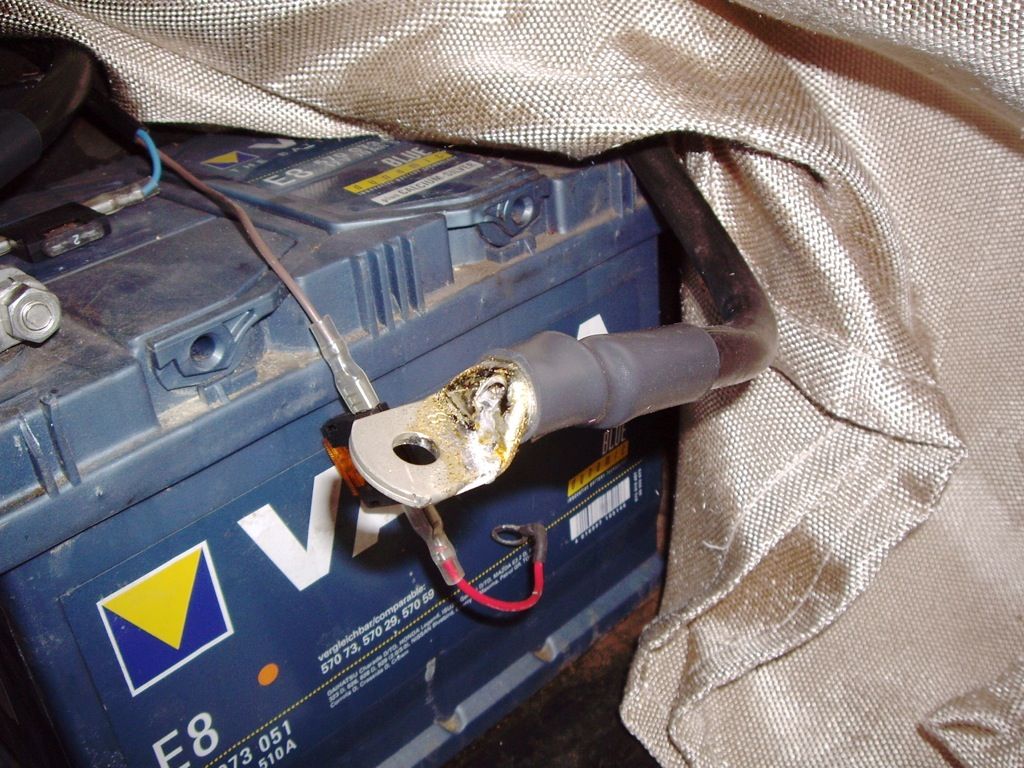
The positive cable needed the same treatment. This had to be done in the car, so I shielded the petrol tank with a welding blanket before applying the blow lamp!
And here is the battery connected up again:
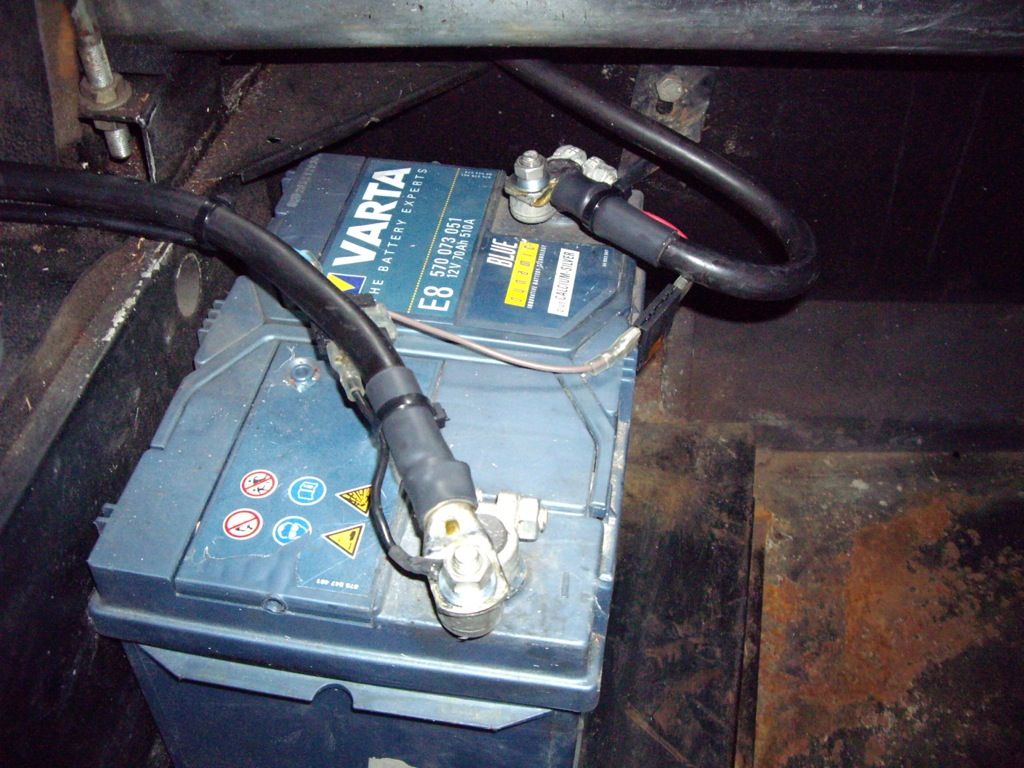
You can just about see the battery clamps which fit on the battery post, and have an M8 stud for the lug of the cable. The small wires are for a lead for my battery conditioner. Before assembly I applied battery terminal grease to stop any corrosion.
The isolator now has its leather trim piece (cleaned and conditioned) in place and the toggle:
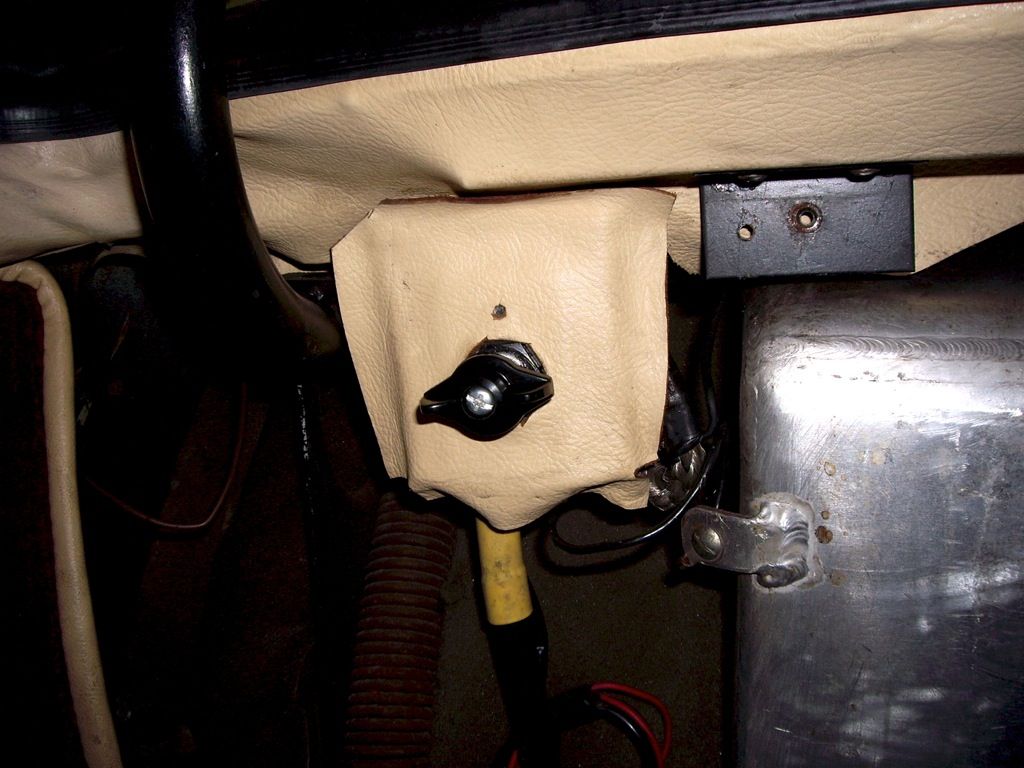
Just need a battery securing clamp now.. |
|
| Back to top |
|
 |
jonc
Joined: 21 Sep 2010
Posts: 584
Location: Cheshire, UK
|
 Posted: Mon Oct 19, 2015 2:01 pm Post subject: Posted: Mon Oct 19, 2015 2:01 pm Post subject: |
 |
|
How time flies..
The car has been on its holidays at David Marks Garages and returned to me a little while ago. It is time for me to catch up on the progress. This is DM work - eventually I will get on to the bits and pieces I have been doing.
So, a spot of steelwork to deal with. The car is an older restoration and the sills were attended to then. I uncovered some of this when I sorted out the front left wheelarch area. I don't think the rear arches had any work done, or maybe didn't need it at the time.
A bit of poking around:
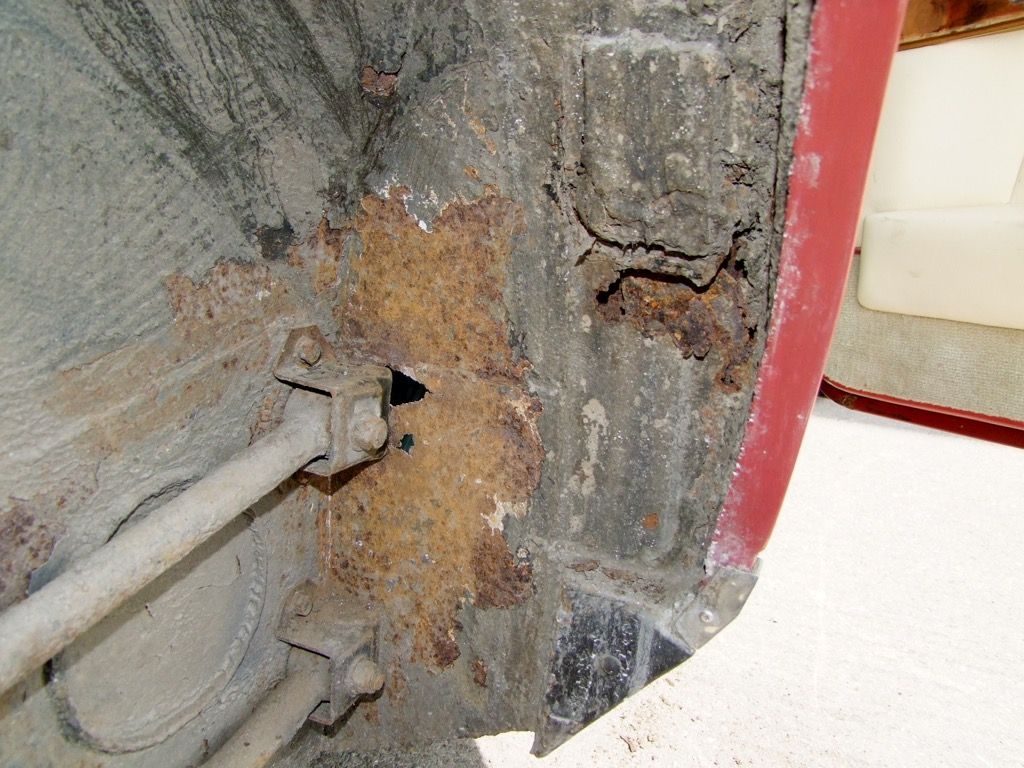
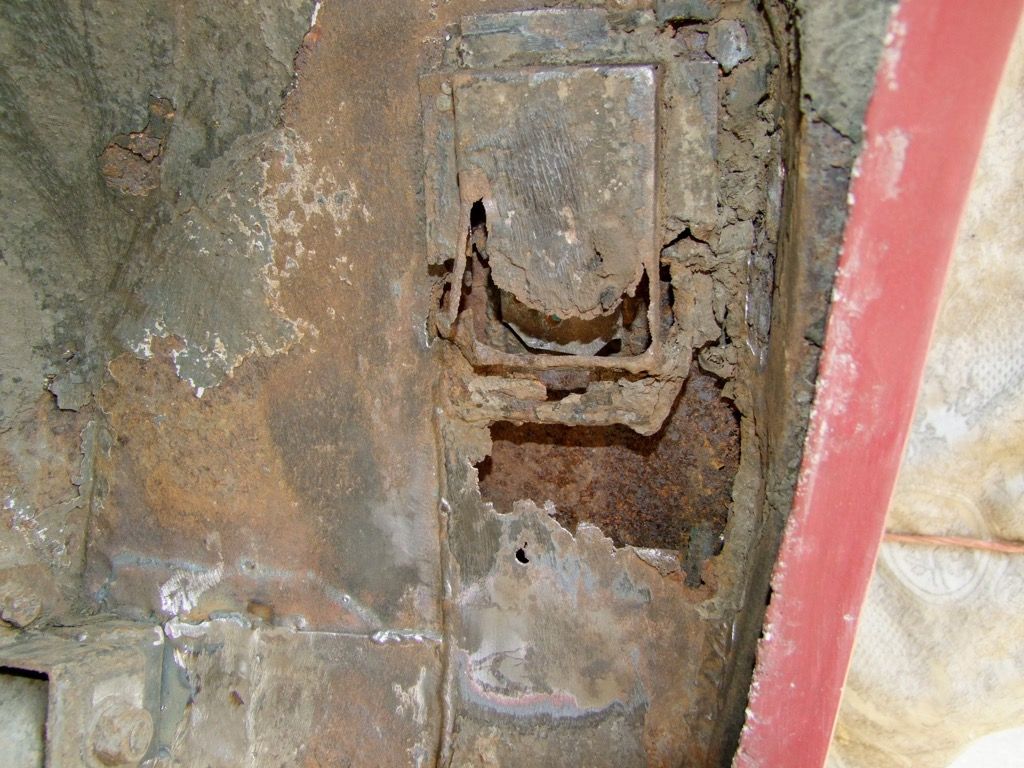
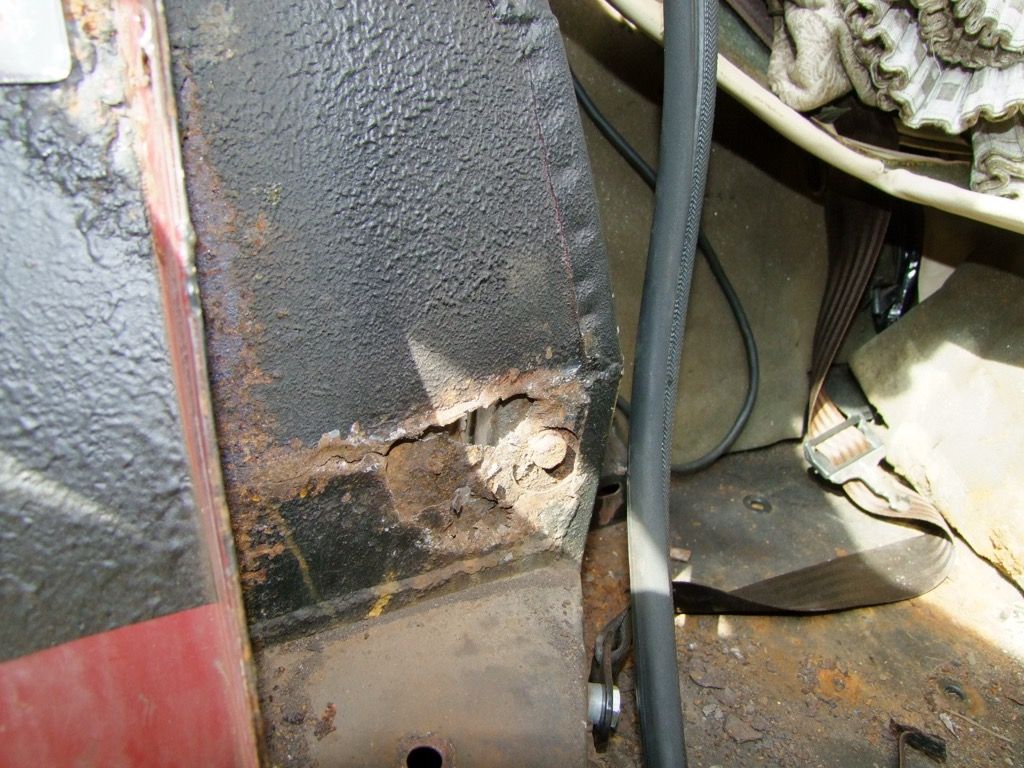

Actually, the car went to DM for a new ball joints at the front end, a service and a tune. This was found as part of a thorough inspection.
On to putting it right. The metal is cut back to good, solid steel:
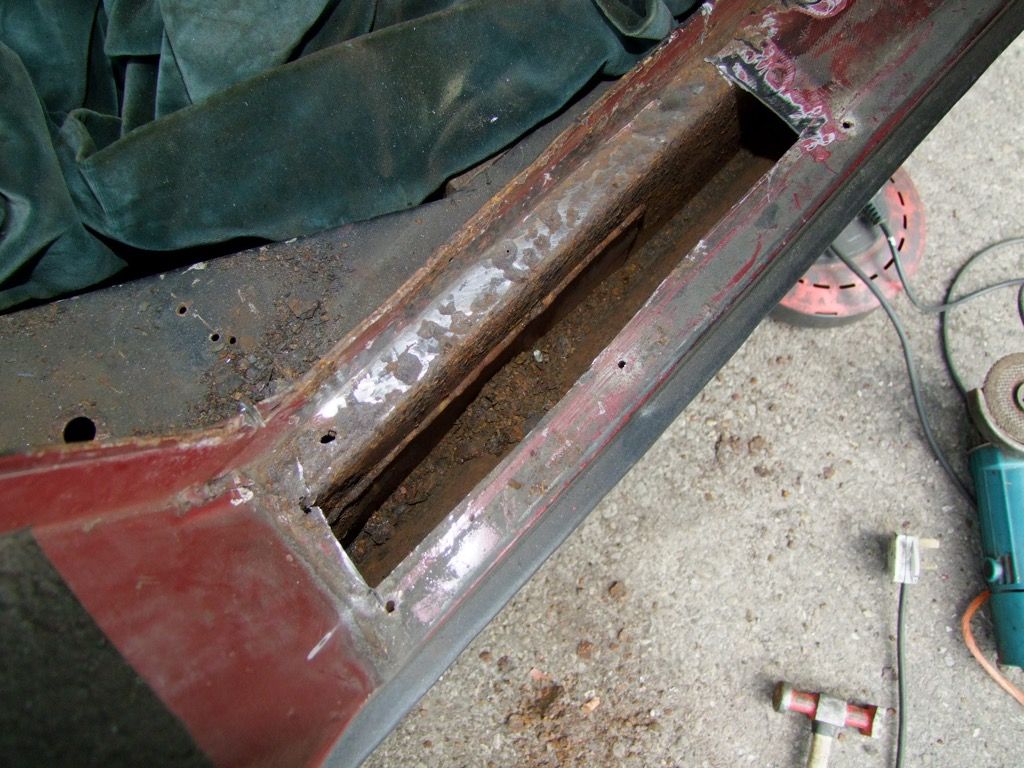
And new metal welded in:
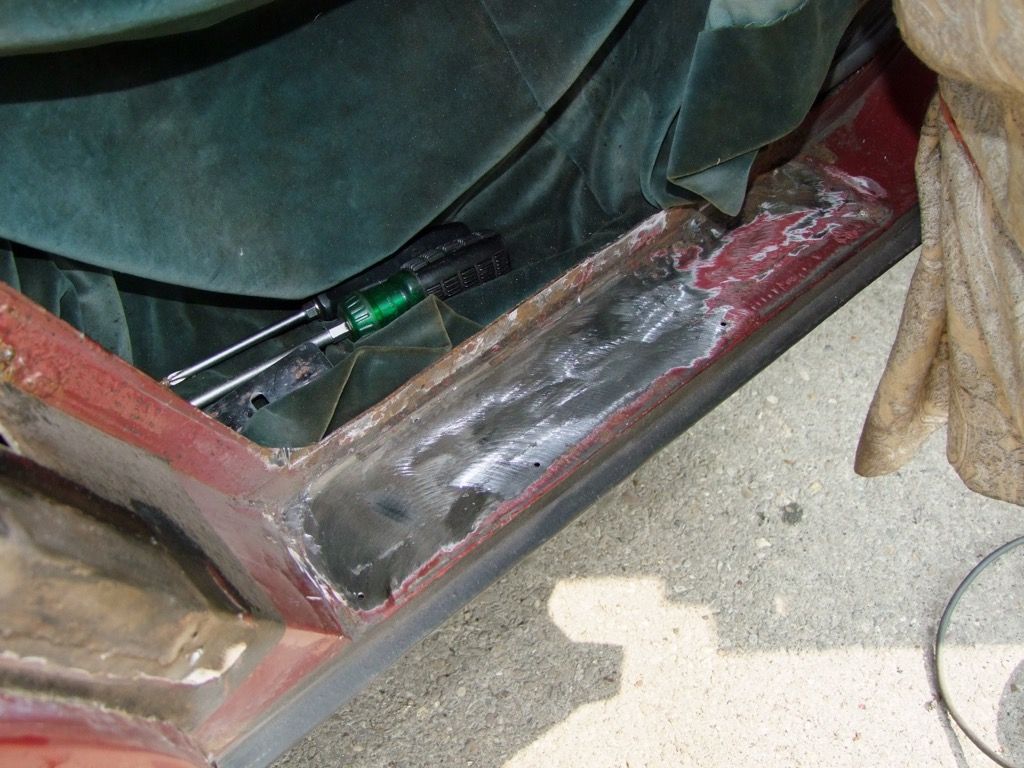
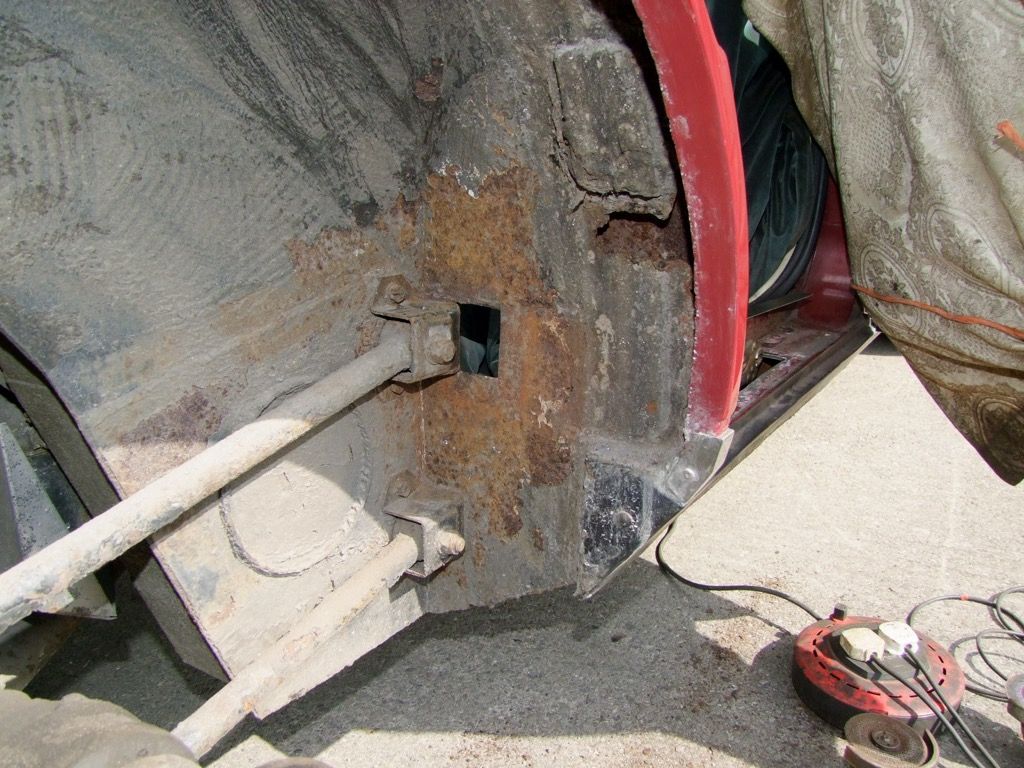
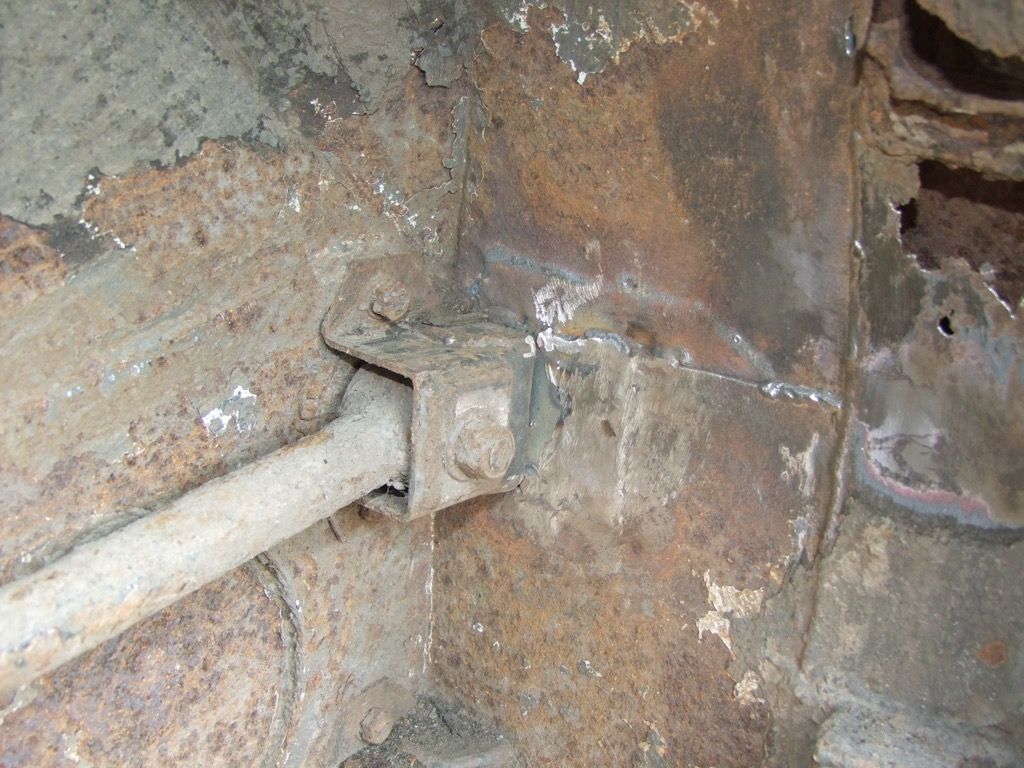
There had been a previous patch on the upper part, hidden by the aluminium wheel arch cover:
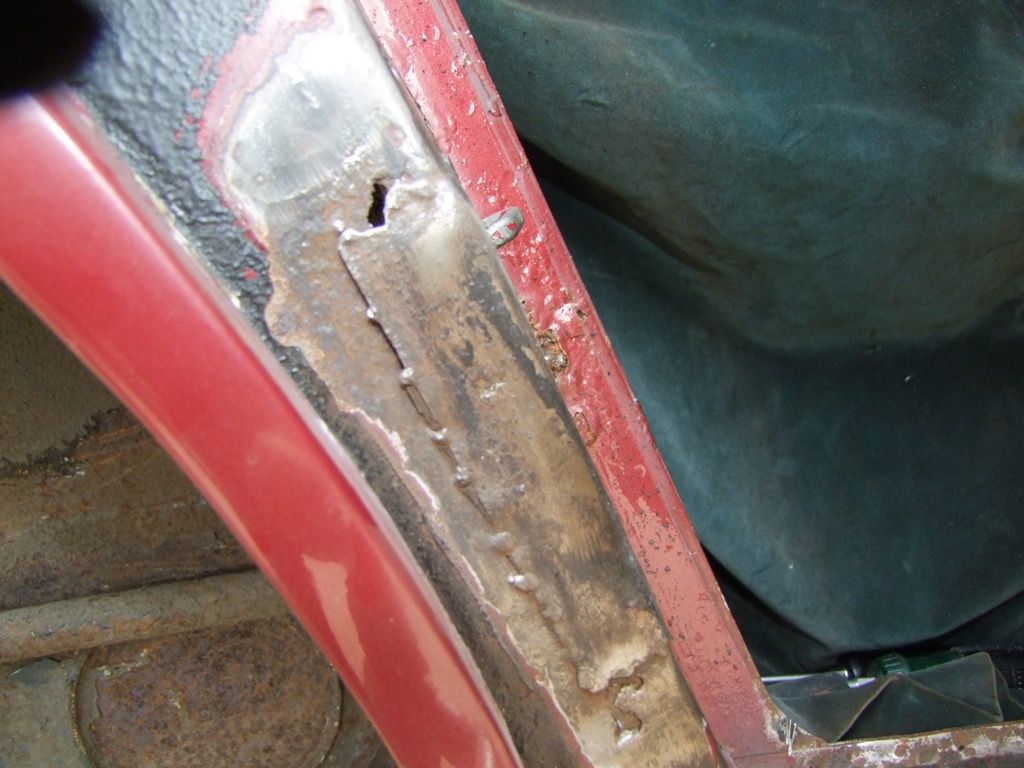
This was not to an appropriate standard, so off it comes:
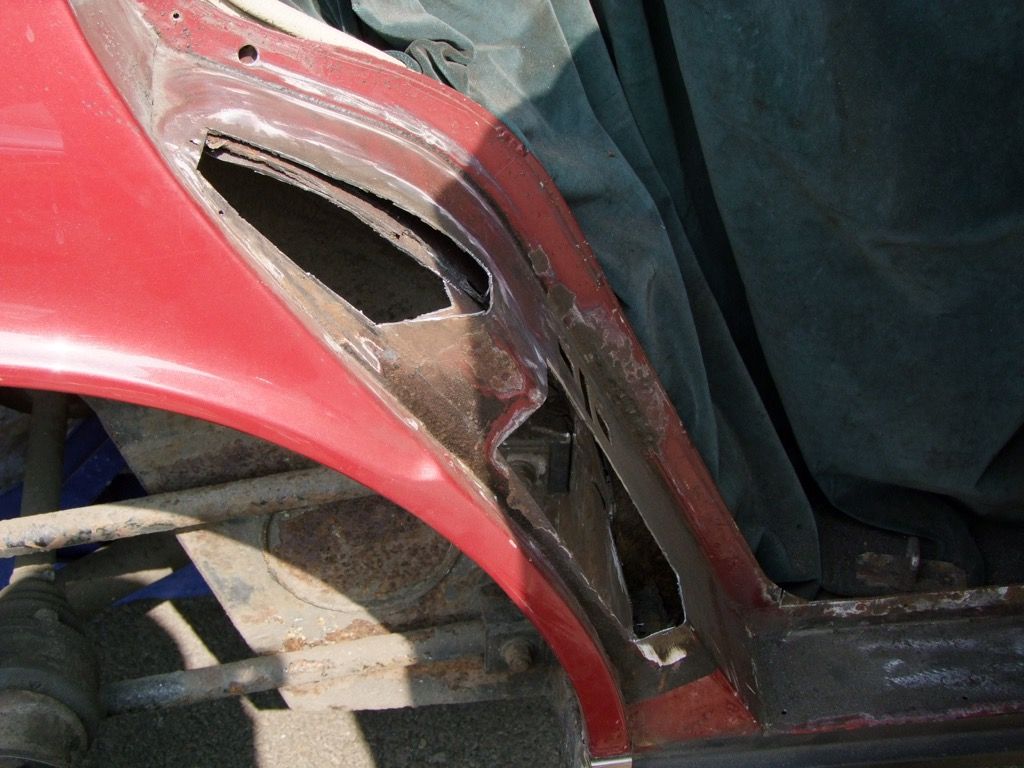
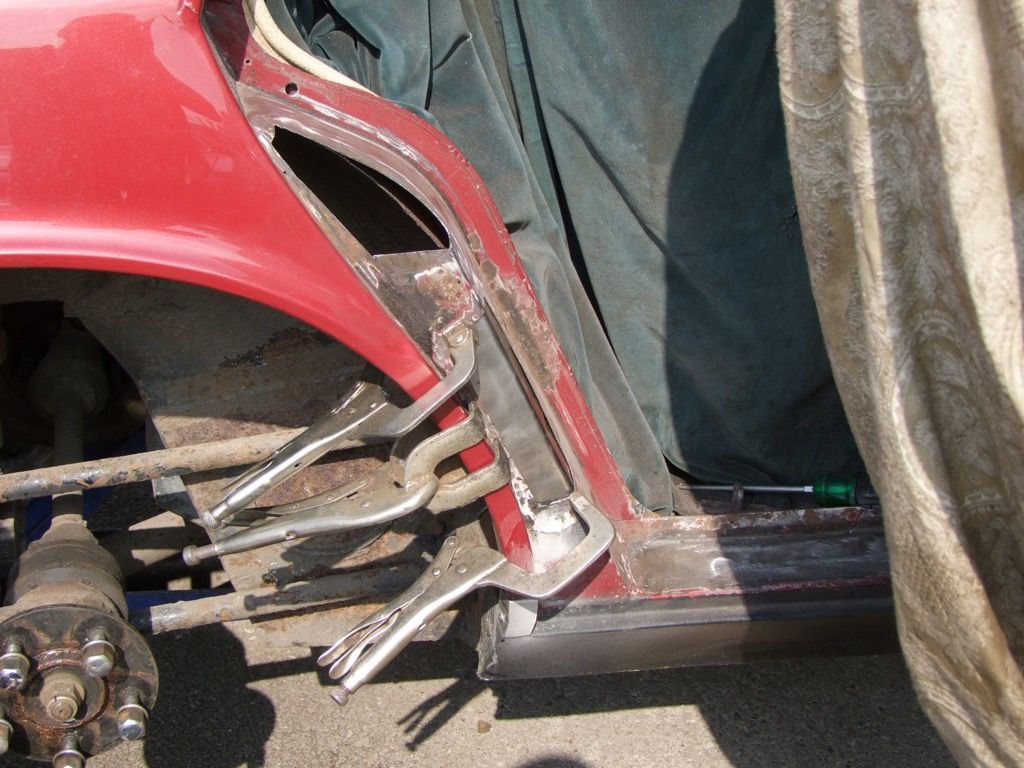
The top repair is done in two pieces:
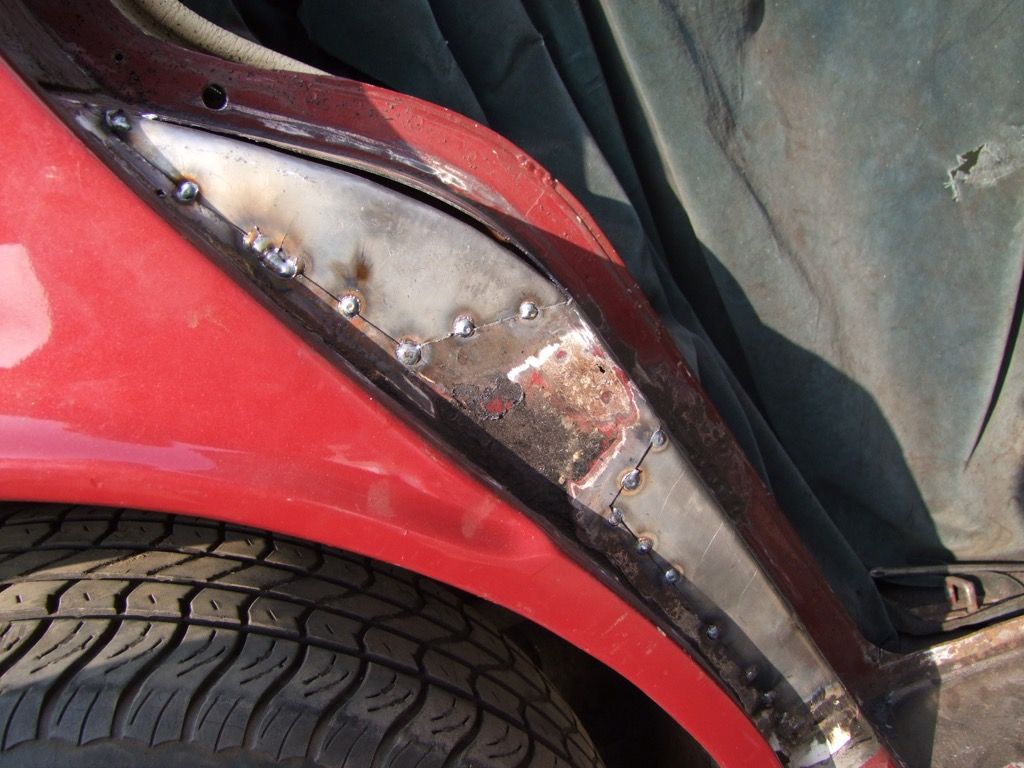
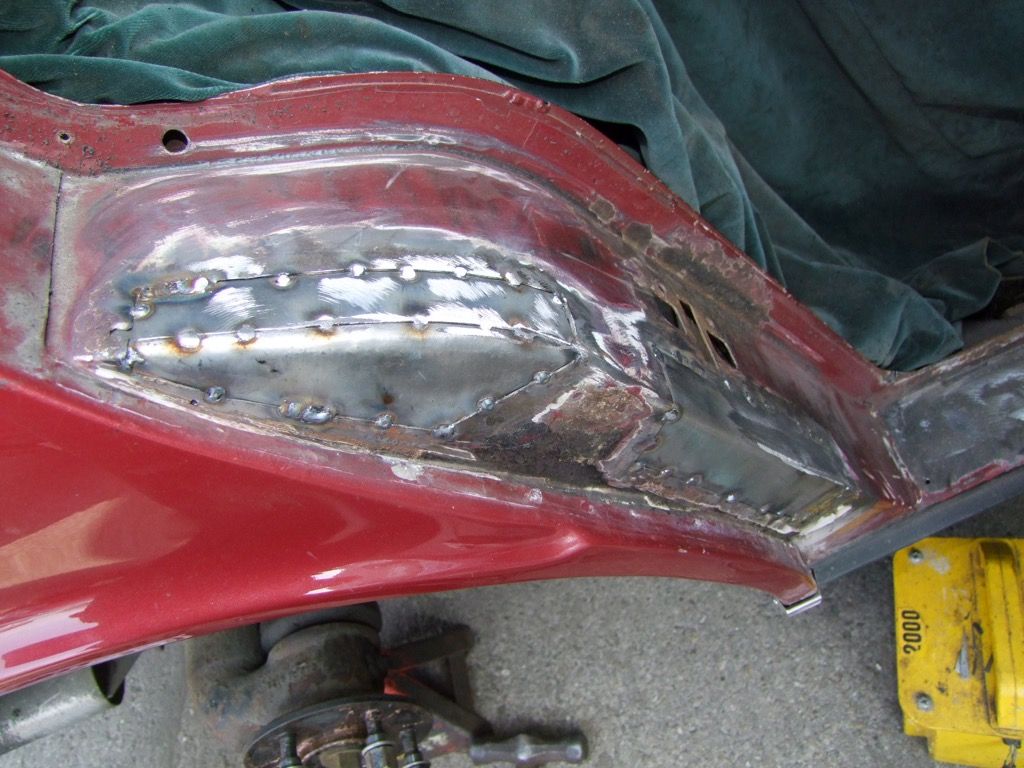
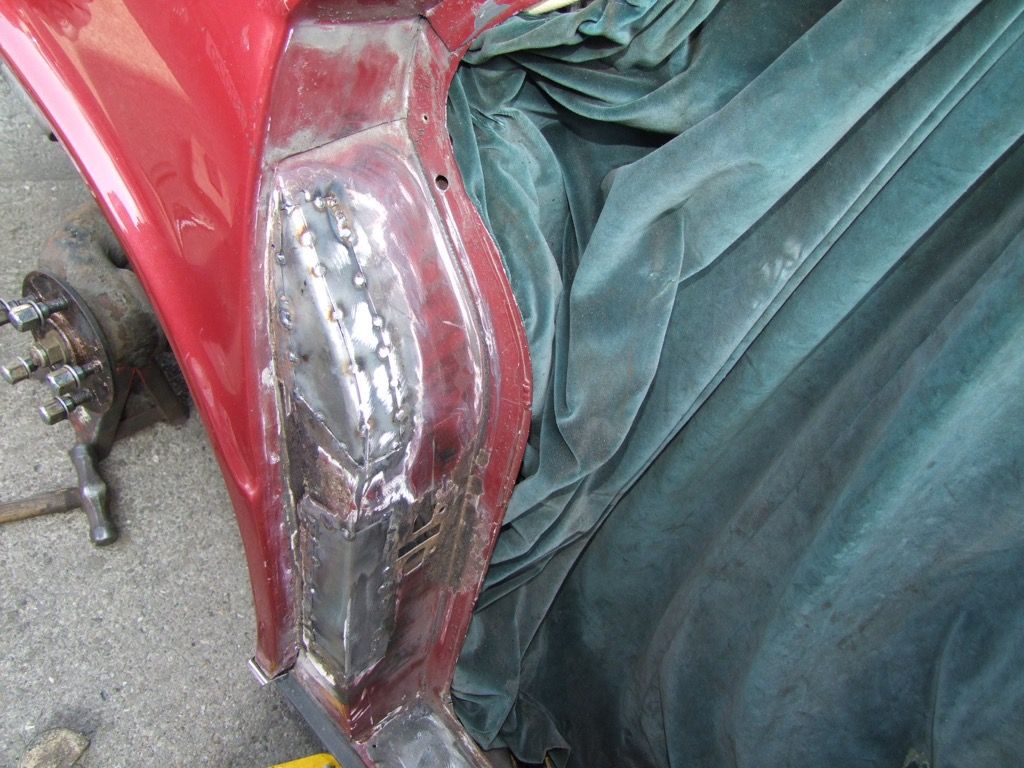
Then on to the inside:
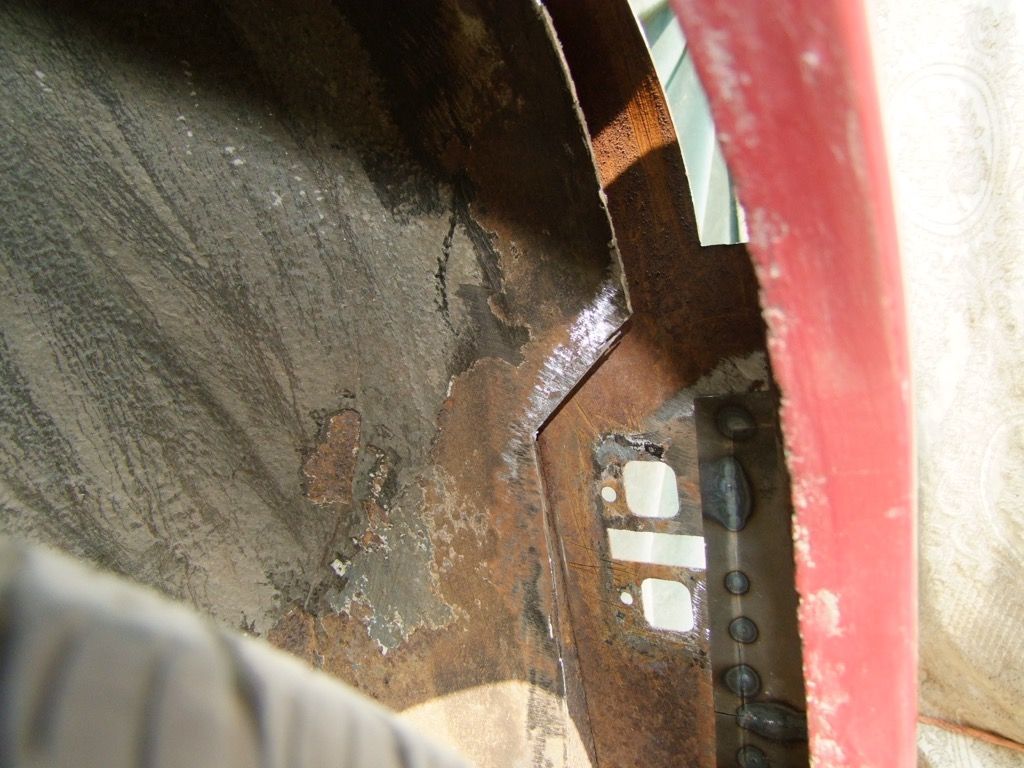
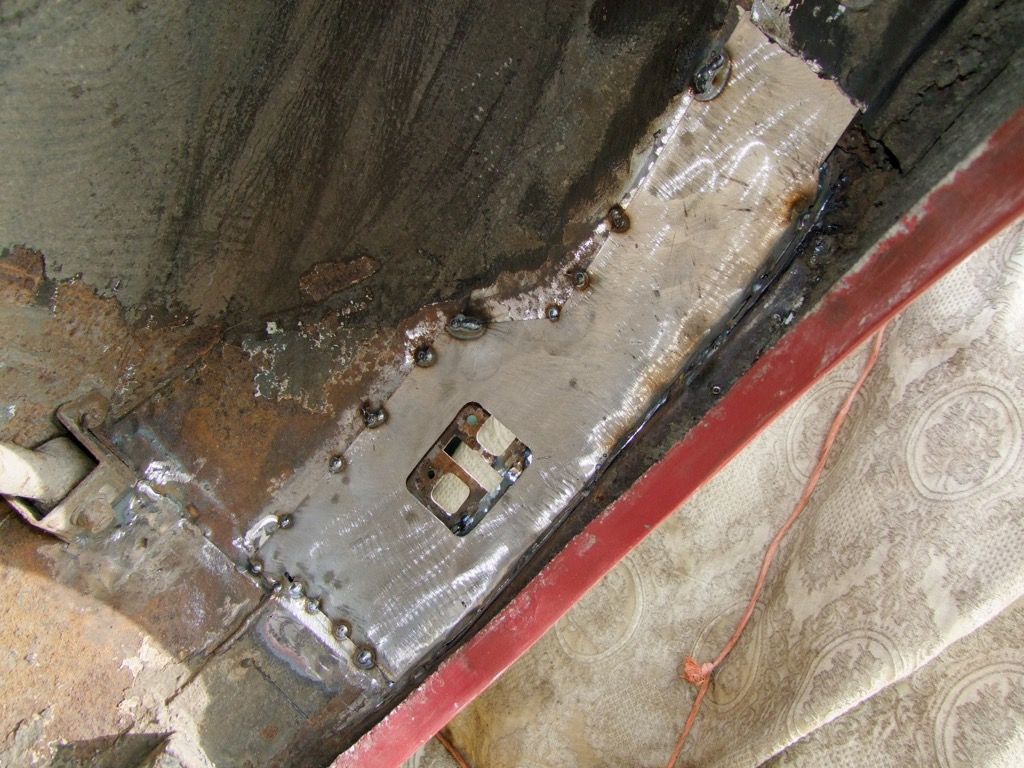
All tacked joins are then seem welded:
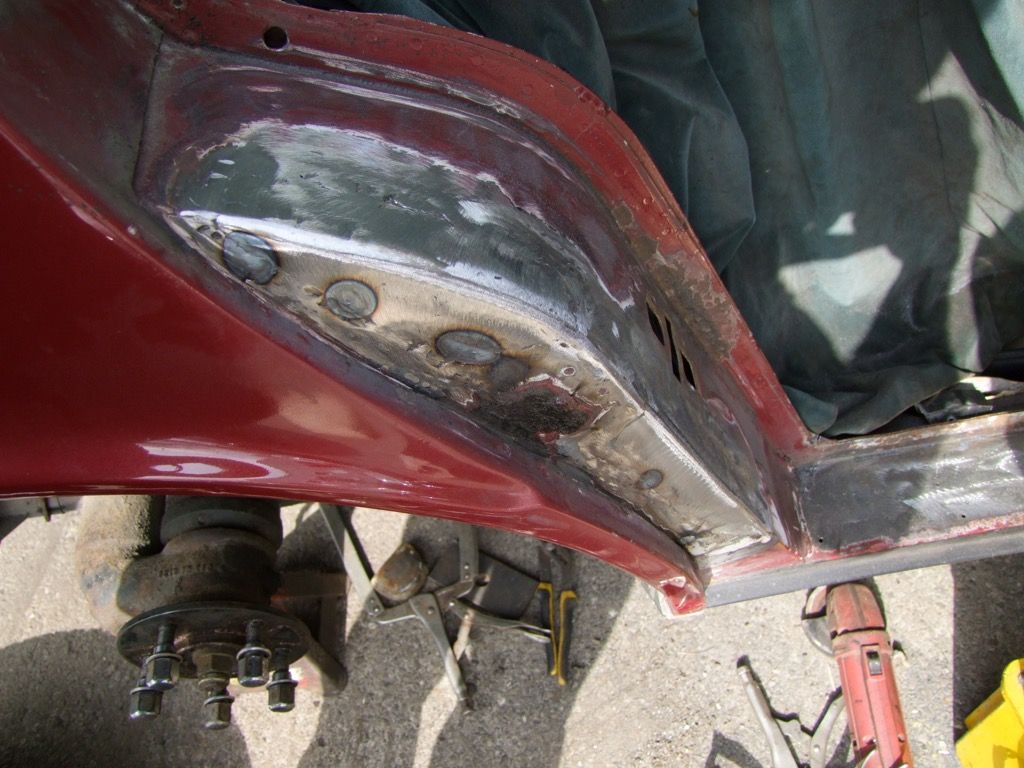 |
|
| Back to top |
|
 |
|
|
You cannot post new topics in this forum
You cannot reply to topics in this forum
You cannot edit your posts in this forum
You cannot delete your posts in this forum
You cannot vote in polls in this forum
|
|


