| View previous topic :: View next topic |
| Author |
Message |
Lagondanet
Administrator

Joined: 03 Jan 2007
Posts: 3110
Location: UK
|
|
| Back to top |
|
 |
david
Joined: 21 Mar 2008
Posts: 118
Location: Nottingham
|
 Posted: Wed Nov 17, 2010 2:00 pm Post subject: Posted: Wed Nov 17, 2010 2:00 pm Post subject: |
 |
|
Well, the work to bring back 13150 to its' former glory has started in earnest now.
The aim is to replace all the corroded sections, which are mainly the inner, middle and outer sills, plus some adjacent floor and bulkhead areas.
The car will have a bare metal respray, the damaged rear bumper fixed (somehow!) and then the vehicle reassembled with rebuilt front and rear suspension, brakes and electronics where required - certainly the dashboard is not working correctly.
Use the link below, the first few pictures show the sill condition once the aluminium Tickford covers were removed and the next sequence is the strip down of the car.
It has been decided to completely re do the engine bay so the engine and gearbox have been removed as well. We had this running for quite some time in order to assess the condition. It ran fine and held good oil pressure and coolant temperature.
We've taken one camshaft cover off for a quick look inside and it is very clean, no signs of any obvious problems. Therefore the engine itself will be left as is, although the cam covers, air box etc will be refinished and the carbs and manifolds similarly cleaned and rebuilt.
The interior of the car will be fully stripped (except the headlining) as the dirt and metal dust from all the cutting work that will take place gets everywhere and could damage things.
We have yet to make a decision about what to do with the headlining
All the dashboard electronics will come out for the same reason.
The trim is in very good condition as it was all redone due to previous rodent damage but as we have discovered chewed seat belts, these will need replacement!
Amazingly, whilst a lot of trim and underlay has been or is damaged by rodents, none of the wiring or compontns have been affected, apart from the seat belts and screen wash jets - of all things!
More pictures and updates will follow as the engine bay is fully stripped and the interior finally prepared.
This car has had electric rear windows retro fitted, most likely by Works Service - and a good job has been done too. The switches for the front windows are in the door panels, as they should be for an early car but the rear window switches, as used by the front passengers, are sited each side of the gear select and the switches for the rear passengers are in the rear vertical face of the centre console, as standard on the later cars.
The aluminium front and rear valences and sill covers are part of the Tickford conversion, it is impressive to look at these and remember that they are hand formed aluminium panels.
http://s878.photobucket.com/albums/ab343/dmgarage/13150/?albumview=slideshow
I am not sure if the pictures will come out in order, I can fix Lagondas but seem to struggle with web uploads!
More to follow as work progresses. |
|
| Back to top |
|
 |
E38B12
Joined: 04 Dec 2007
Posts: 43
|
 Posted: Sun Jan 02, 2011 3:29 pm Post subject: Posted: Sun Jan 02, 2011 3:29 pm Post subject: |
 |
|
Nice to see that you picked the Fayed car up, I was a bit interested in it myself when it came up for sale. Gorgeous car.
Good luck with the restoration. That Clarion G80 rack cost a fortune when new, and is a surprisingly capable system even by today's standards. so try to keep/restore it if possible.
_________________
Victor P.B.
Sweden |
|
| Back to top |
|
 |
david
Joined: 21 Mar 2008
Posts: 118
Location: Nottingham
|
 Posted: Sun Jan 02, 2011 3:40 pm Post subject: Posted: Sun Jan 02, 2011 3:40 pm Post subject: |
 |
|
Hi,
Thanks for the positive comments.
It is not my car, we are doing it for a client and yes, we will keep the whole stereo system. It all comes out in one piece, the wiring to it was well thought out.
The instruction is to keep to standard specification as much as possible and especially with visible finish and switches etc.
We will need to change the speakers, AML's habit of placing foam over the tops of them have caused some problems and the rodent damage has done the rest...............
More pictures will be posted soon
David |
|
| Back to top |
|
 |
david
Joined: 21 Mar 2008
Posts: 118
Location: Nottingham
|
 Posted: Thu Jan 06, 2011 8:22 pm Post subject: Posted: Thu Jan 06, 2011 8:22 pm Post subject: |
 |
|
Here are some pictures showing progress to date.
The pictures should tell the story
As always, we found a few odd things:
Some of the wiring has been messed about with
One of the four lamps to illuminate the instrument display is missing
The radiator has been leaking for some time
When the right sill section was cut away, there was evidence of a rodent nest behind the front wing!
You can see the corrosion in the inner and middle sill section, this is where the strength is - not so much the the outer sill. This is why it is never wise (or good) to weld repair just the outer sill and not deal with the inner sections.
You can see in the picture of the cut away sections how water has run down from the top and caused a heavy corrosion patch in the upper area and completely eroded the lower parts of both the inner and middle sills.
This is possibly the better side of the car...................!
http://s878.photobucket.com/albums/ab343/dmgarage/13150%20Final%20strip%20down/?albumview=slideshow |
|
| Back to top |
|
 |
Lagondanet
Administrator

Joined: 03 Jan 2007
Posts: 3110
Location: UK
|
 Posted: Sun Nov 20, 2011 3:39 pm Post subject: Posted: Sun Nov 20, 2011 3:39 pm Post subject: |
 |
|
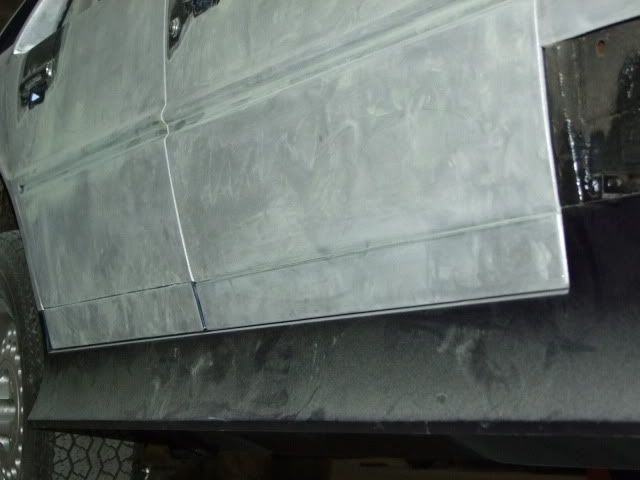
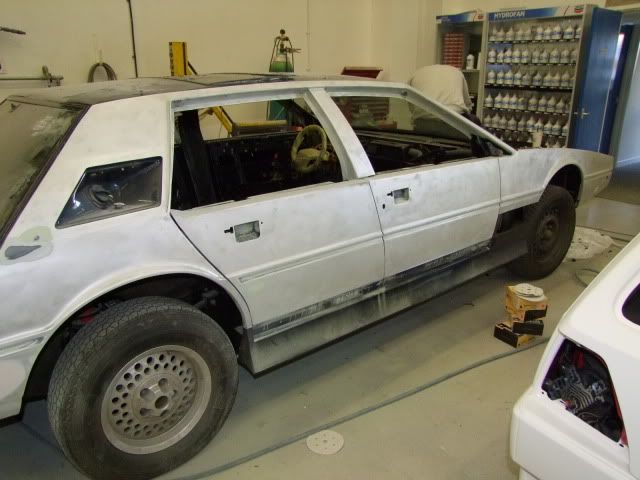
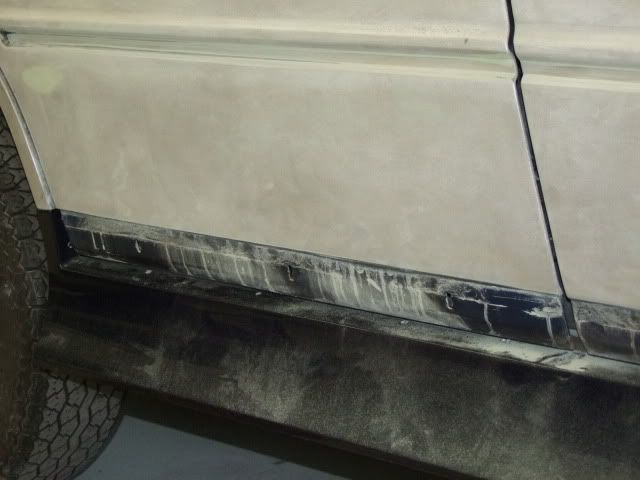
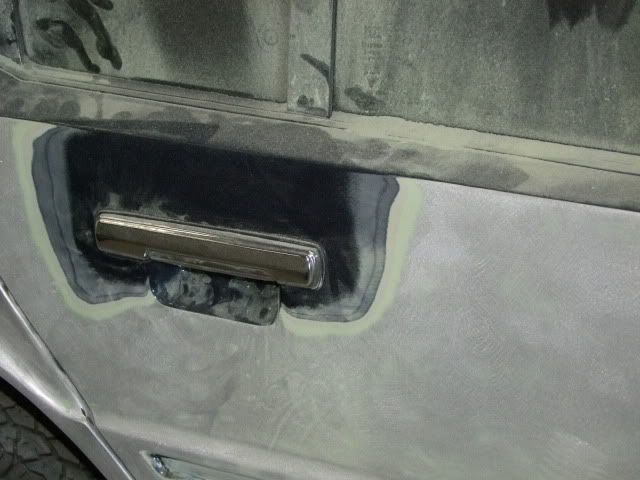
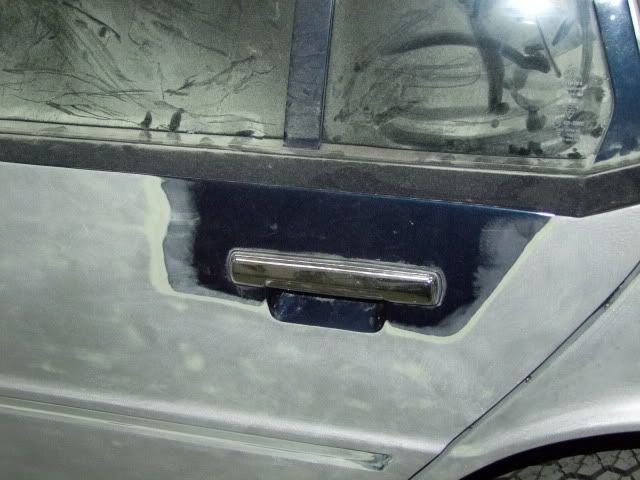
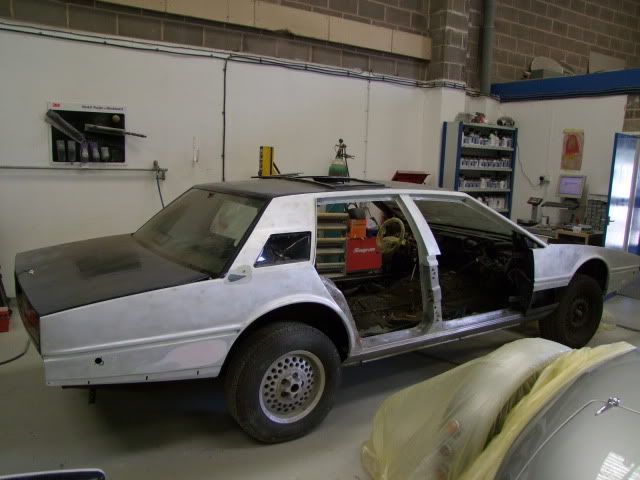
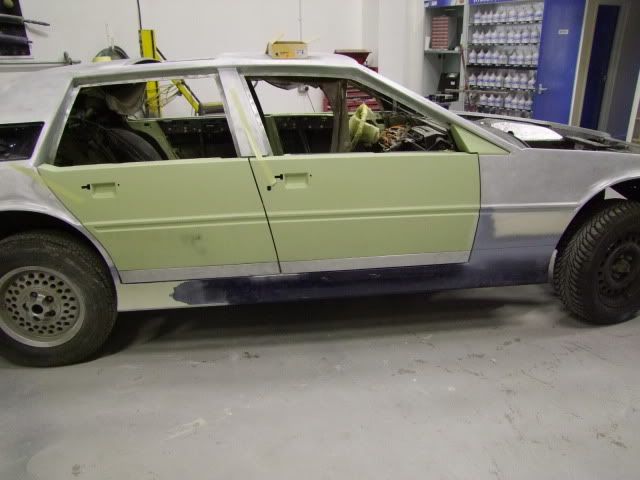
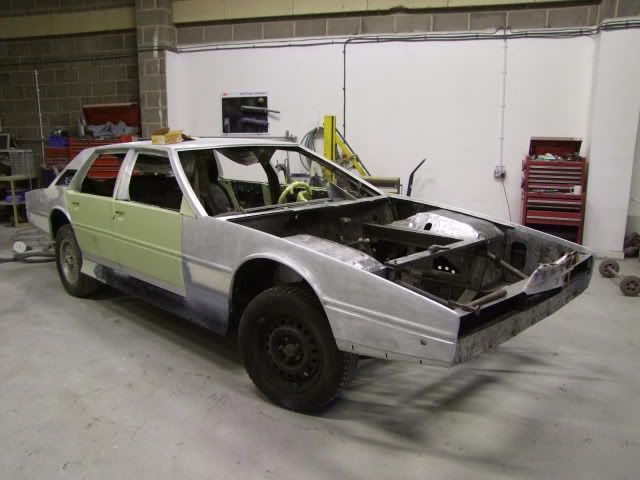
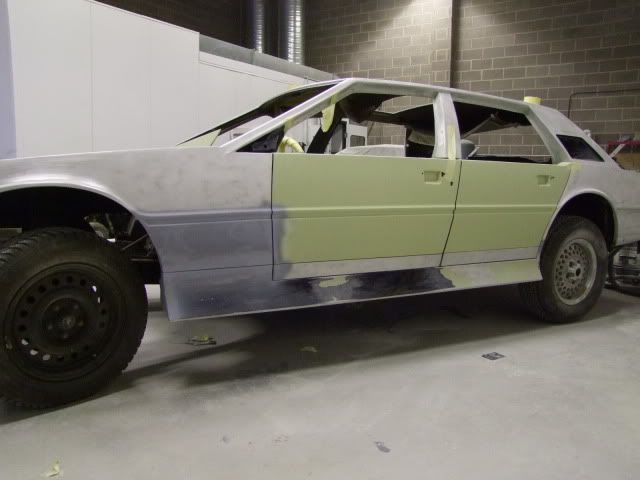
131011 in bare metal
151111 in primer
 |
|
| Back to top |
|
 |
Lagondanet
Administrator

Joined: 03 Jan 2007
Posts: 3110
Location: UK
|
 Posted: Sun Nov 20, 2011 4:15 pm Post subject: Posted: Sun Nov 20, 2011 4:15 pm Post subject: |
 |
|
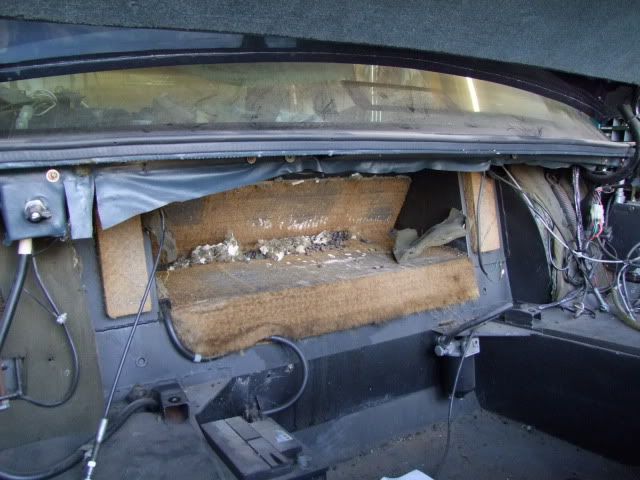
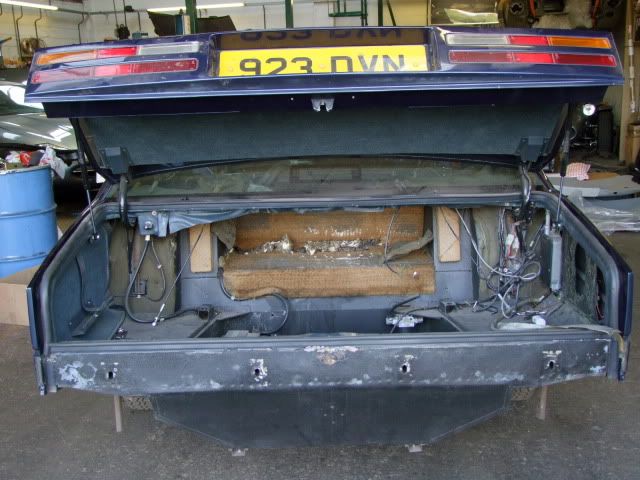
Earlier. Rodents!
 |
|
| Back to top |
|
 |
Lagondanet
Administrator

Joined: 03 Jan 2007
Posts: 3110
Location: UK
|
 Posted: Sun Nov 20, 2011 4:30 pm Post subject: Posted: Sun Nov 20, 2011 4:30 pm Post subject: |
 |
|
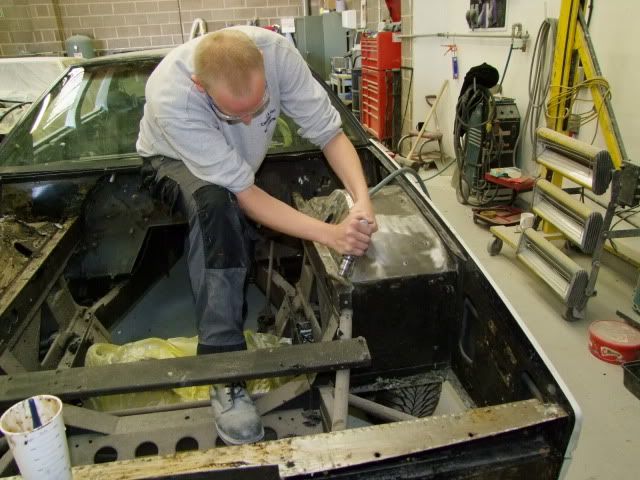
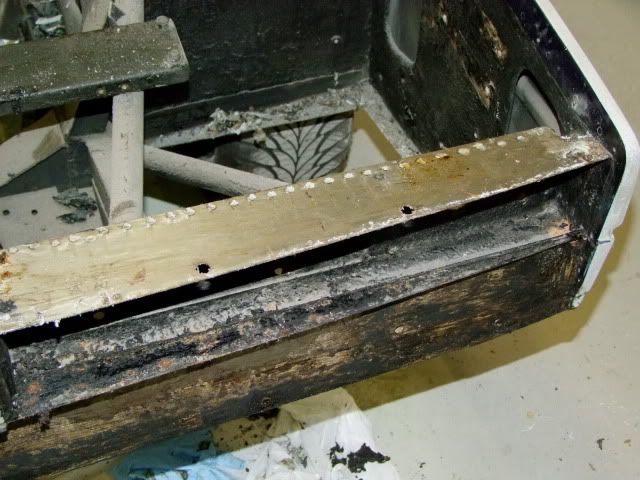
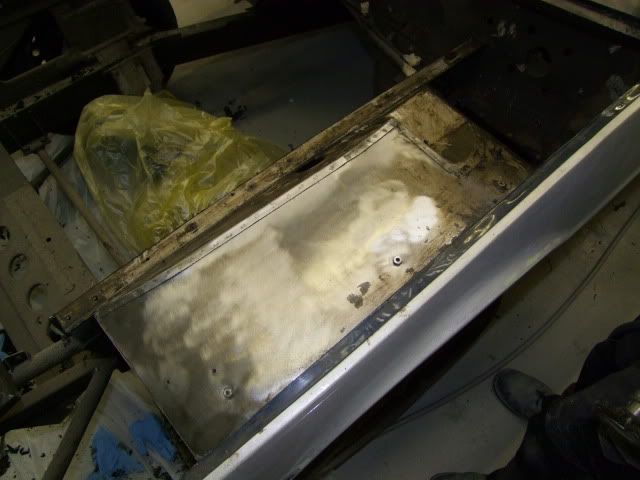
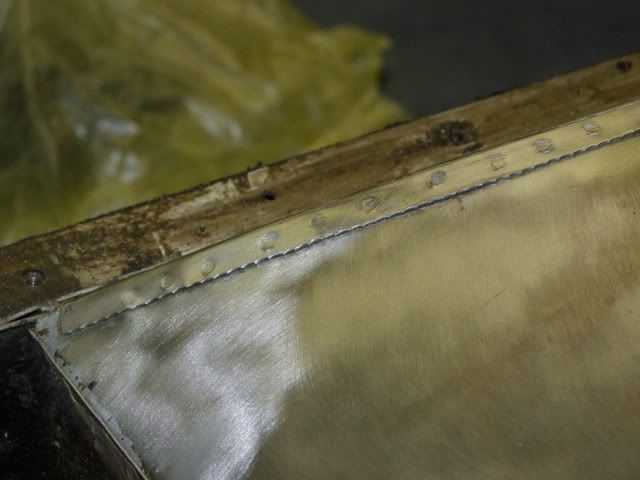
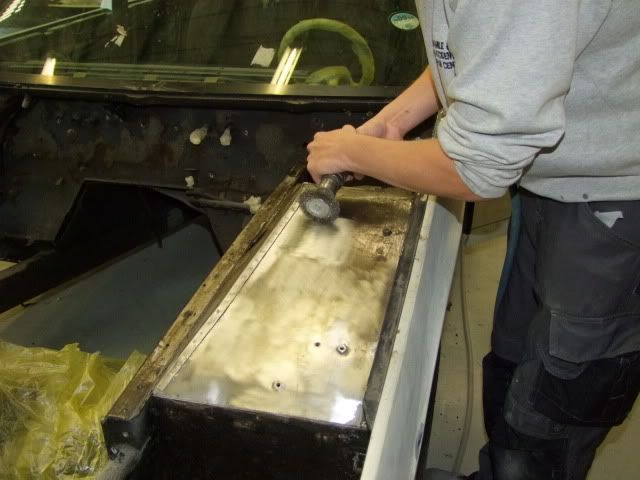
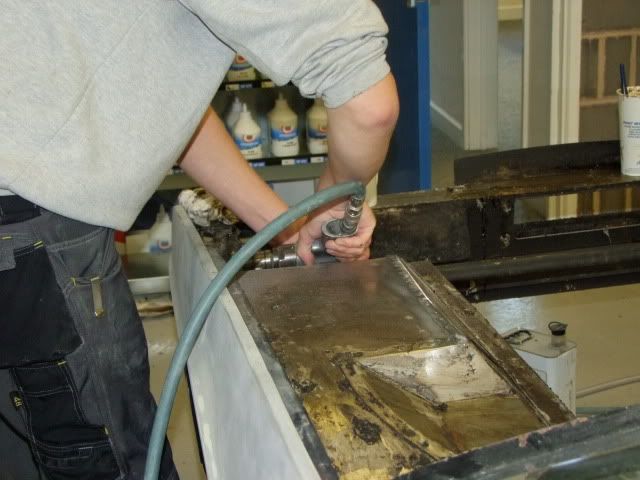
131011 In the body shop
 |
|
| Back to top |
|
 |
Lagondanet
Administrator

Joined: 03 Jan 2007
Posts: 3110
Location: UK
|
 Posted: Sat Dec 22, 2012 4:36 pm Post subject: Posted: Sat Dec 22, 2012 4:36 pm Post subject: |
 |
|
 |
|
| Back to top |
|
 |
Lagondanet
Administrator

Joined: 03 Jan 2007
Posts: 3110
Location: UK
|
 Posted: Sun Jan 06, 2013 5:51 pm Post subject: Posted: Sun Jan 06, 2013 5:51 pm Post subject: |
 |
|
David has started to put it back together.
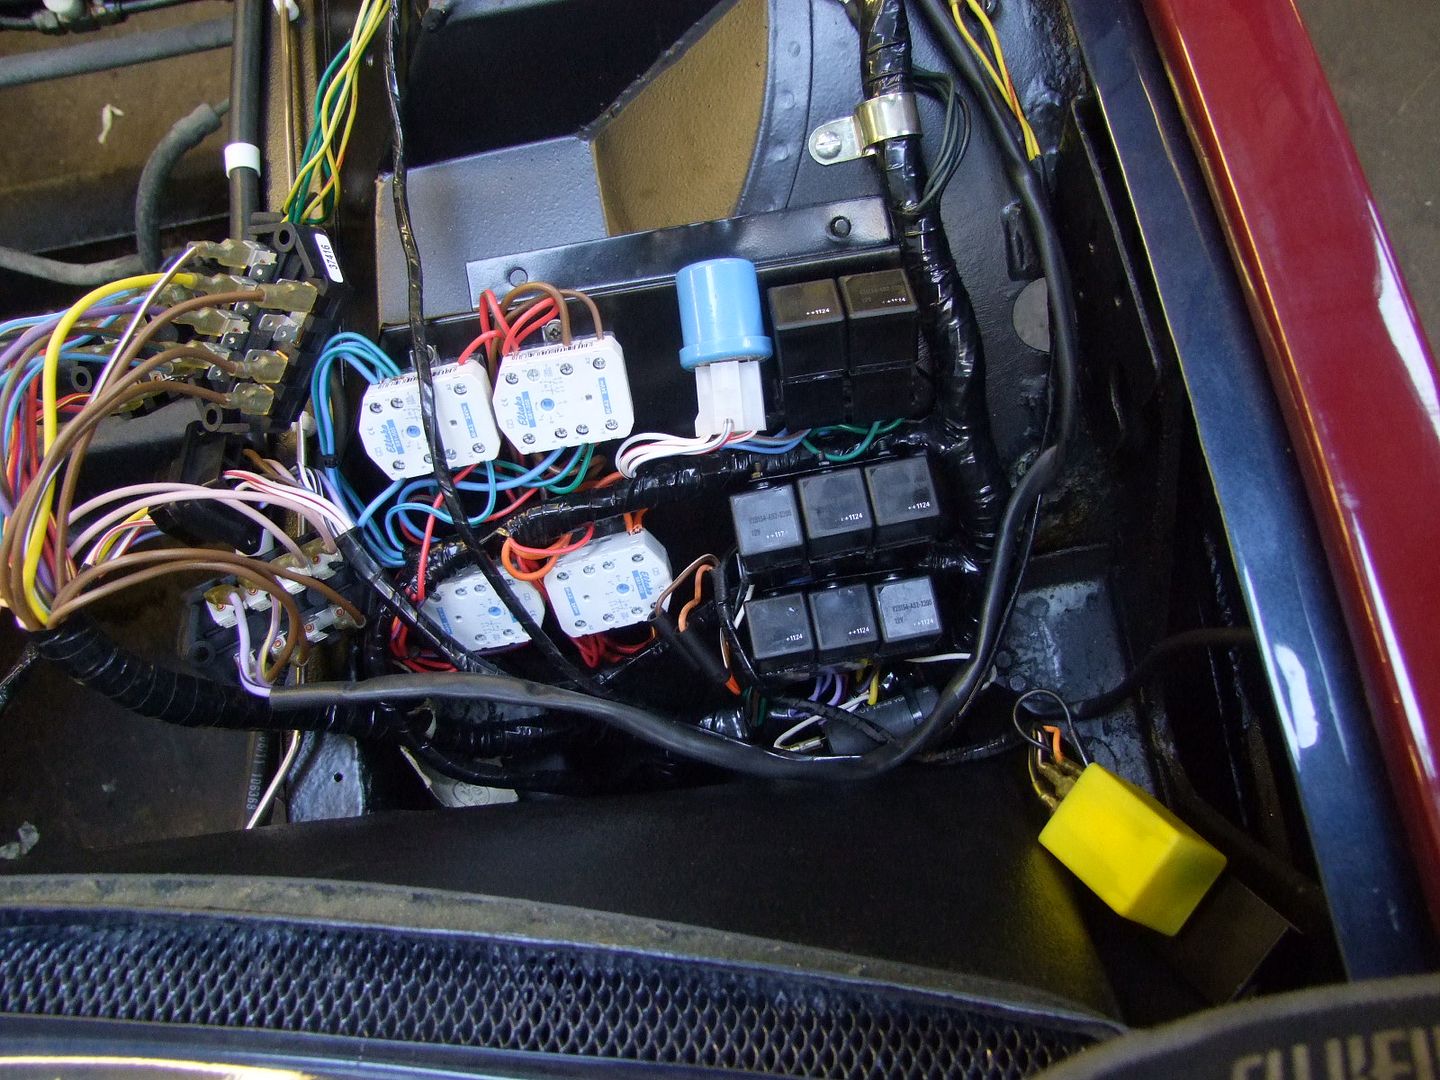
Underside of engine bay fuse board
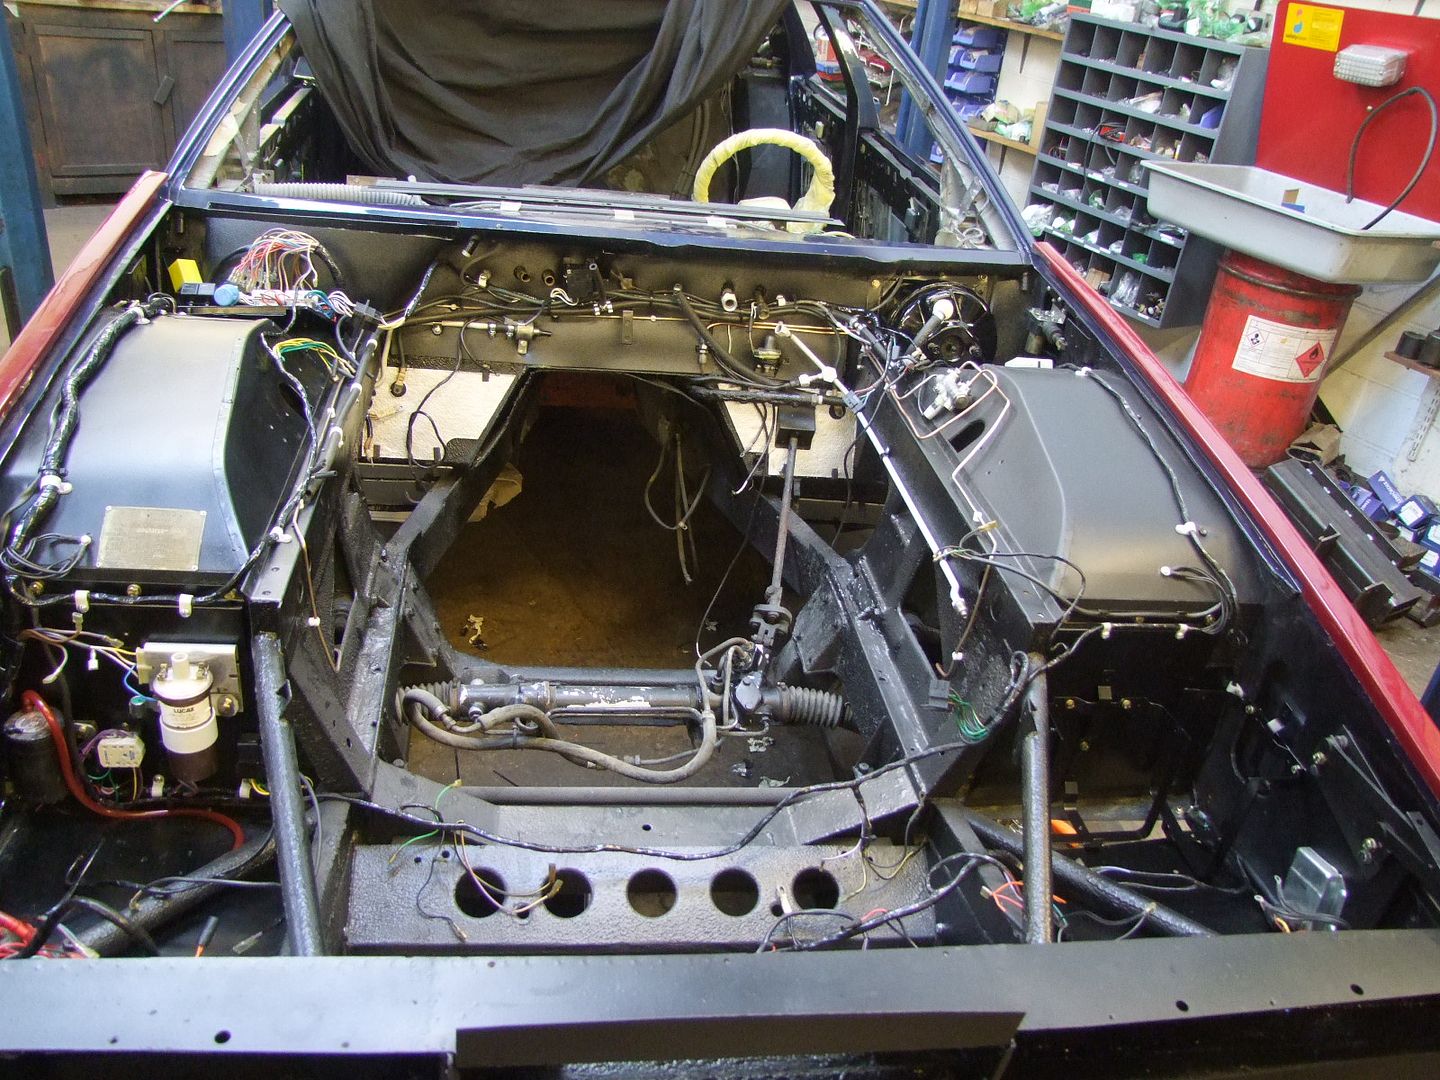
Engine bay ready for engine
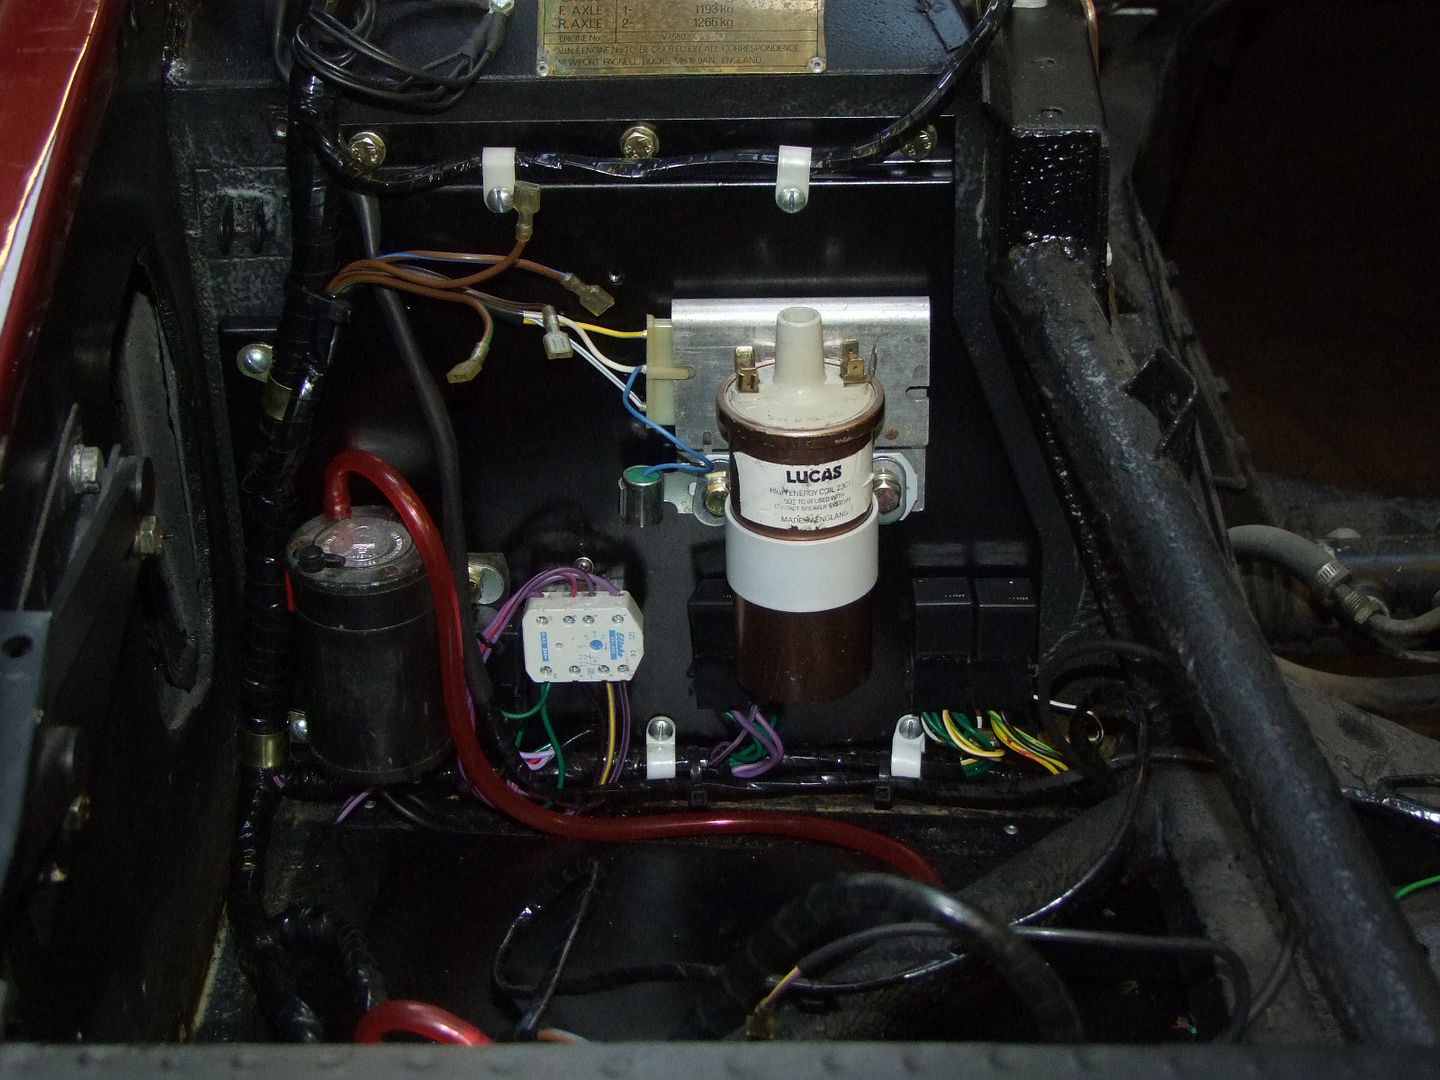
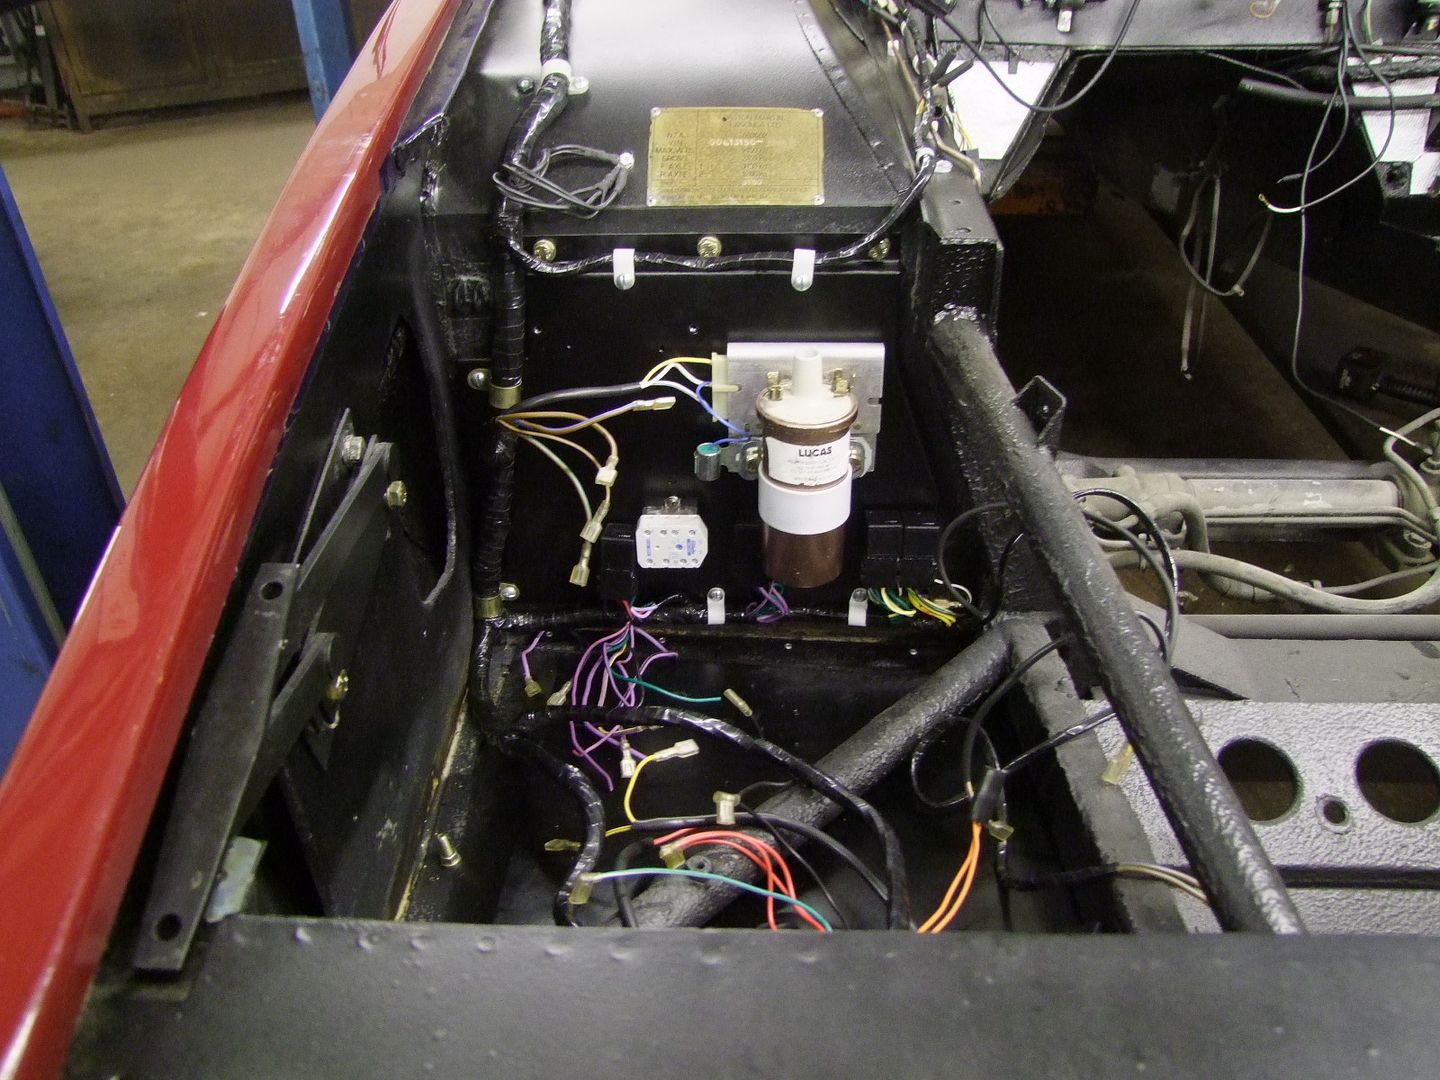
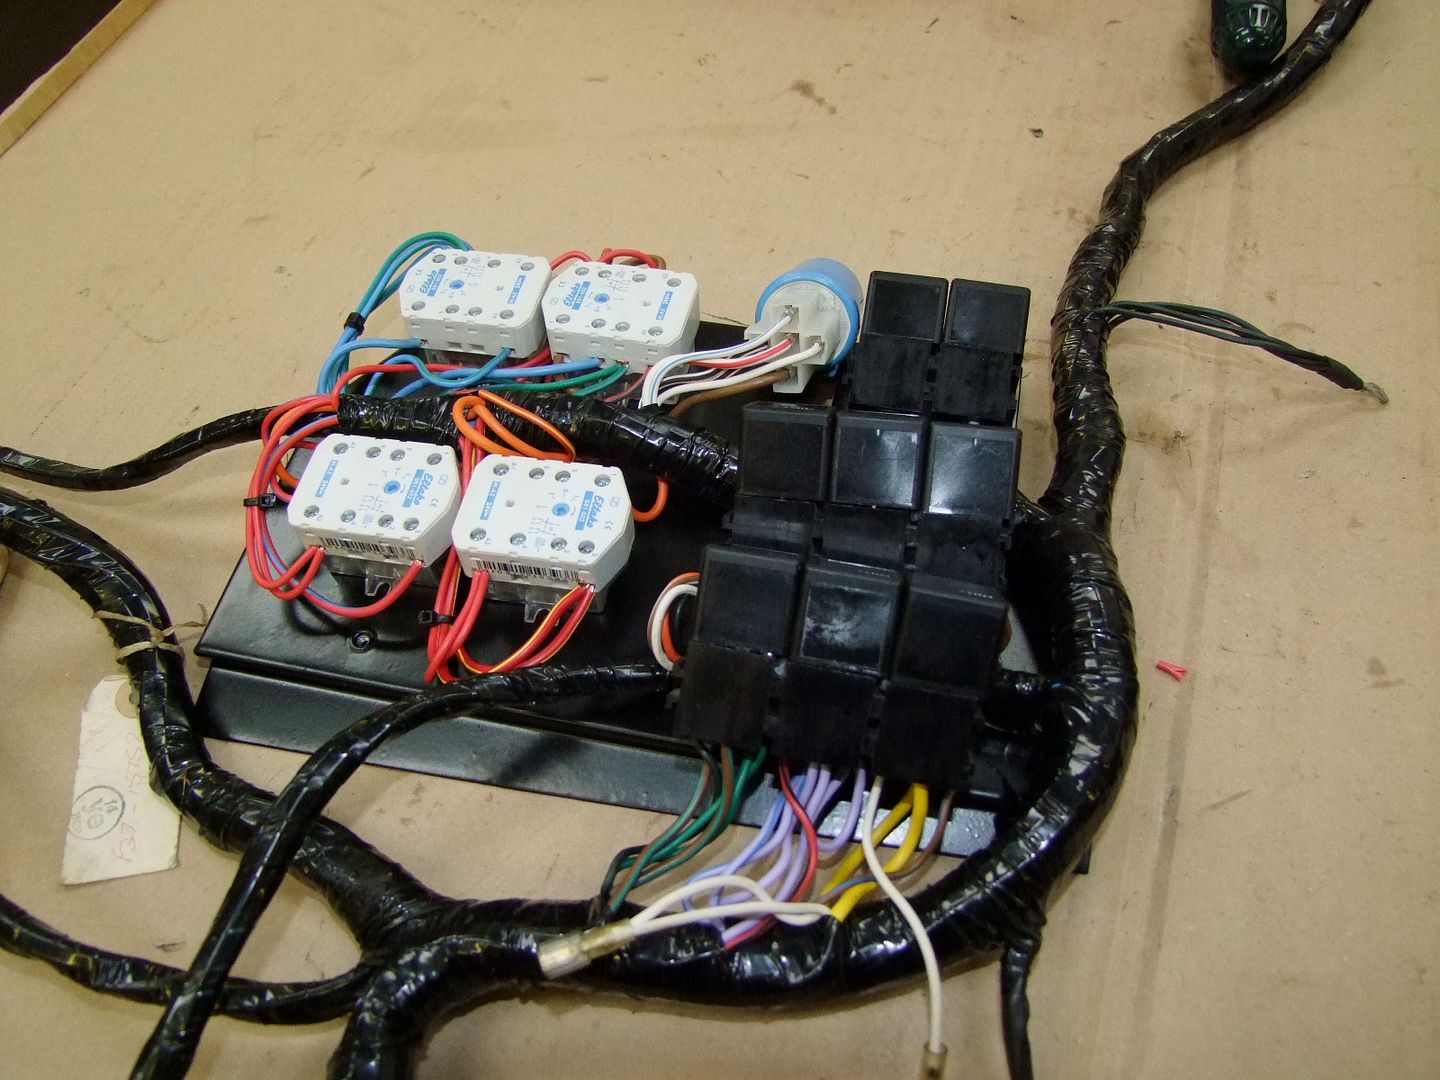
Final fit for latching relays etc.
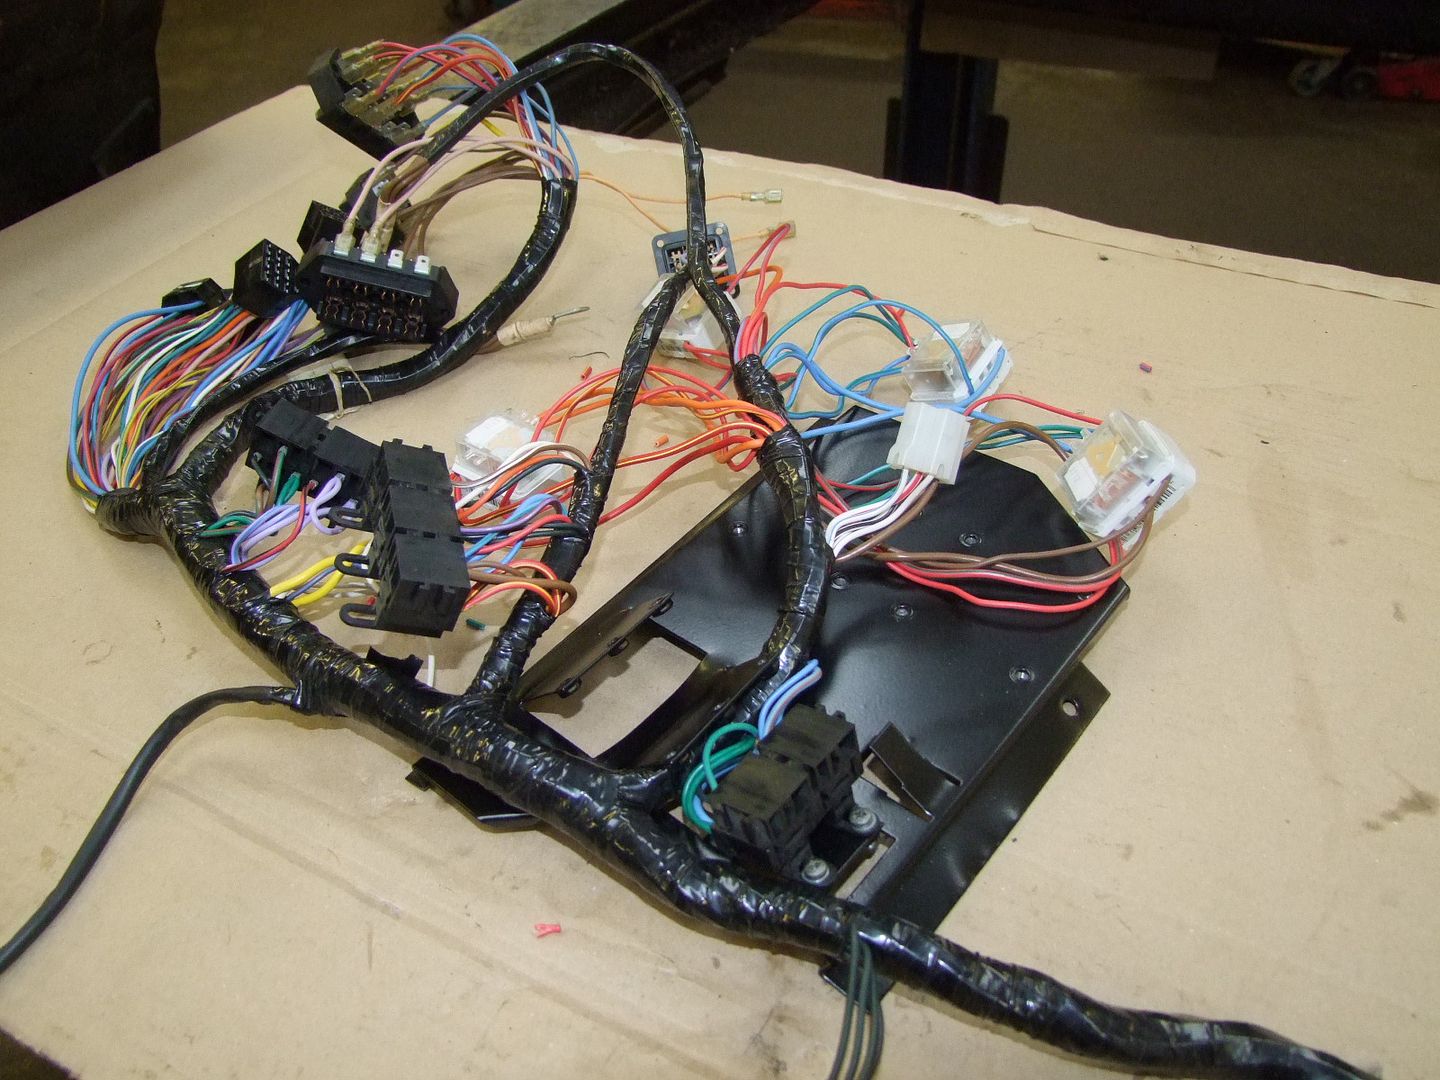
Starting to fit wiring harness to relay board
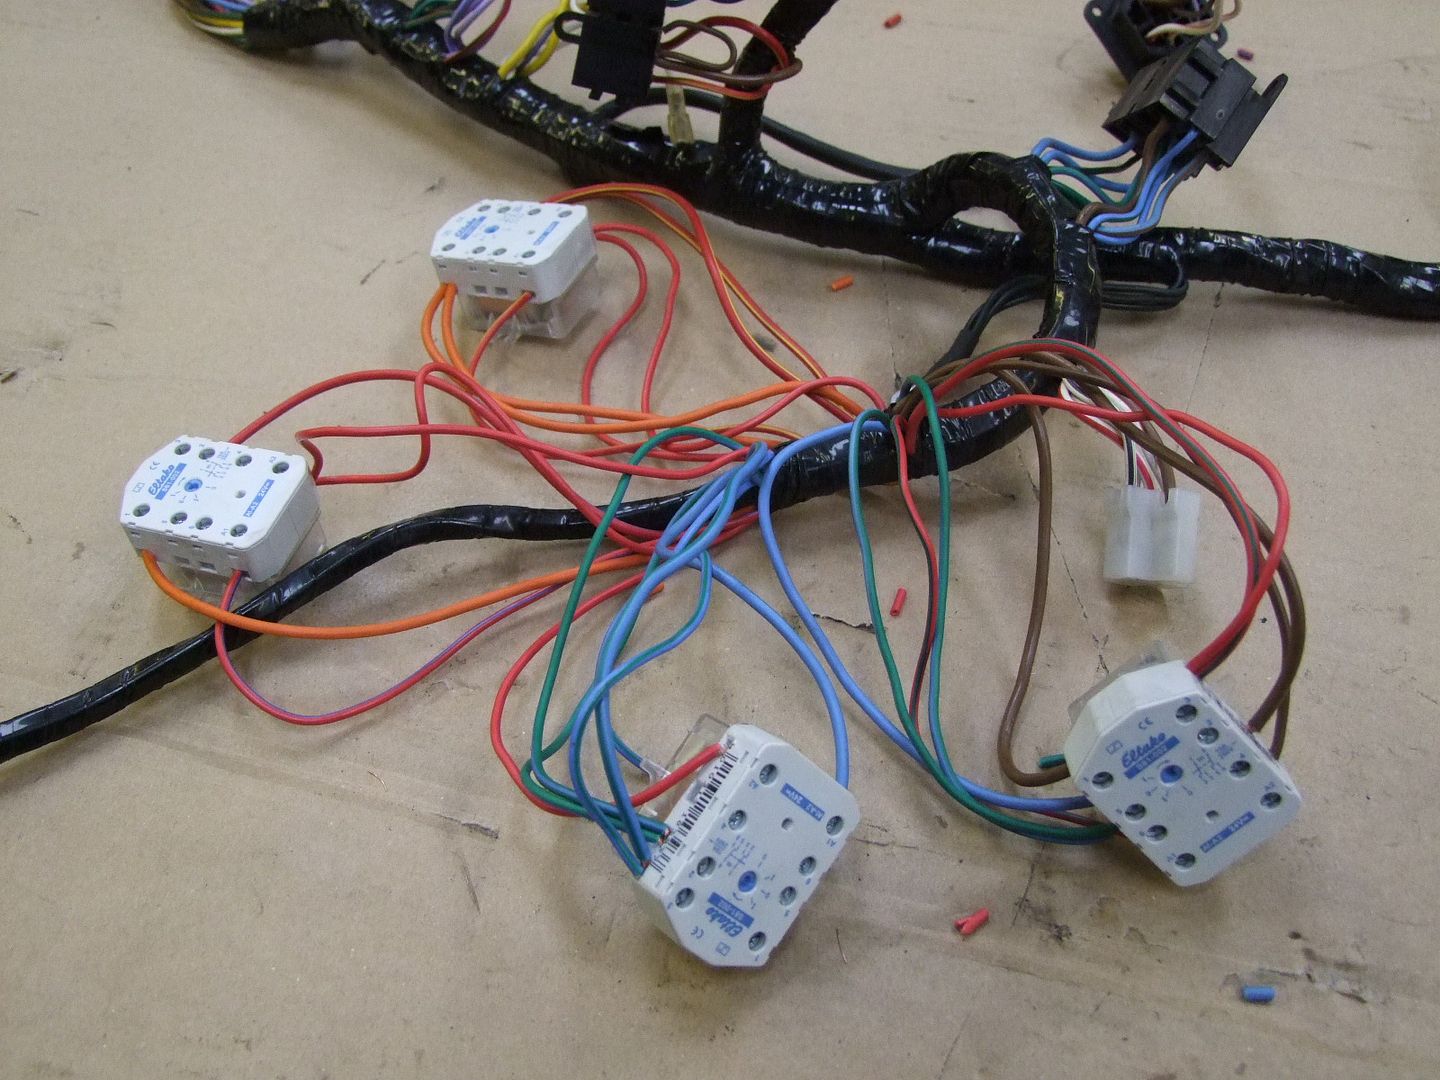
Fitting new latching relays - original style no longer
available. It was much easier to wire them off the board and once fitted,
remove each wire to cut to correct size and then refit. A di electric grease
was used at each of the relay connectors to help prevent corrosion, the same
being used for all other relay blocks and connectors, especially the through
bulkhead connectors, perhaps the weakest electrical link in these cars.
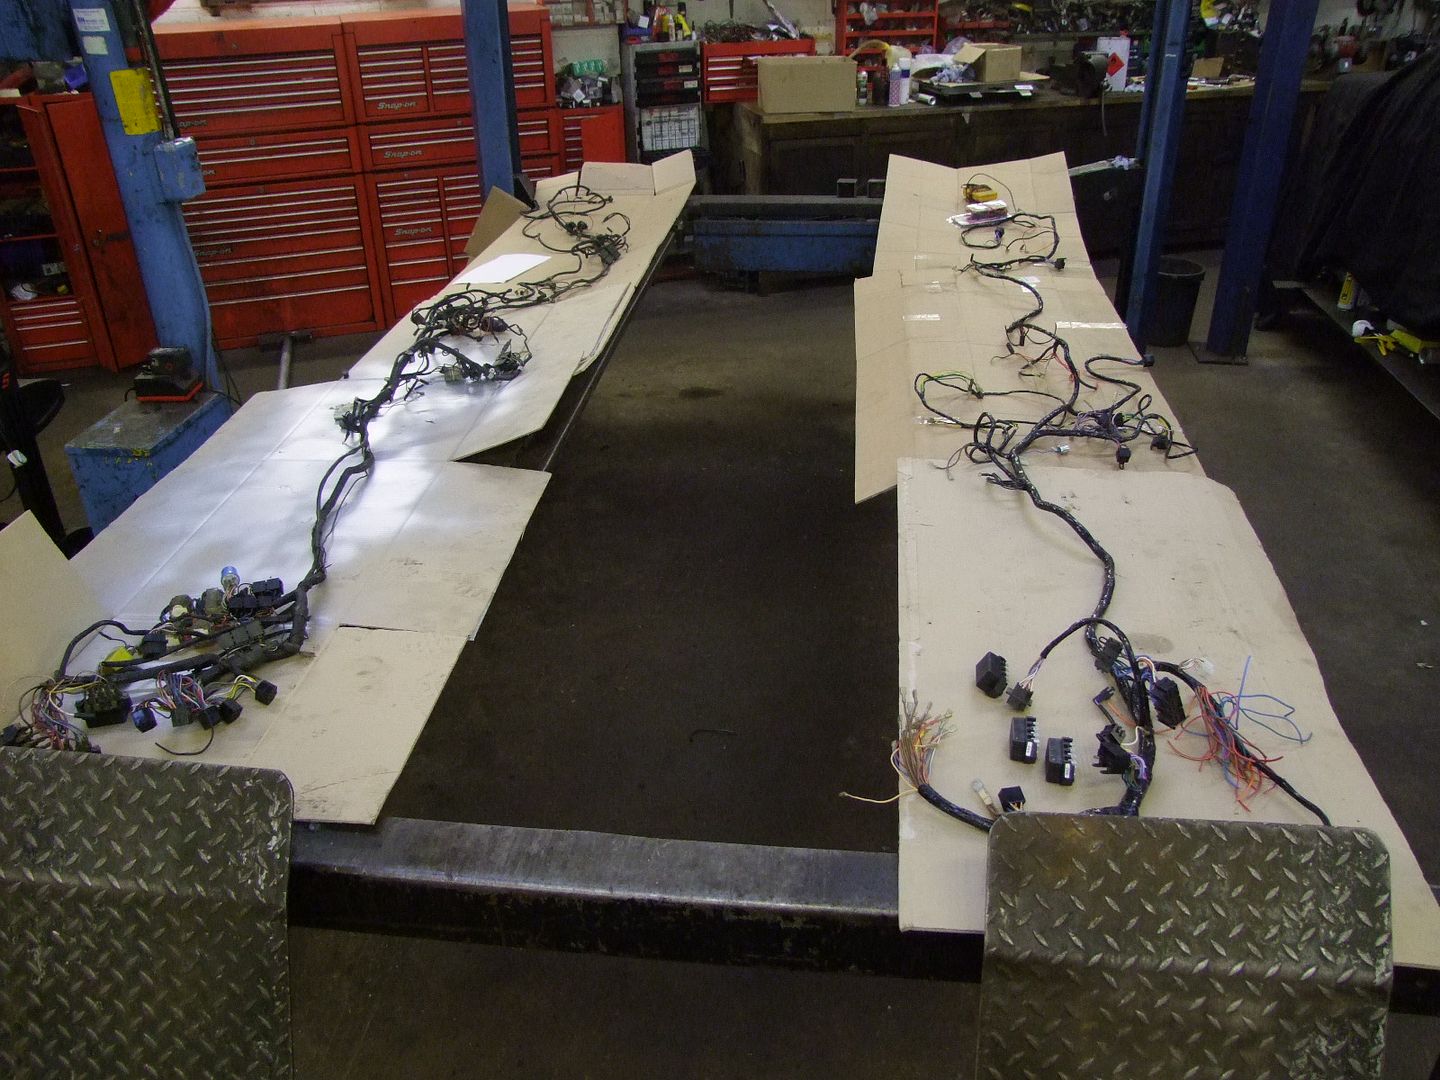
Old wiring harness on the left, new one on the right, a
combination of rodent damage, broken and cut wires etc. meant it was cheaper
to buy a new harness and work on that than try and repair the old one. Both
the right and left harnesses are new (this is the right harness on this LHD
car) and, surprise surprise, even though being purchased by VIN and car
spec, were still incorrect but easily rectified. This harness starts at the
fuse board by the bulkhead right side and goes right round the front of the
car, terminating at the headlamp unit at the left front.
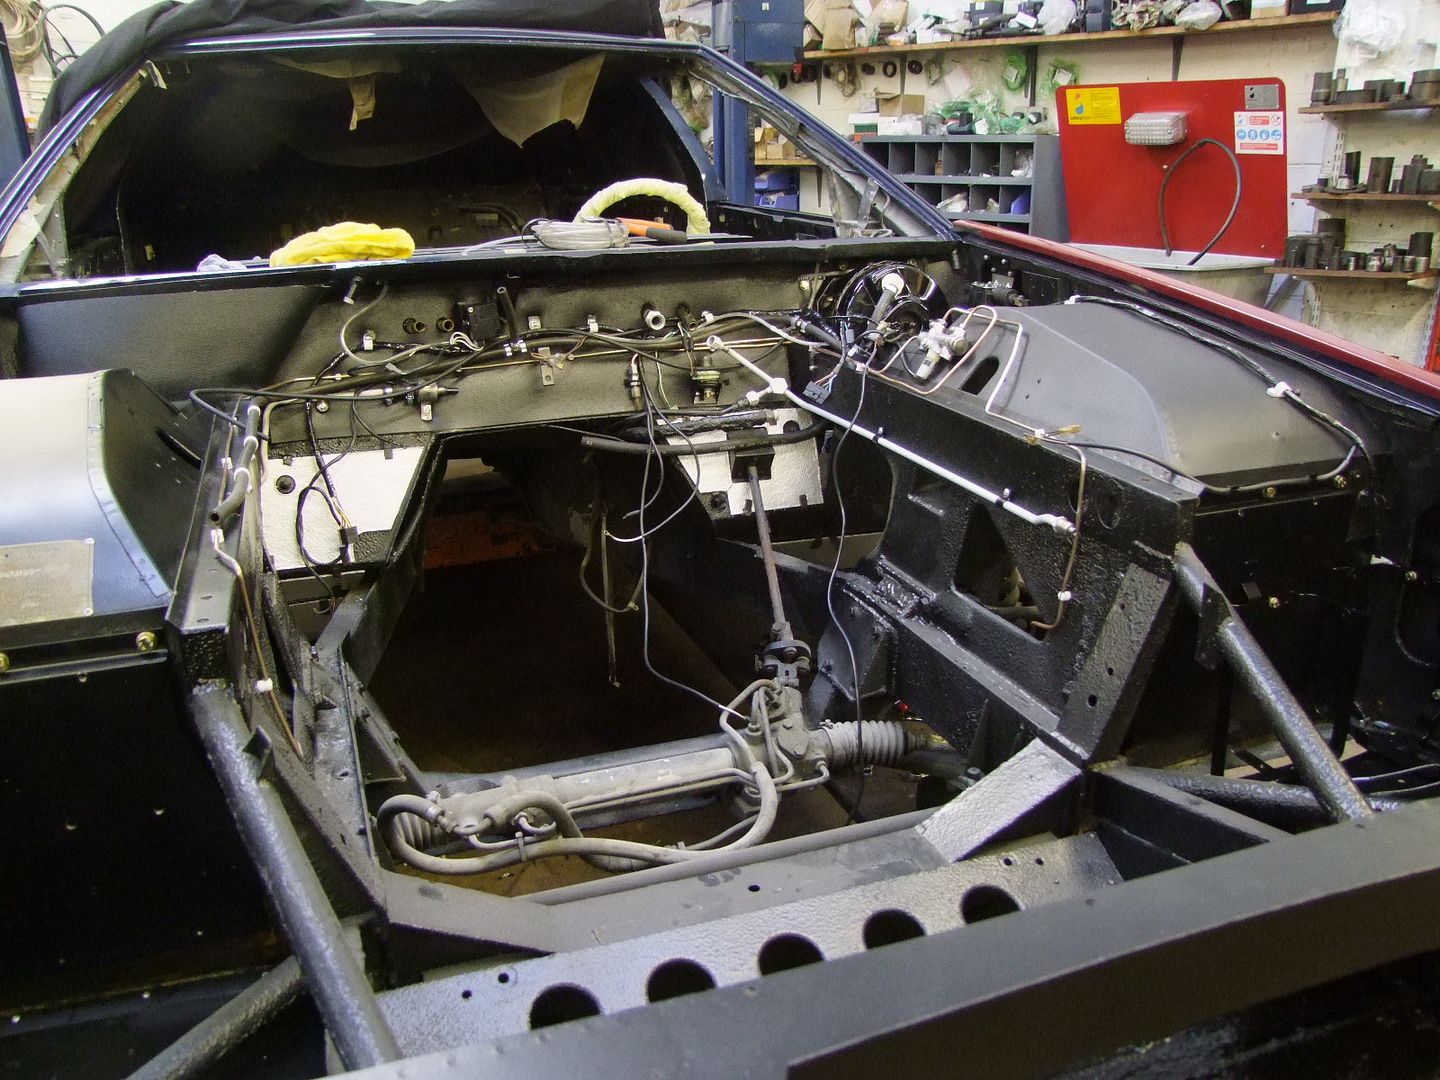
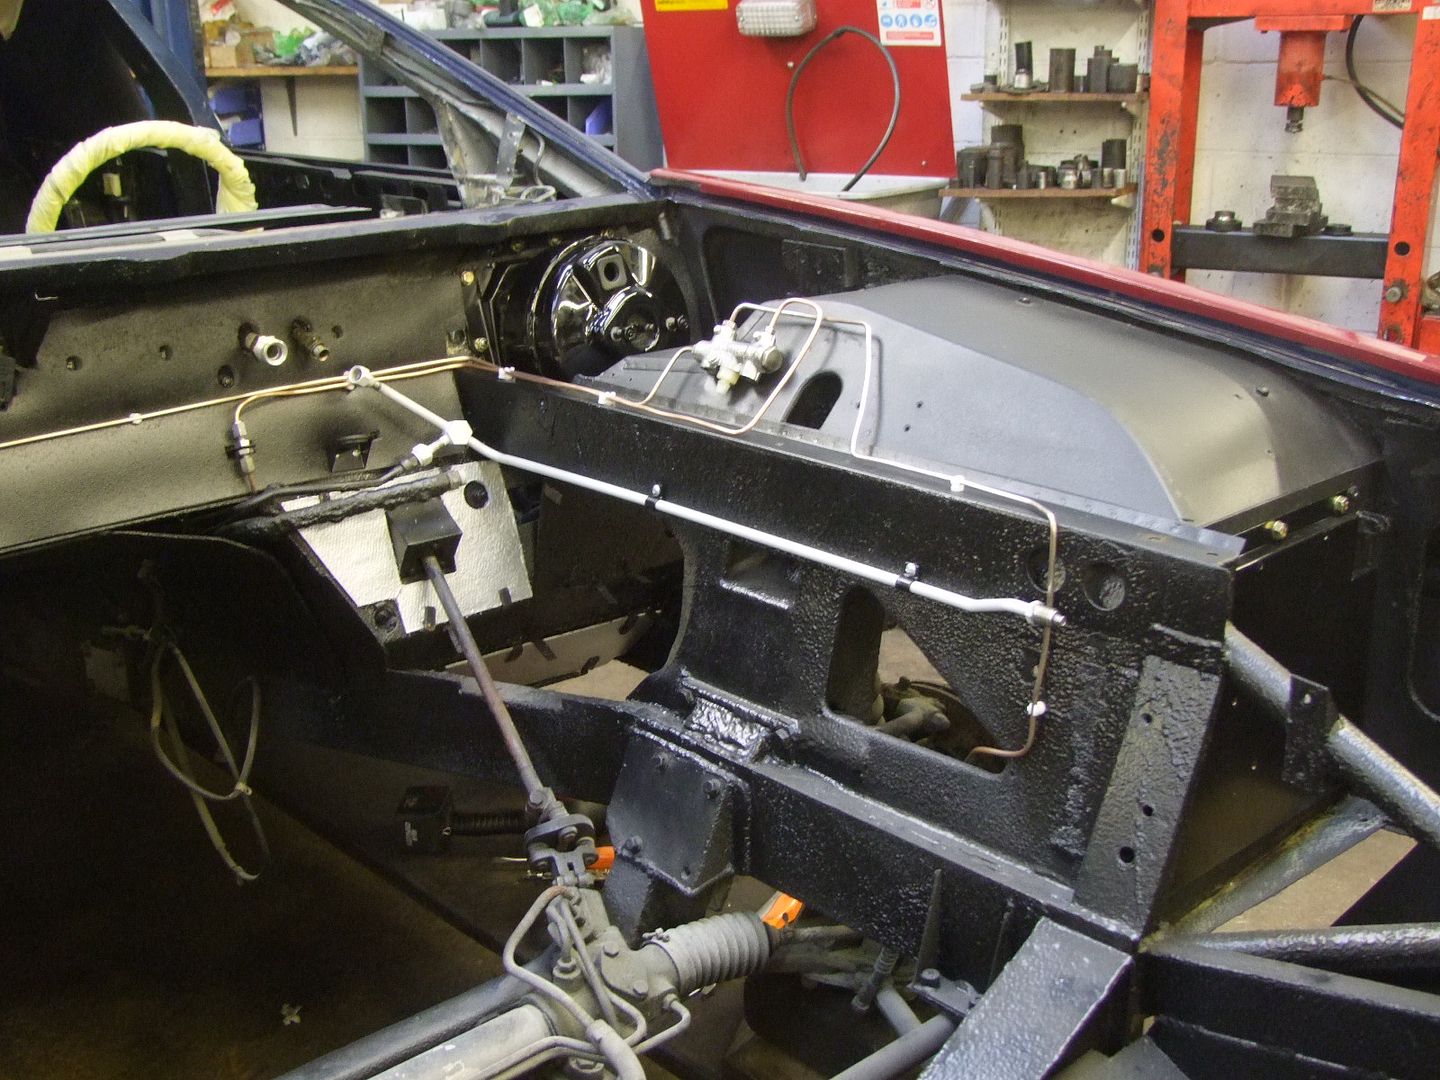
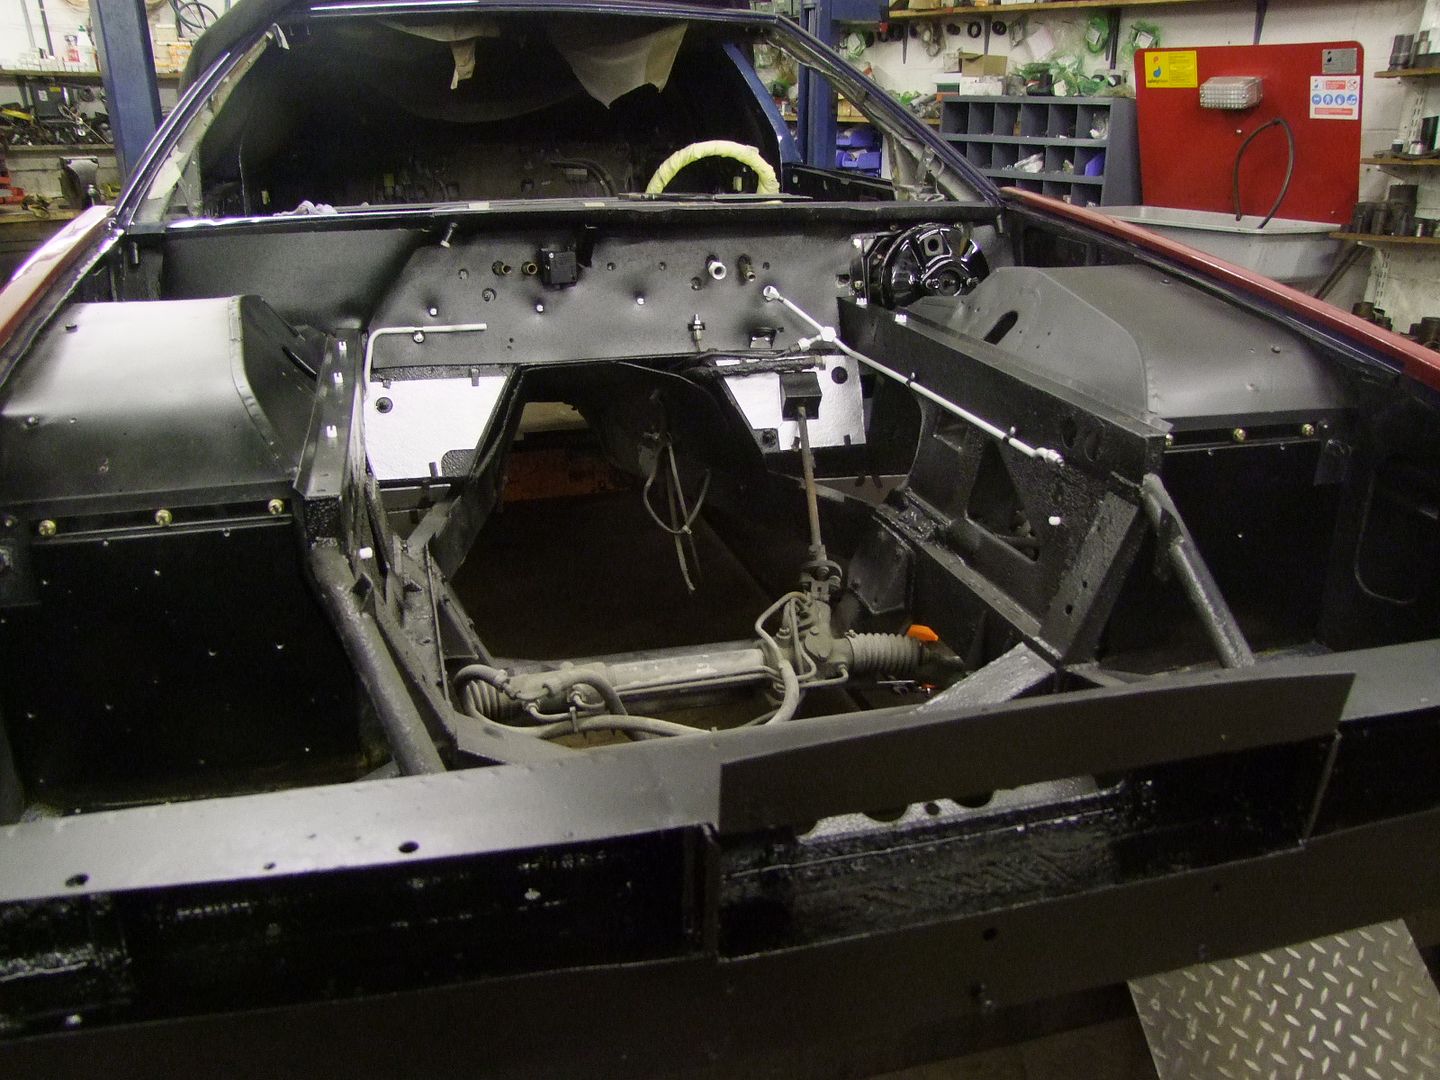
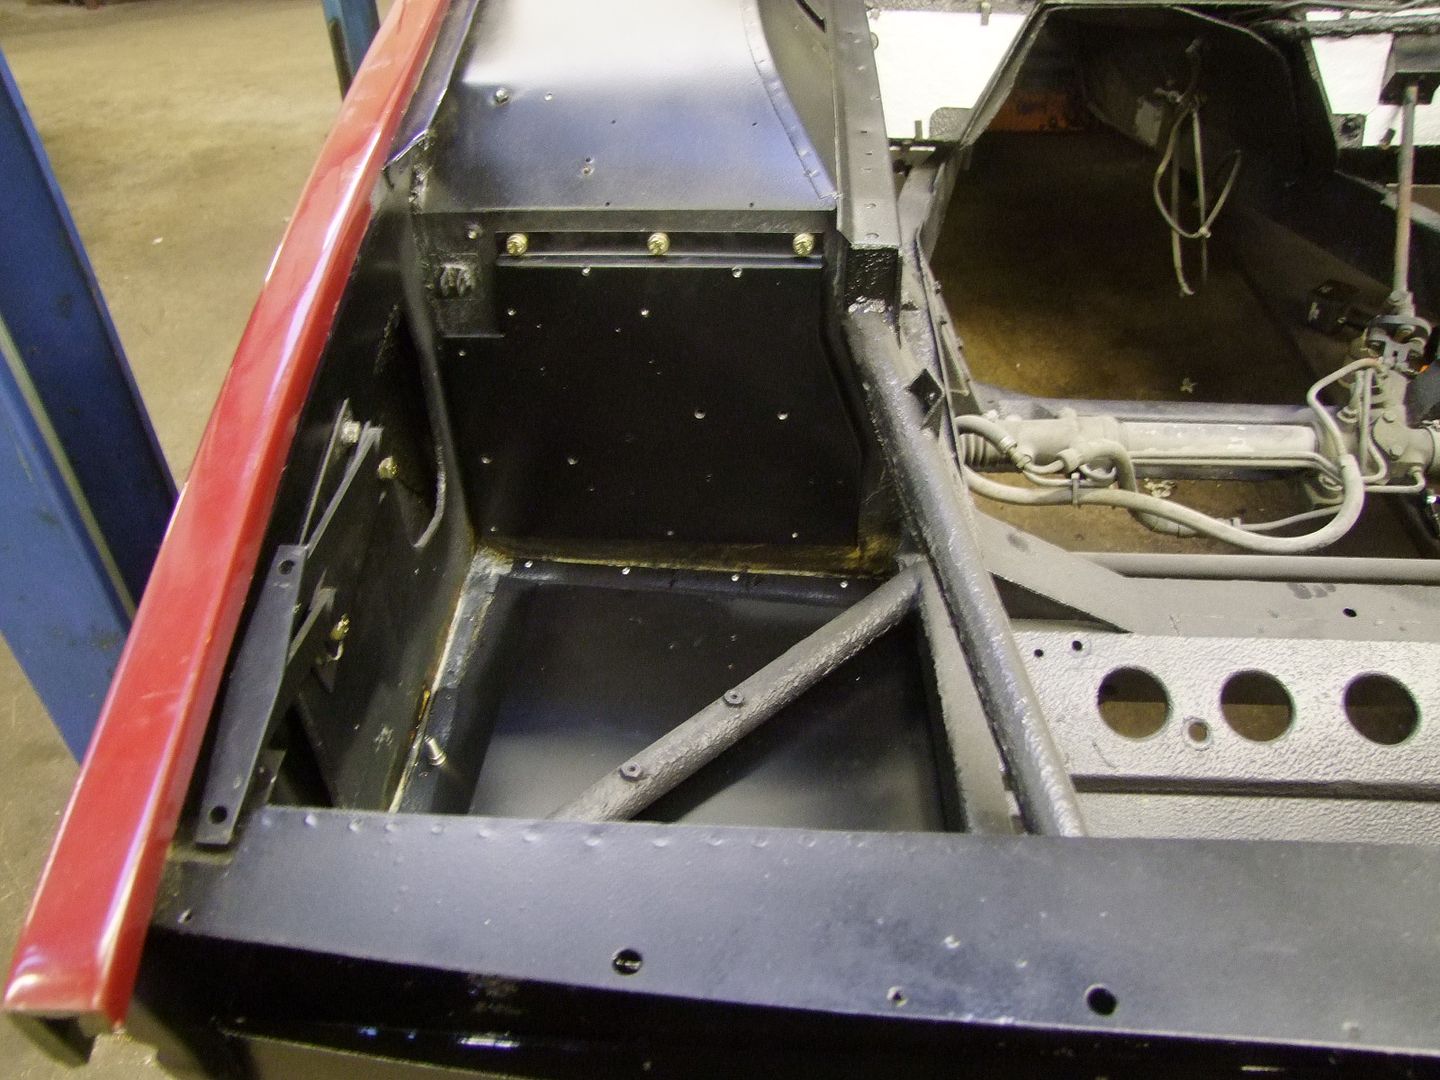
Front tray and electrical carrier bolted/riveted in place
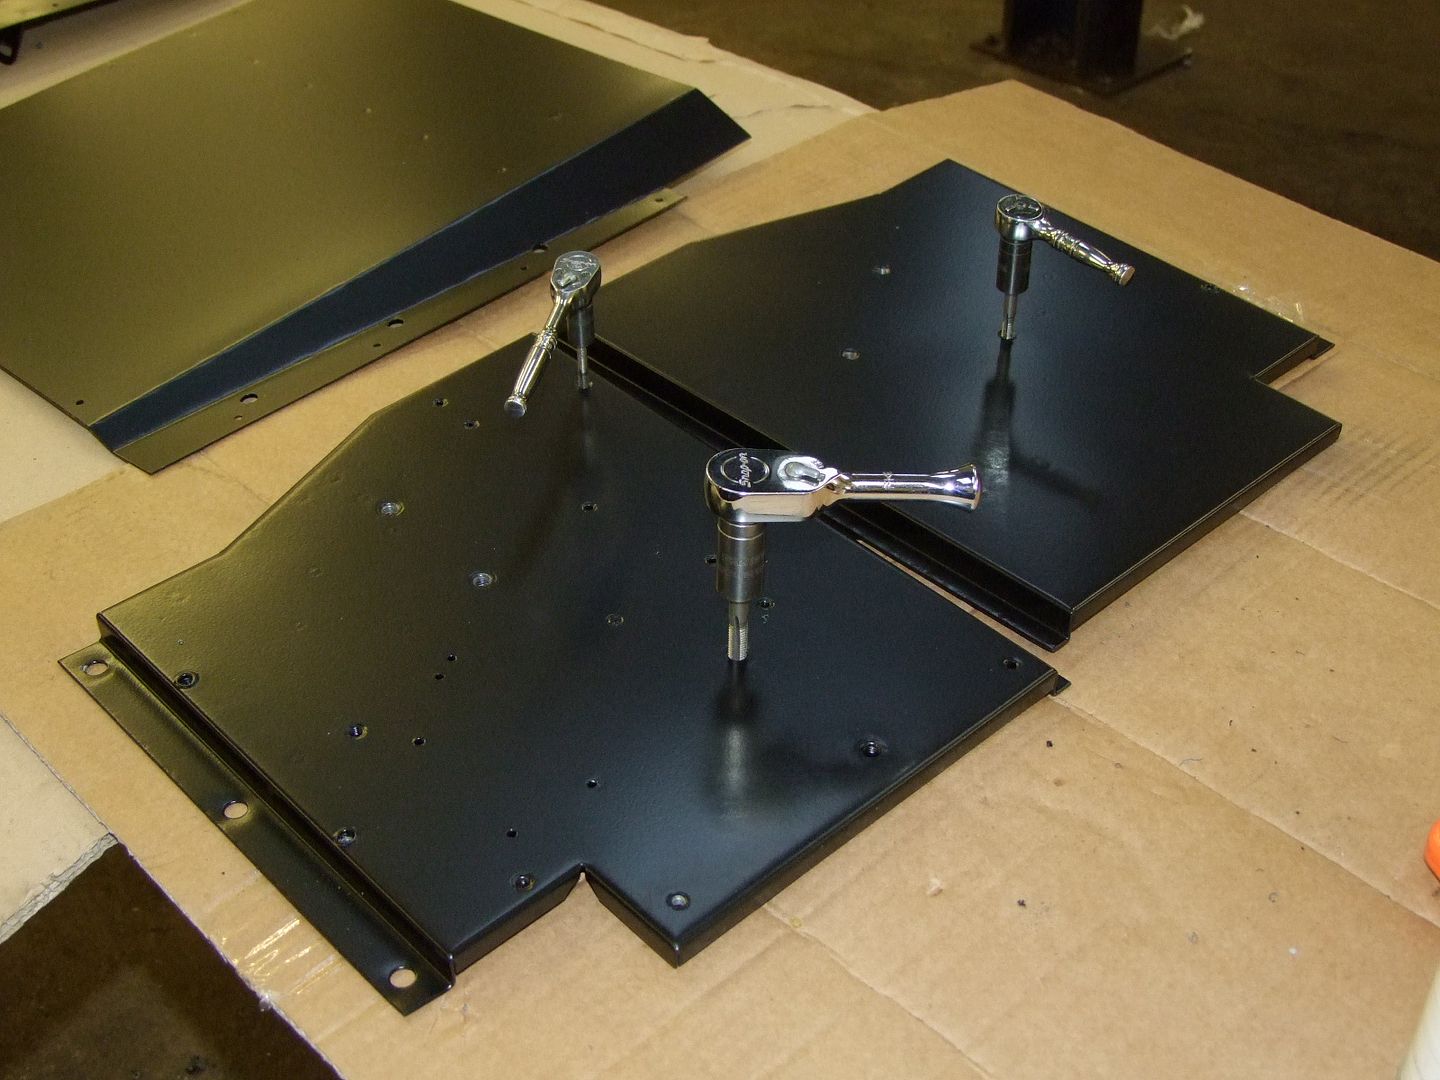
Tapping out all the different thread sizes on all components
and also in the engine bay - a tedious but essential job.
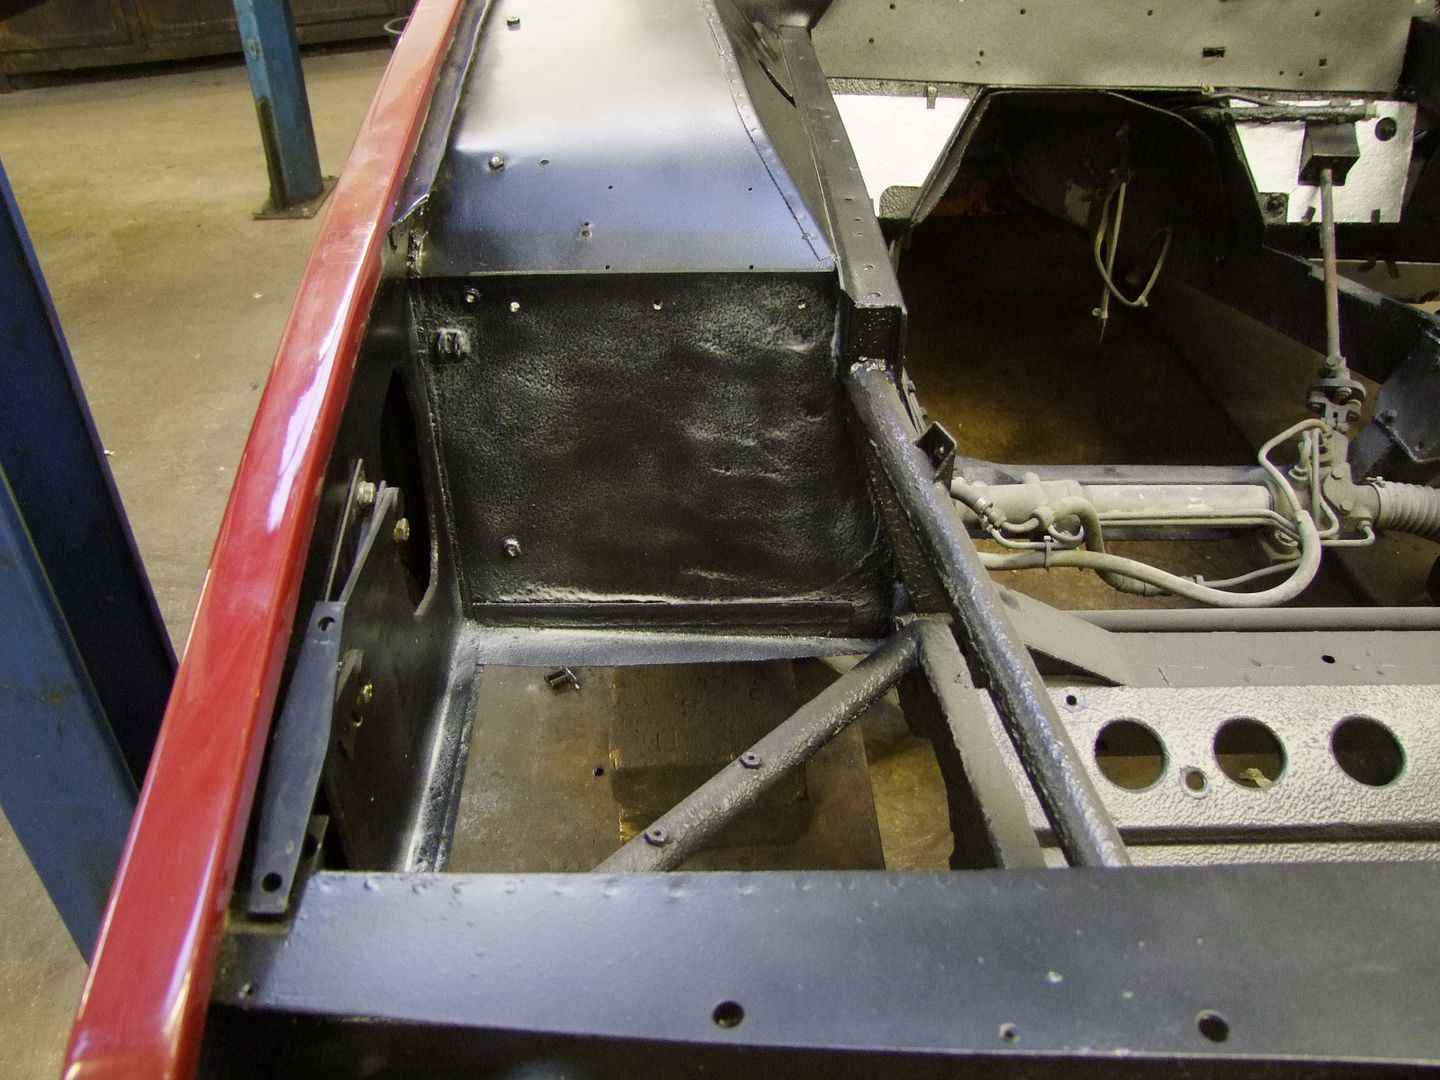
Before the trays were fitted - anticorrosion wax applied to
hopefully keep things in good order

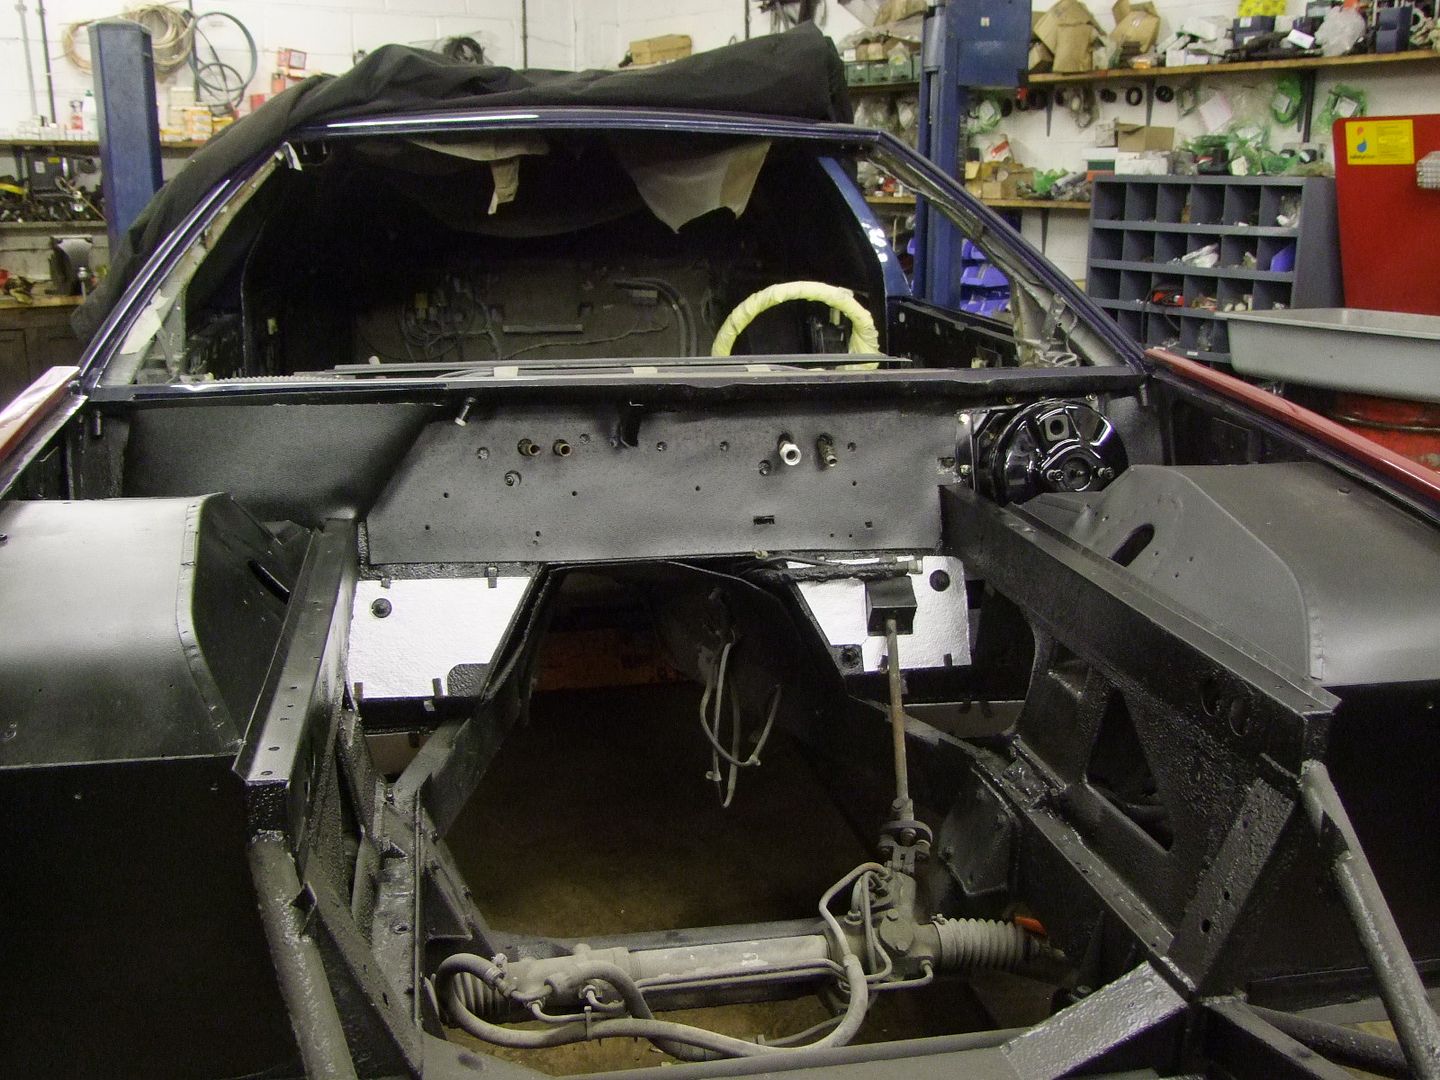
Bulkhead insulation followed by brake servo are the first
things to be fitted
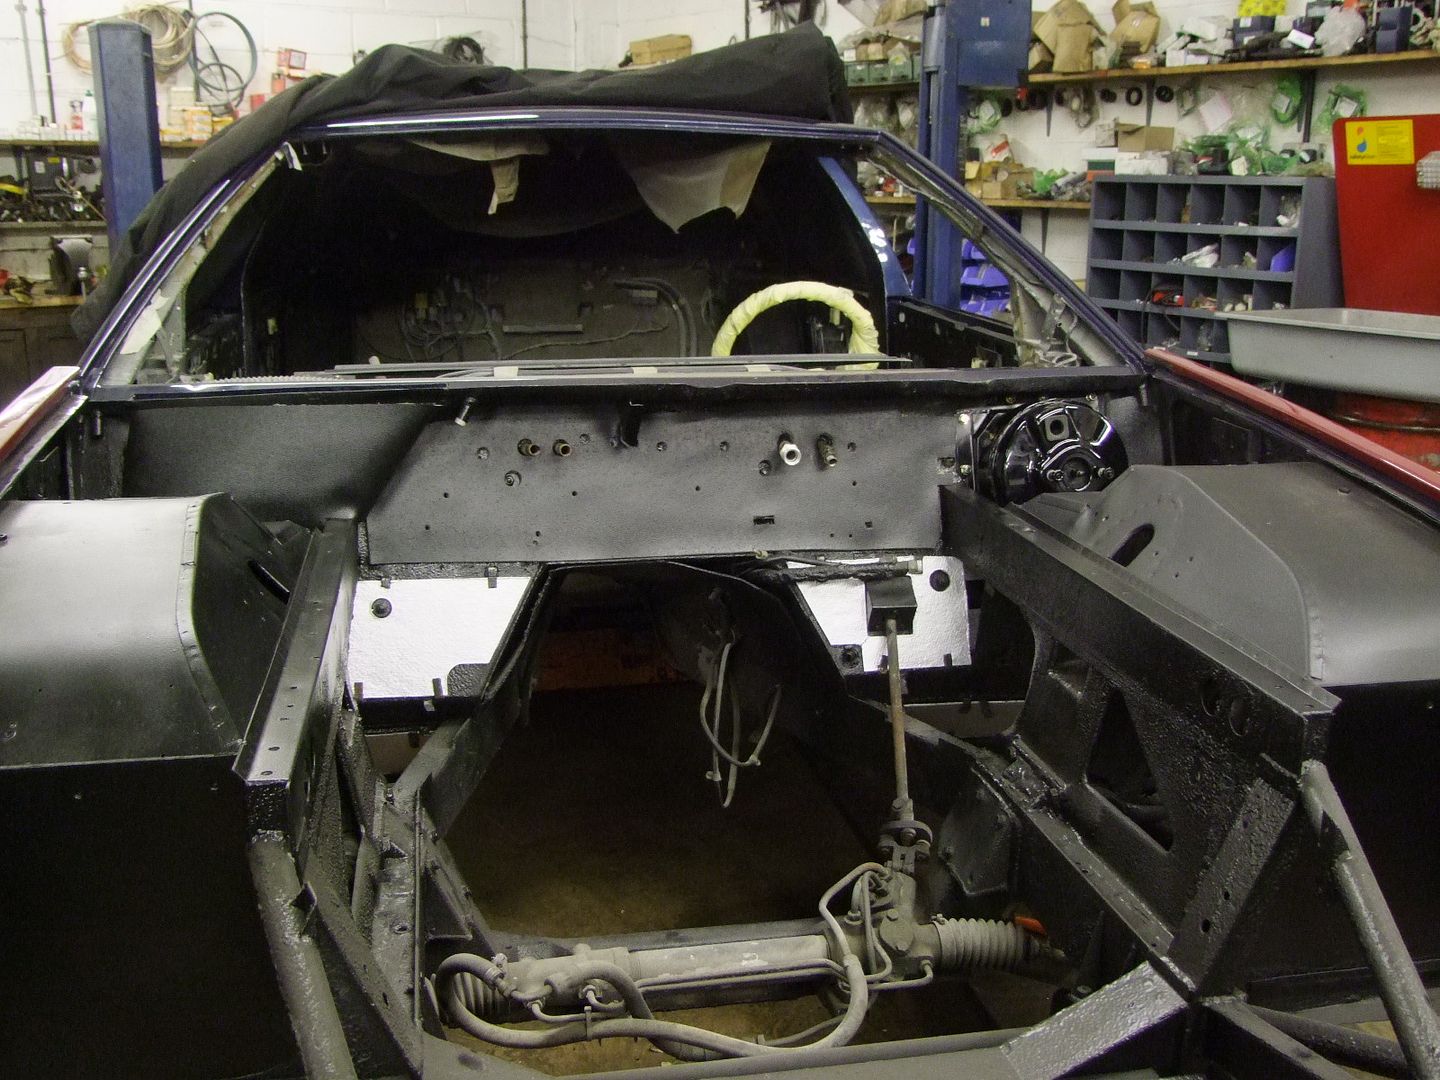
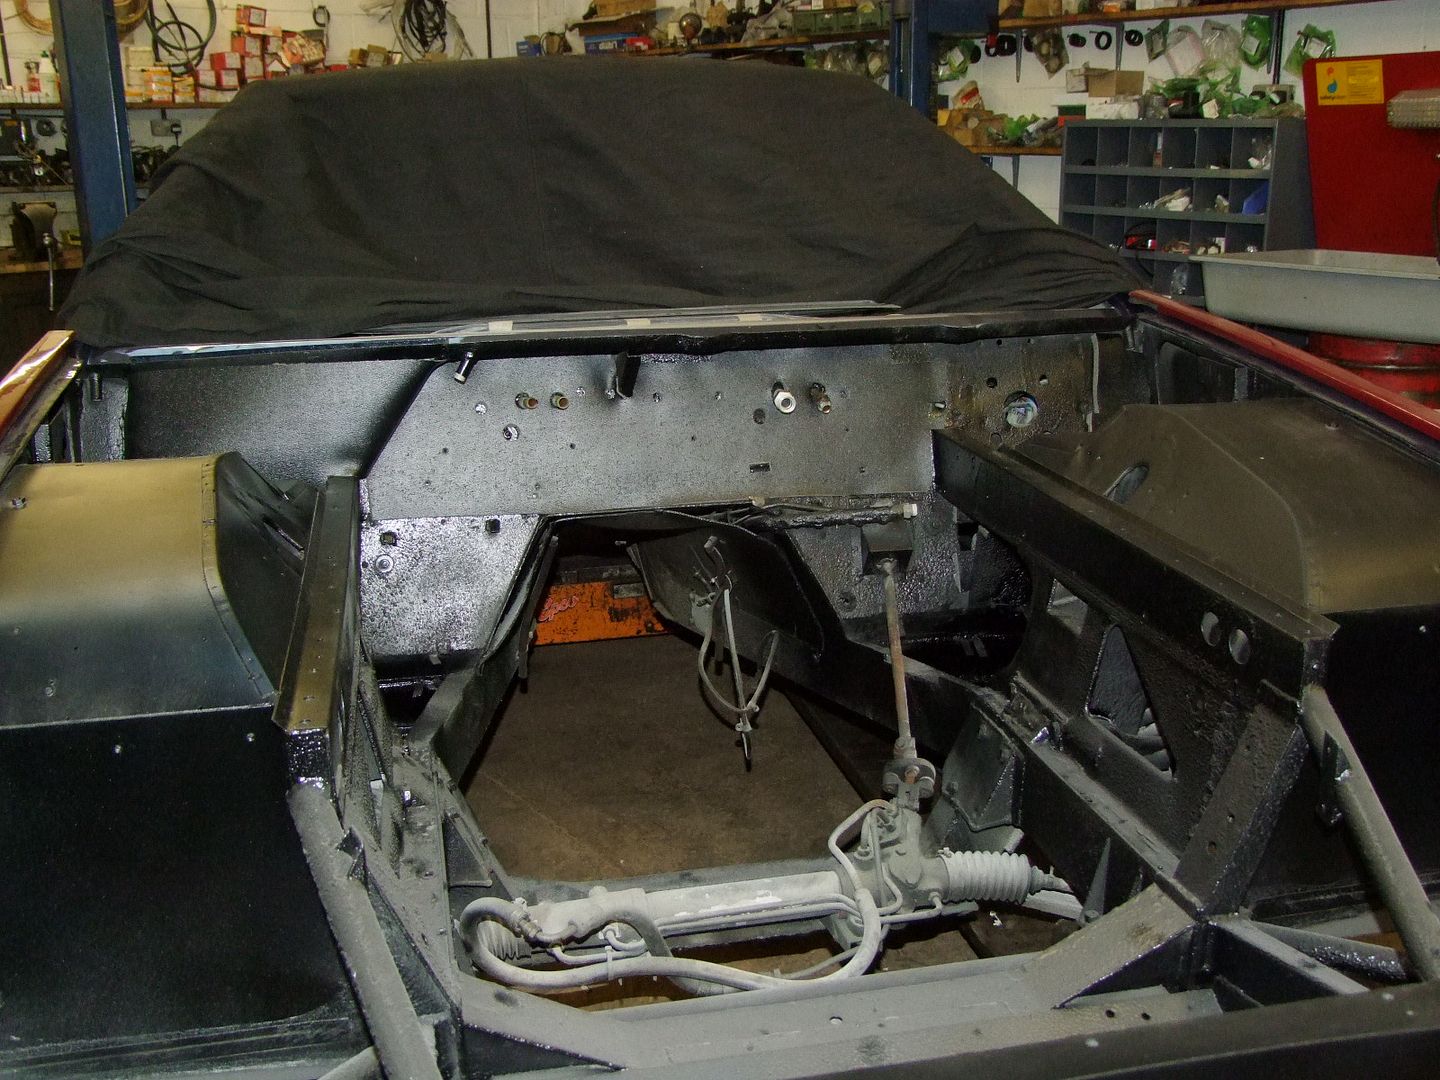
Bulkhead insulation glued in place, all had to be cut by hand
and all holes die cut to match the locations in the bulkhead, another slow
job. This is the original style material that is not as good as modern stuff
but helps with the "look".
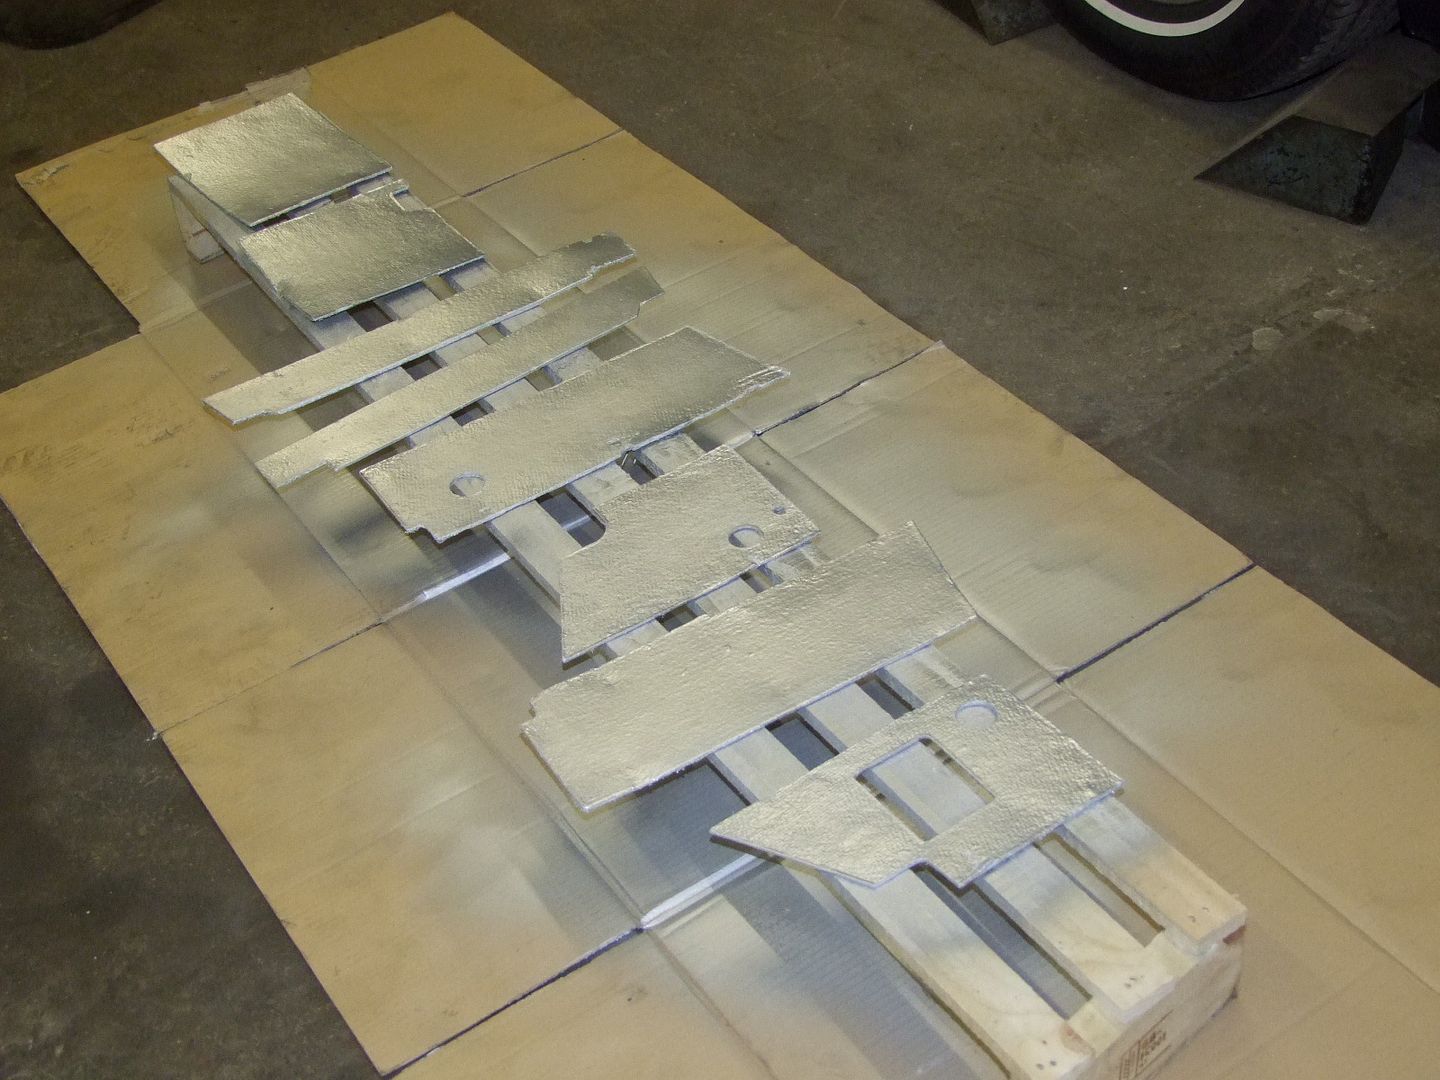
All the heat shields painted the silver finish.
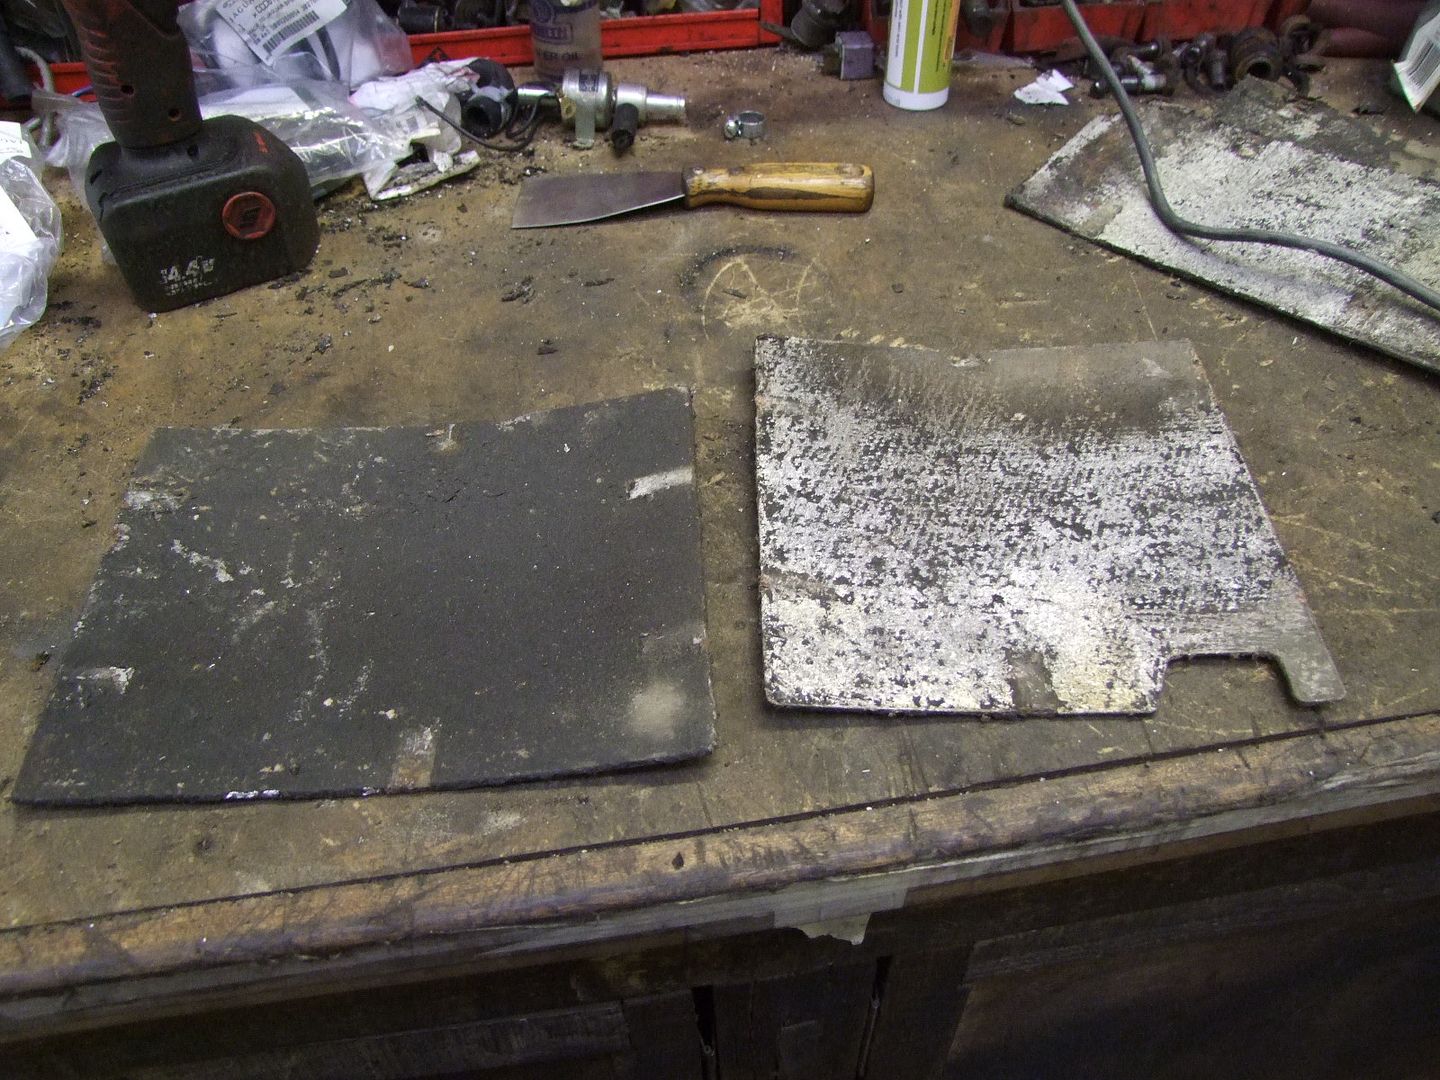
Preparing them for paint, the one on the left as it came off
the car and the one on the right after cleaning. A final wash with thinners
takes most of the ingrained dirt out and then 3 coats of paint thinly
applied brings them up well. The silver marks on the left hand one, where
the tangs press over, indicate that they were silver when originally fitted
but over time a combination of road dirt, under seal and wax have turned
them almost black
.
Last edited by Lagondanet on Fri Jan 11, 2013 8:01 am; edited 2 times in total |
|
| Back to top |
|
 |
jonc
Joined: 21 Sep 2010
Posts: 584
Location: Cheshire, UK
|
 Posted: Sun Jan 06, 2013 7:46 pm Post subject: Posted: Sun Jan 06, 2013 7:46 pm Post subject: |
 |
|
Love it.
Interesting that you are going for the correct aluminium paint finish on all the heat shields. I chose to paint the wheel arch ones in black on 277 because it made it far easier to paint the holding tabs which I expected the paint to crack on them when bent over to hold the shields in place (and they did). It was very tempting to replace them with Zircoflex which would be the modern-day equivalent and remove all the tabs, but better to stick to original.
All the cars I have looked at have had black Waxoyl sprayed over the wheel arches (and suspension) so these heat shields looked black anyway. My Virage is the same.
In going for originality, I am pretty sure the white nylon P clips on the tops of the inner wings holding the loom should be matt black painted, as should their screw heads. Only on the inner wing tops though.
Jonathan |
|
| Back to top |
|
 |
david
Joined: 21 Mar 2008
Posts: 118
Location: Nottingham
|
 Posted: Mon Jan 07, 2013 6:23 pm Post subject: Posted: Mon Jan 07, 2013 6:23 pm Post subject: |
 |
|
Hi Jonathan
Thanks for the comments.
Yes, the P clips and screw heads require painting but I'll leave that until the end in case anything requires "adjustment" - ie, I get it wrong!
As for the heatshields, the tangs will be retouched as required
but for me the silver is (or should be) a more efficient heatshield colour.
David |
|
| Back to top |
|
 |
jonc
Joined: 21 Sep 2010
Posts: 584
Location: Cheshire, UK
|
 Posted: Mon Jan 07, 2013 6:55 pm Post subject: Posted: Mon Jan 07, 2013 6:55 pm Post subject: |
 |
|
Agreed.
Great work, and I look forward to more updates.  |
|
| Back to top |
|
 |
Lagondanet
Administrator

Joined: 03 Jan 2007
Posts: 3110
Location: UK
|
 Posted: Fri Jan 11, 2013 8:16 am Post subject: Posted: Fri Jan 11, 2013 8:16 am Post subject: |
 |
|
and yet more on the engine
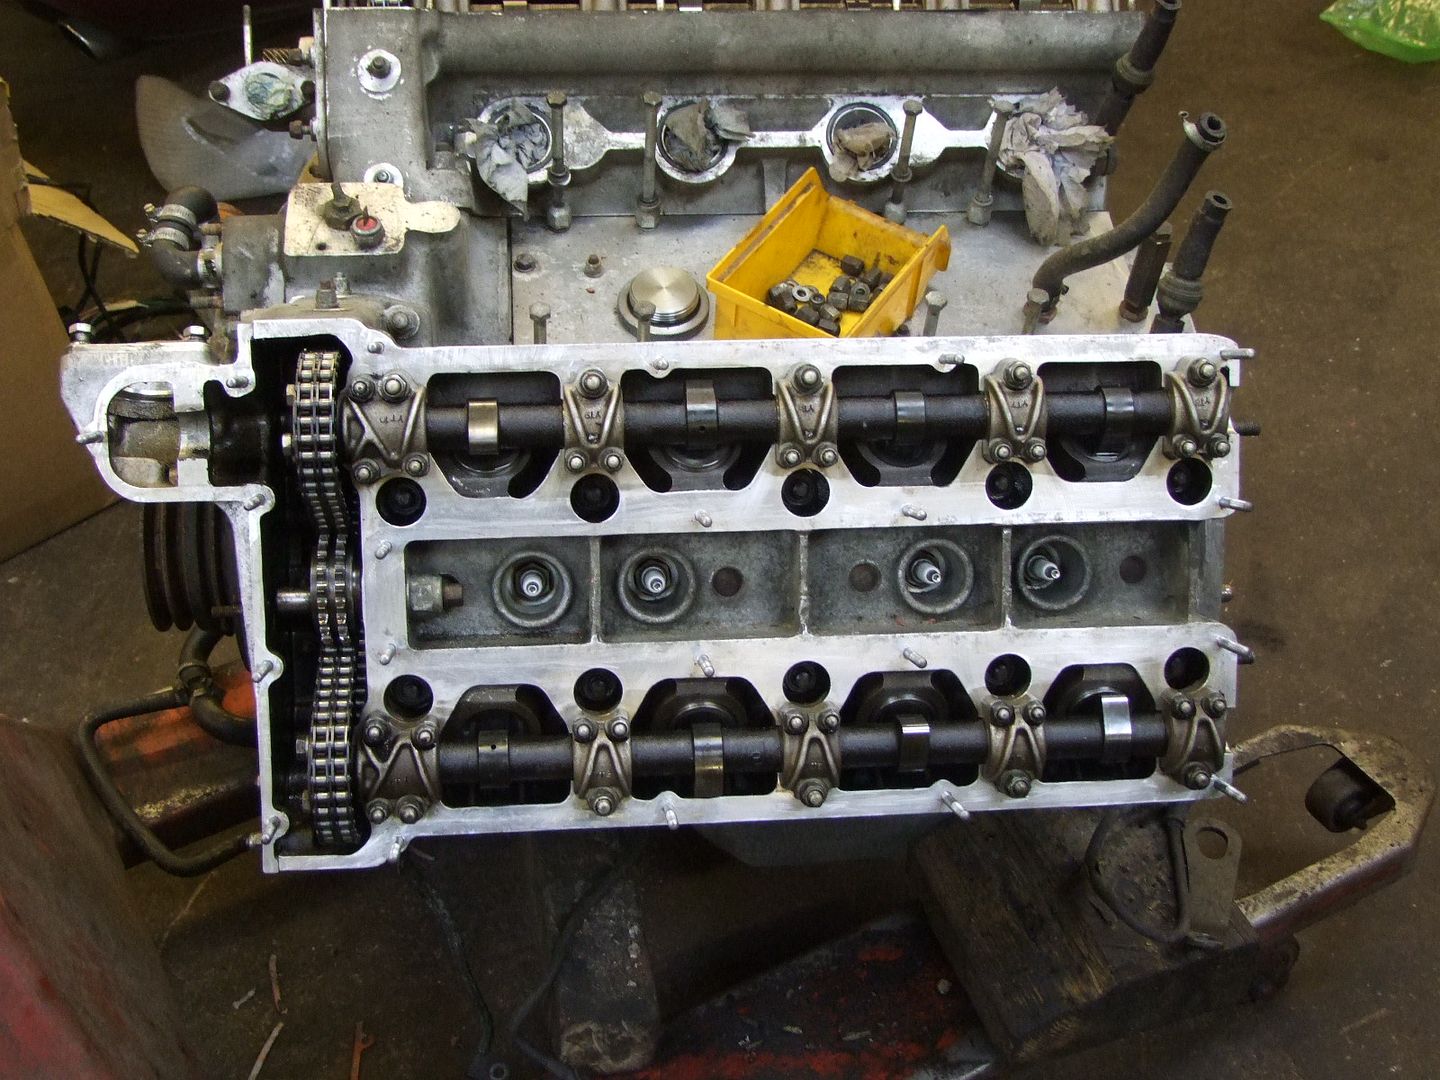
Preparing to fit camshaft cover to left side of engine
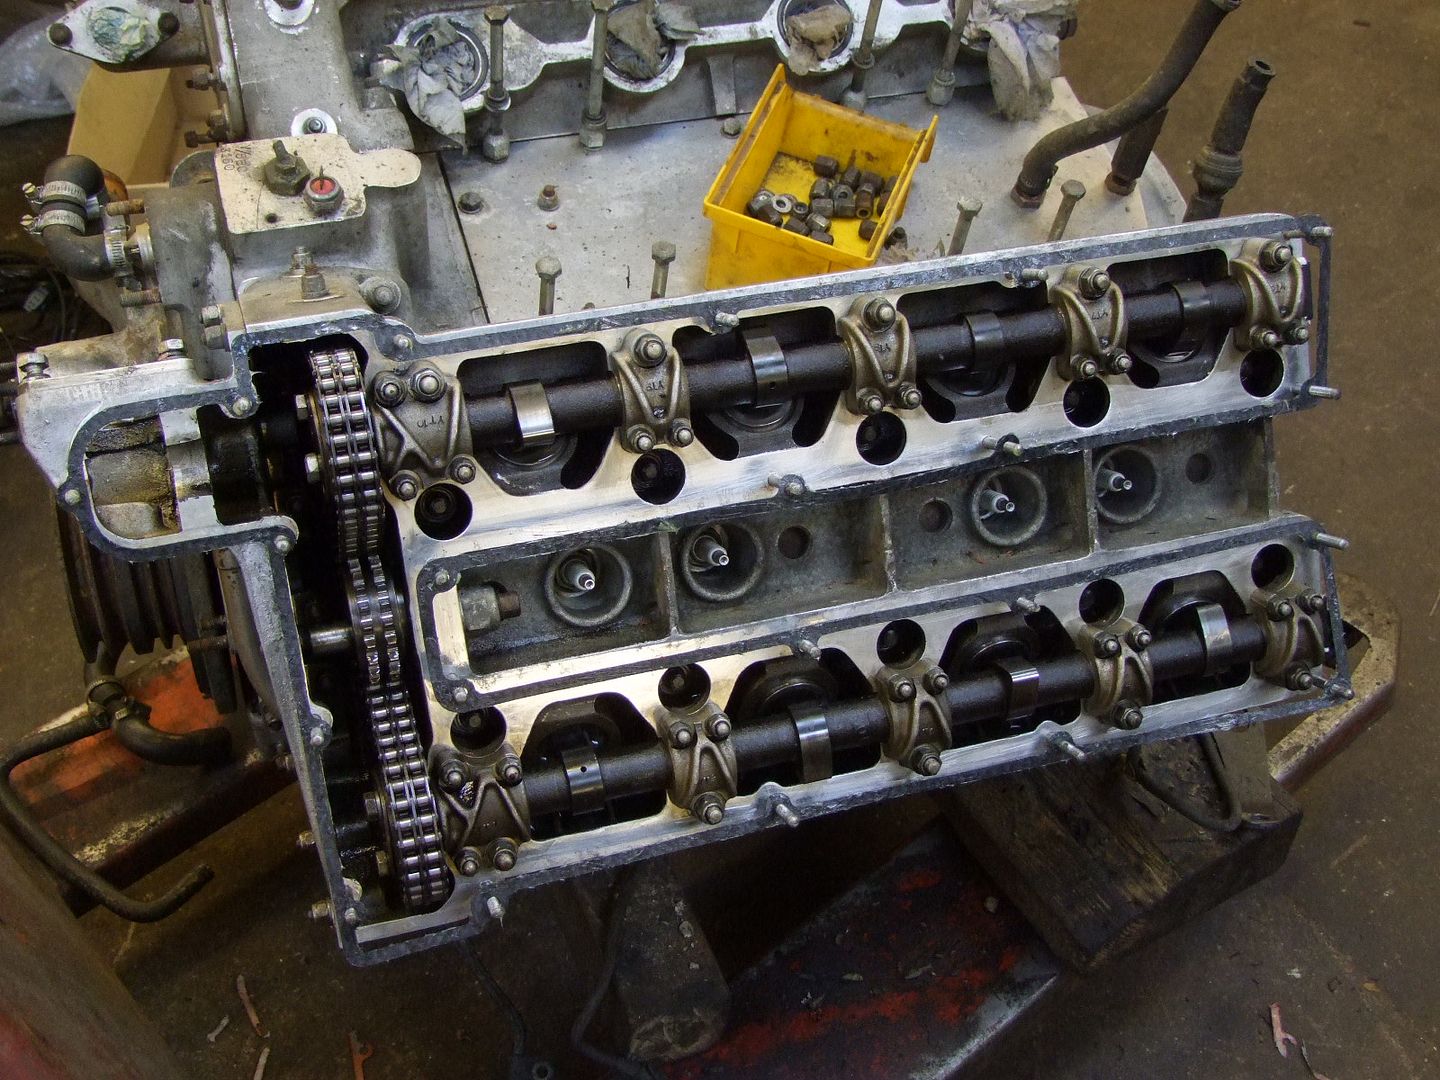
A greased gasket will last longer (and look neater) than one covered in silcone sealant
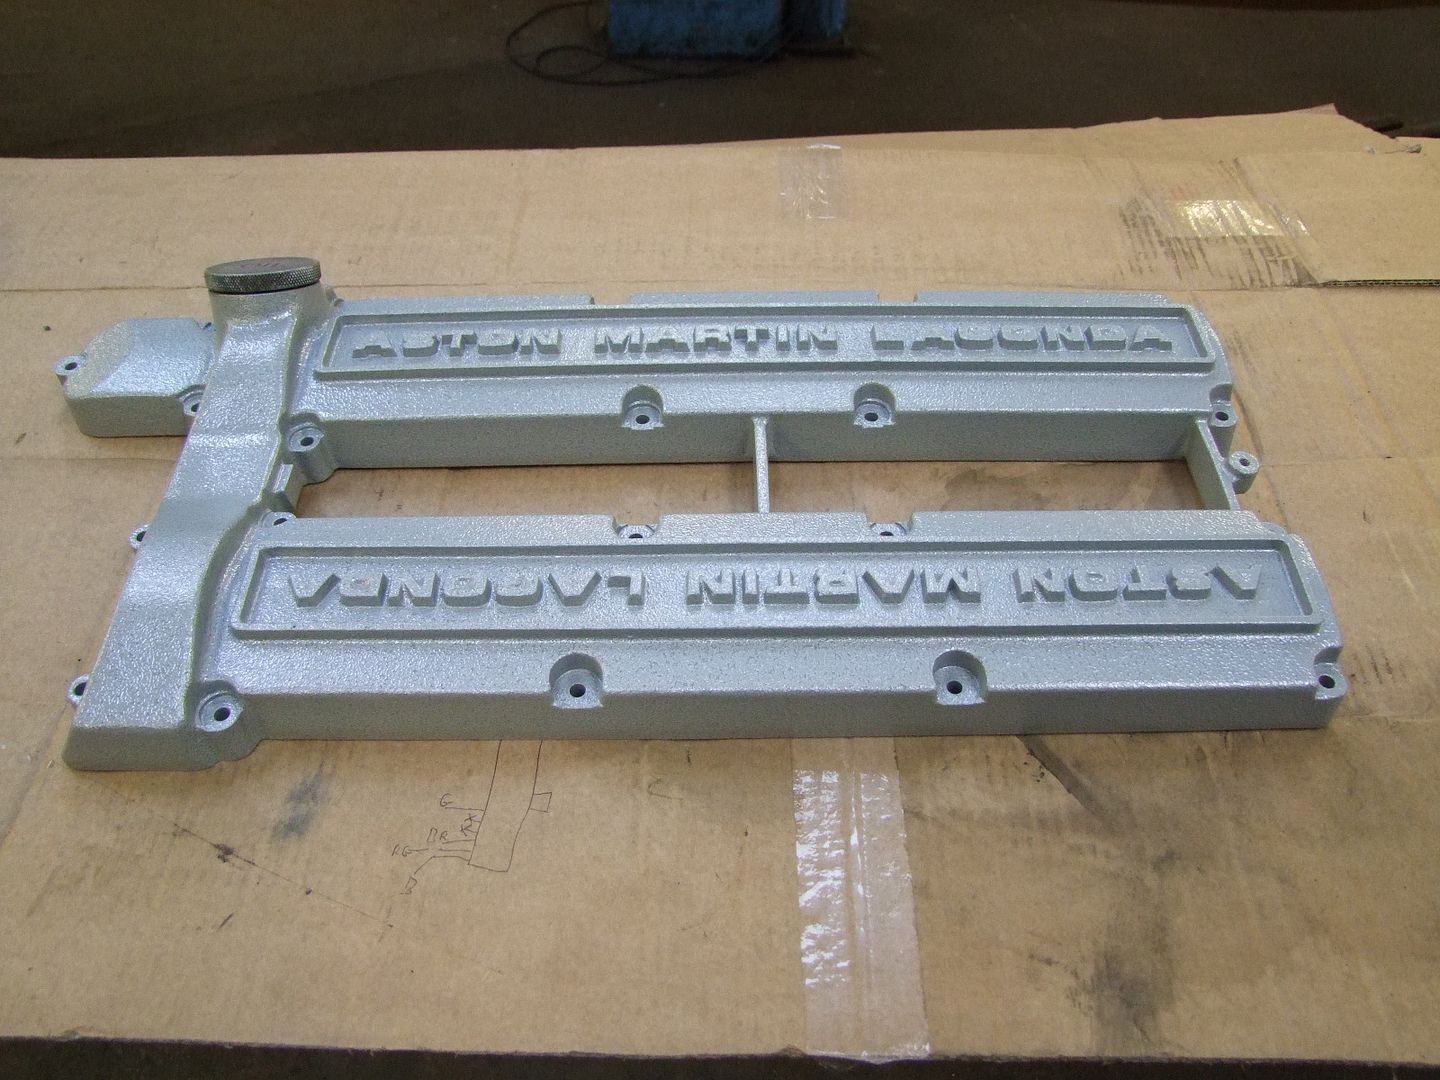
Newly powder coated cam cover
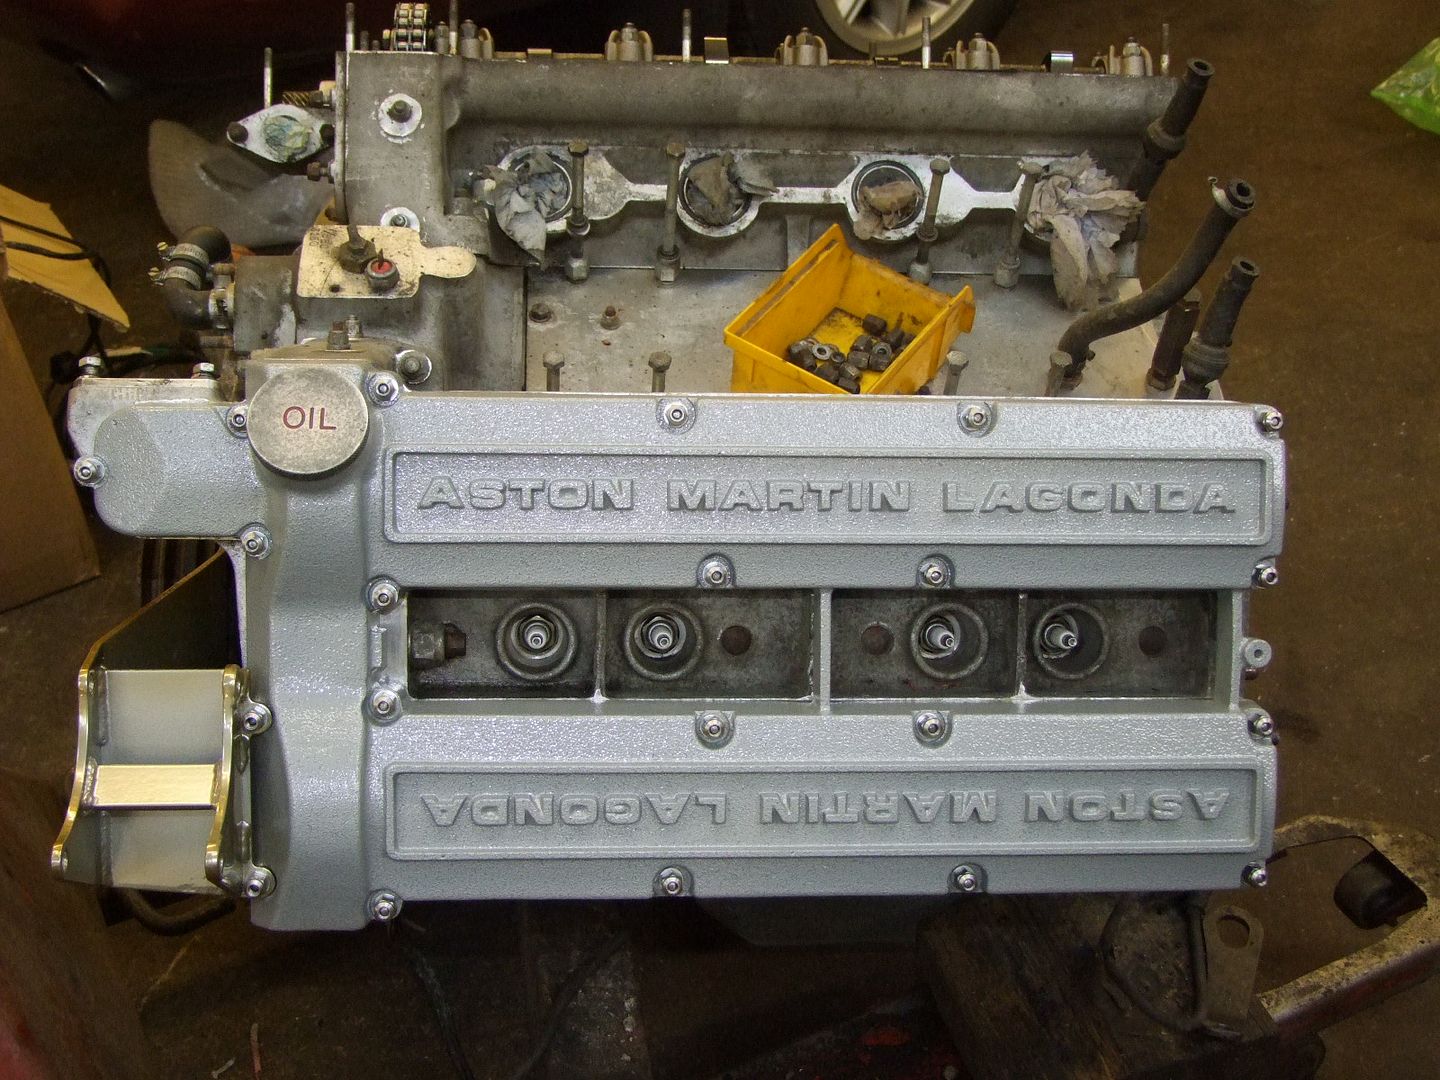
Fitted, complete with AC compressor carrier bracket
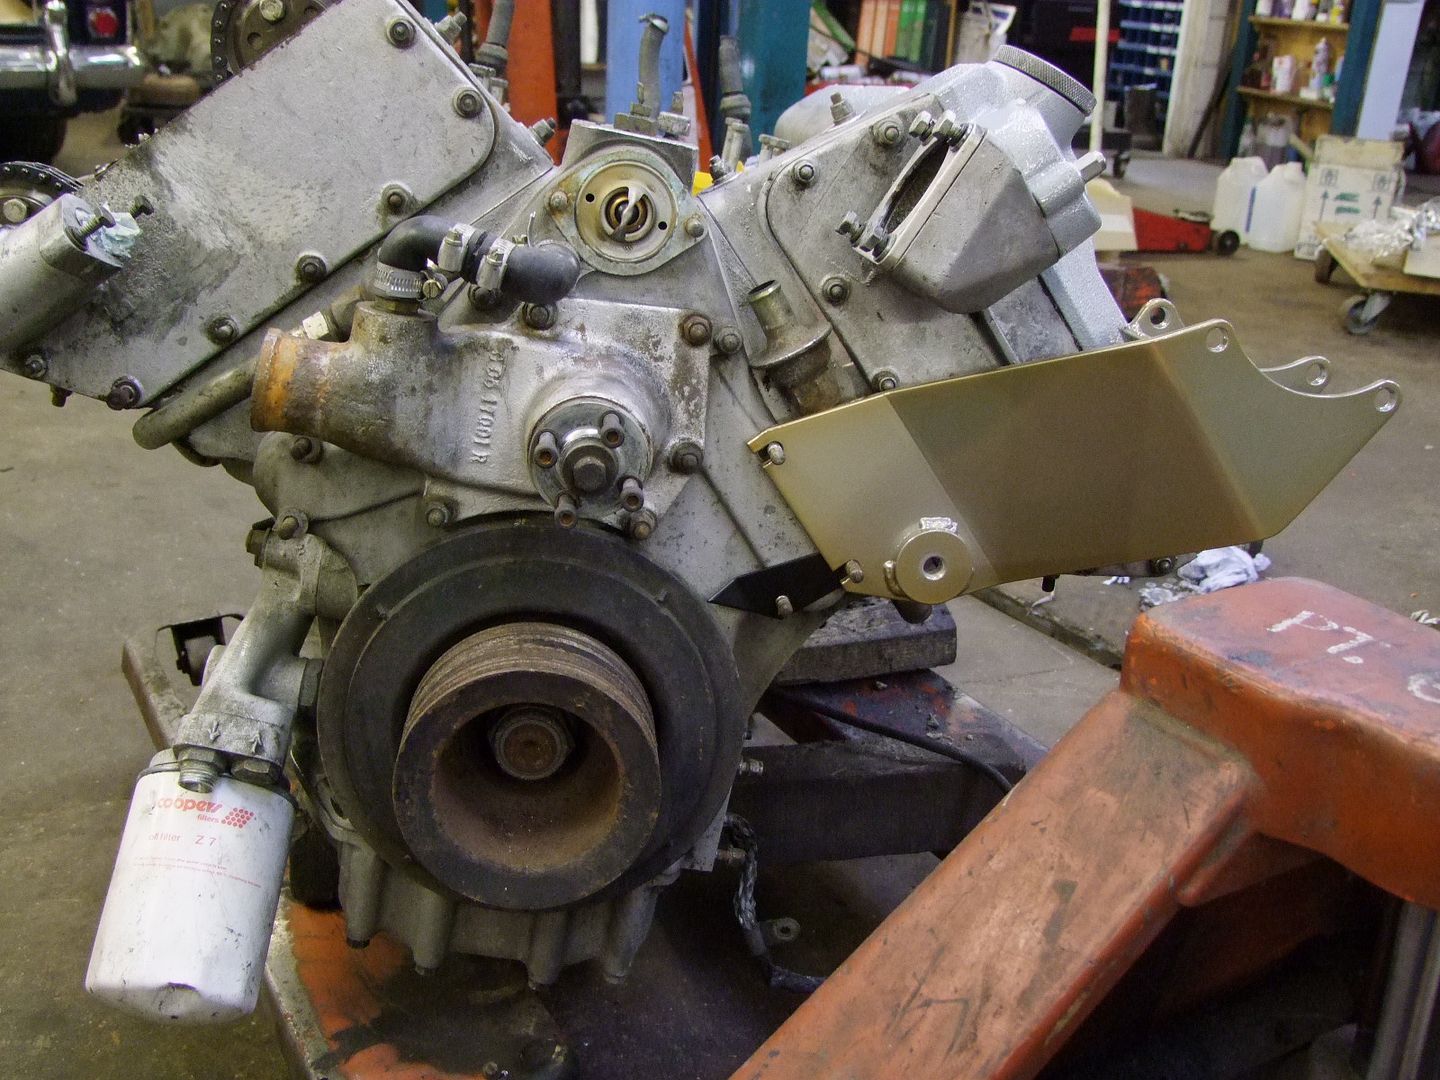
The left side cam cover was fitted first as behind the carrier bracket goes the timing marker and this needs setting before the right side cam cover can go on
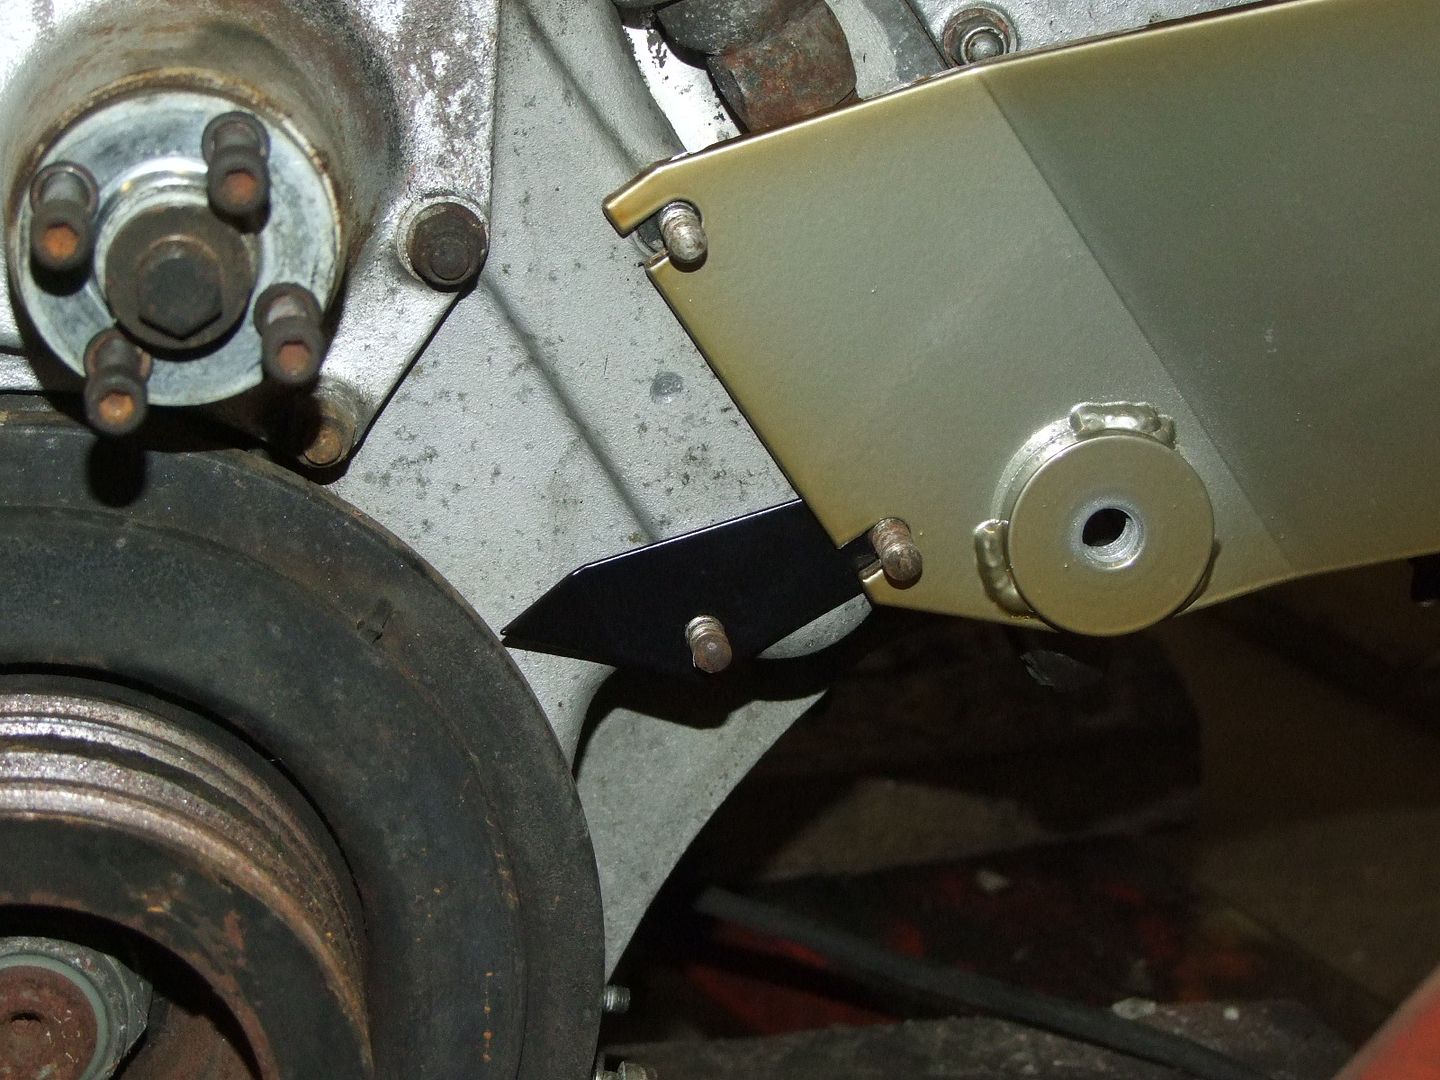
The timing marker
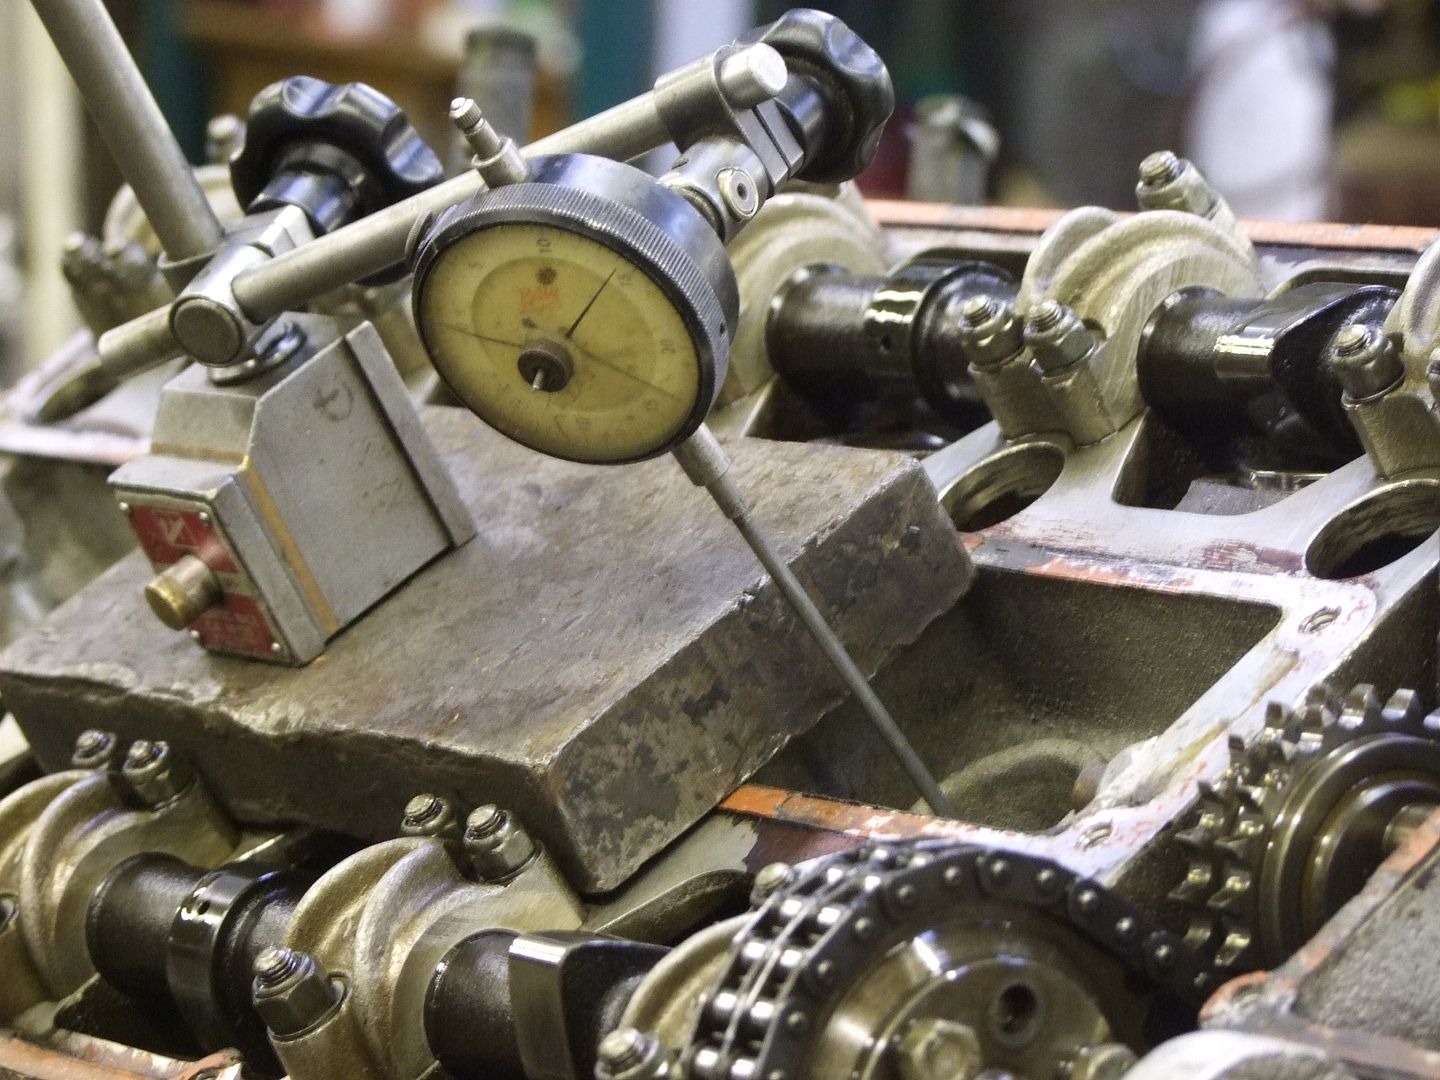
Using a timing marker to establish Top Dead Centre (TDC) on number 1A cylinder
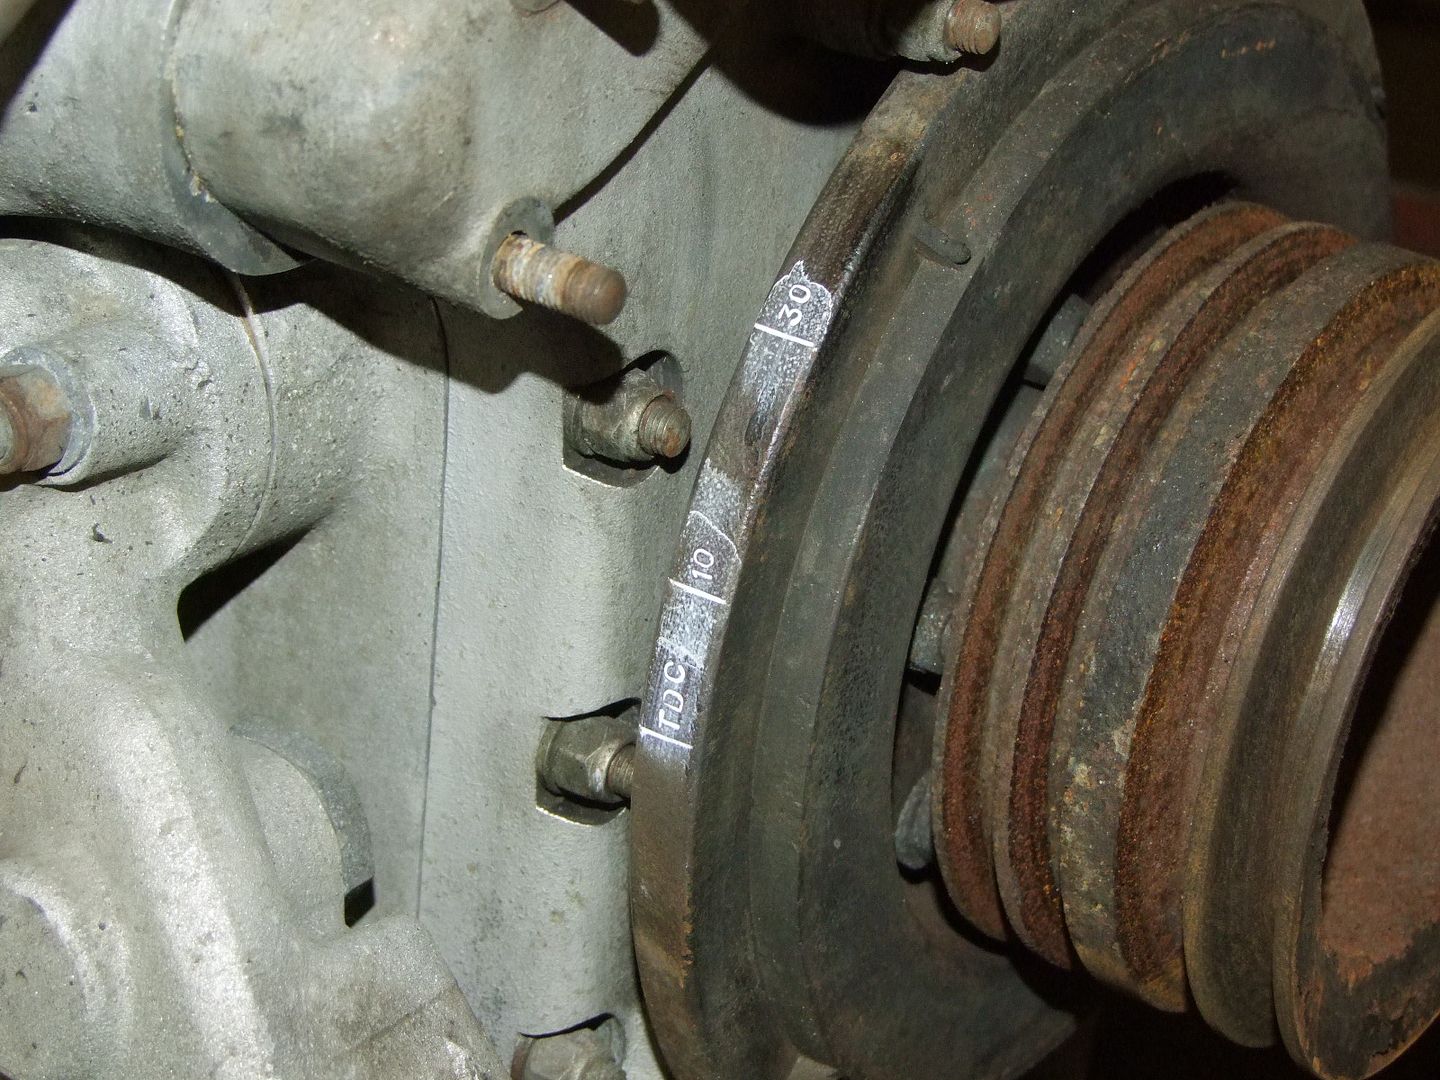
Crankshaft pulley marks after cleaning
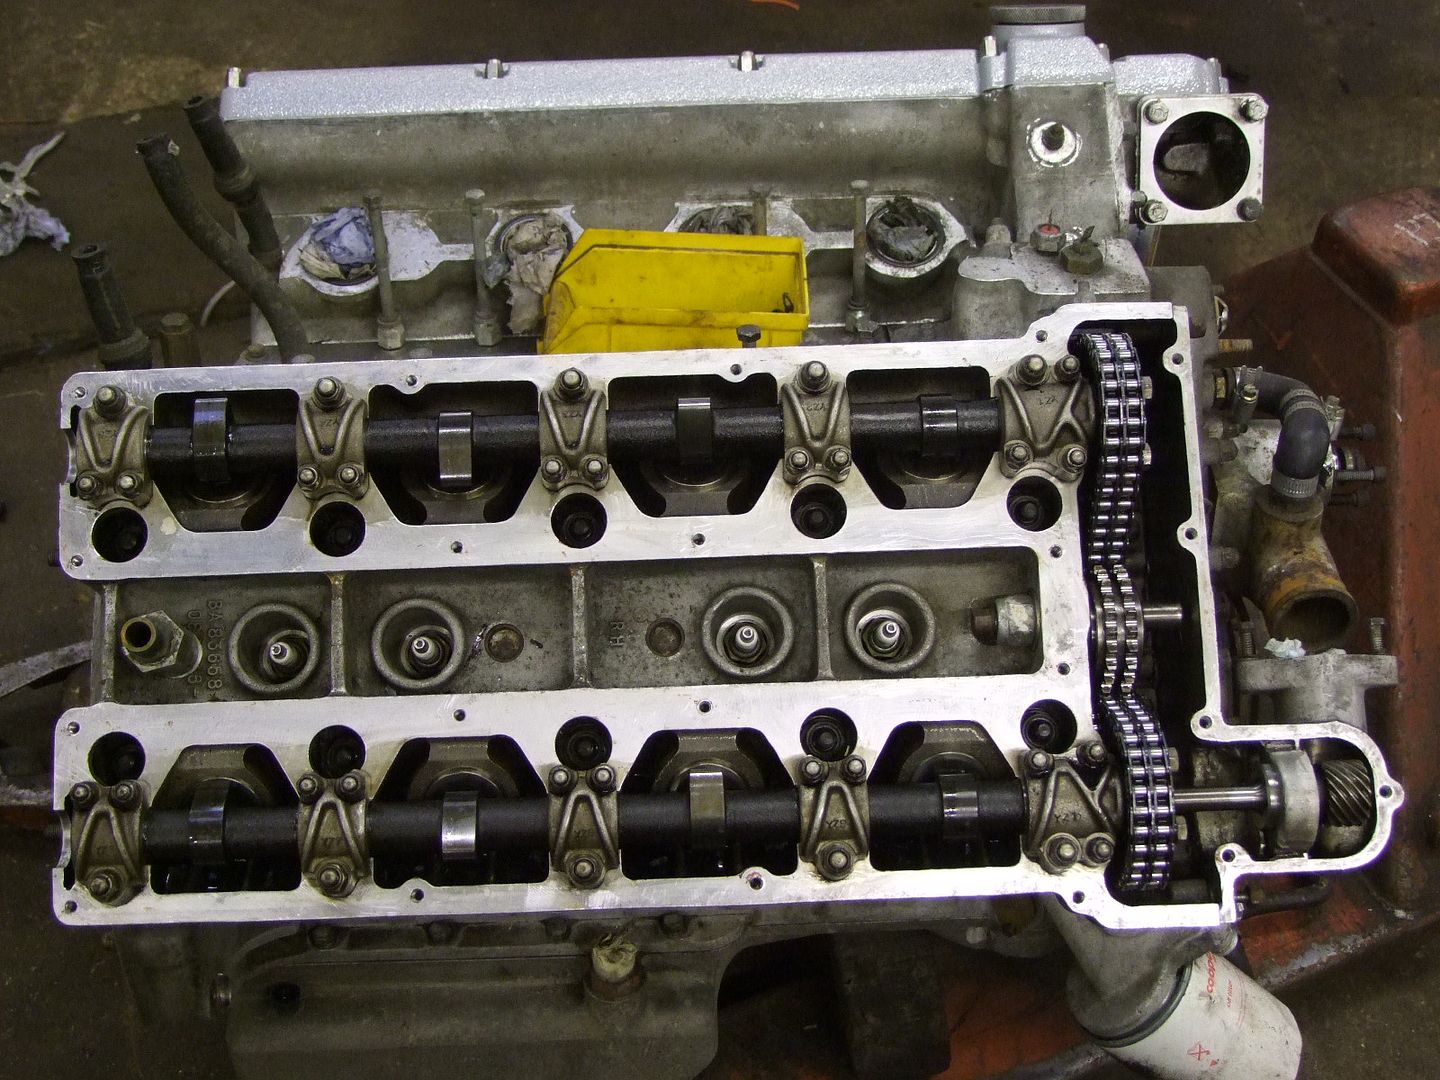
The right hand face cleaned, prior to refitting all 21 locating studs
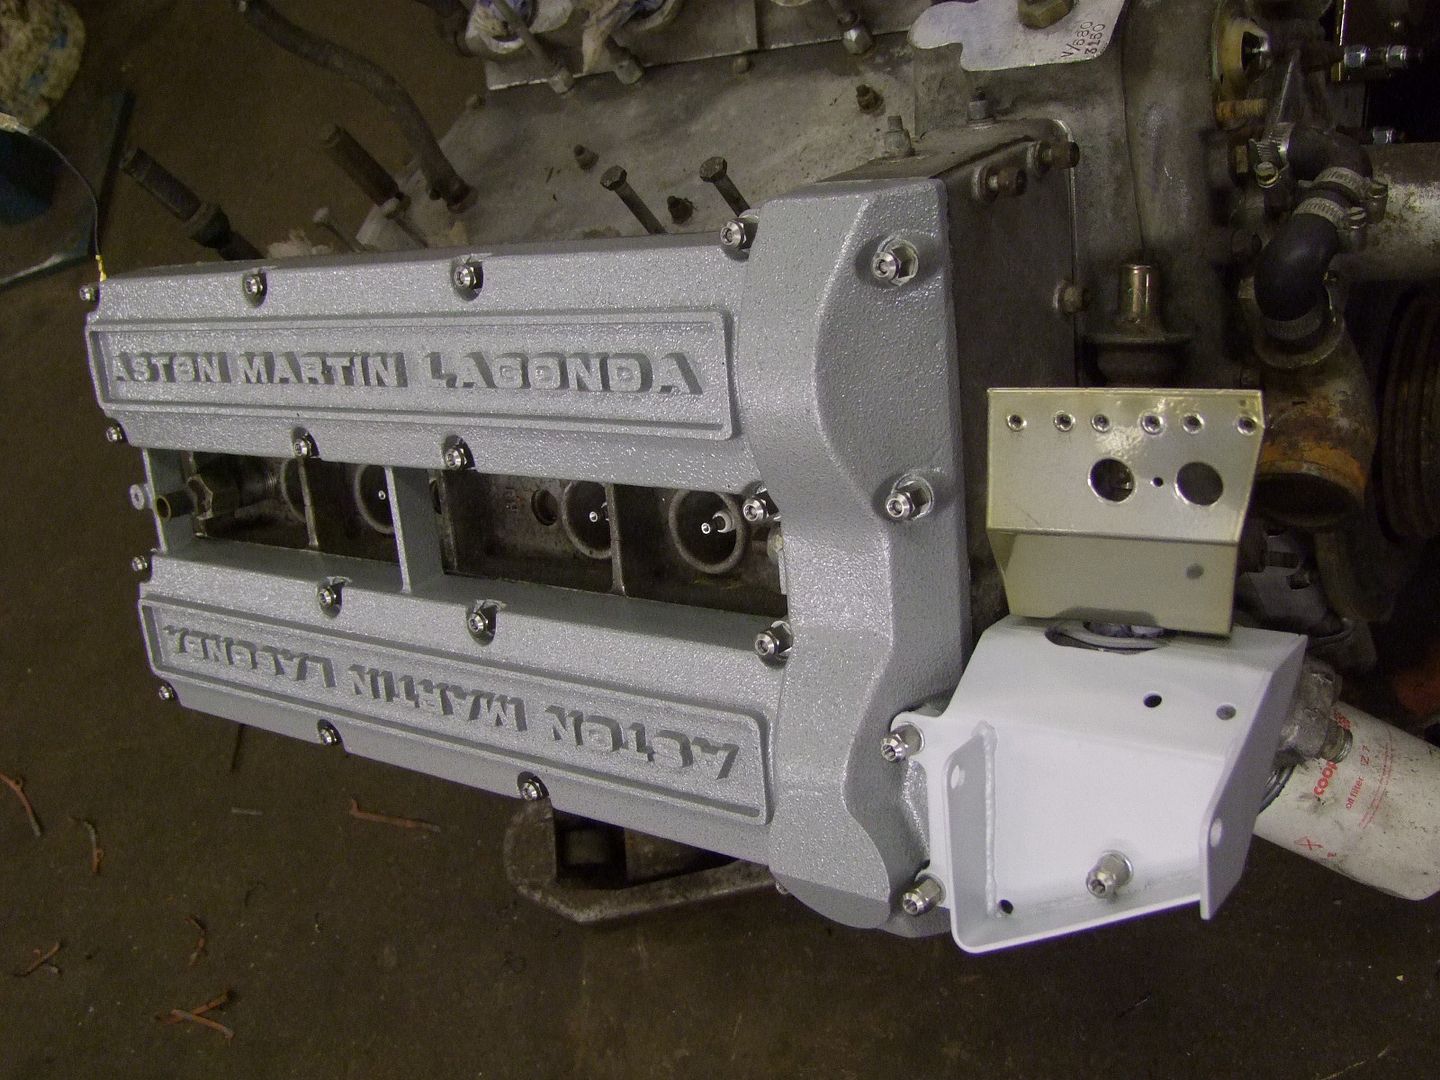
Cam cover fitted, together with the air pump carrier bracket and vacuum advance retard control solenoids bracket
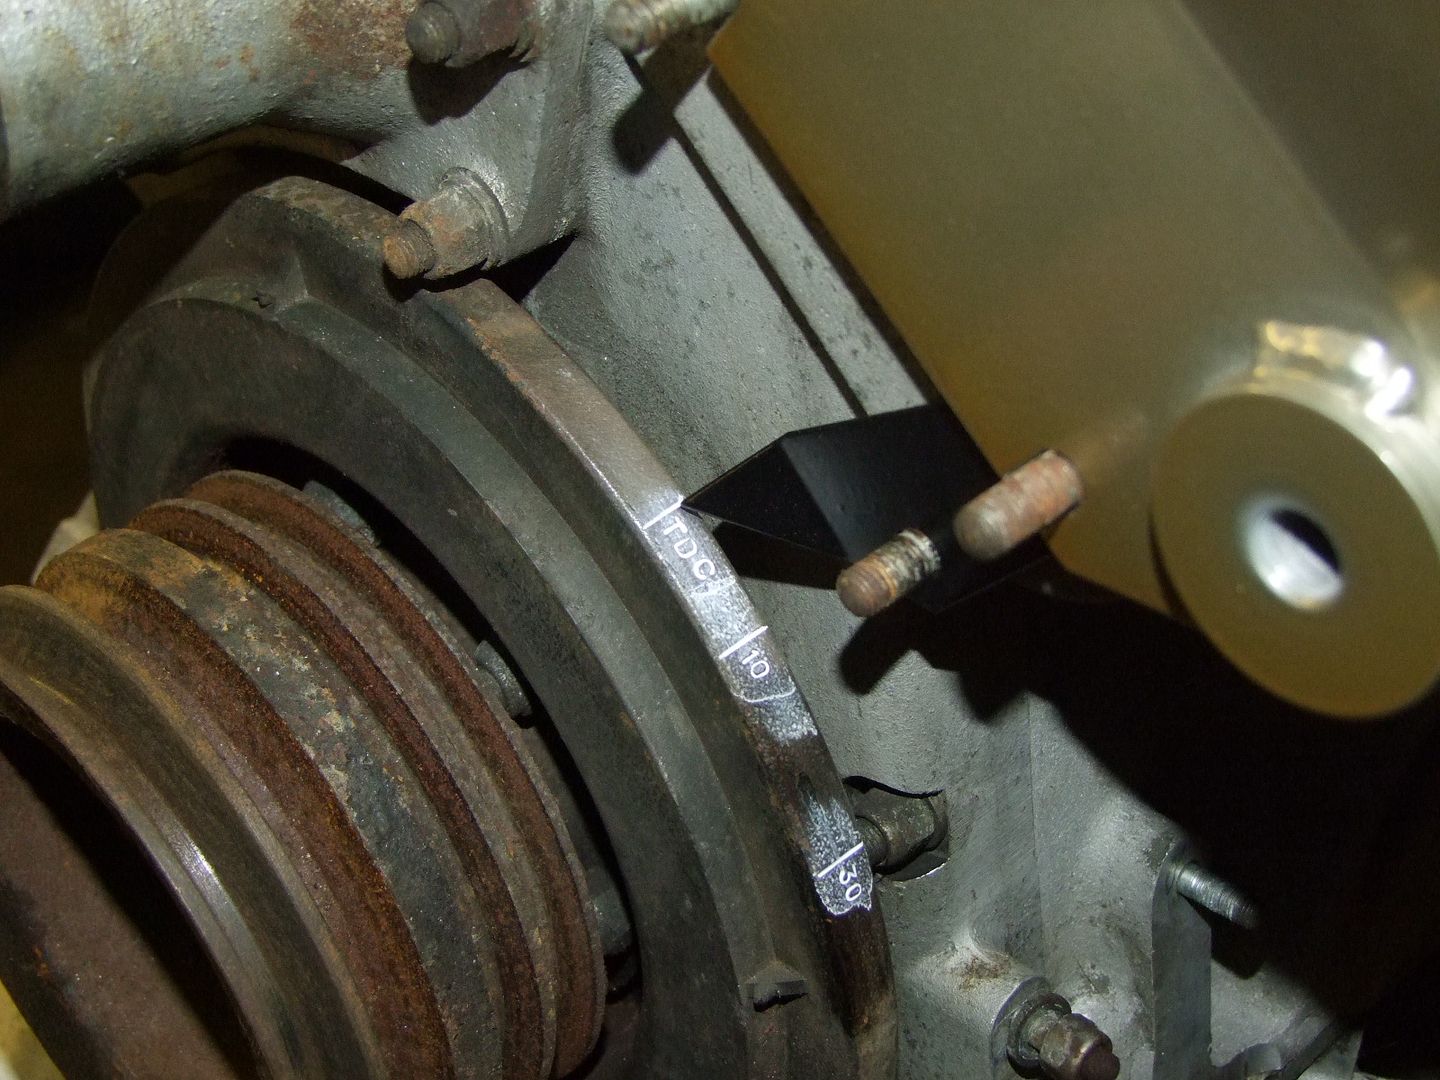
Timing marker set to TDC, before securing nuts are fitted to locate it in place
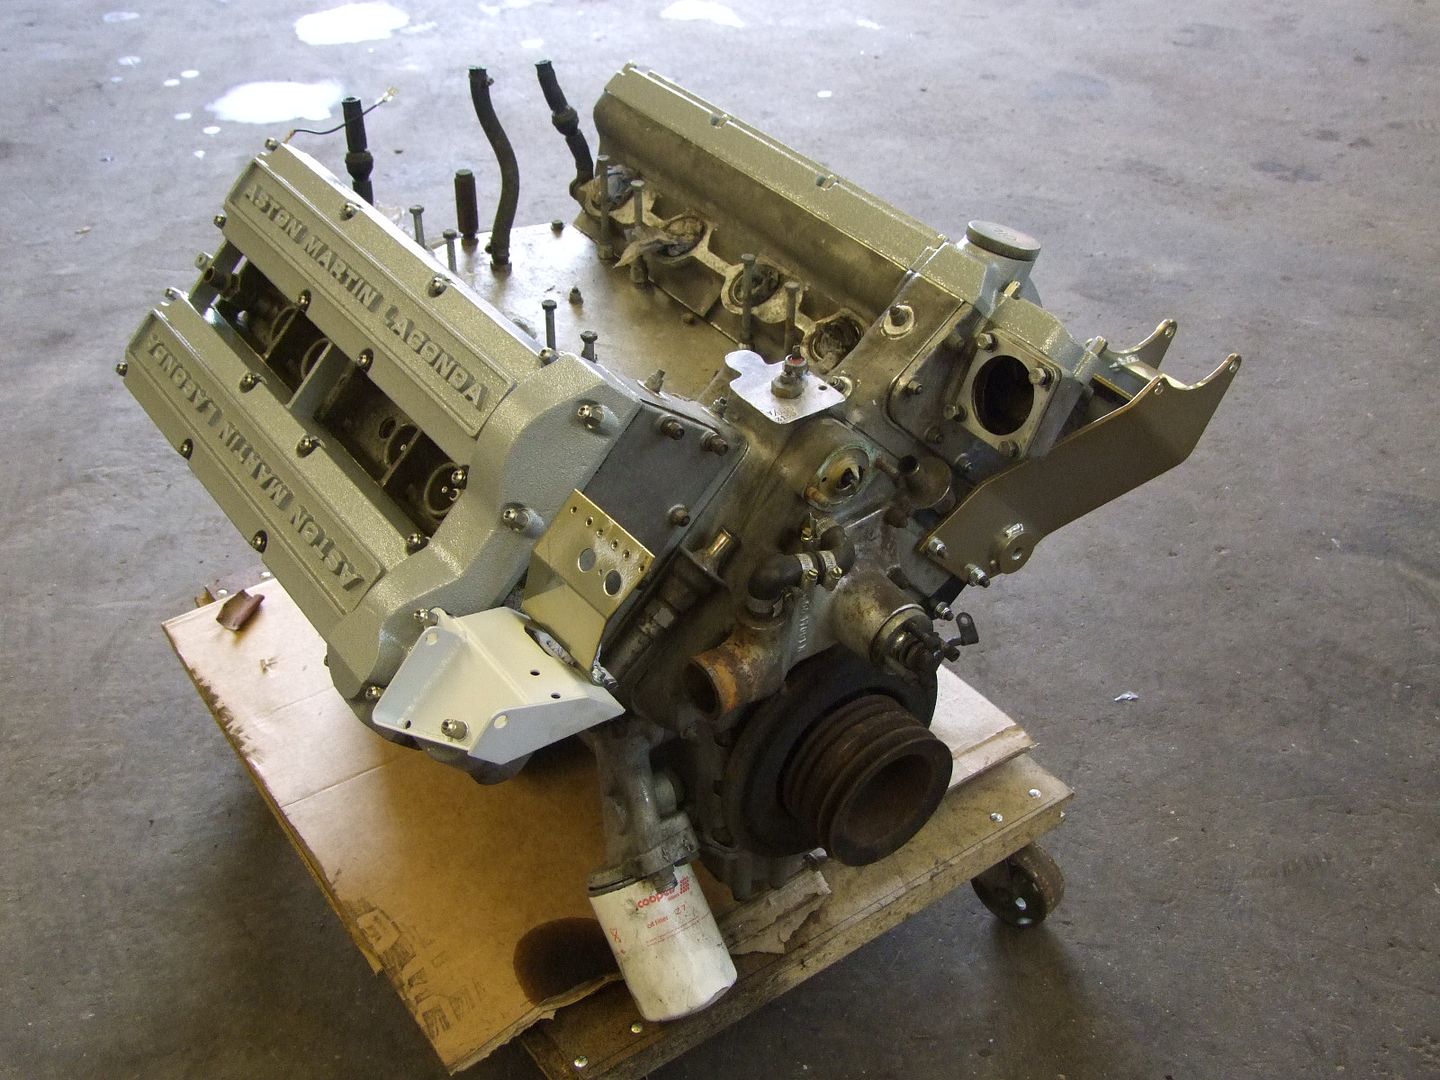
The engine ran well when we tested it so it was decided to do nothing major to it and just clean the outside as best as possible and refinish all the fittings
Last edited by Lagondanet on Fri Jan 11, 2013 2:58 pm; edited 2 times in total |
|
| Back to top |
|
 |
jonc
Joined: 21 Sep 2010
Posts: 584
Location: Cheshire, UK
|
 Posted: Fri Jan 11, 2013 10:59 am Post subject: Posted: Fri Jan 11, 2013 10:59 am Post subject: |
 |
|
I see the platers and powder coaters have been busy  . .
What is the paint finish on the rocker covers? It that a baked-on paint? From the pictures it looks darker than on mine (or a standard silver Hammerite), but that could just be the camera. |
|
| Back to top |
|
 |
|


