 |
LagondaNet
|
| View previous topic :: View next topic |
| Author |
Message |
jonc
Joined: 21 Sep 2010
Posts: 584
Location: Cheshire, UK
|
 Posted: Thu Feb 17, 2011 10:29 am Post subject: 13277 Posted: Thu Feb 17, 2011 10:29 am Post subject: 13277 |
 |
|
I bought my 1983 Lagonda in 2010 as a 40th birthday present to myself. As a child of the early ‘70s, I remember it as a Top Trumps car of playground games and had always admired it - from afar - as I had never actually experienced one until I started looking for my own.
I know Lagondas have a reputation for their ‘advanced’ technology being troublesome, but they contain nothing more than 70s and 80s technology, and so I see no reason why this can’t be made to be reliable and even dependable. This is something I intend to prove over the coming years, not least because I want a car I can enjoy, rather than a museum piece.
With this in mind, my first job was sorting the fuel flaps. The left one clicked but didn’t open, right one did nothing at all and this makes filling up a little difficult, requiring the use of a special tool - a plastic ruler - to open them.
This is the start of an article I have written for AM Quarterly, hopefully it will be published in the next issue.
Before I go into the details, first a copy of the jobs list I made for the car:
Electrics
Fix fuel flap operation
Side/Headlights
replace relays
fix wiring 'mods'
fix n/s central locking
replace heater control / temp pot
fix gear selector lights
fix external temp sensor
fix oil temp sensor
Engine / Mechanics
clean replate rocker cover nuts / vacuum pipes
replace air pump hose / clean up / plate brackets.
fix vacuum advance
repaint air box
repaint rocker covers
replace top hose
degrease engine lower
Bodywork
clean rear wheel arches / seal / repaint
Clean/repaint rust spots on steel
remove/clean/repaint/refit sill step covers
remove fog/spot lamp glasses / clean / refit
repair/repaint bumpers
repair / refix rear valance
remove rear wheelarch covers (door shut) / clean / paint underneath
paint above oil coolers
rechrome door catches
remove/plate/paint front lower mesh / retainer / screws
Interior
remove velcro from dash
rechrome gear selector button
clean all leather
reveneer door wood?
replace headlining?
replate center console lock
fix heater controls
blank hole in lower dash panel
Misc
refix boot carpet / panel
Label up relay bases - dymo
behind rear seats
under bonnet
under dash
fit conditioner socket
tidy wiring loom, o/s front
fit town horns
remove wheels / check paint / clean up hubs / refit
remove overspray from rear silencers
remove overspray from rear reflectors
remove overspray from number plate lights
replace boot seal / check seal of boot floor (to stop exhaust fumes in car)
The car is not bad, and so this is not really a restoration, but I am a bit of a perfectionist - exactly the sort of person who should not have a car like mine! It runs and drives fine, and mechanically has been well looked after, so the jobs are pretty much either cosmetic, to correct something which has been meddled with, or to ensure I have the confidence in the reliability car for going on trips. |
|
| Back to top |
|
 |
jonc
Joined: 21 Sep 2010
Posts: 584
Location: Cheshire, UK
|
| Posted: Thu Feb 17, 2011 11:17 am Post subject: |
|
|
So, on to the fuel flaps. Left one clicked but didn't open, right one did nothing.
Both mechanisms were 'sticky' when I moved them manually so decided to remove/clean/grease them. This meant removing the back seats.
The left one also had an ugly self-tapper instead of grub screw, so I bought some M4 stainless grub screws to replace them on both sides of the car. This involved drilling and tapping out the holes.
The mechanism needs to be greased in three places - the solenoid plunger, the slider fork and pivot. First I removed the mechanisms and degreased in my ultrasound bath.

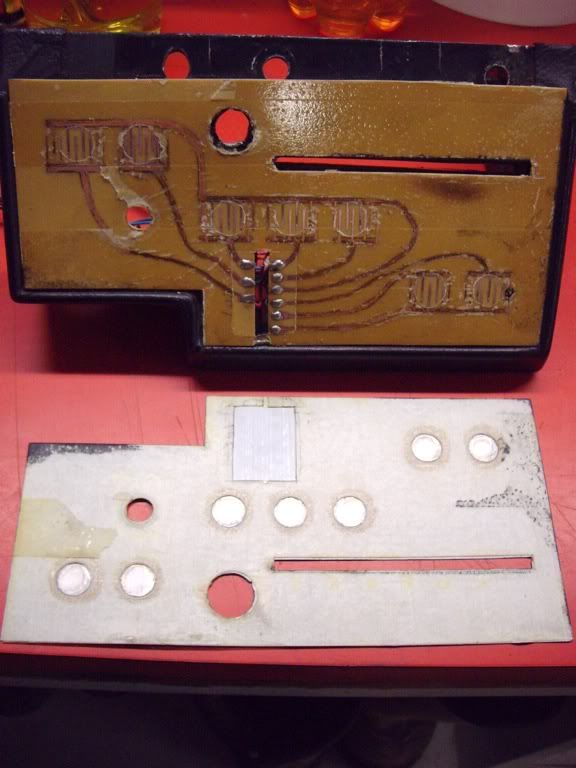
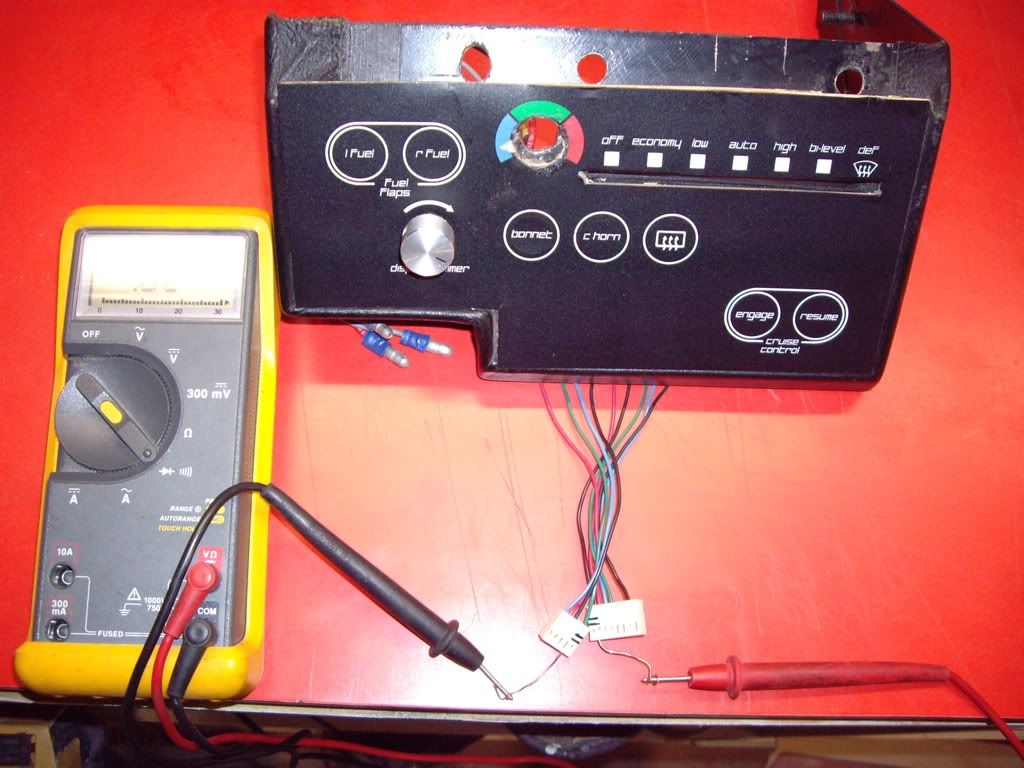
The electrical fault with the right one turned out to be the touch switch on the binnacle, but the membrane could be lifted off and so I could clean up the contacts and test the operation of each switch.
All back together and working now. It took a month or so though, because I cleaned all the leather in the back while it was in bits. |
|
| Back to top |
|
|
jonc
Joined: 21 Sep 2010
Posts: 584
Location: Cheshire, UK
|
| Posted: Thu Feb 17, 2011 3:33 pm Post subject: |
|
|
Now, I already knew that the heater controls had been messed with, since there was a switch in place of the rotary control for the temperature, and a manual choke-like control under the dash, but when I took off the right binnacle to fix the fuel flap switch, I discovered a real mess:
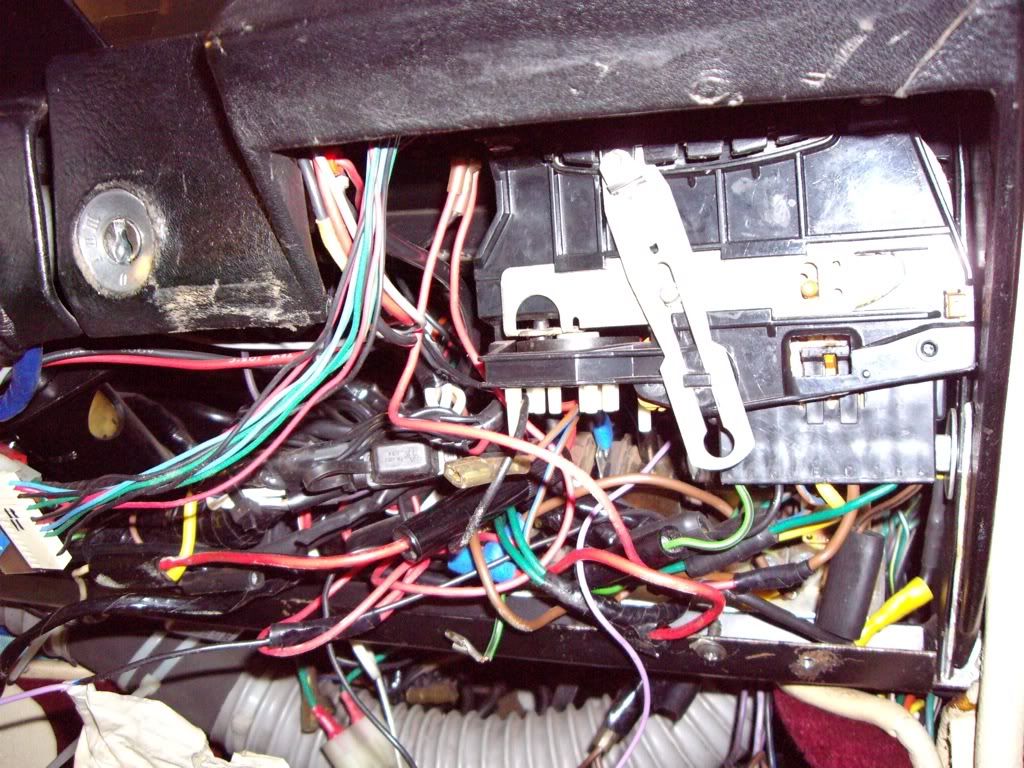
This is the result of multiple 'operations'. The wires on the back of the heater control slider have been butchered, there has some new wiring and switches for the vacuum solenoids, some of which is now disconnected, there are loose vacuum tubes (none connected to slider control), and some new mysterious in-line fuses. I counted at least a dozen connectors which are not connected to anything.
There is also the remains of a hands-free mobile phone kit, CD interface module and relay and flashers which should be mounted are also dangling.
I also found that the heater slider control itself is broken. ** added to the list for replacement, find OEM source and locate new one **
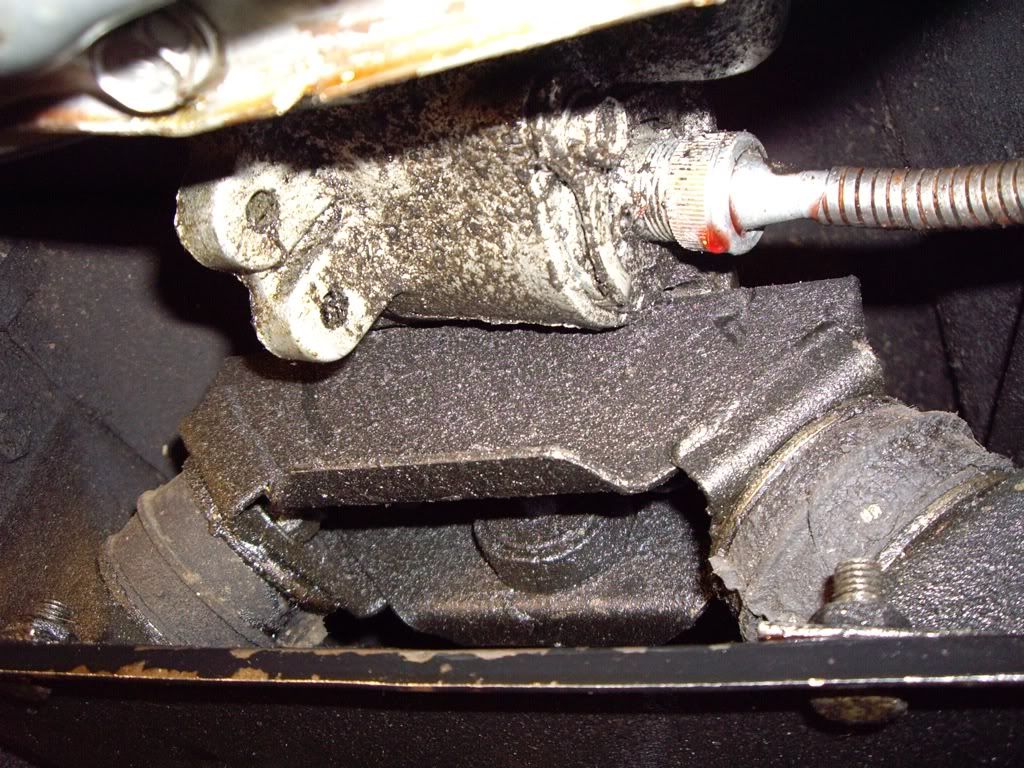
Since I am now looking at the under-dash wiring, I have a look at the other side footwell. Discovered slight modification to what I presume is the heater blower resistor:
** add repair to list **
I am assuming heater system has been modified to manual operation because it wasn't working properly. One short discussion with David Marks and the car is booked in for heater system upgrade in March.
Just have to sort out the messy wiring first.. |
|
| Back to top |
|
|
Vincent

Joined: 20 Nov 2007
Posts: 1055
Location: Belgium
|
|
| Back to top |
|
|
jonc
Joined: 21 Sep 2010
Posts: 584
Location: Cheshire, UK
|
| Posted: Thu Feb 17, 2011 8:52 pm Post subject: |
|
|
But before I sort the wiring mess, I thought I would fix the gear selector lights - none of them worked.
Dash out first (because I was interested in what it looked like, and because I already had some of it apart).
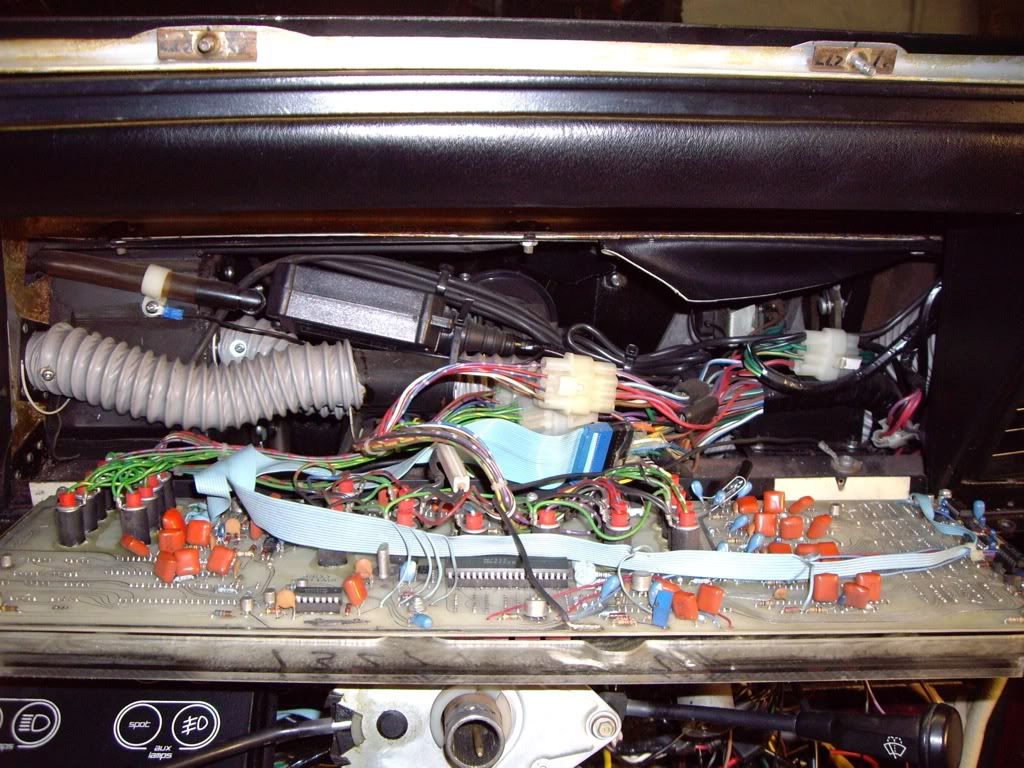
Nothing too scary there. Not the sort of thing I would expect to be exposed behind a dash panel though - what would happen if a screw fell on the circuit board when the car is running? Bare components and an unlacquered circuit board. There is also no strain relief on the looms, the most vulnerable of these is the ribbon cable. At the very least I would have a few blobs of silicone to stop any vibrations causing the vulnerable soldered ends of this loom from failing. ** another job on the list **.
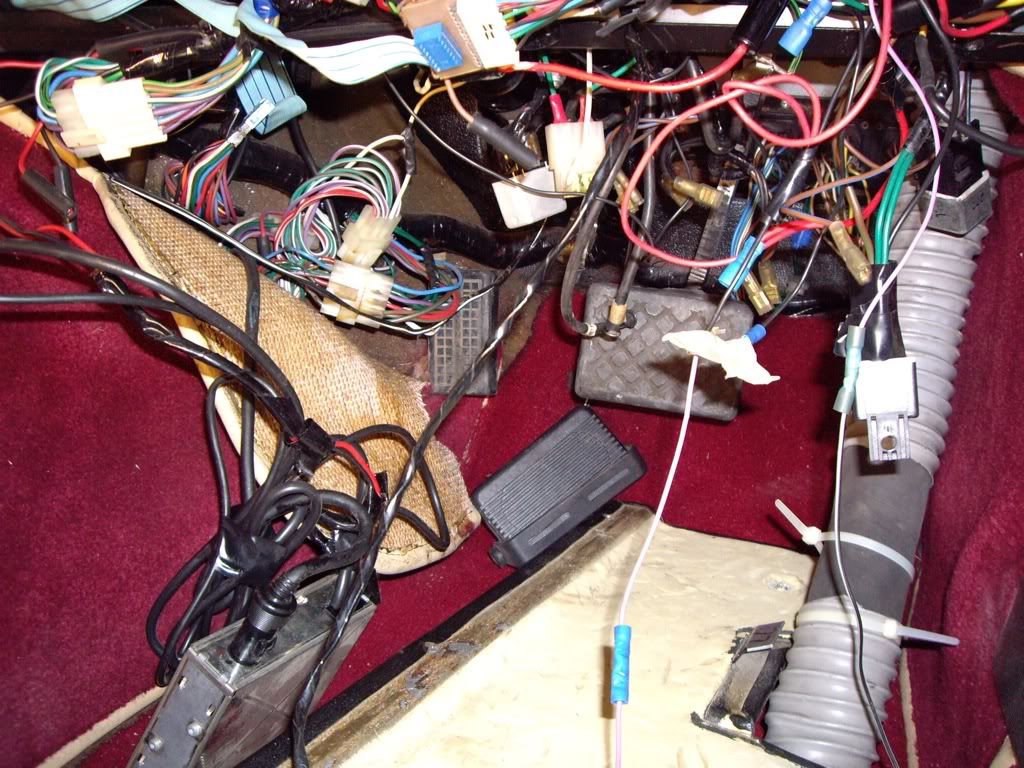
Loom for the selector lights looked ok, so on to the other end - the switch on the gear lever. So, center console out..
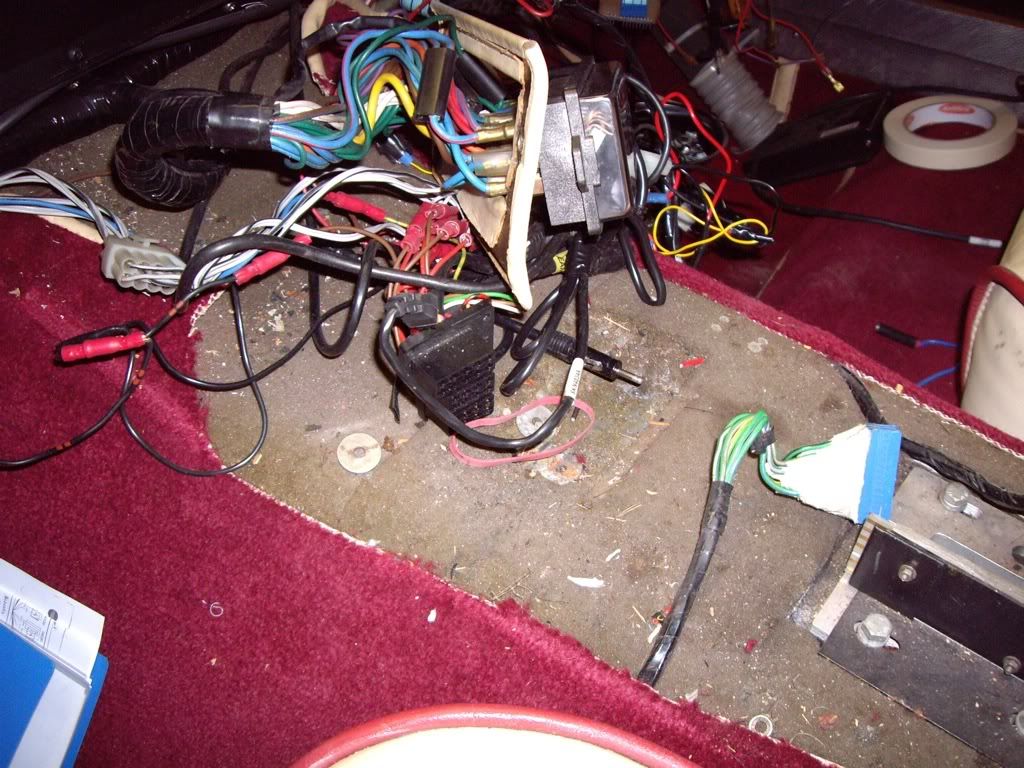
And more modified wiring, plus the box for the hands-free to be removed along with wiring.
Fortunately, the gear selector dash lights not working was because the loom connector was not plugged into the switch on the gear lever. I gave the switch a clean, plus cleaned and greased the connector.
Tested and found the bulb was blown for the Drive light. Tried to remove and found it had soldered itself in due to the heat. Pliers needed to break and remove the bulb. Fitted new one and found it would not connect due to melting of the holder plastic insulator. Disassembled / reshaped insulator with knife and put back together. Maybe I will replace it one day, but it works for now.
While I was there, I replaced all the dash warning bulbs - 23 in total. |
|
| Back to top |
|
|
jonc
Joined: 21 Sep 2010
Posts: 584
Location: Cheshire, UK
|
| Posted: Thu Feb 17, 2011 9:20 pm Post subject: |
|
|
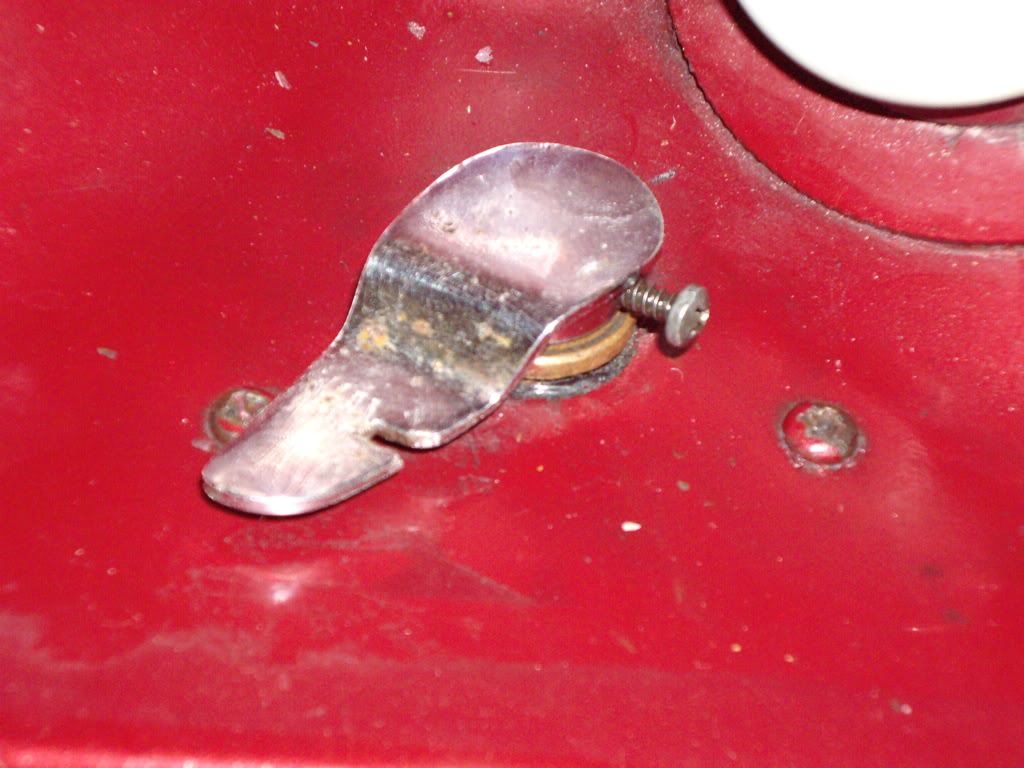
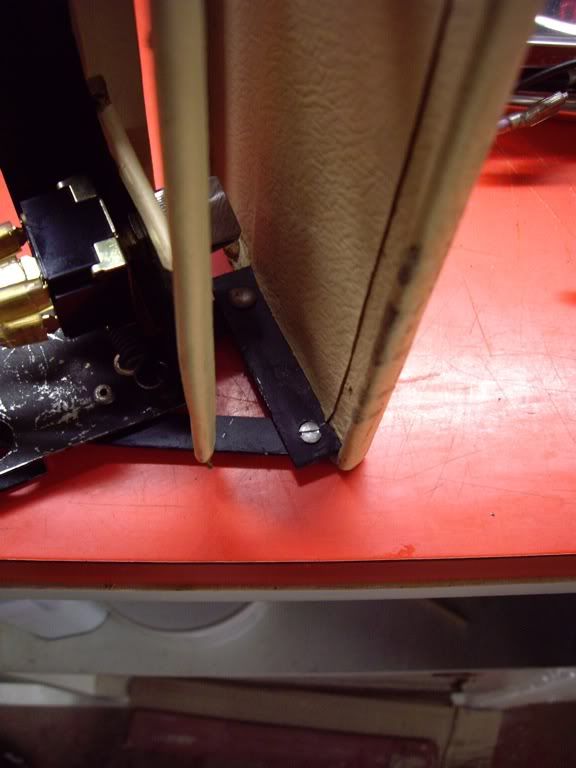
Disassembled the center console to clean properly on the bench. I already knew that the cover for the rear aircon control was stuck. Managed to open it without breaking anything, and discovered that part of the mechanism was detached and bent.
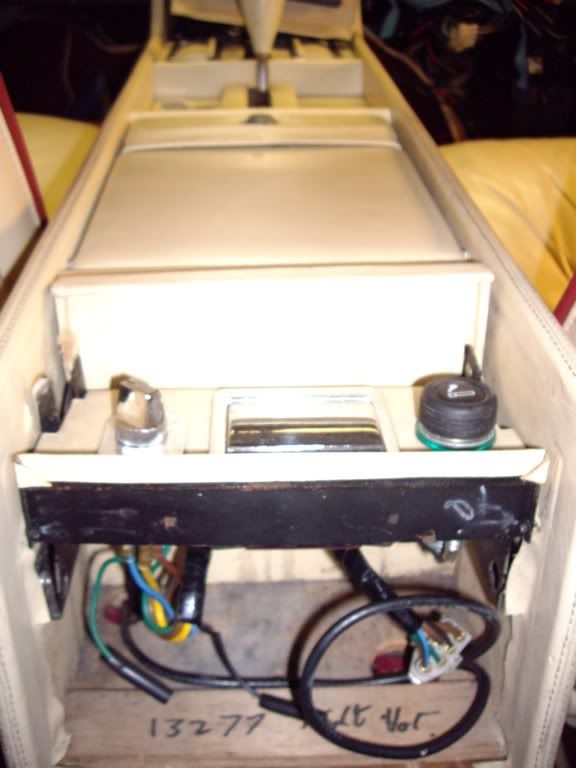
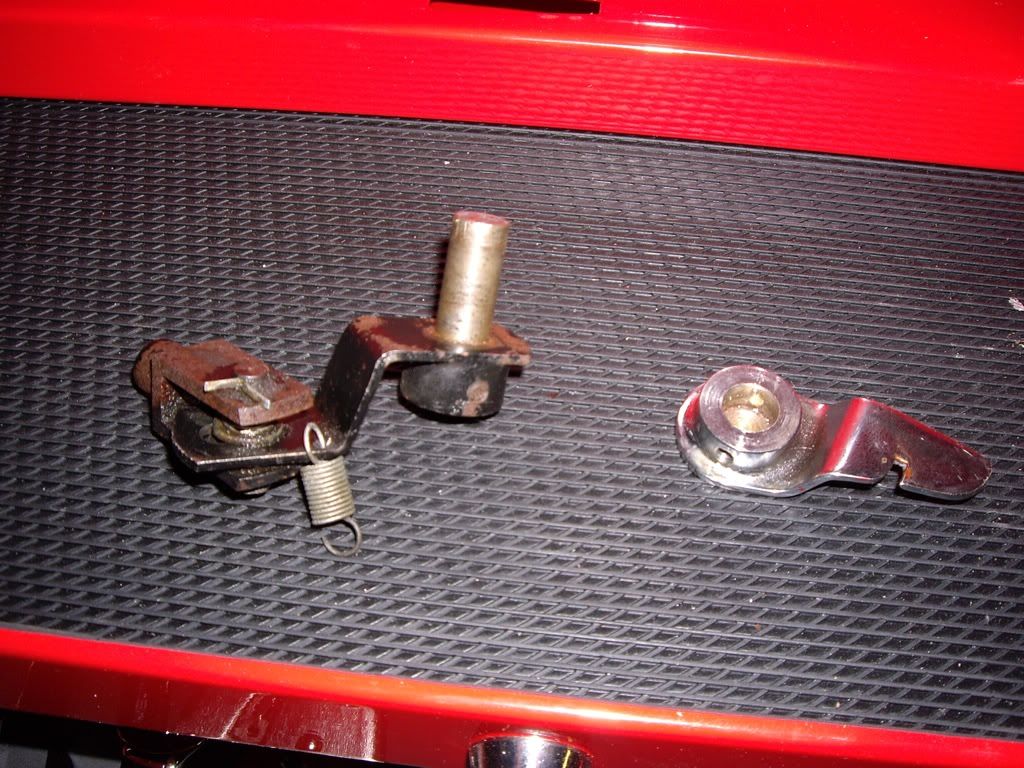
This is a good side:
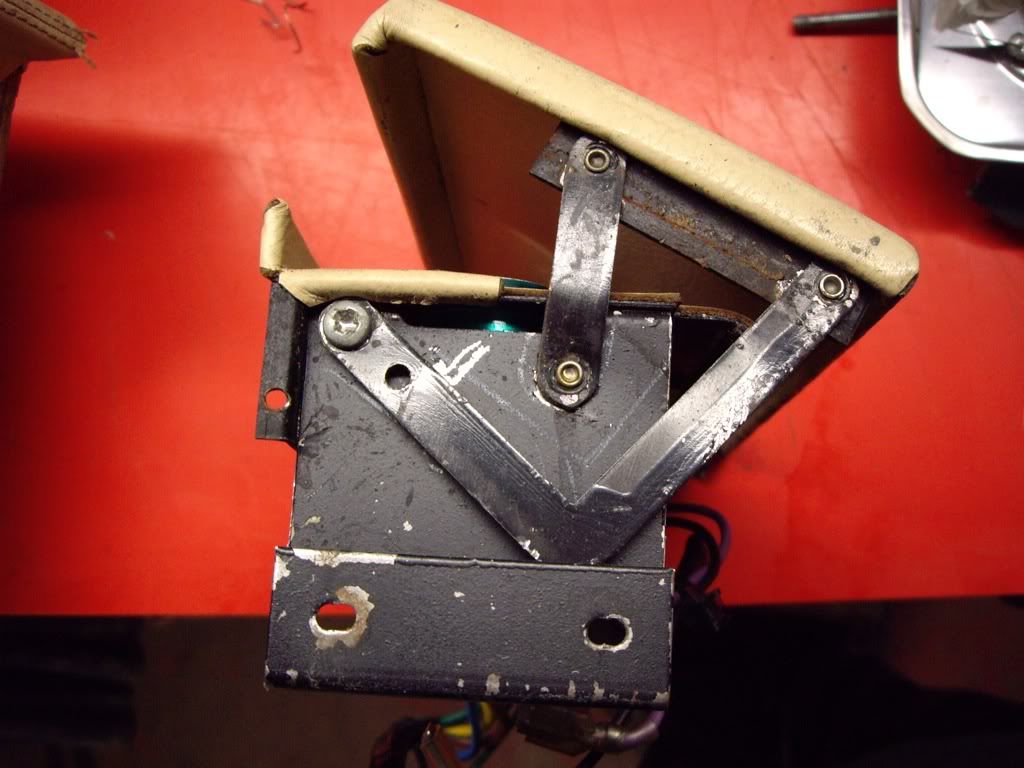
And the other:
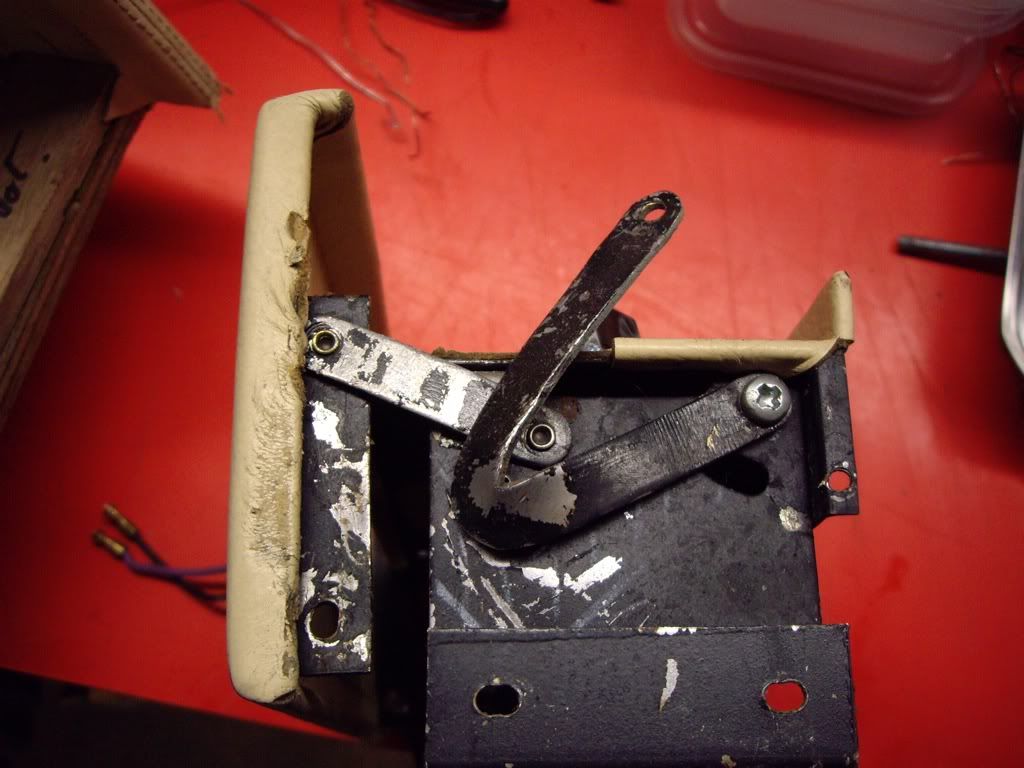
At some point, the rivet which holds one of the levers has broken and then a fair amount of force has been used to bend that piece of steel plate!
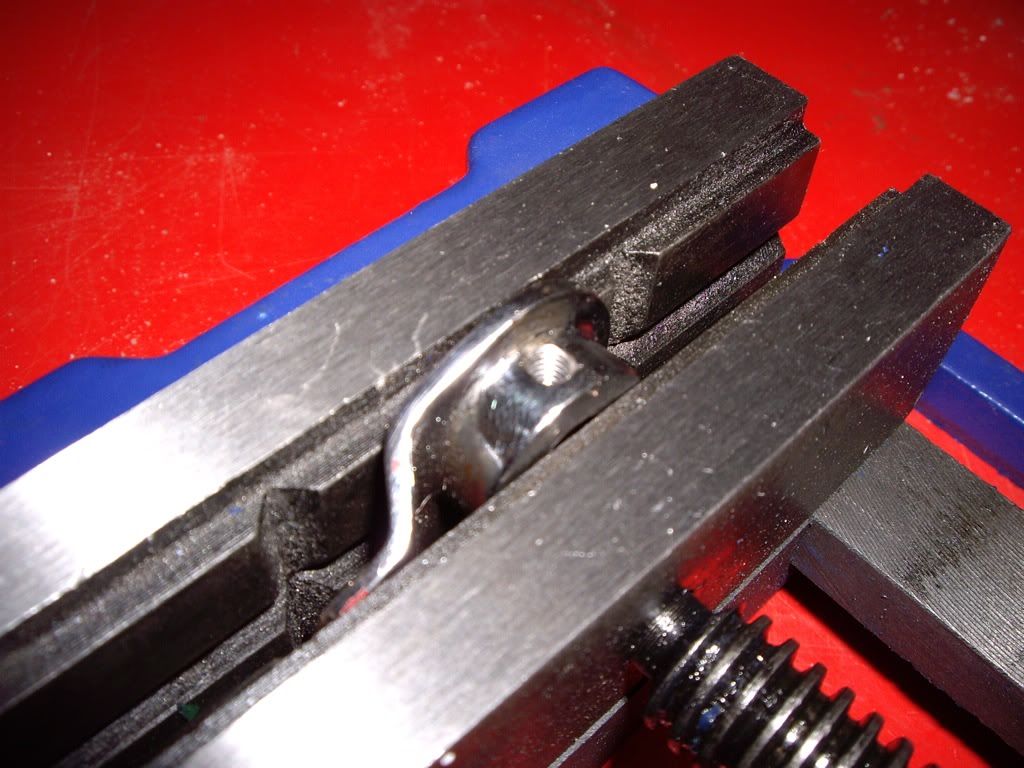
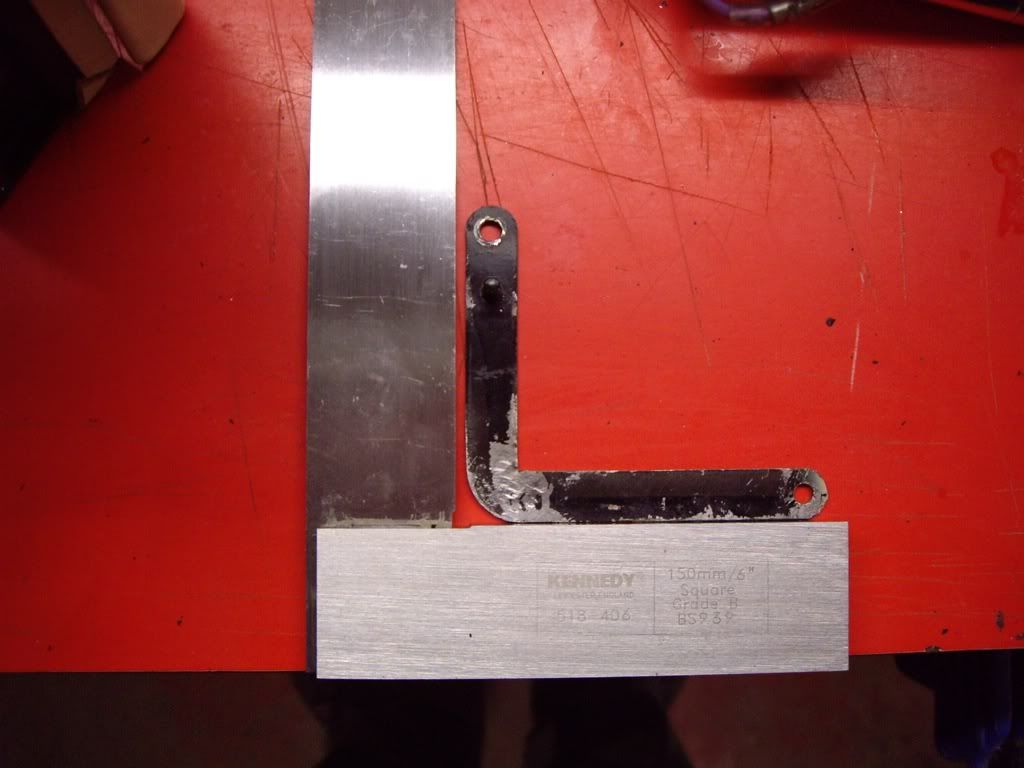
I bent it flat and found it was now 80 degrees instead of 90 due to the metal being stretched. Ten minutes later and it was as AM intended:
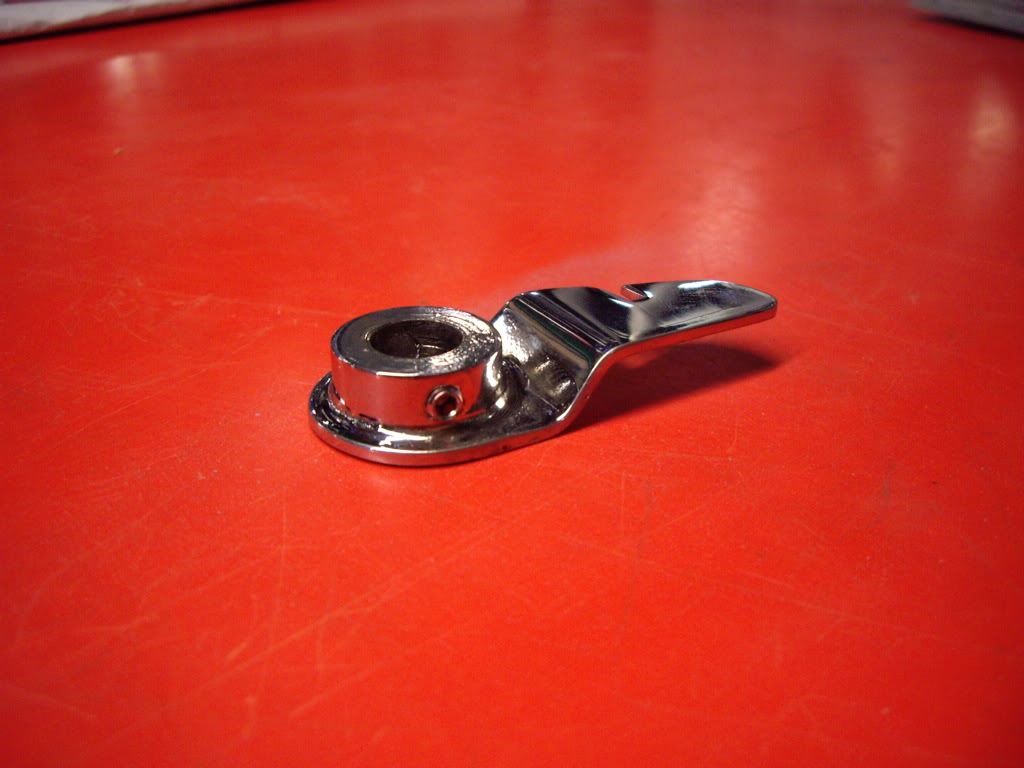
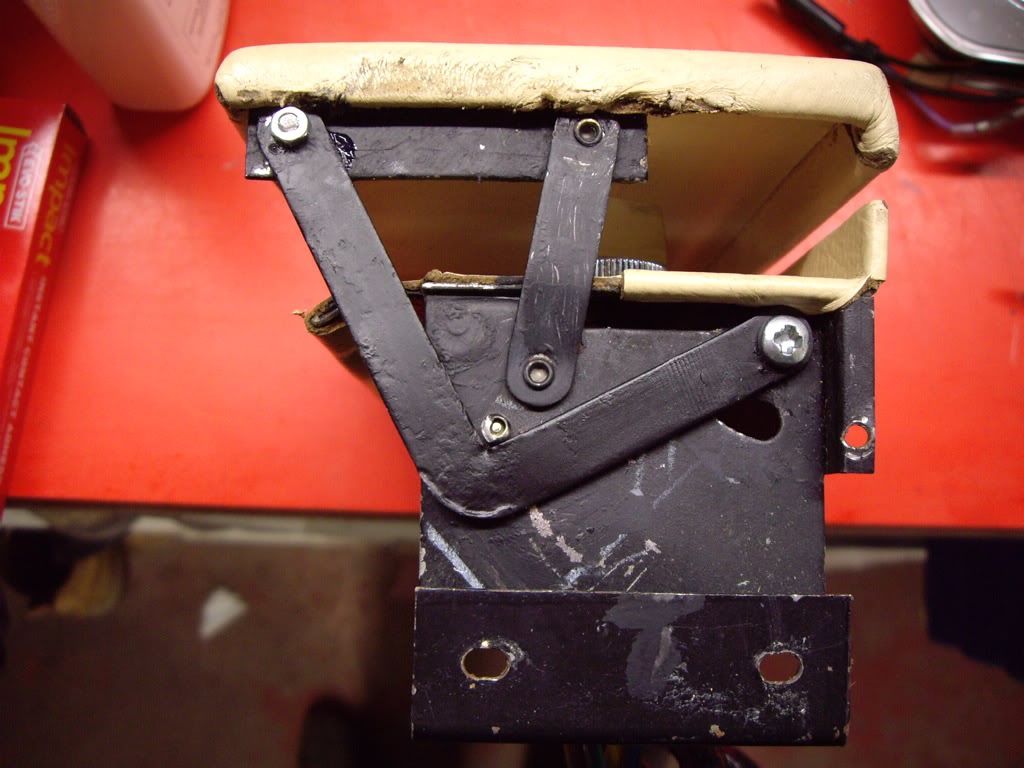
I painted it, and then used an M3 screw to replace the rivet. The head of the rivet was quite flat, so I altered the shape of a countersunk screw to a shallow mushroom by hammering and then filing. Rather than leave naked steel to rust over time, I zinc plated it. There wasn't room for a nyloc nut on the other side, so I thread-locked a regular nut.
Finished result, joints lightly greased:
 |
|
| Back to top |
|
|
Vincent
Joined: 20 Nov 2007
Posts: 1055
Location: Belgium
|
| Posted: Thu Feb 17, 2011 9:56 pm Post subject: |
|
|
As anyone can see, owning a Lagonda is a real pleasure!
Those pics look very familiar to me as when I 'opened' the dash of 13295...
_________________
Welcome to Paradise ! (FRONT 242)
https://www.youtube.com/watch?v=XS30BC3D5WM |
|
| Back to top |
|
|
Lagondanet
Administrator

Joined: 03 Jan 2007
Posts: 3108
Location: UK
|
| Posted: Fri Feb 18, 2011 7:47 am Post subject: |
|
|
Jonc
Very impressive! |
|
| Back to top |
|
|
jonc
Joined: 21 Sep 2010
Posts: 584
Location: Cheshire, UK
|
| Posted: Fri Feb 18, 2011 12:08 pm Post subject: |
|
|
Thanks for the words of encouragement so far 
A previous owner of the car had been doing some 'detailing' under the bonnet with a paint brush and pot of silver paint. Thick paint has been applied to various nuts, pipes etc. The rocker cover nuts have a thick layer of rust with a thick layer of paint on top and look a mess.
I bought myself some metal cleaning and plating equipment for Christmas and so am currently de-rusting and then zinc plating these at a rate of about four per week. I take two off each rocker cover at a time.
The nuts and washers are cleaned up in an ultrasound bath which removes the paint and the bulk of the rust. I then use an electrolytic cleaning tank to remove the remainder of the rust.
Once clean, each one is rotary wire brushed with a steel wheel on a dremel before electrolytic zinc plating. They are then clear passivated for the nuts and P clips giving a silver finish. I also did the two steel vacuum tubes which are gold passivated.
This is one side, which has a combination of old silver painted nuts and new plated ones. It also shows the newly plated vacuum pipe. You can see that one of the aircon hose ends has been painted, and yet the lower one is still oily and rusty!
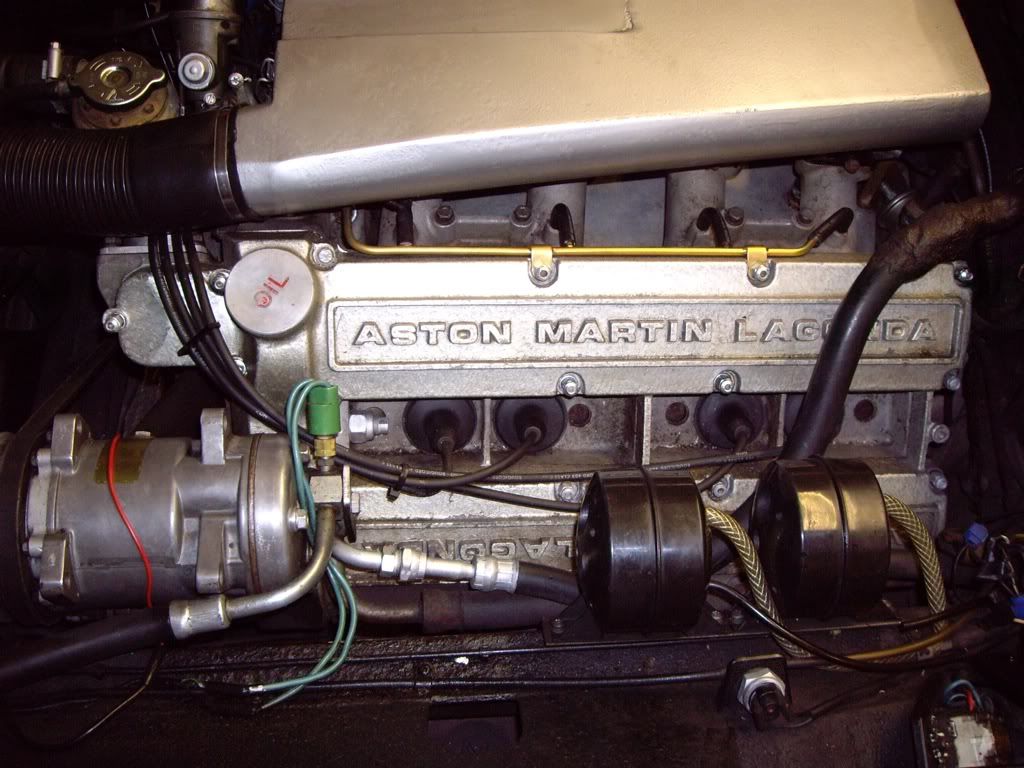
I am hoping over time that the shinyness will dull down! |
|
| Back to top |
|
|
jonc
Joined: 21 Sep 2010
Posts: 584
Location: Cheshire, UK
|
| Posted: Sat Feb 19, 2011 12:55 pm Post subject: |
|
|
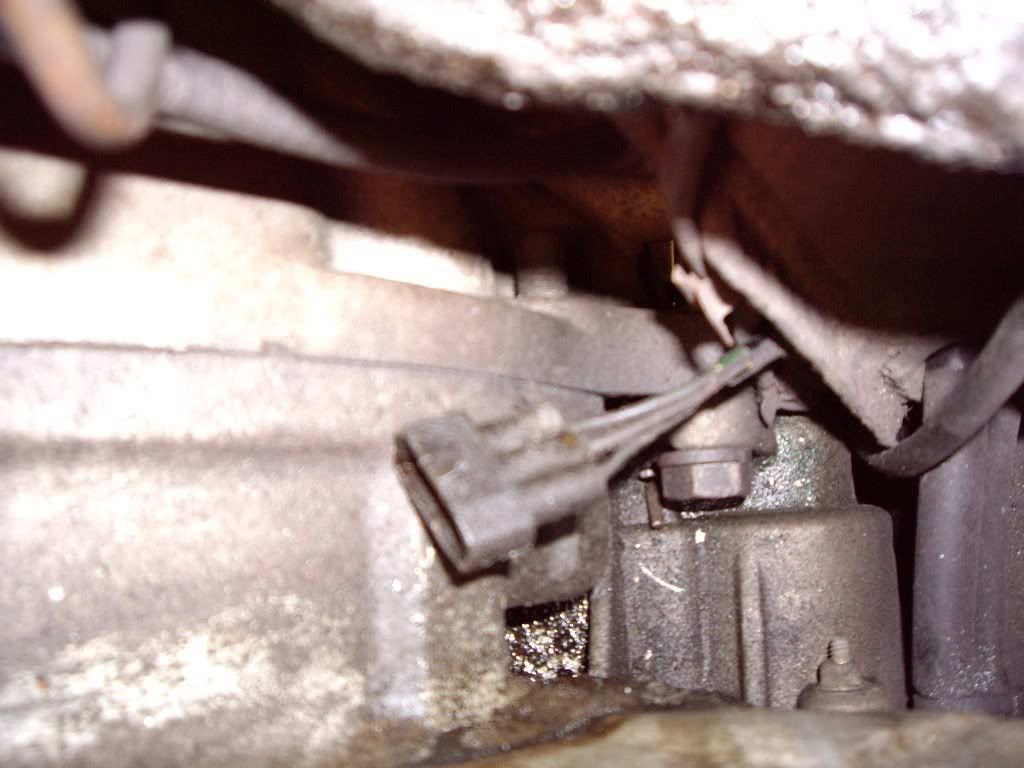
At this point the car had been standing for some time, and there was a pool of gearbox oil underneath. Time to get it up in the air and have a look. First time I have put a jack under the car - its a long way under and a heavy car to lift - ordered a new 2 tonne long reach jack..
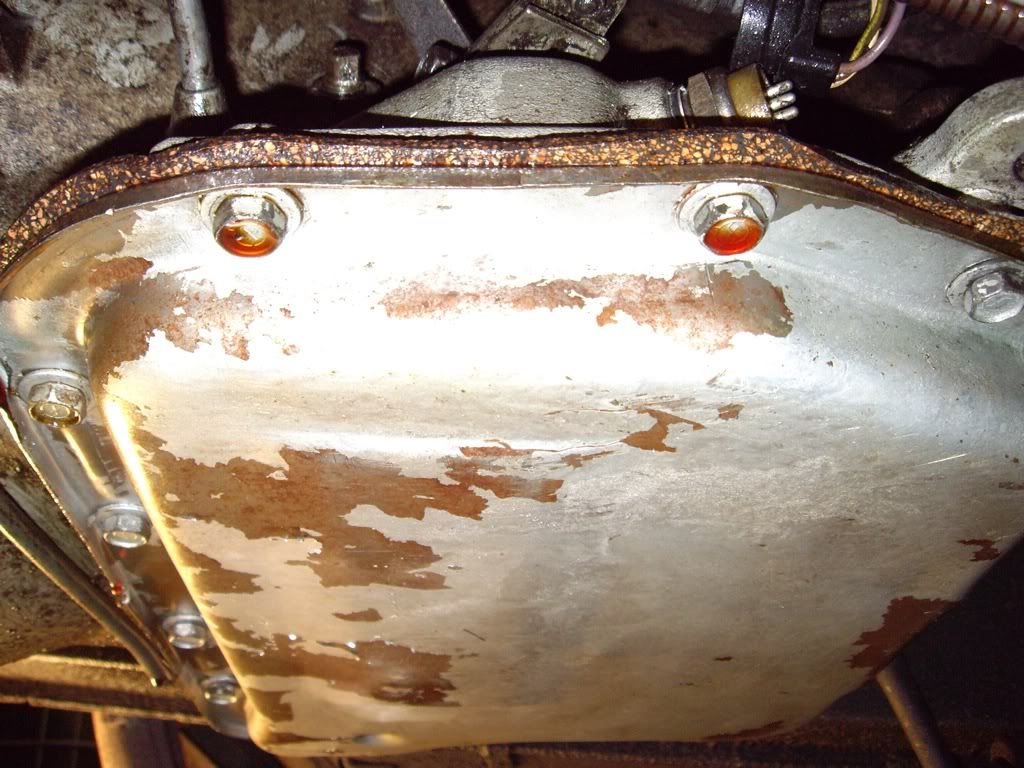
It looks like its coming from the cork sump gasket. Also noticed the electrical plug was not attached to the gearbox switch. Also leaking from the speedo drive:
I am not a fan of cork gaskets, I probably need order a replacement. I think I will probably fit a drain plug on the sump while its off. ** added to jobs list **
I checked the tightness of the sump bolts and added an eighth of a turn to them to see if this would stop the drips. Cleaned up oil and I will wait and see..
Took out the speedo drive to check the seal.
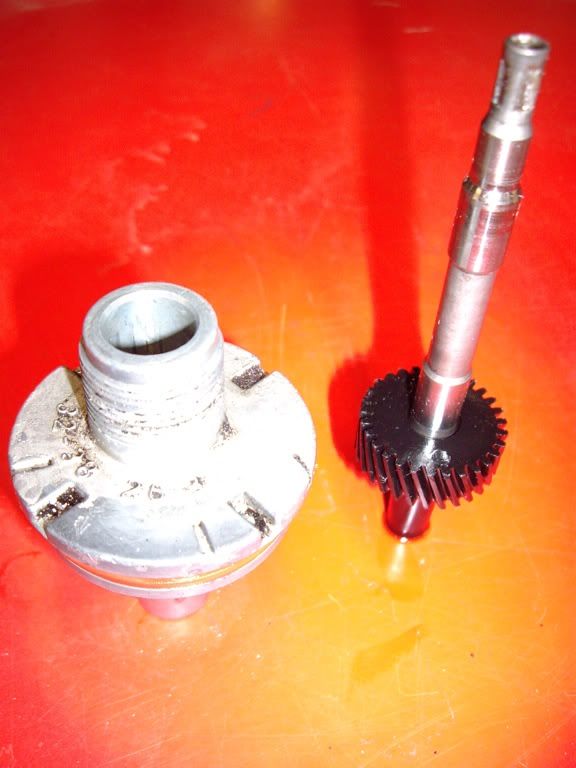
The seal is fitted from the outside and held in place with a circlip. The clip was not straight and so the seal was at an angle. This was the cause of the leak here I think. Straightened it up and refitted. I have left the speedo cable off for now in order to drain the oil out of it. |
|
| Back to top |
|
|
jonc
Joined: 21 Sep 2010
Posts: 584
Location: Cheshire, UK
|
| Posted: Sat Feb 19, 2011 1:40 pm Post subject: |
|
|
OK, final post to bring me up to date.
Last time I was out in the car, I used the headlights. This was only the second time I had driven the car in the dark and they lasted about five minutes into the journey before failing. Fuses were all ok, so I am assuming connection or relay. The headlights pop up, but no light. There is also something not right with the fog/spots I think (from memory).
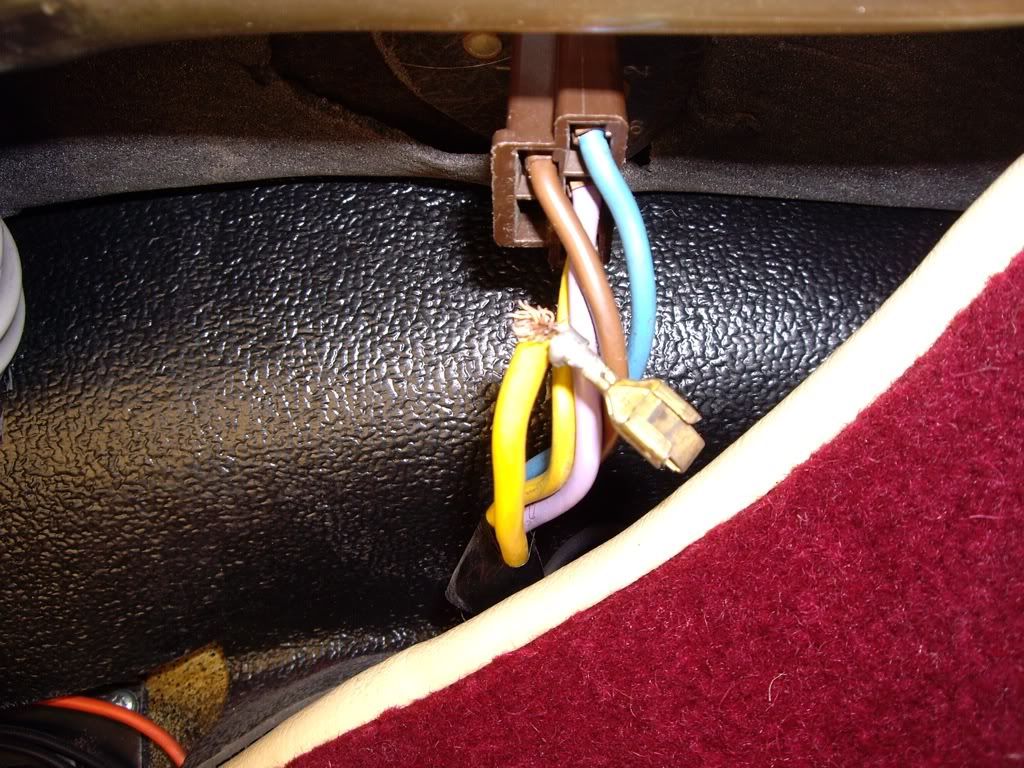
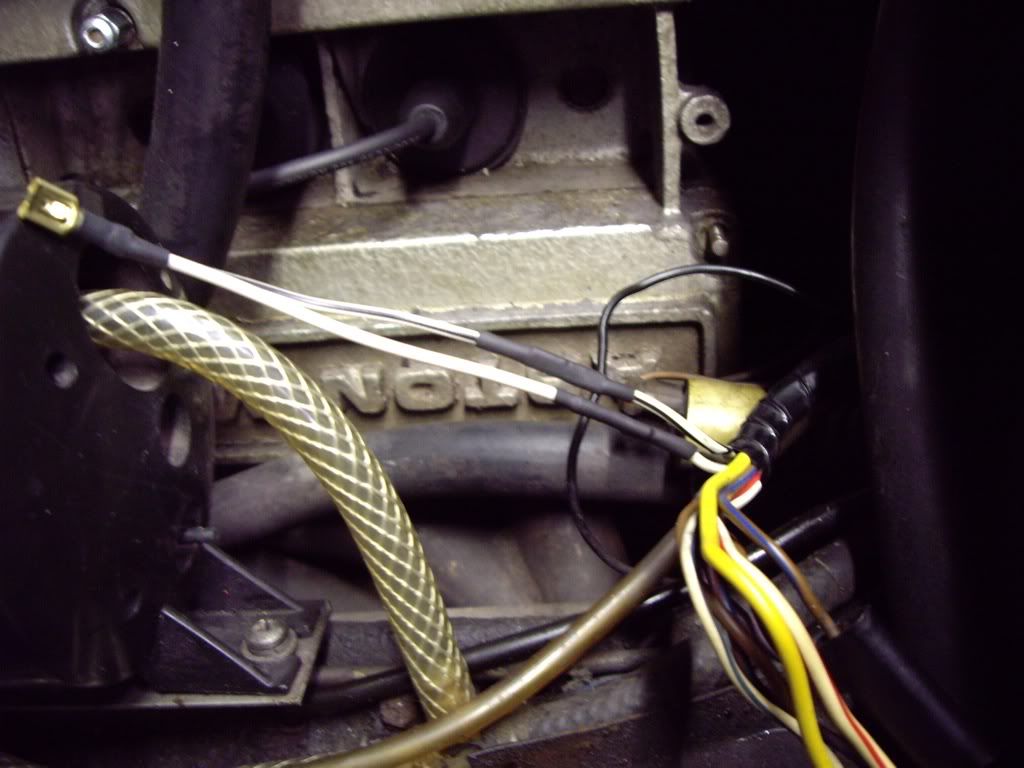
Starting point was some modified wiring next to the fuse box under the bonnet:
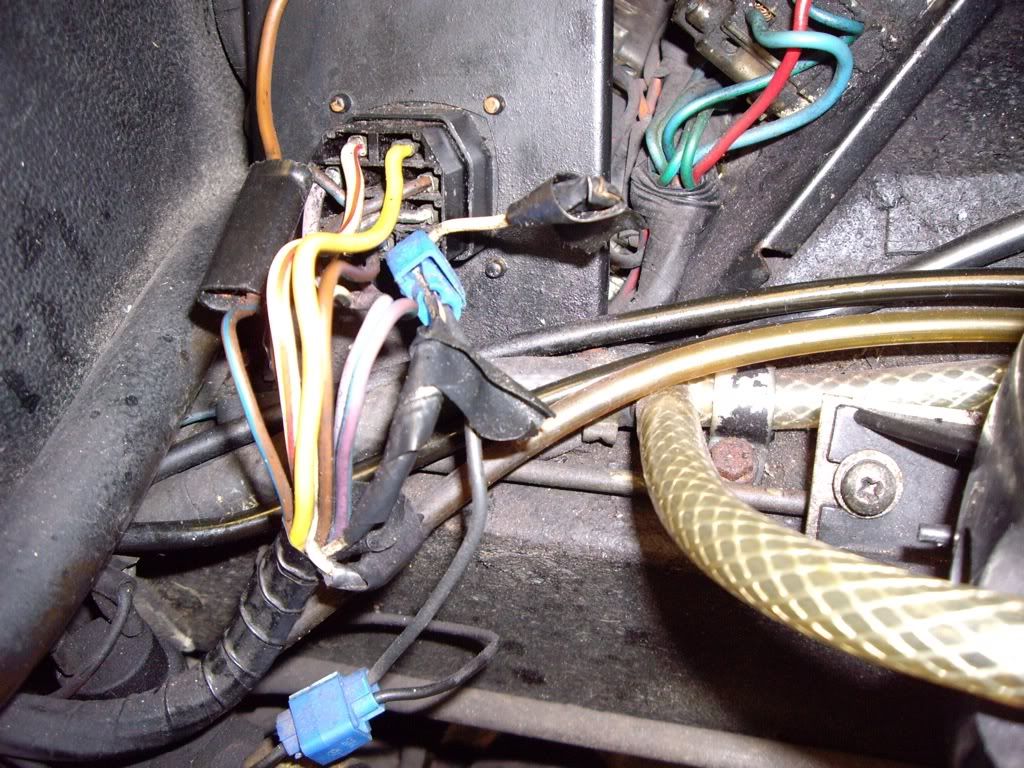
I've got scotch-locs, a bullet connector and some insulating tape. Tape off and a clean up so I can identify the wires:
It turns out that there are two wiring mods here. First is to the starter relay - the inhibit from the gearbox has been bypassed by grounding the wire - this explains why the car still starts without the plug attached to the gearbox. (The plug is also for the reverse light switch so presumably the reverse lights don't work at the moment.) The disconnected wire goes to a relay for the vacuum advance/retard control which should be grounded in Park or Neutral.
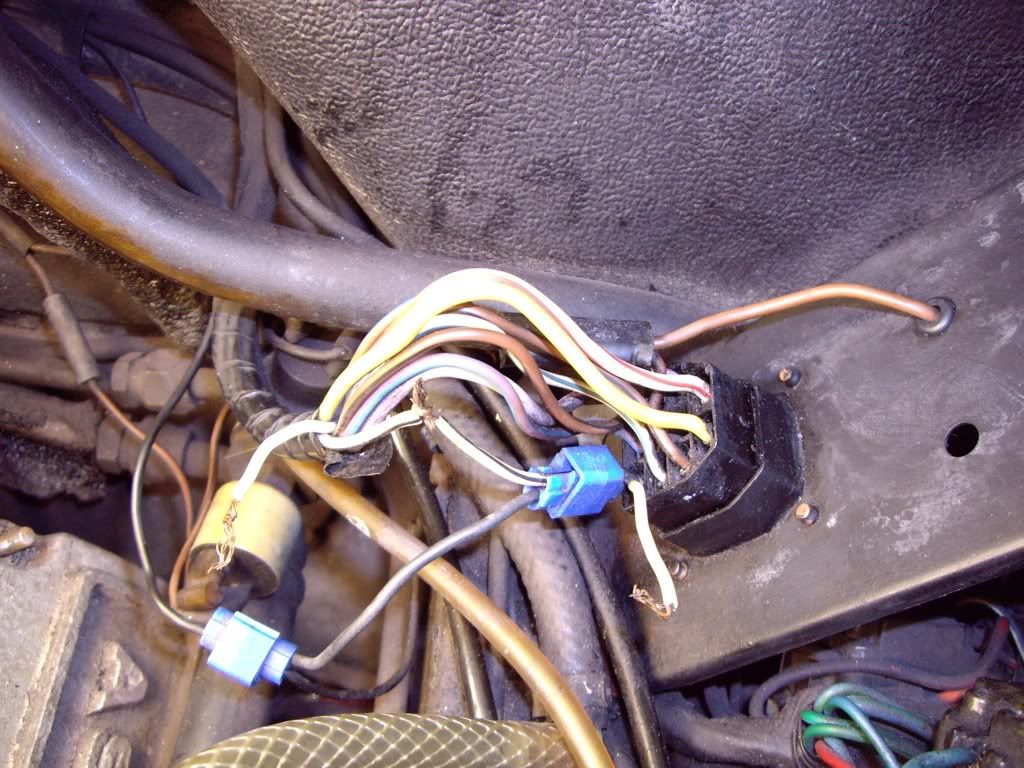
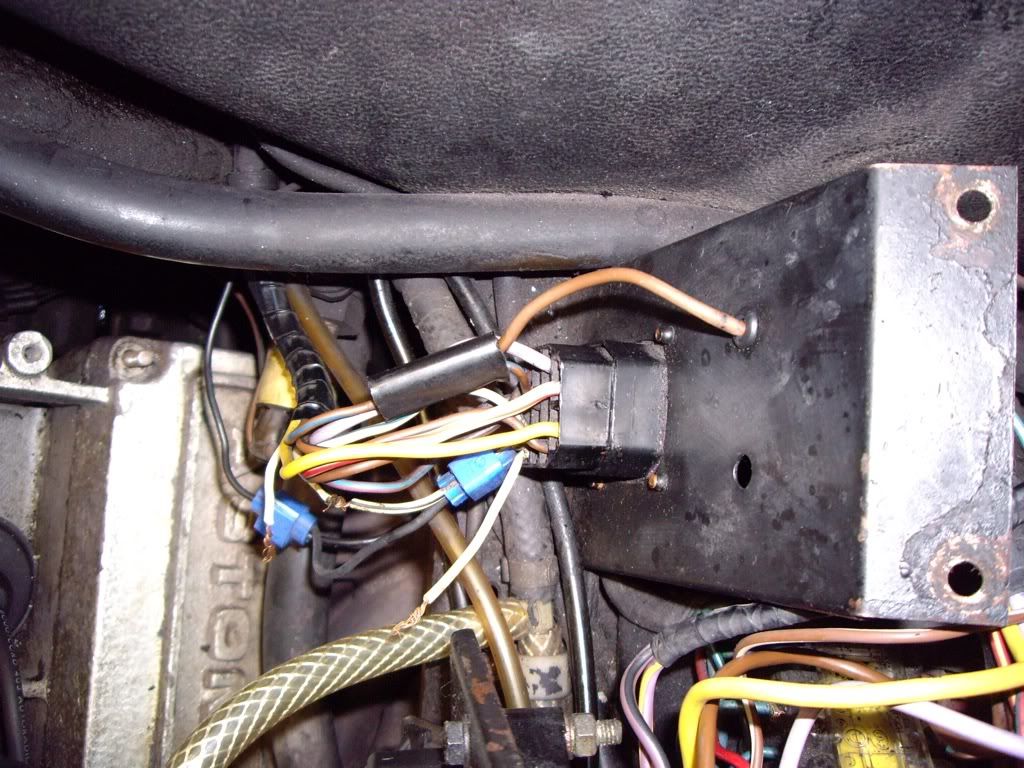
These will be easy to put back together, but I also need to reconnect the gearbox plug. I followed the loom a short distance to the bulkhead and to a plug I had assumed was for the inertia switch (disconected):
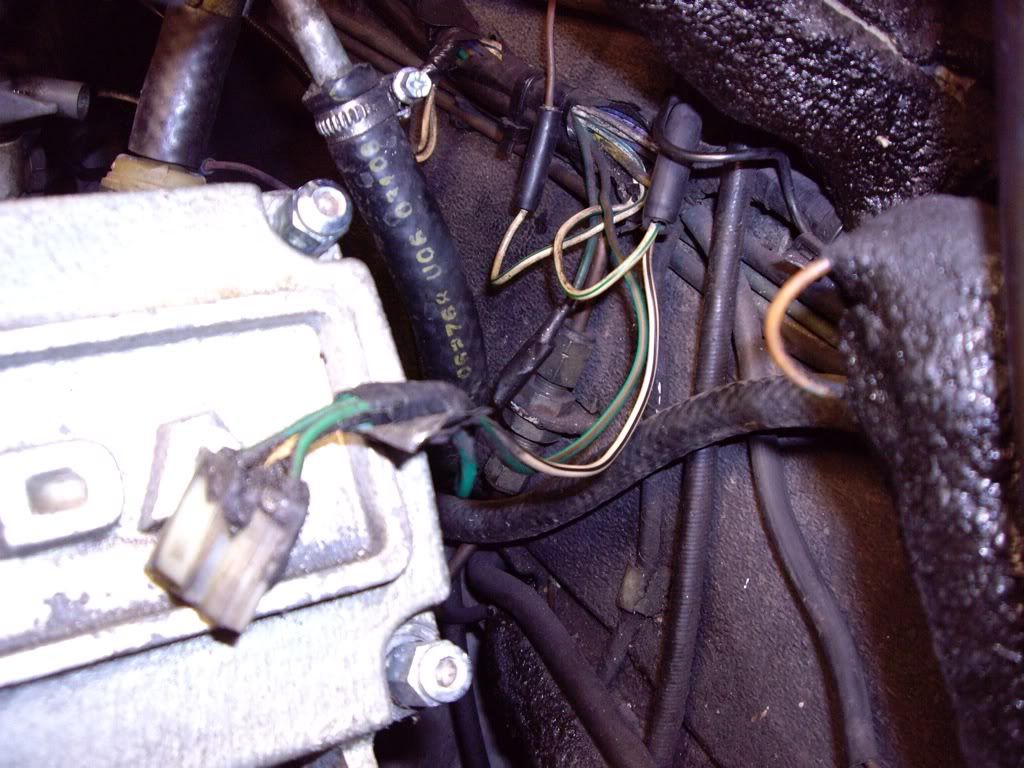
When I looked at the diagram, I found this was the plug to a short loom down to the gearbox. I discovered the other end resting just above the starter. Looks like it had been there for some time:
So, I am not actually on to the lights yet. All this to put back together first. |
|
| Back to top |
|
|
jonc
Joined: 21 Sep 2010
Posts: 584
Location: Cheshire, UK
|
| Posted: Tue Mar 01, 2011 8:31 pm Post subject: |
|
|
I have been waiting on some crimp/heatshrink splices for the gearbox loom, so I am looking at the lights.
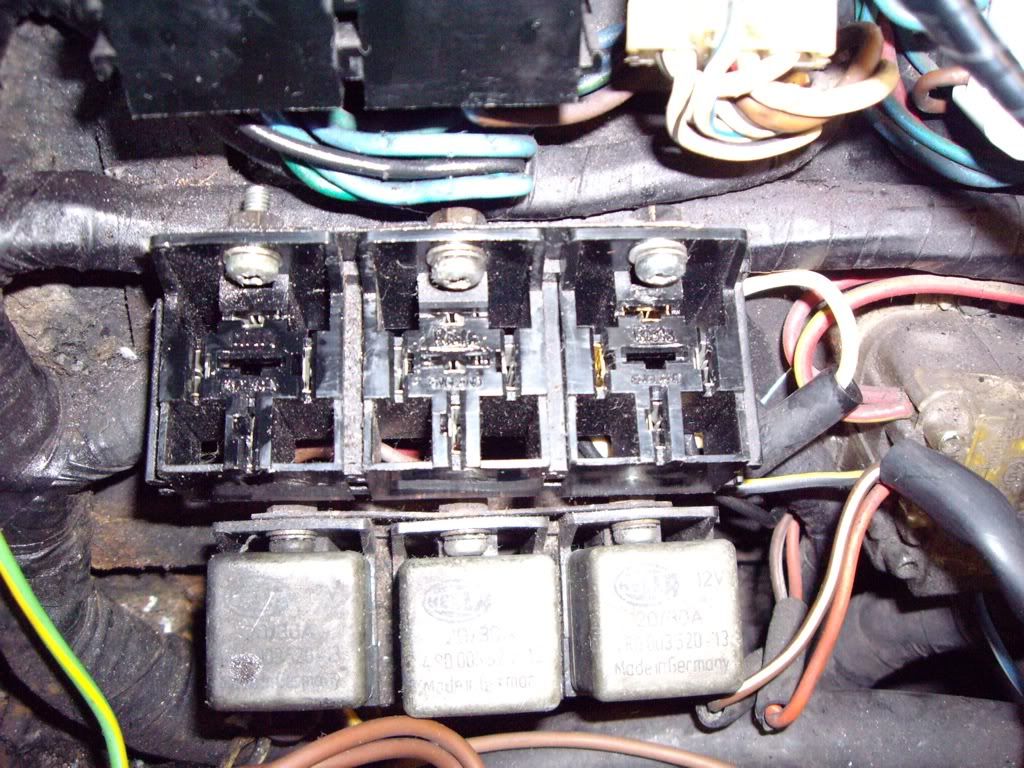
I have the fuse box cover under the bonnet apart:
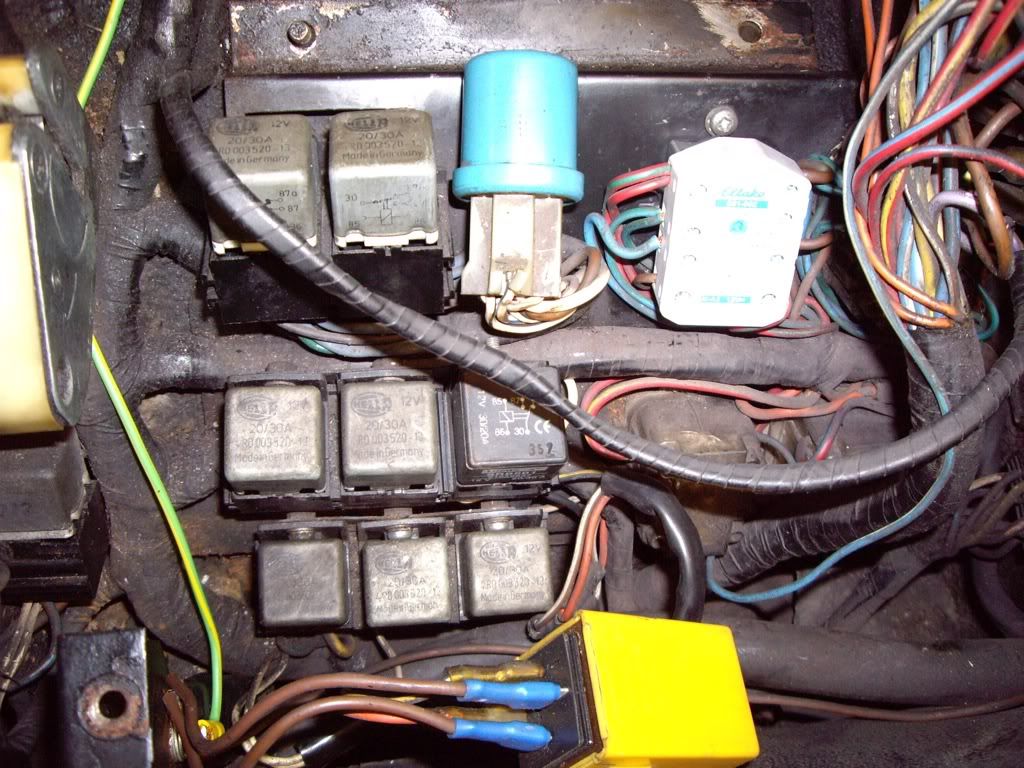
I replaced the impulse relay for the sidelights last year. The rest is pretty much standard, apart from some crimps on the yellow relay at the bottom (which is not mounted on anything). I am pretty sure this is a timer for the heated front lamp glasses. It looks like the one at the back of the car for the heated rear window. The wiring diagrams I have (81/82) don't show it, or the one on the left which is mounted on the inner wing.
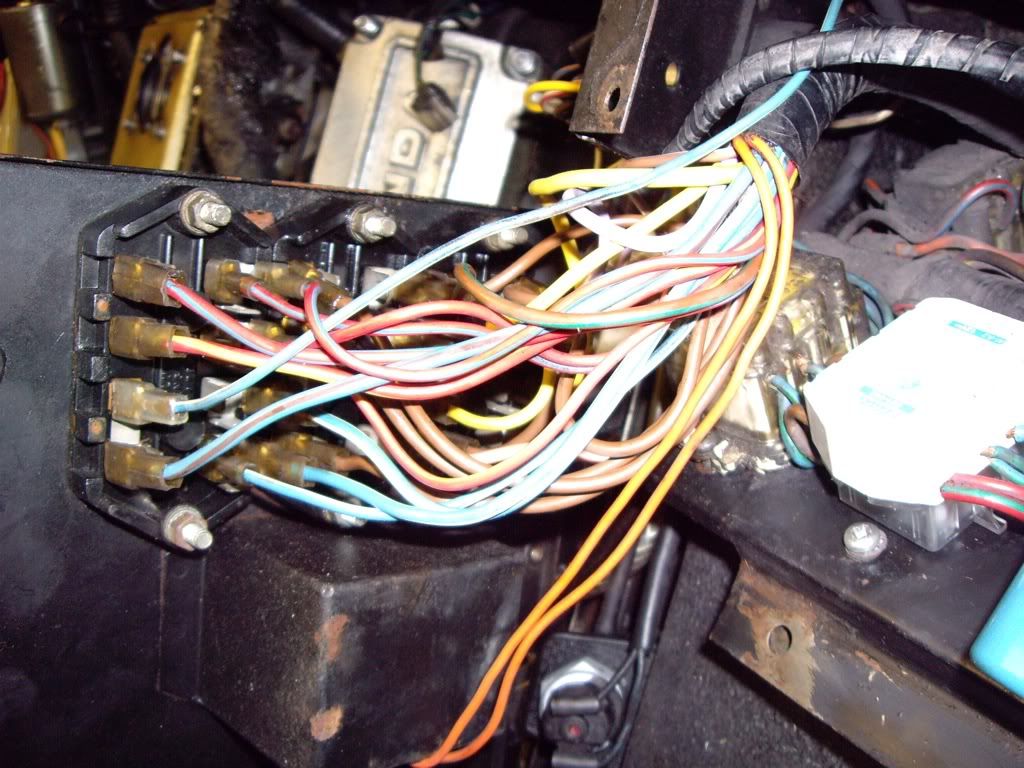
First job is to check the connections on the fuse boxes. Each wire is removed, cleaned, then I spray the connector and spade on the fuse box with DeoxIT D5. Finally, Contralube 770 contact grease on the connector before reassembly. I did this on each wire, one at a time. Here it is, nice and clean:
 |
|
| Back to top |
|
|
jonc
Joined: 21 Sep 2010
Posts: 584
Location: Cheshire, UK
|
| Posted: Tue Mar 01, 2011 8:53 pm Post subject: |
|
|
Now I will clean the connections on the relays, and for good measure, replace the relays. Each relay is taken out, the connectors in the base sprayed with contact cleaner, greased and then the new relay can be plugged in.
While I am doing this, I find that one of the connectors has dropped down in the base. This is because the connector has been replaced with the wrong type of crimp - crimps for the base have a little clip so they stay in place when inserted.
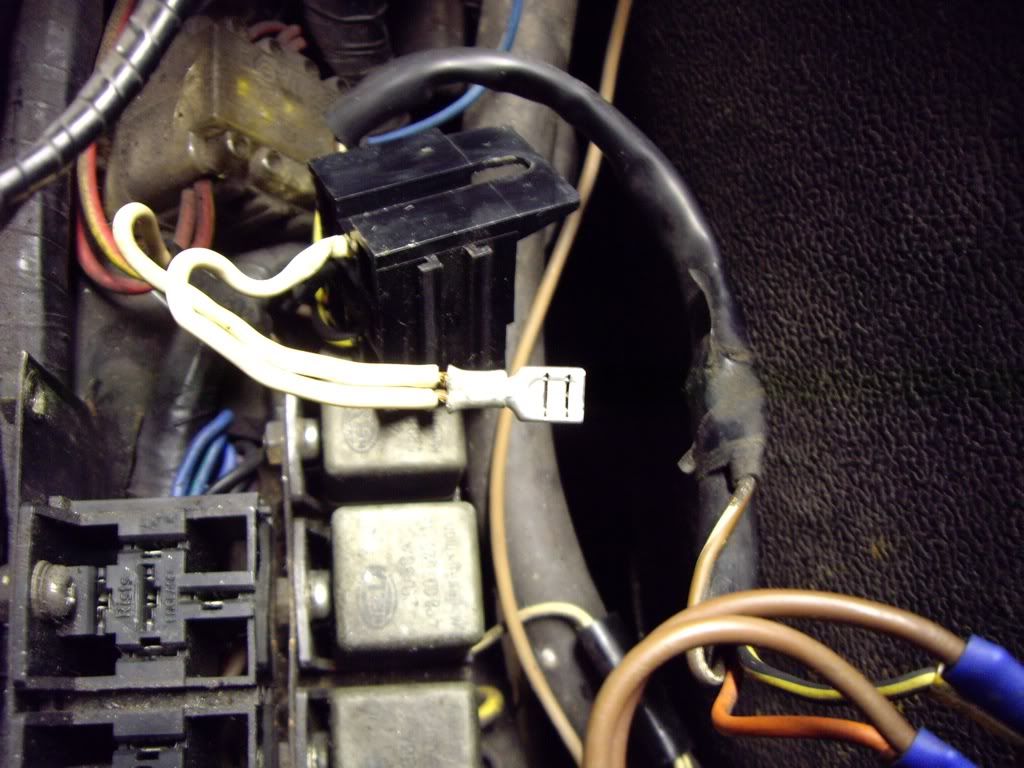
I fit a new one, and since this for two wires, I am going to use a hellerman sleeve as well. Here it is crimped:
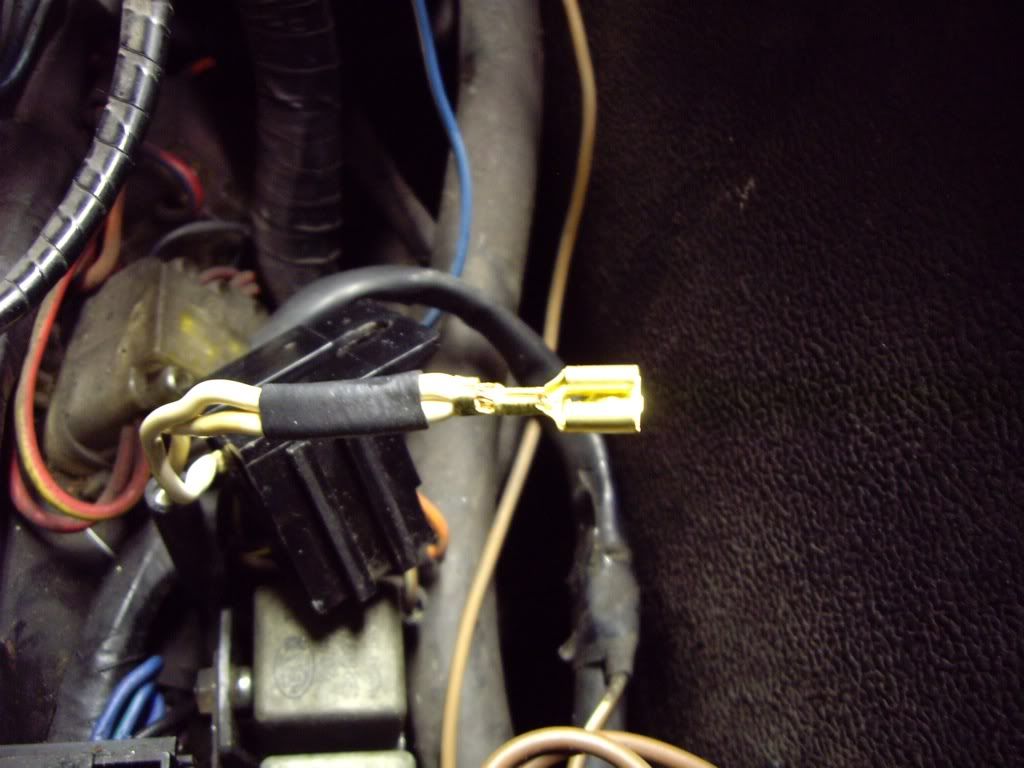
and sleeve in place:
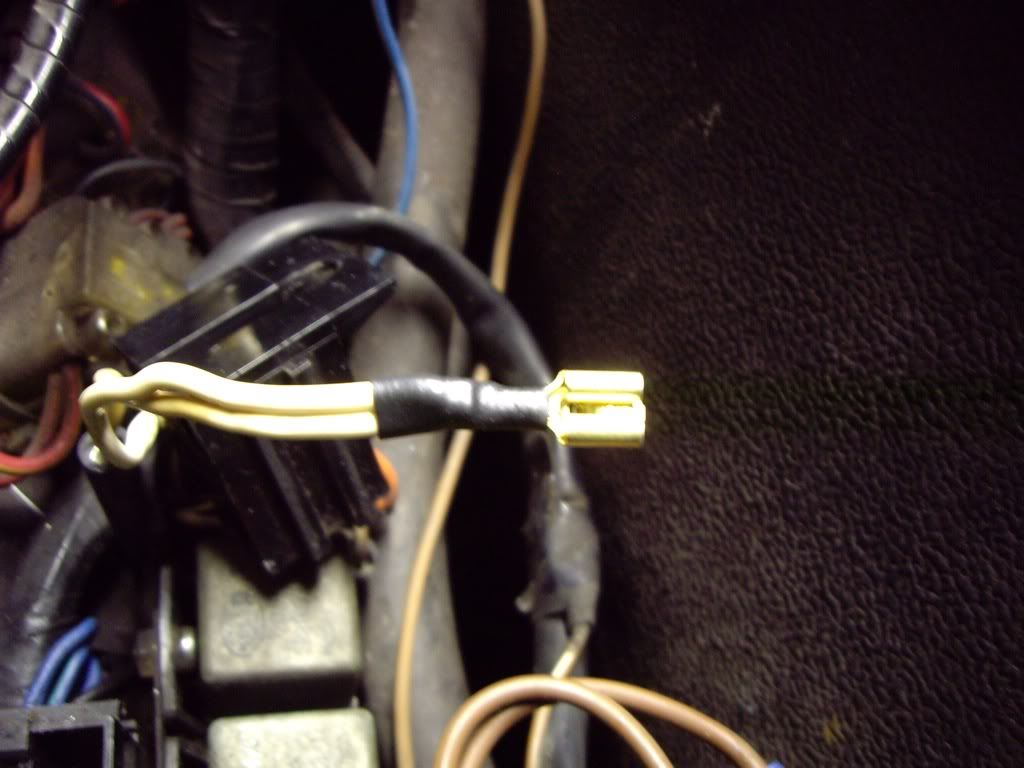
Finally, I can click it back into the relay base, and refit the base:
 |
|
| Back to top |
|
|
jonc
Joined: 21 Sep 2010
Posts: 584
Location: Cheshire, UK
|
| Posted: Wed Mar 02, 2011 7:09 pm Post subject: |
|
|
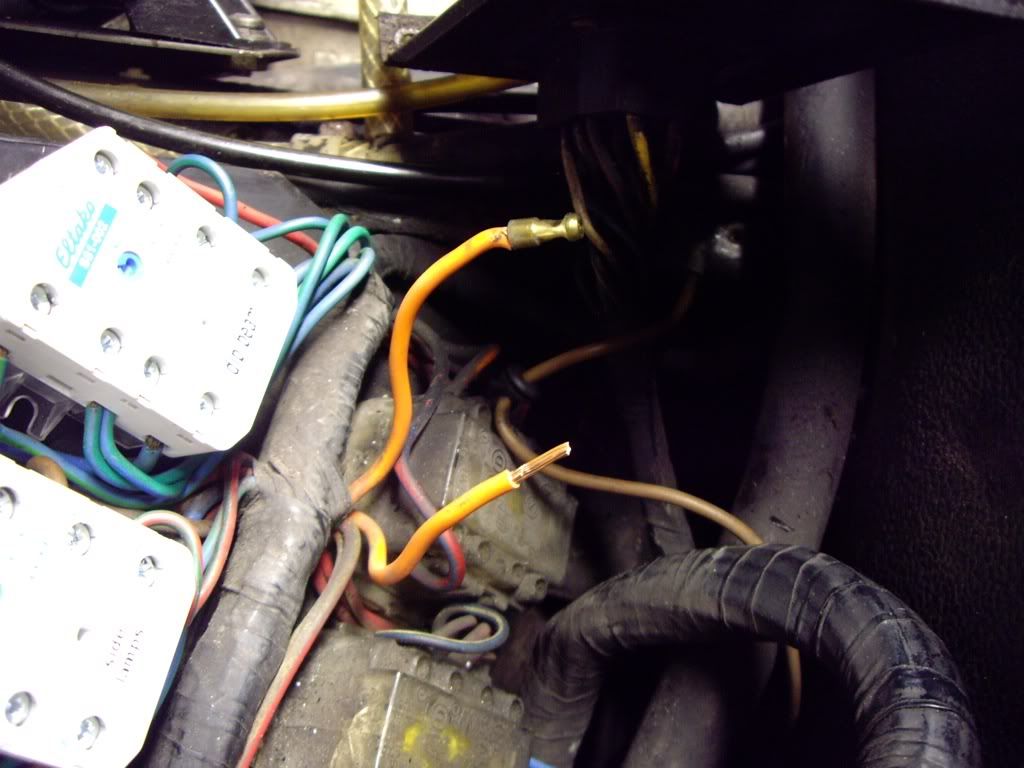
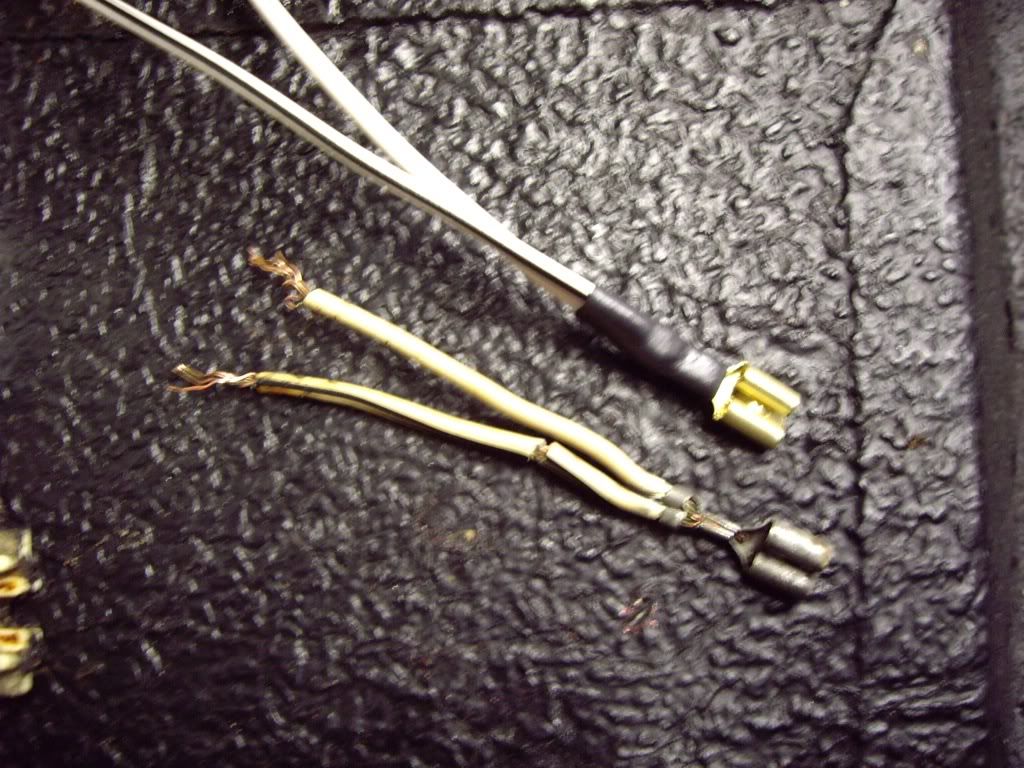
I thought I would clean up some more of the loom in this area. I pulled up an orange wire with a bullet join and it fell apart:
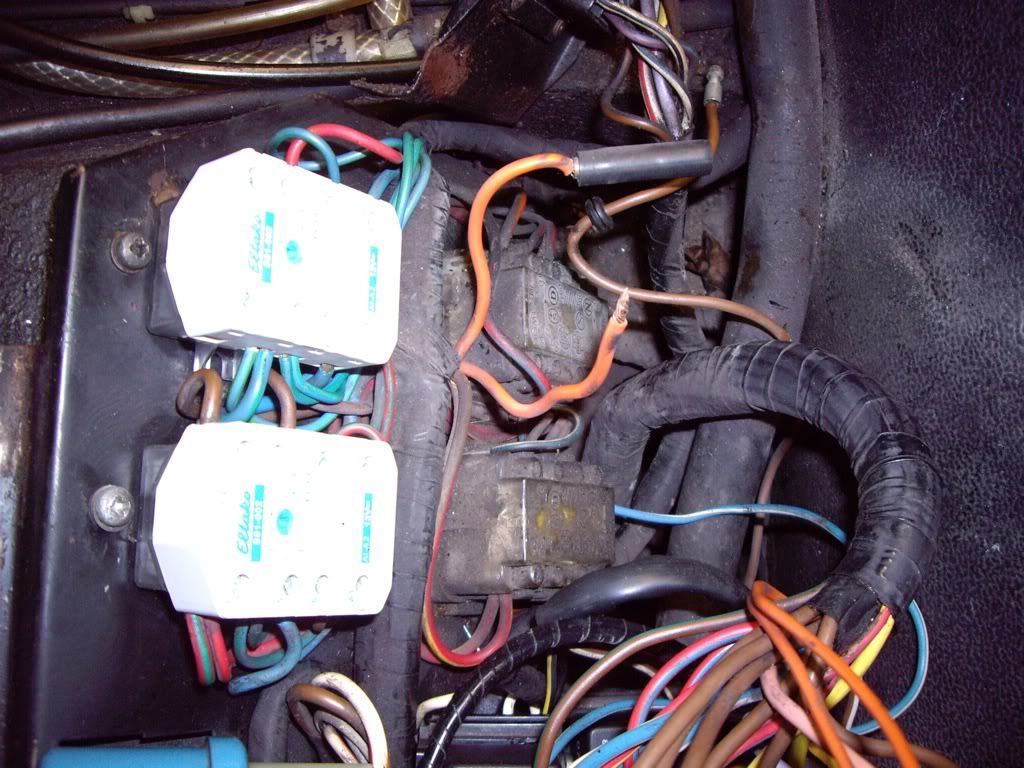
This looks like an original loom join, but on closer inspection it has not been done right. Two problems - firstly, the bullet is crimped, and yet the wire has been twisted. This is bad because a twist takes up more space than straight wires. That's bad because if it starts to untwist, it becomes loose.
Secondly, the bullet crimp is not actually the right size for the gauge of wire - its too small. This meant that the wire didn't actually fit properly before it was crimped. Fortunately I have some of the correct size. Both need replacing.
The main thing here is that the wire should actually peep out at the other end of the bullet - this is important as you can see that the crimp didn't slip while you were crimping it.
I have stripped the wire to fit the first one. The old second one is still in place, but pulled off too with very little effort.
New crimps in place:
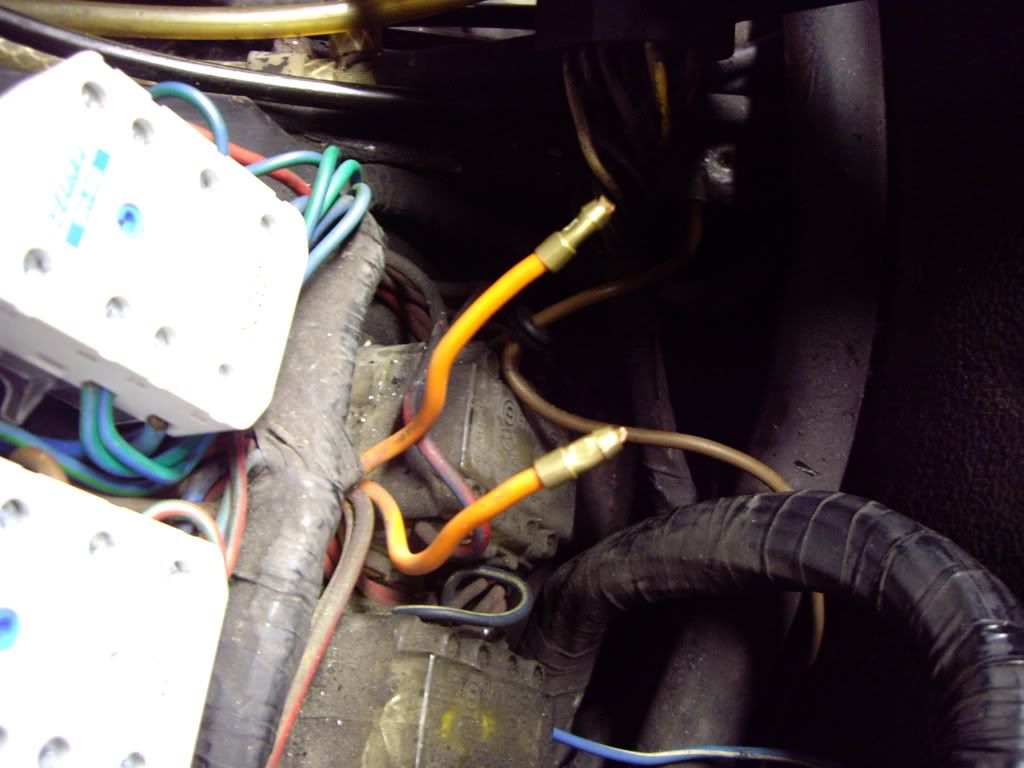
Job done, new bullets and a new snap connector:
 |
|
| Back to top |
|
|
jonc
Joined: 21 Sep 2010
Posts: 584
Location: Cheshire, UK
|
| Posted: Wed Mar 02, 2011 7:59 pm Post subject: |
|
|
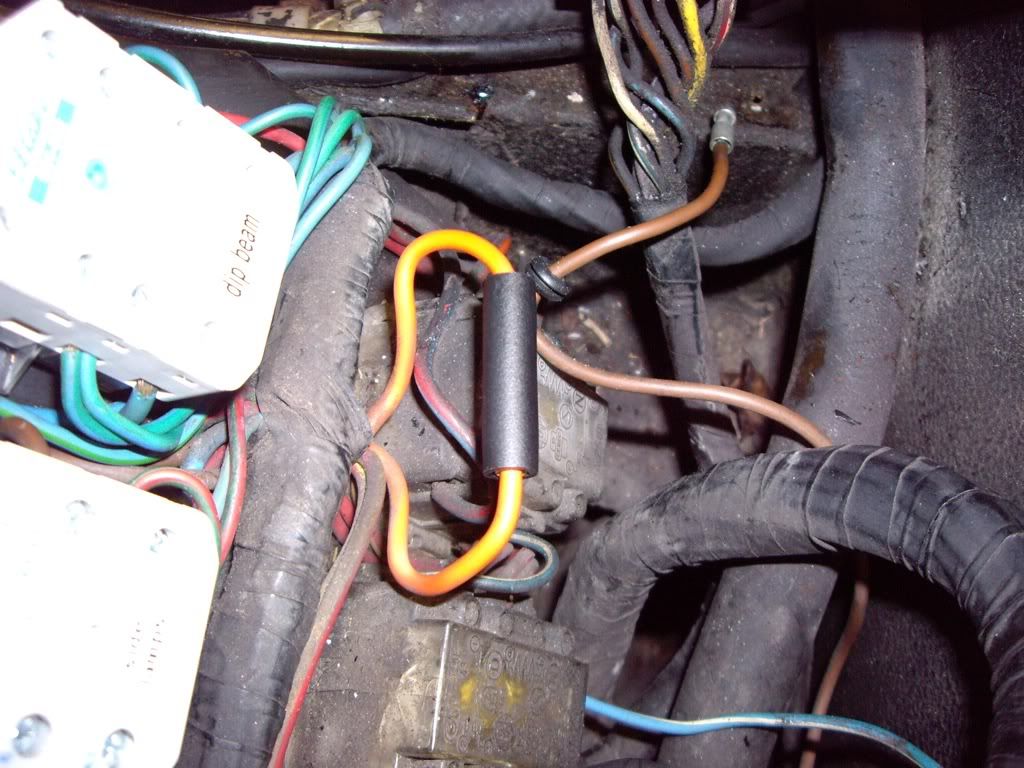
Right, back to the loom outside the fuse box. I have got the crimps and some new wire. Here's what it looked like:
I have a white and a white-black to join back together and get rid of the scotchlocs. Since the scotchloc has damaged the white-black, I make a new piece from the connector. Its a two-wire crimp, so again I apply a hellerman sleeve to it:
This is connected to the wires in the loom with crimps. I use the ones with the integral heat shrink, but since this heat shrink is a bit thick I cut it off and use some thinner stuff. This is so the splice won't show up when the loom is taped:
Finally, I retape the loom. Loom tape is like insulation tape, but without the adhesive. Insulating tape on a car is a bad idea since the adhesive ages and either dries out or goes gooey. I super glue the start and ends, and the repair is hidden:

This now means the car won't start since I put this wiring back to original. Next I need to fix the connections to the gearbox, and check at the vacuum control end too. |
|
| Back to top |
|
|
|
|
You cannot post new topics in this forum
You cannot reply to topics in this forum
You cannot edit your posts in this forum
You cannot delete your posts in this forum
You cannot vote in polls in this forum
|
|

