| View previous topic :: View next topic |
| Author |
Message |
jonc
Joined: 21 Sep 2010
Posts: 584
Location: Cheshire, UK
|
 Posted: Sun Feb 26, 2012 4:06 pm Post subject: Posted: Sun Feb 26, 2012 4:06 pm Post subject: |
 |
|
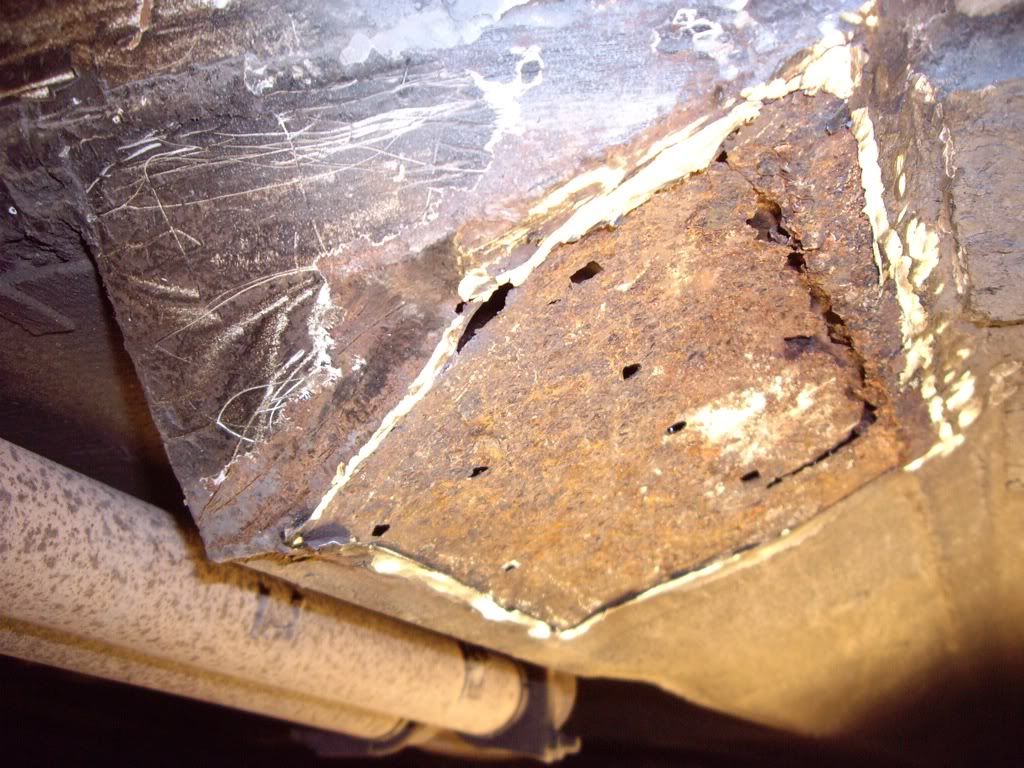
Time to chop out and straighten up:
The bottom edge at the back is a bit rusty and so this needs to come out:
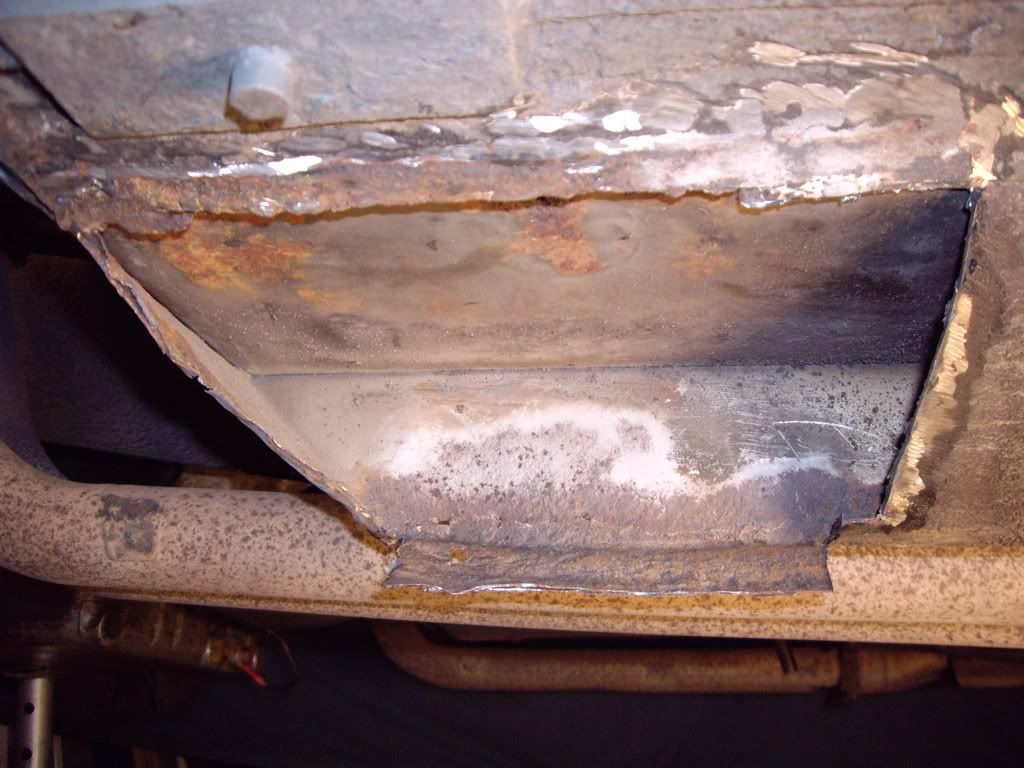
and be replaced:
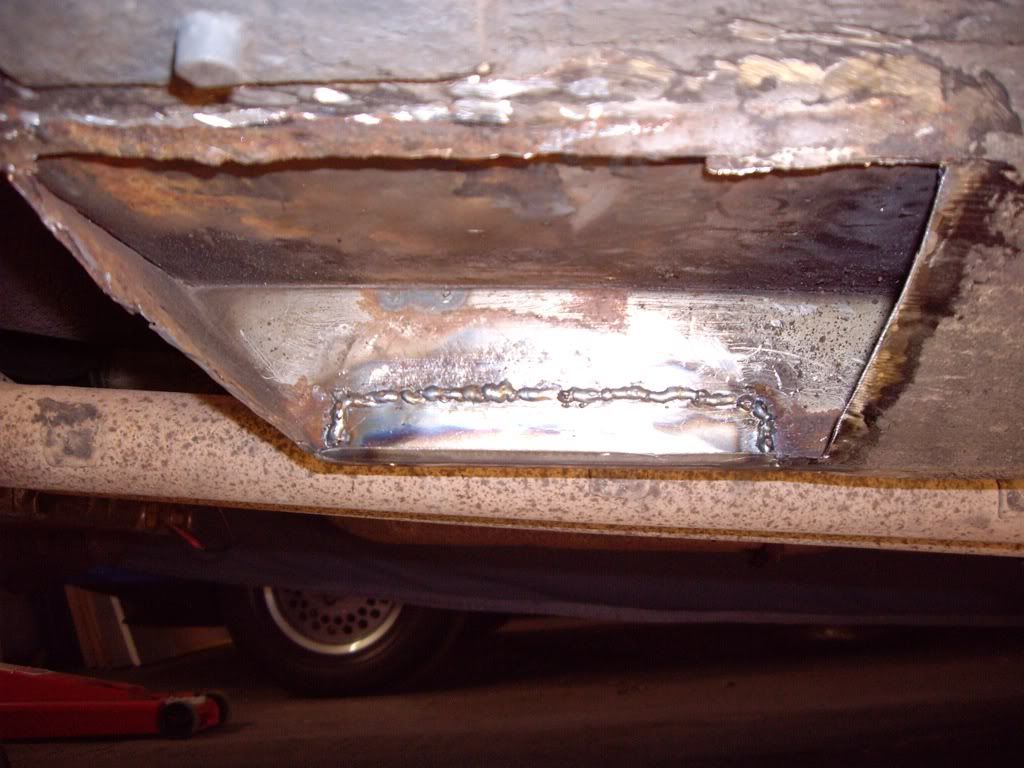
It is only when you start doing this type of work that you realise how time consuming it is. Each piece of replacement metal must be cut/bent/shaped to be an exact fit in order to be butt welded.
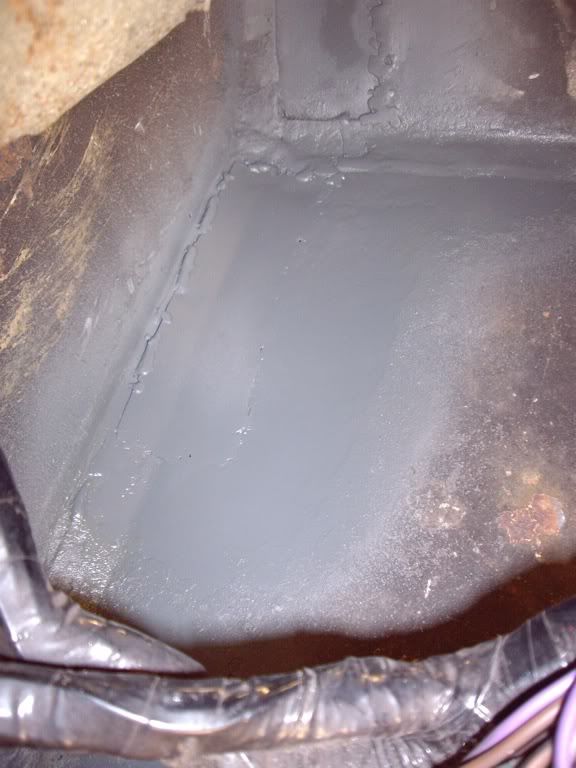
Once in, it can be painted with the zinc paint:
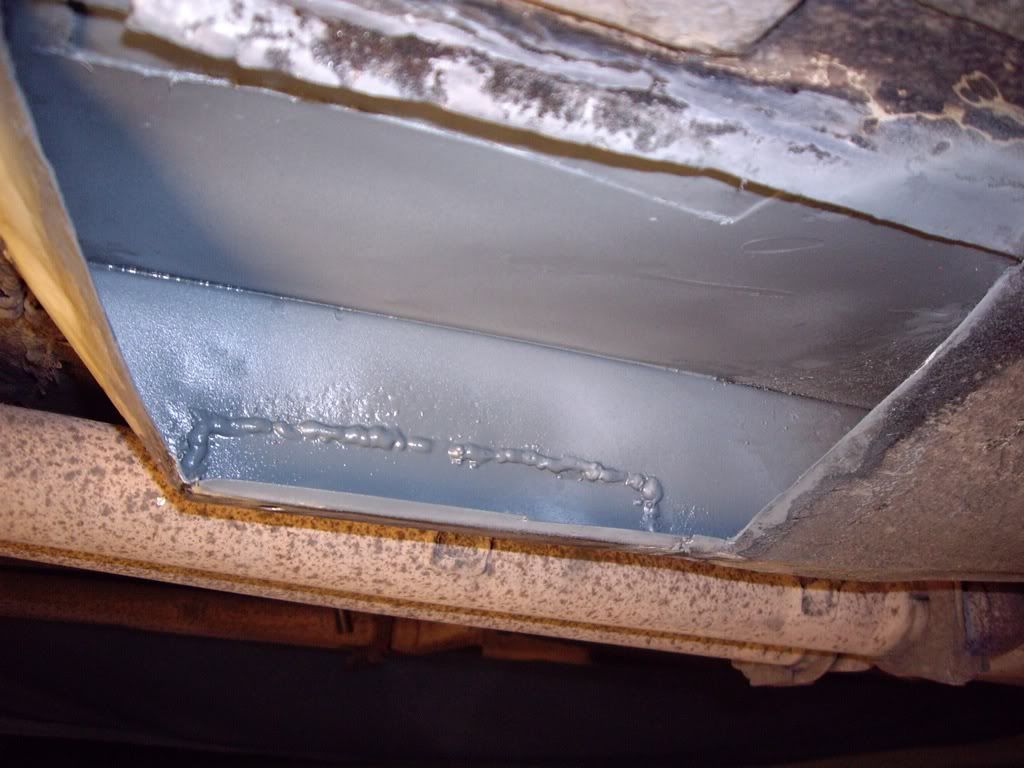
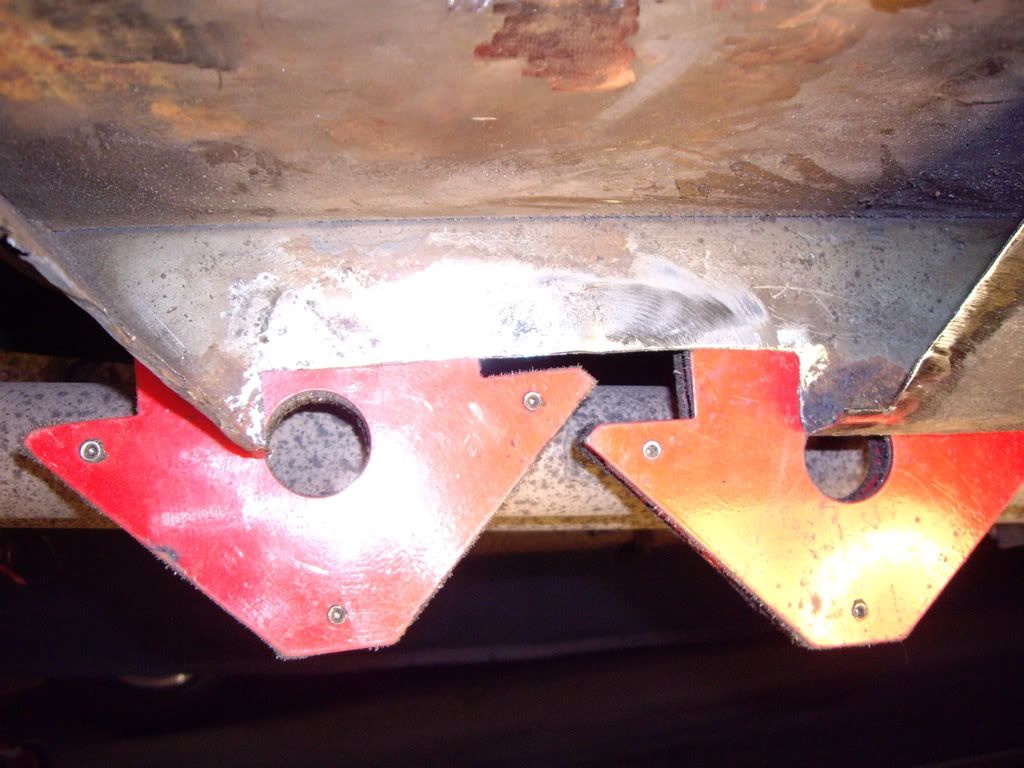
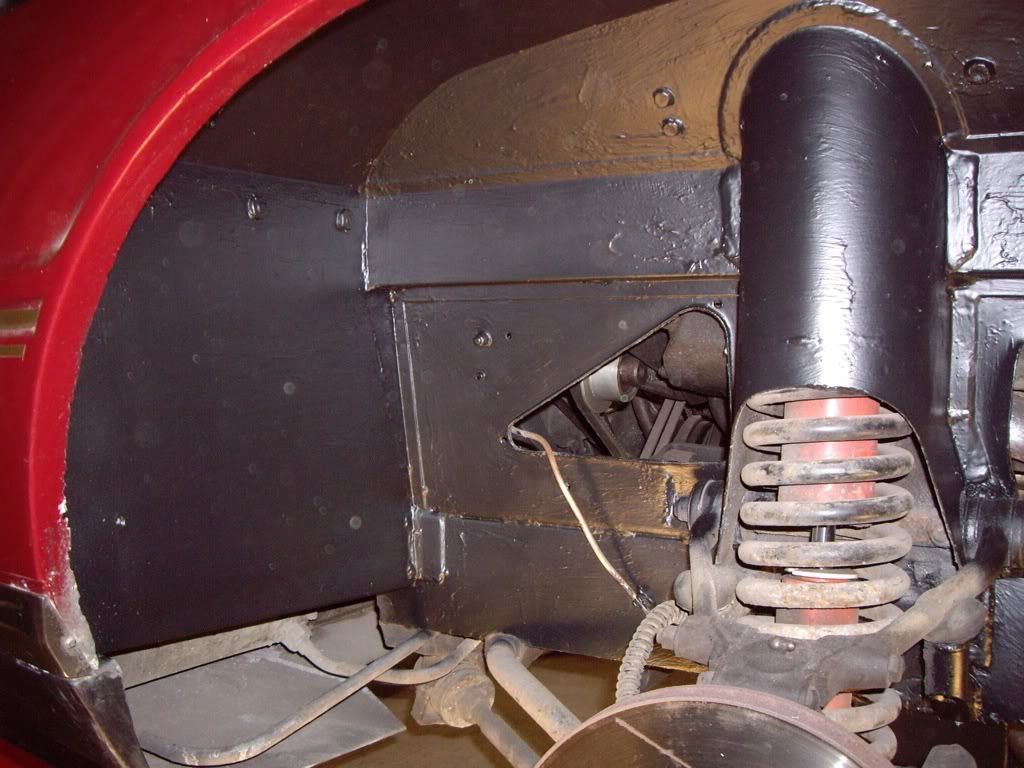
The front piece is vulnerable to damage from jacking pads, so I used thicker metal, again painting the back before welding into place. The two holes are to match original ones used for waxoyl:
Last edited by jonc on Sun Feb 26, 2012 7:35 pm; edited 1 time in total |
|
| Back to top |
|
 |
jonc
Joined: 21 Sep 2010
Posts: 584
Location: Cheshire, UK
|
| Posted: Sun Feb 26, 2012 4:16 pm Post subject: |
|
|
There was a piece of floor to replace above this area:
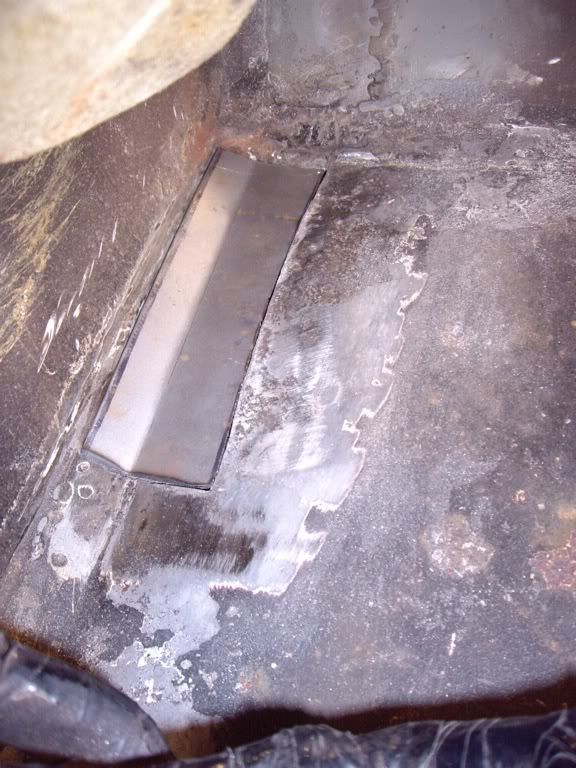
And now the remaining section of floor/bulkhead is welded in, and then painted before the piece of inner wing goes in:
Again, a piece is made from a cardboard template, bent where needed and the edge ground to be an exact fit. Holes were drilled along the bottom edge where it was spot welded to the floor so I can plug weld the seam. For this piece, I also needed to punch two holes. I had kept the chopped out metal to ensure these were in the correct place.
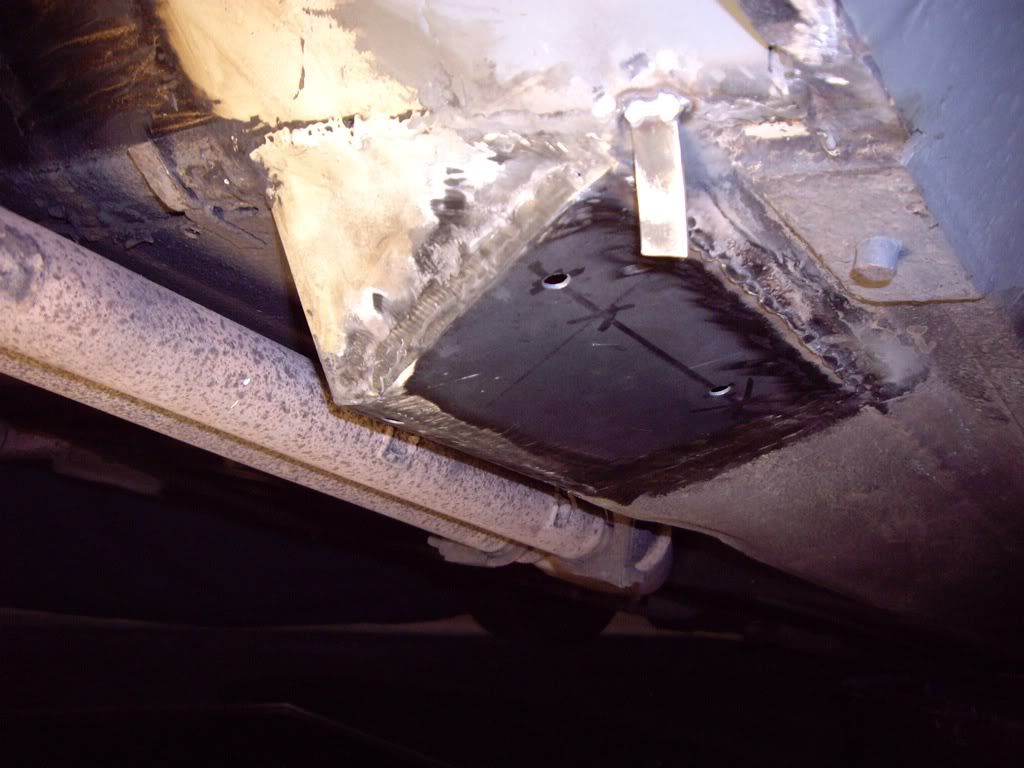
The metal is tacked first before being seam welded:
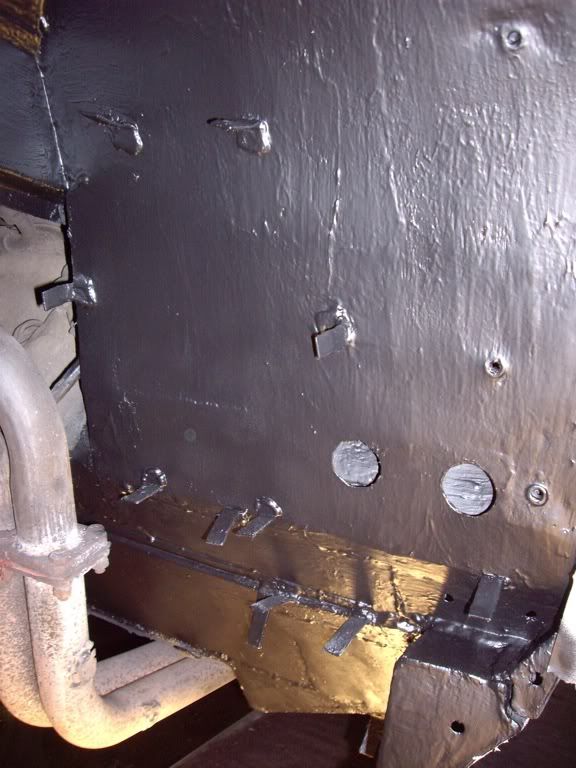
The bottom edge is bucket welded and then seam welded. All painted up, and the new metal tabs welded in for the heat shields:
You can see at the top I am busy putting a seam sealant on as well.
Last edited by jonc on Mon Feb 27, 2012 9:55 am; edited 2 times in total |
|
| Back to top |
|
|
jonc
Joined: 21 Sep 2010
Posts: 584
Location: Cheshire, UK
|
| Posted: Sun Feb 26, 2012 4:25 pm Post subject: |
|
|
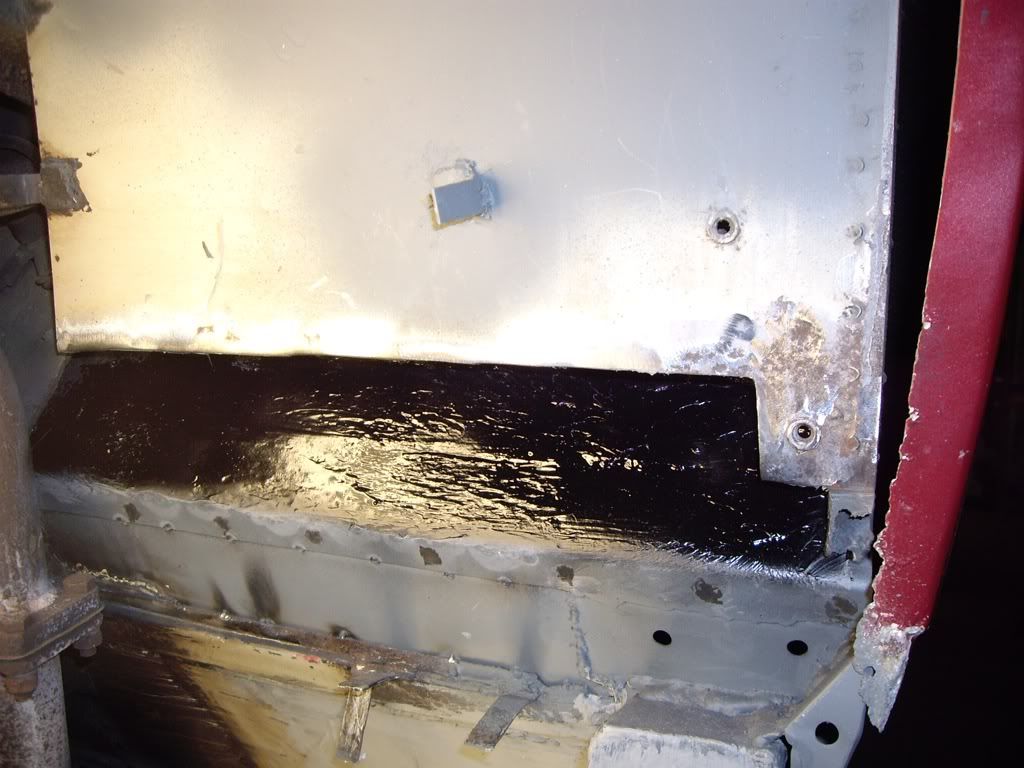
Instead of bitumen based underseal, I am using 'Wunderseal' which is a polymer based modern equivalent. It is painted on (after which you discard the brush). I could have used a schutz gun and a runnier product, but I wanted thick protection. You are supposed to be able to stipple the stuff, but I found this didn't really work. The result has brush strokes in it and I am not sure about the finish.
I then sprayed it with black stone-chip:
 |
|
| Back to top |
|
|
Lagondanet
Administrator

Joined: 03 Jan 2007
Posts: 3108
Location: UK
|
| Posted: Sun Feb 26, 2012 5:25 pm Post subject: |
|
|
| Jesus! Masterly! |
|
| Back to top |
|
|
Arnaud
Joined: 26 Oct 2010
Posts: 101
|
| Posted: Sun Feb 26, 2012 10:05 pm Post subject: |
|
|
| Really nice work ! |
|
| Back to top |
|
|
jonc
Joined: 21 Sep 2010
Posts: 584
Location: Cheshire, UK
|
| Posted: Mon Feb 27, 2012 9:48 am Post subject: |
|
|
Thanks for your comments.
I forgot to say why the car is like this. At some point, the rubber grommets which give access to the bonnet release have been removed and left out. Please check your cars!
Once out, water and mud from the road can get through the hole and settle in areas which are not well protected or well drained such as the top of the sill and the back of the wheel arch behind the two lower grommets. Once settled in, it rots the panel and allows water into another area - for example the foot well inside the car. There it can collect and work its way back through the floor and into whatever is underneath.
This job has taken me a while to complete, mostly because my workshop was not equipped for such things. I have invested in a professional MIG welder, panel beating hammers and dollies, cutters, grinders, an anvil, metal guillotine, welding blankets and various other essentials. And of course plenty of sheet steel and paint!
I have a renewed respect for people who do this sort of work. The process of 'restoration' metalwork repair is so much more time consuming than the 'MOT' patching I have done in the past. It takes far longer to properly shape and match a new piece of metal, and usually a repair is needed in an area where multiple panels meet - which means multiple repair pieces, fitted in the correct order to preserve the proper seams. |
|
| Back to top |
|
|
Vincent

Joined: 20 Nov 2007
Posts: 1055
Location: Belgium
|
| Posted: Mon Feb 27, 2012 10:10 am Post subject: |
|
|
Great job !
I'll post in another topic the other reason why the Lagondas rust...
_________________
Welcome to Paradise ! (FRONT 242)
https://www.youtube.com/watch?v=XS30BC3D5WM |
|
| Back to top |
|
|
jonc
Joined: 21 Sep 2010
Posts: 584
Location: Cheshire, UK
|
| Posted: Tue Feb 28, 2012 9:12 pm Post subject: |
|
|
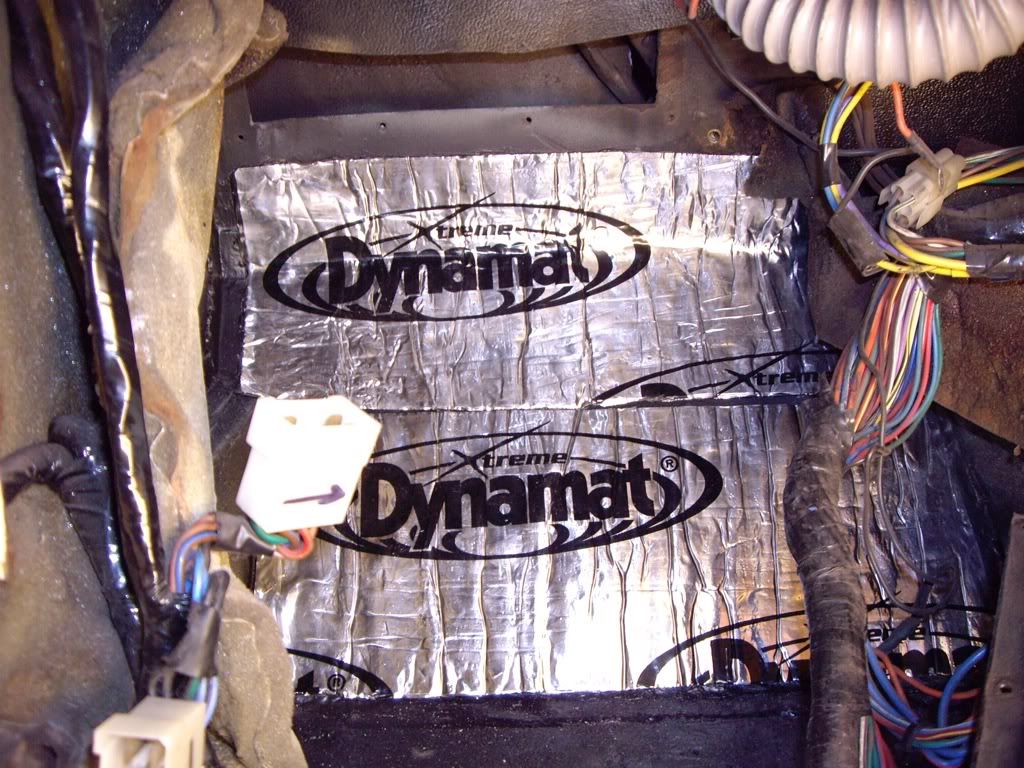
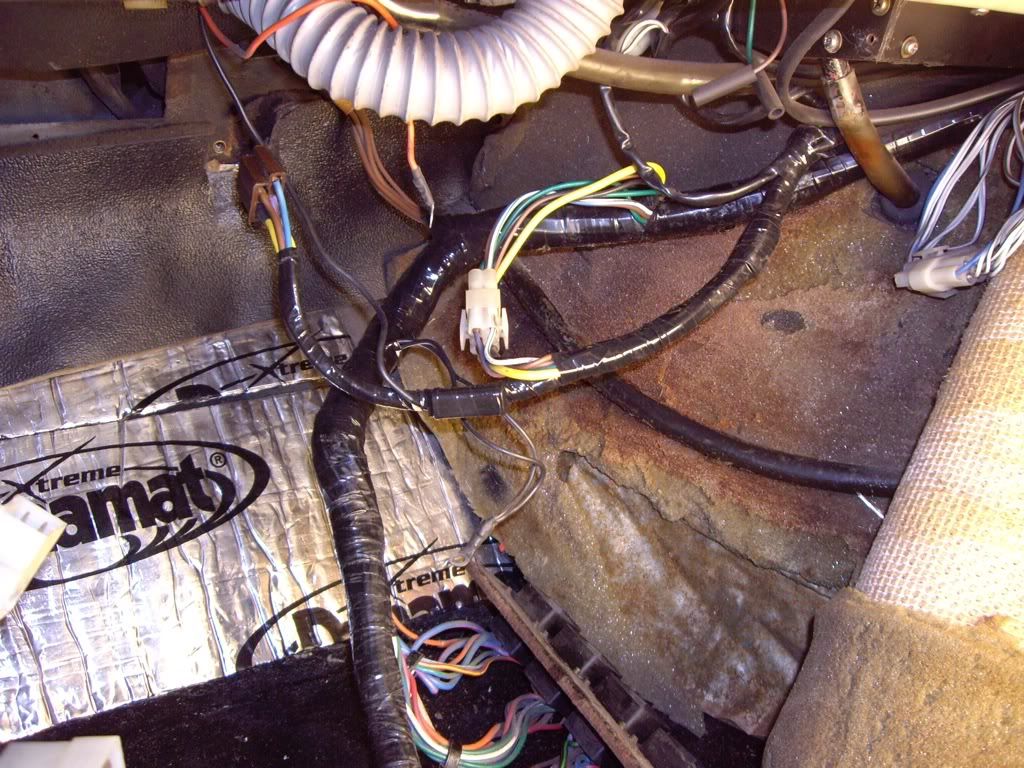
The foot well is made up of flat panels with a layer of foam/lead over them. I decided to put some proper sound deadening material over them. I am using Dynamat Xtreme which is a bitumen layer covered with aluminium foil with a fancy logo printed on it. It is a really soft bitumen but not messy because of the foil, and it does a good job.
I previously worked on the heater loom, and didn't have time to tape it up. Time to sort that and the main loom which has previously been attacked:
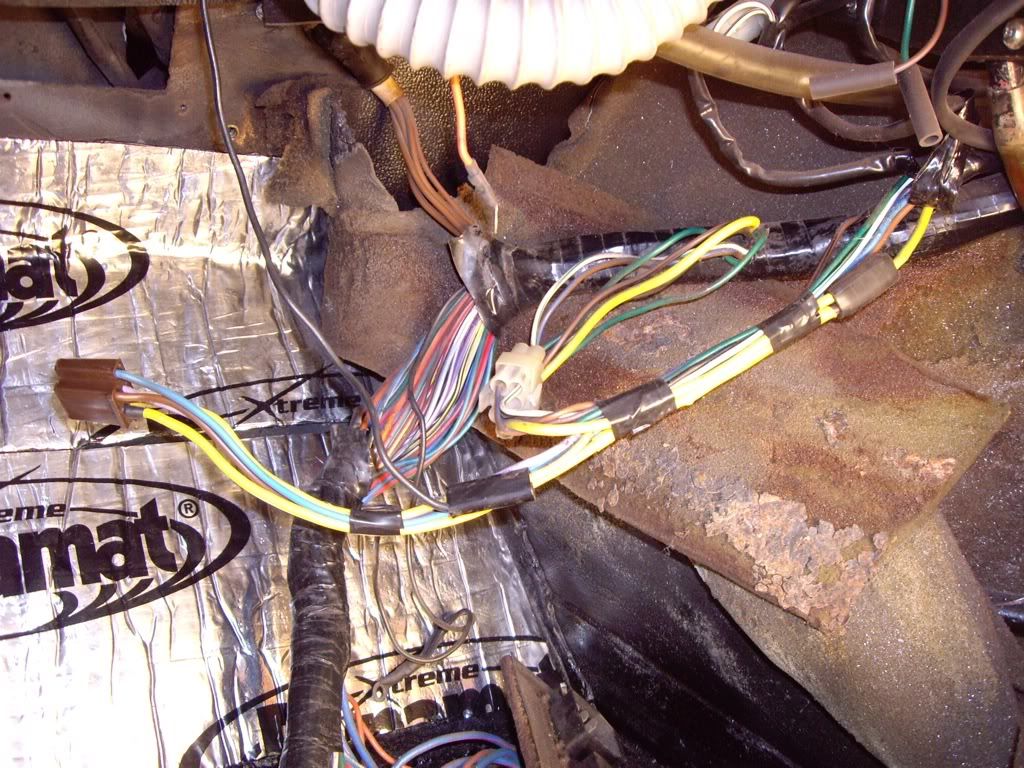
All tidy now:
 |
|
| Back to top |
|
|
jonc
Joined: 21 Sep 2010
Posts: 584
Location: Cheshire, UK
|
| Posted: Tue Feb 28, 2012 9:28 pm Post subject: |
|
|
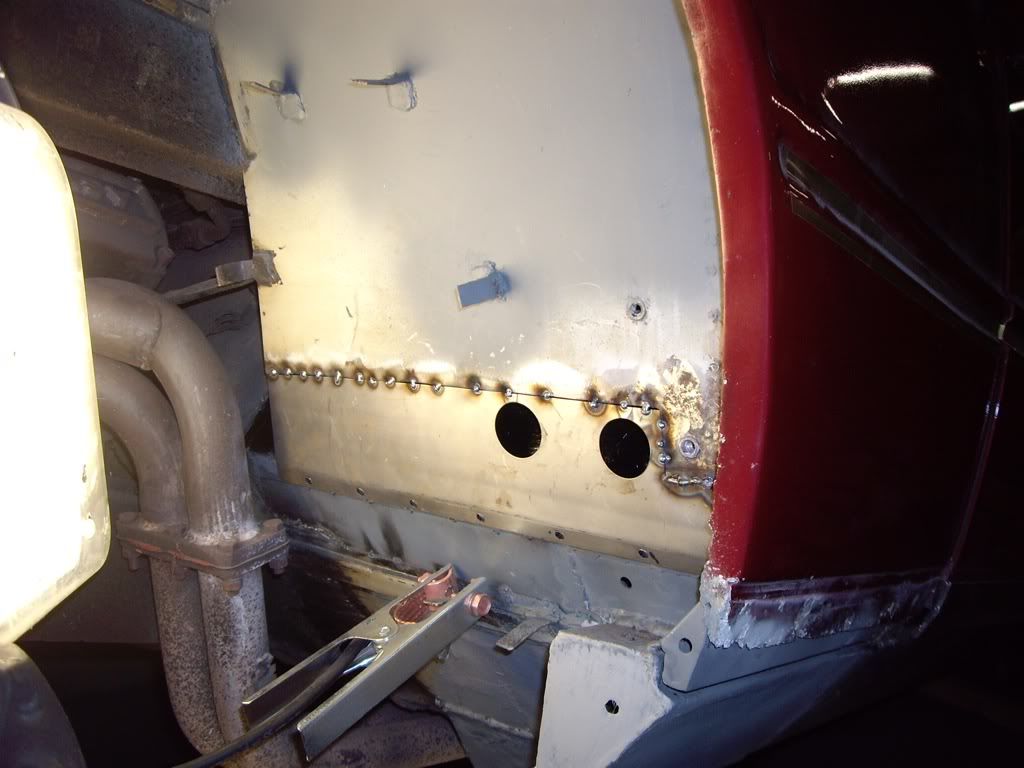
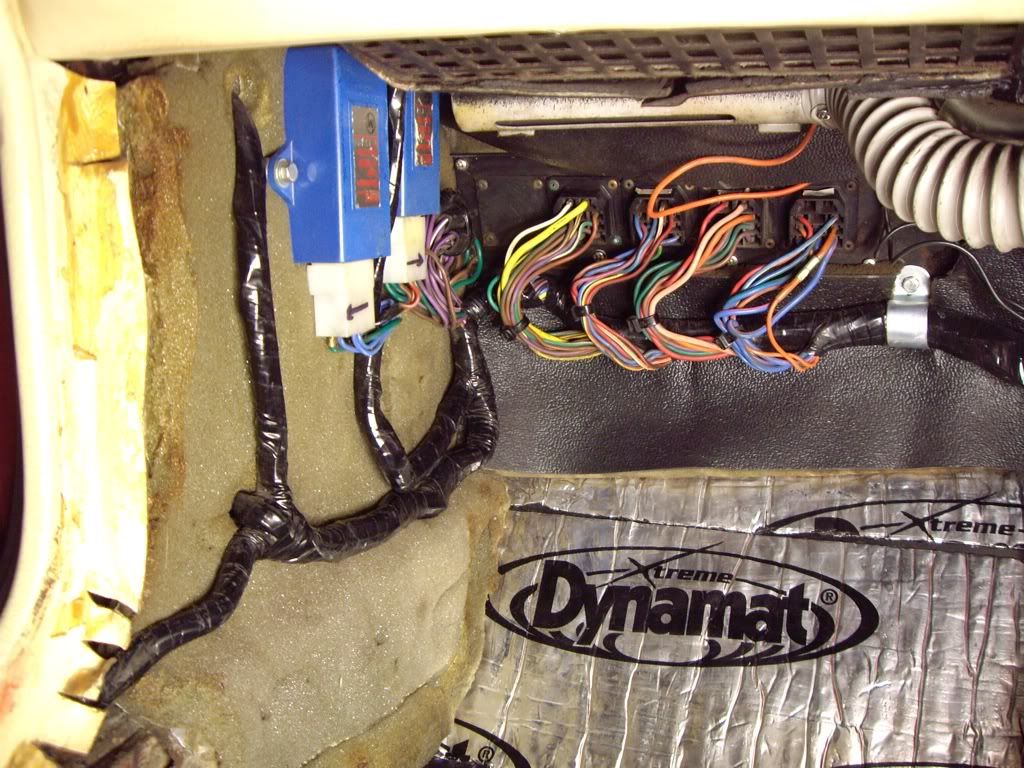
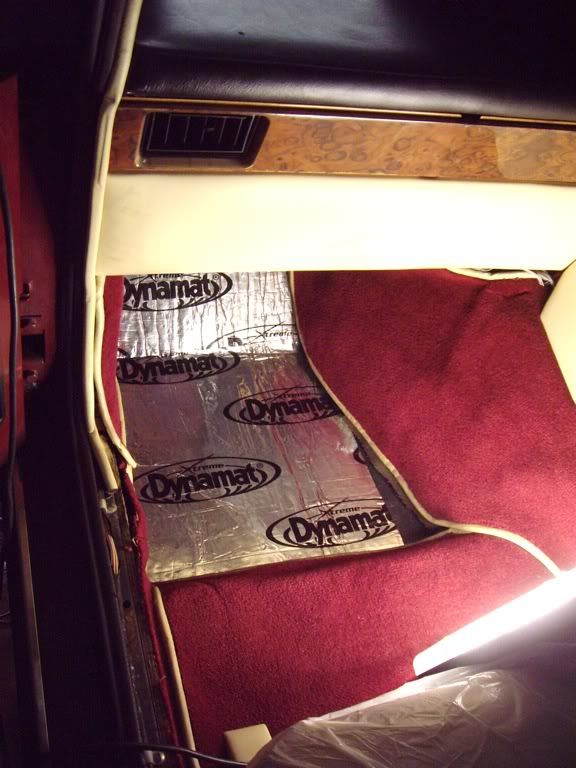
Now the bulkhead plugs can go back together. The loom from under the bonnet is fed through the hole into the car, and then the four plugs fit into the sockets on the panel. It is obvious which is which because of the wiring colours. The panel can then be screwed back into place, not forgetting the earth tags from the loom and the heater blower motor. The loom P clip can then be screwed back to the bulkhead. The the two blue boxes on the left are the sensor modules for the water levels in the radiator and washer bottle. The loom below them sits on a ledge on top of the inner sill and the loom snap connectors rest above it.
Did you spot the problem in the last photo? Fortunately I did before I got any further:
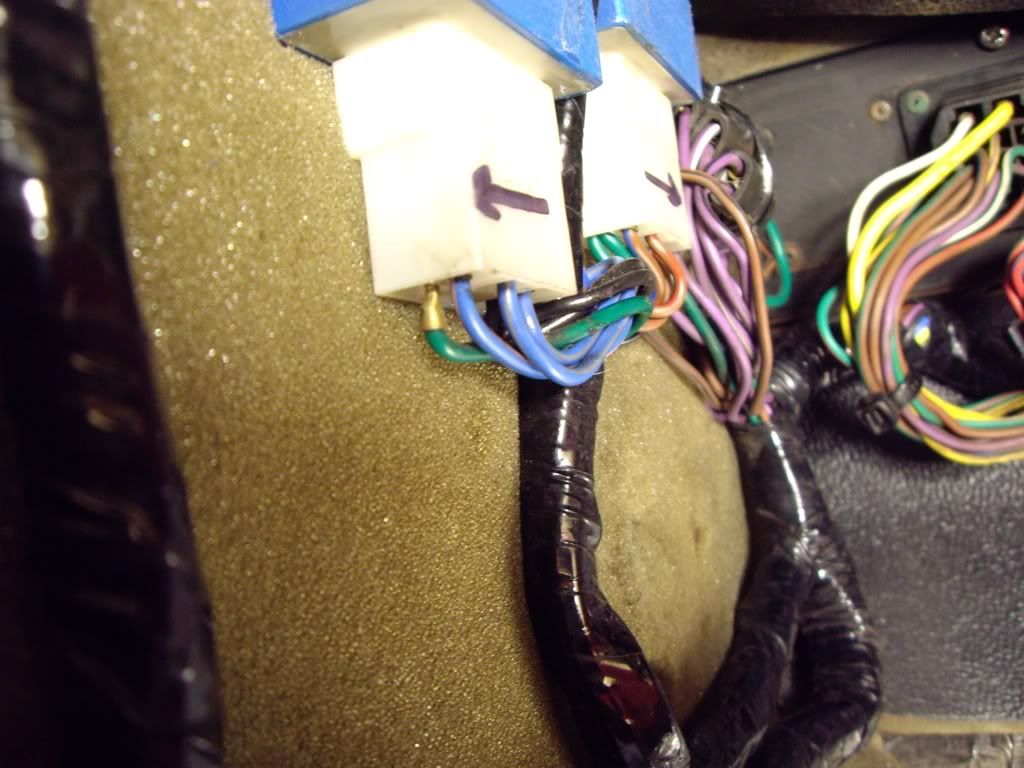
The crimp has pushed out of the connector housing when I reconnected the module. I pulled out the crimp and eased the integral clip out a bit so that when it is pushed back into the housing it 'clicks'.
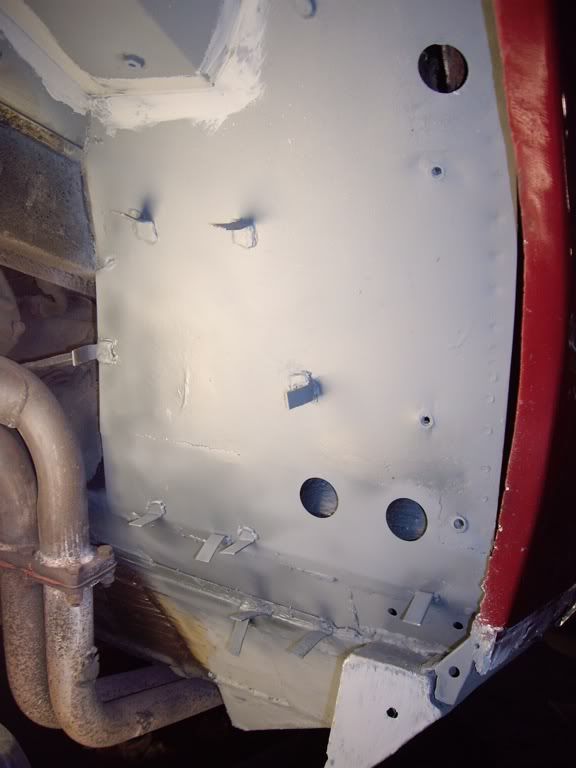
Next the aluminium panel is refitted. With the loom in the correct place, the panel sits flush with the blue modules:
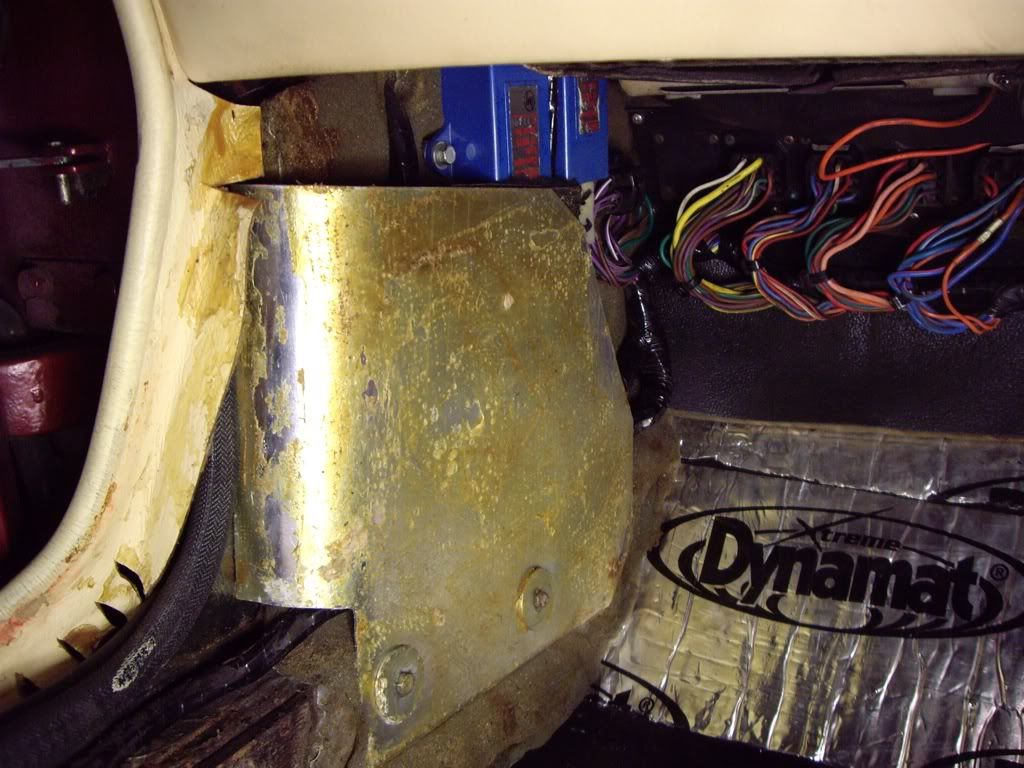
The door edge piping is glued on top of the aluminium panel and then the carpet glues on top of it. |
|
| Back to top |
|
|
jonc
Joined: 21 Sep 2010
Posts: 584
Location: Cheshire, UK
|
| Posted: Tue Feb 28, 2012 9:35 pm Post subject: |
|
|
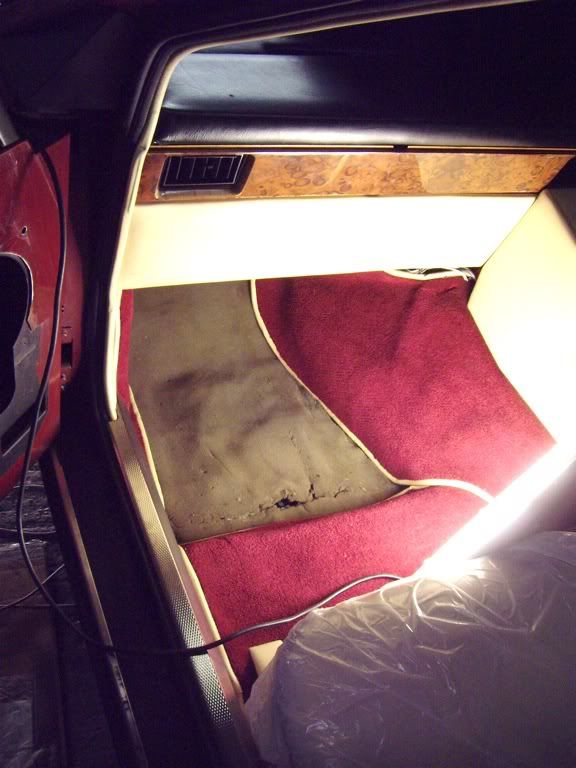
I had used up the last of my Dynamat and had ordered some more. I have removed any remaining surface rust and repainted the floor.
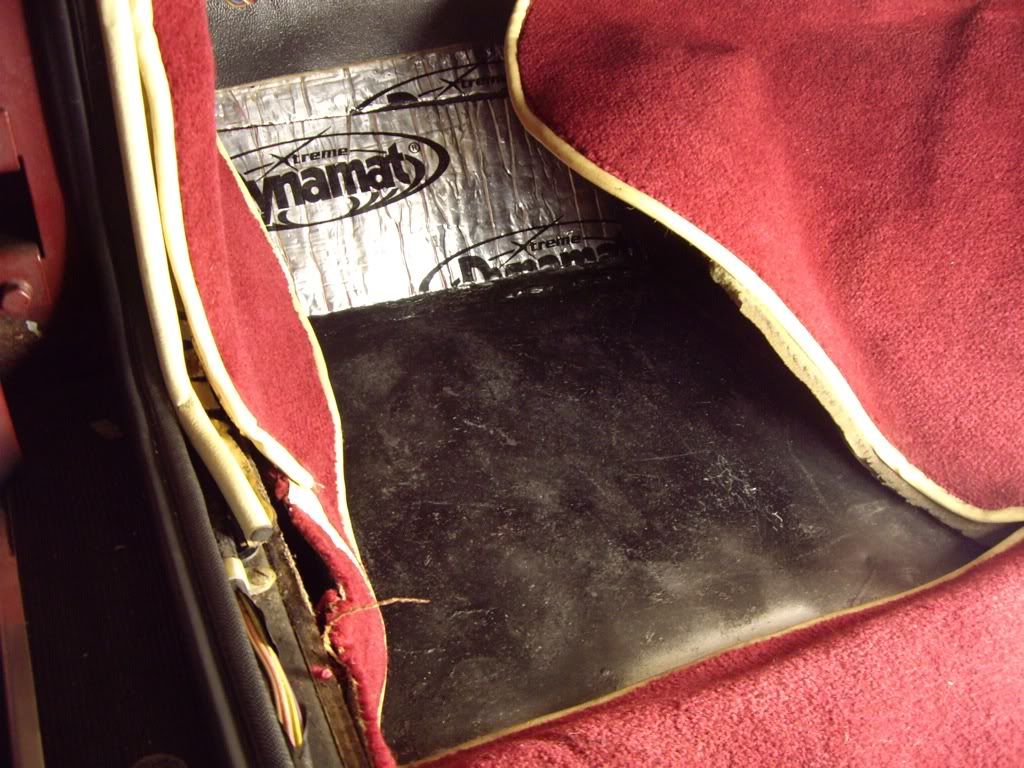
..so its time to fit the last piece. Cut it to size first, then peel the backing and put in place. Finally I roller it with a decorator's wallpaper edge roller:
Now the AML insulation and then stainless steel sill trim go back:
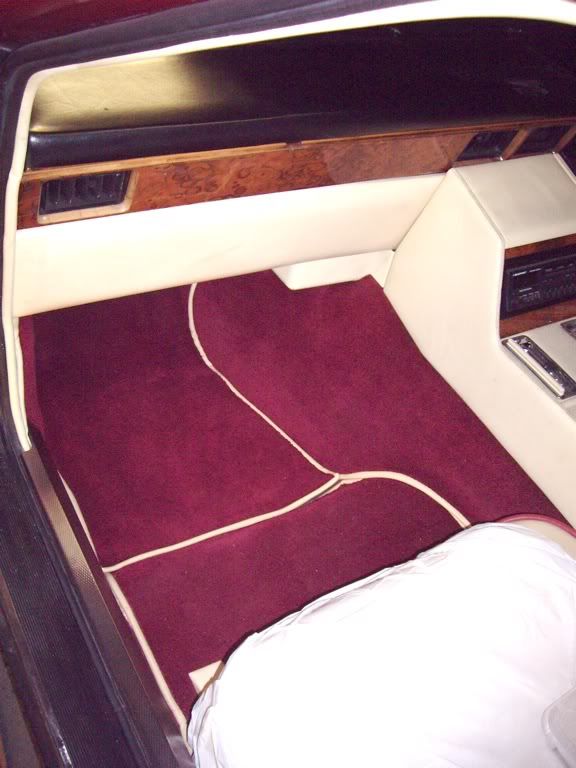
And finally the carpet. Each piece of carpet is separate, and has a piped edge, so I was never sure which went on top. I referred to my DB9 which still uses the same method and style of trimming. The floor mat sits on top so its piping is on show:
All done:
Just need to finish the outside.. |
|
| Back to top |
|
|
Lagondanet
Administrator
Joined: 03 Jan 2007
Posts: 3108
Location: UK
|
| Posted: Tue Feb 28, 2012 10:37 pm Post subject: |
|
|
| A mighty fine job! |
|
| Back to top |
|
|
Christoph
Joined: 19 Feb 2011
Posts: 51
|
| Posted: Tue Feb 28, 2012 10:40 pm Post subject: |
|
|
Wonderful!
Didn`t you say `this is not really a restauration`?
_________________
Christoph |
|
| Back to top |
|
|
jonc
Joined: 21 Sep 2010
Posts: 584
Location: Cheshire, UK
|
| Posted: Fri Mar 30, 2012 12:34 pm Post subject: |
|
|
..and I still don't think of it as a restoration! To me this is just a general tidy-up, but done properly 
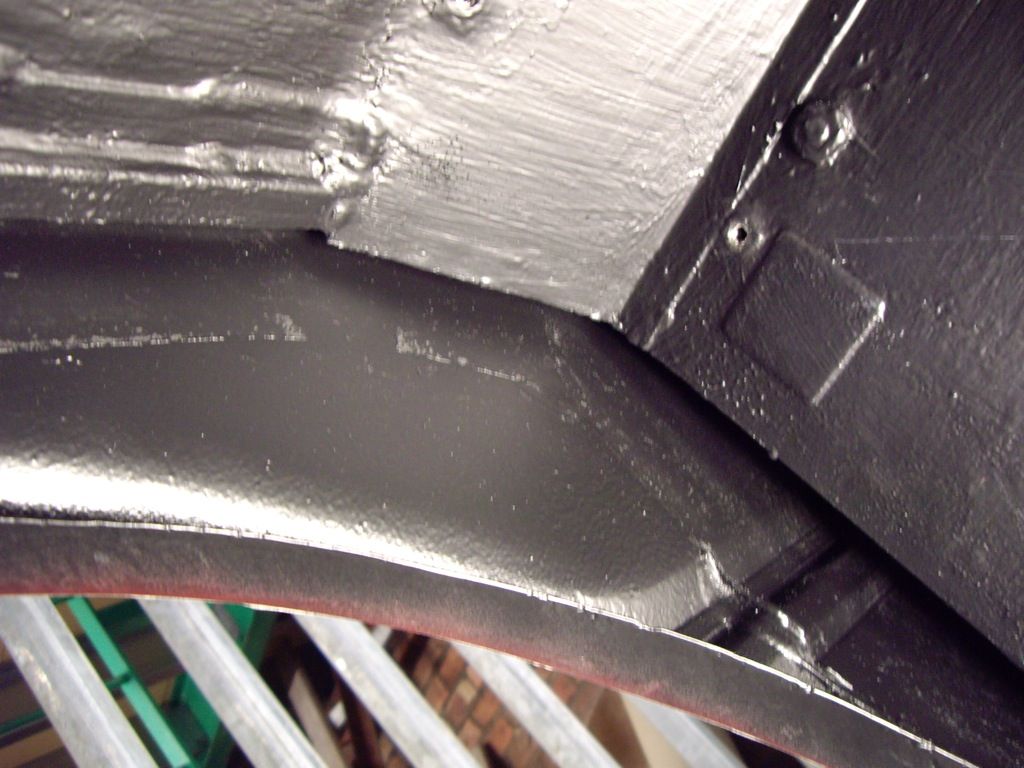
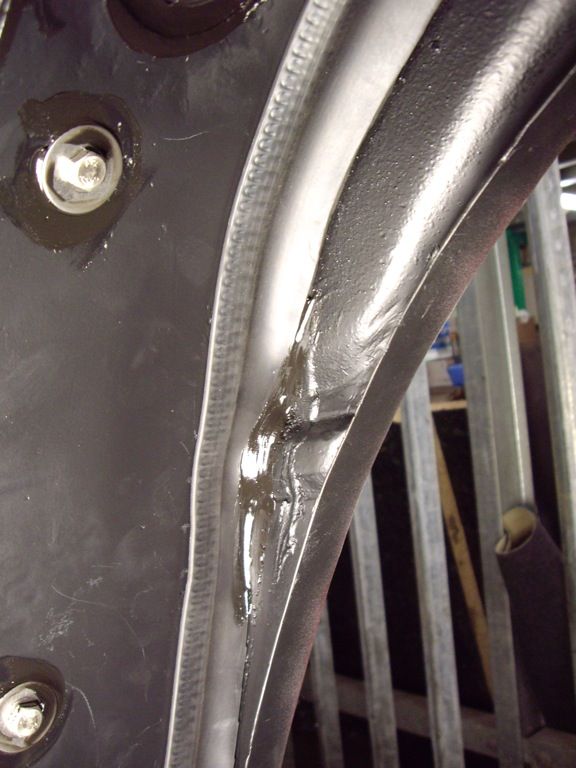
Right - the final push to finish the outside. I have put schutz gun applied stone chip on the sill and below it. I also had to make the front bracket to support the stainless steel trim which I made from stainless plate and riveted it onto the wing support. The wing is riveted back on too - also with stainless steel rivets and with canvas tape between it and the steel:
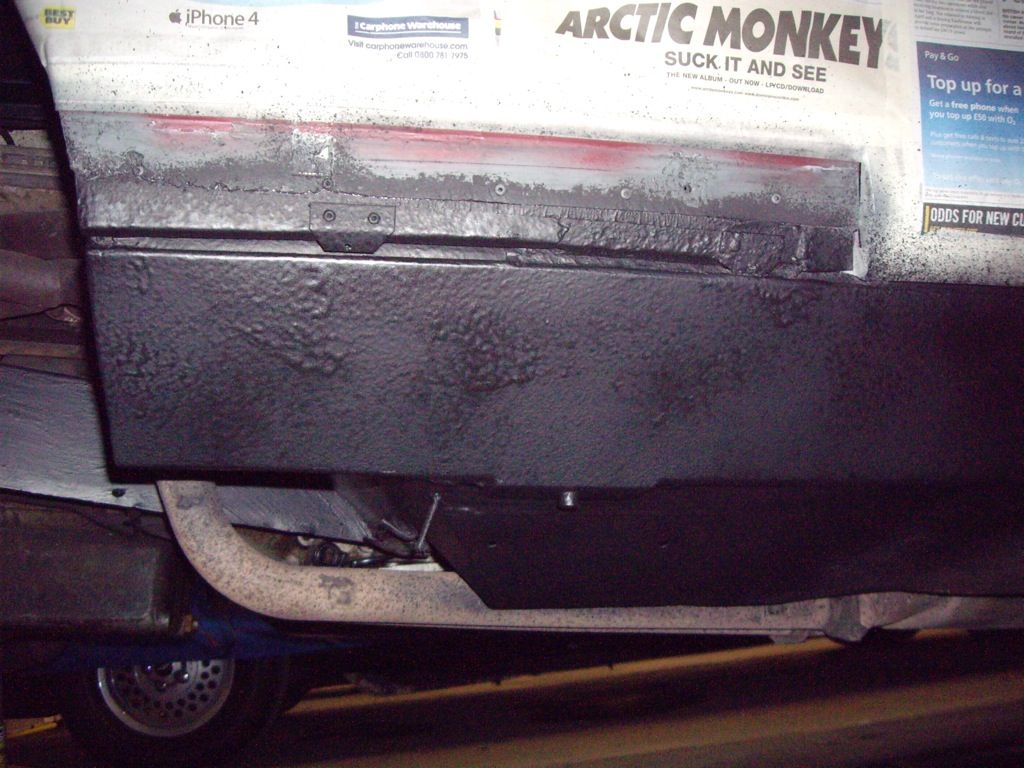
Now I am getting close to the waxoyl injection. However, I need to make sure everything is painted first. I need to clean the back of the wing and make sure the paint is good there. Here is the first bit cleaned, and it looks like the edge of the aluminium has no paint on it:

Once it is all cleaned, I paint it with stone chip. I have deliberately sprayed onto the wheel arch edge to give it protection too.
 |
|
| Back to top |
|
|
jonc
Joined: 21 Sep 2010
Posts: 584
Location: Cheshire, UK
|
| Posted: Fri Mar 30, 2012 12:42 pm Post subject: |
|
|
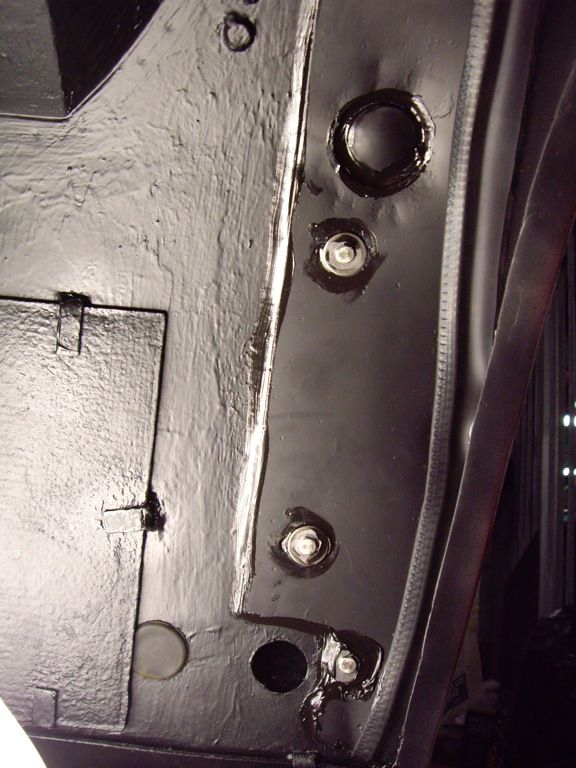
Next the waxoyl. This goes into all the box sections I left access to with my 8mm holes. I also do on top of the outer sill which I can access through the gap between the wing and the inner wing (which will be covered with the wheel arch liner). Then the plastic plugs can go in:

And now the wheel arch liners can go back. These are shaped pieces of aluminium sheet held in place with M6 screws and big washers. The seal to the wing is made with a rubber trim and the sheet is sealed to the inner wing with some sort of sealant (which was rock hard and brittle when it all came apart).
The liners have been cleaned to remove all the old sealant, the corrosion has been removed, and in a couple of places I have trimmed the edge slightly to clean it up. They are also getting new rubber trim as the old stuff is quite hard, and the embedded steel which helps it grip the liner is rusty and mostly gone.
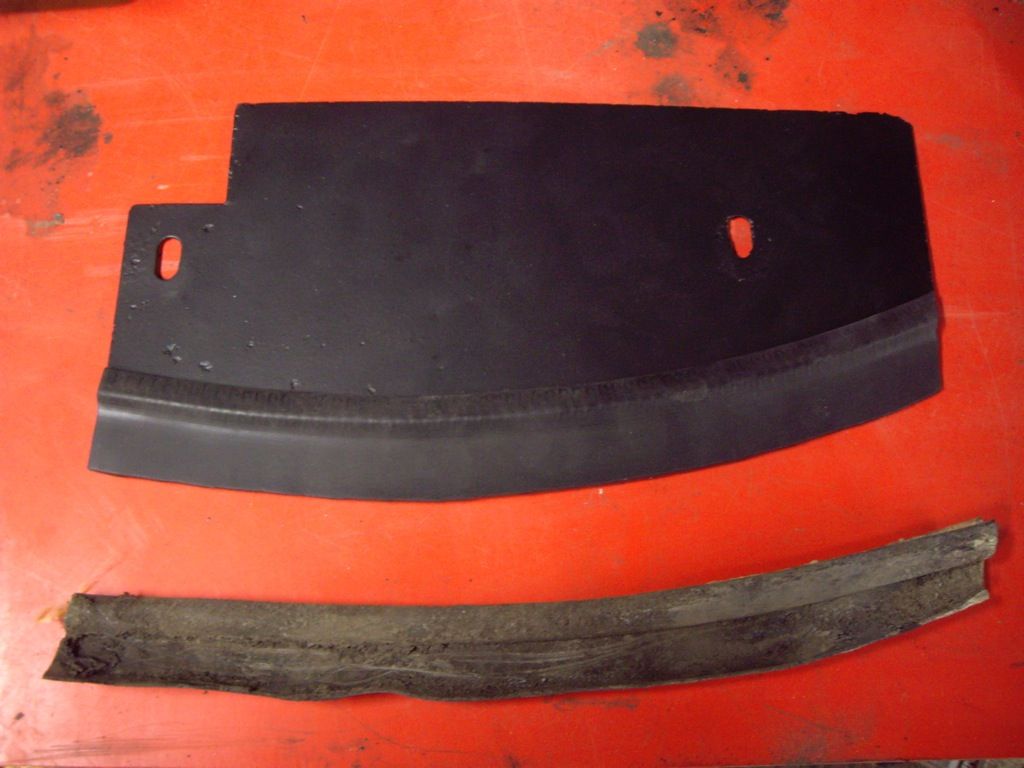
I am fitting with new stainless steel screws and washers as they are quite vulnerable and likely to rust.
 |
|
| Back to top |
|
|
jonc
Joined: 21 Sep 2010
Posts: 584
Location: Cheshire, UK
|
| Posted: Fri Mar 30, 2012 12:49 pm Post subject: |
|
|
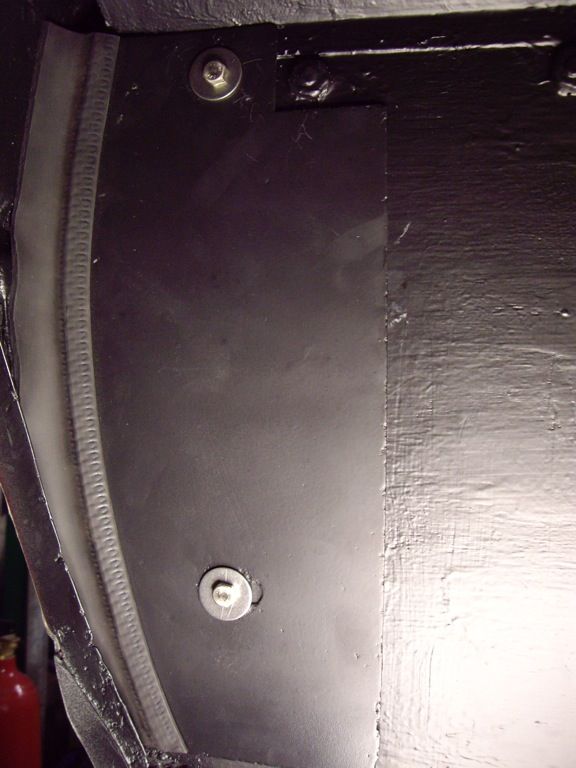
There are a few places where the sealant is quite important. This is one of them:
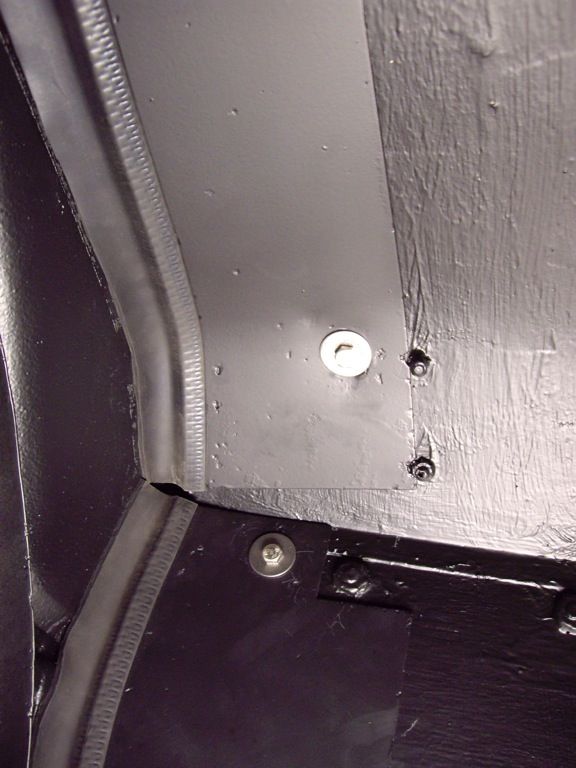
The sealant I am using is from Car Builder Solutions. It is imaginatively called 'Black Polyurethane Adhesive/Sealant'.
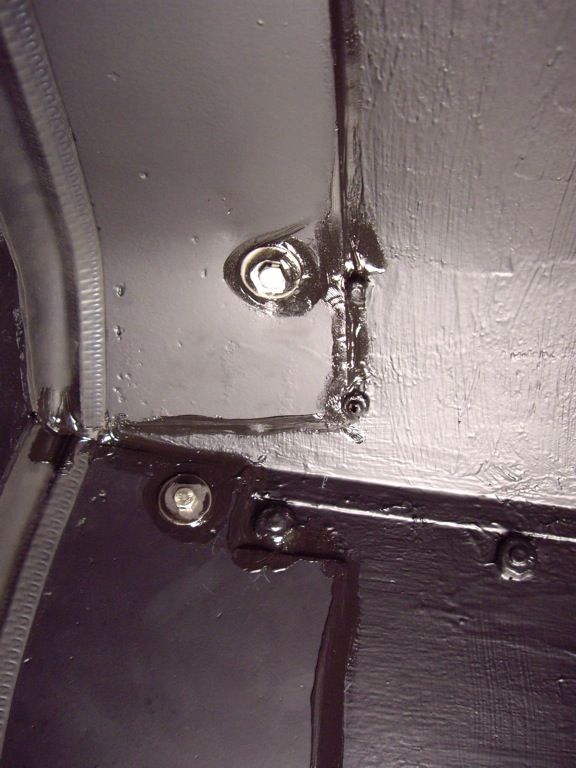
There are only a few places where the trim needs sealing to the outer wing. These are where the swage lines are:
I have sealed all around the edge of the liner where it meets the inner wing, and around the screws and washers. The heat shields are back in place, as are the grommets, including the missing one for the bonnet release:
 |
|
| Back to top |
|
|
|