 |
LagondaNet
|
| View previous topic :: View next topic |
| Author |
Message |
jonc
Joined: 21 Sep 2010
Posts: 584
Location: Cheshire, UK
|
 Posted: Fri Jun 29, 2012 8:00 pm Post subject: 13379 Posted: Fri Jun 29, 2012 8:00 pm Post subject: 13379 |
 |
|
Ok. This one isn't a restoration either!
It's time for my first MOT on 13379. Rules have changed and I know it will fail on the ball joint gaters. Time to replace them:
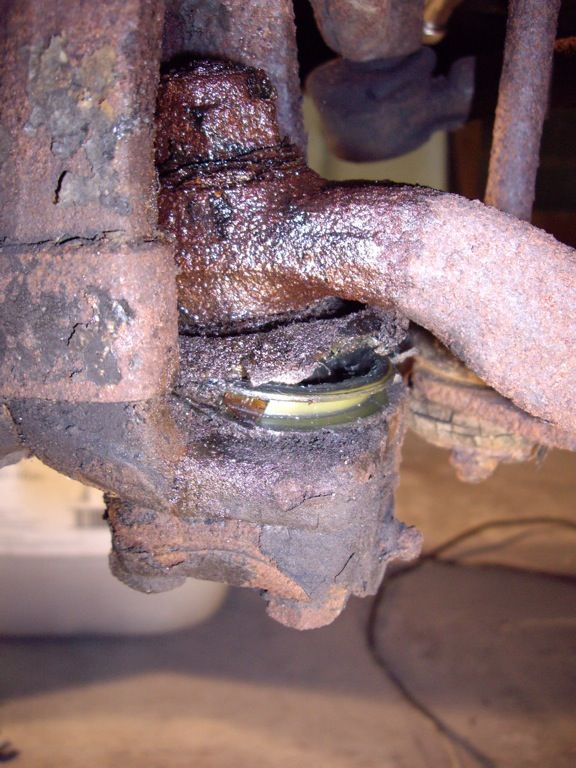
In anticipation of this, I have collected a few additional tools - ball joint splitter, locking wire and pliers, plus the parts I will need.
First, the caliper and hub with disc come off. I have clamped the brake hose here to stop the fluid going everywhere as you have to disconnect the brake pipe behind the caliper from the flexible hose to do the job properly.
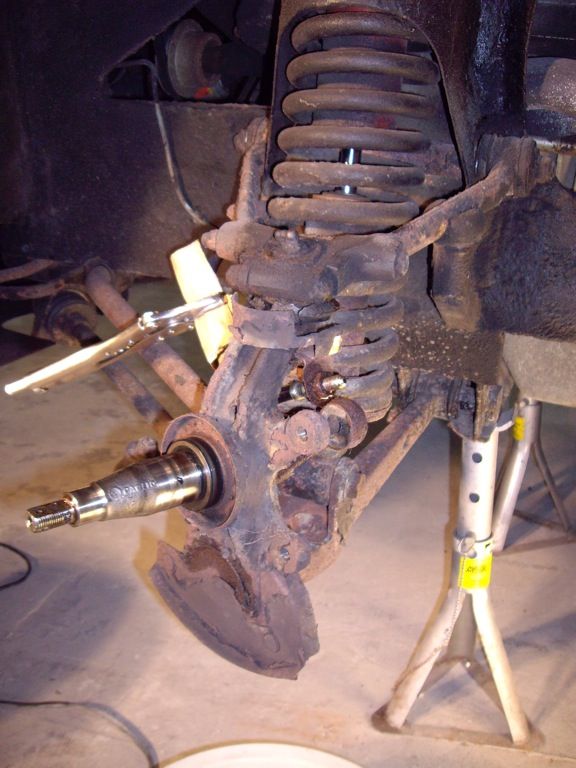 |
|
| Back to top |
|
 |
jonc
Joined: 21 Sep 2010
Posts: 584
Location: Cheshire, UK
|
 Posted: Fri Jun 29, 2012 8:20 pm Post subject: Posted: Fri Jun 29, 2012 8:20 pm Post subject: |
 |
|
Of the two ball joints, the top one is the smaller and is easier to separate, and the track rod end is even easier. I did the track rod end first, then the top, and that then gave the best access to the bottom.
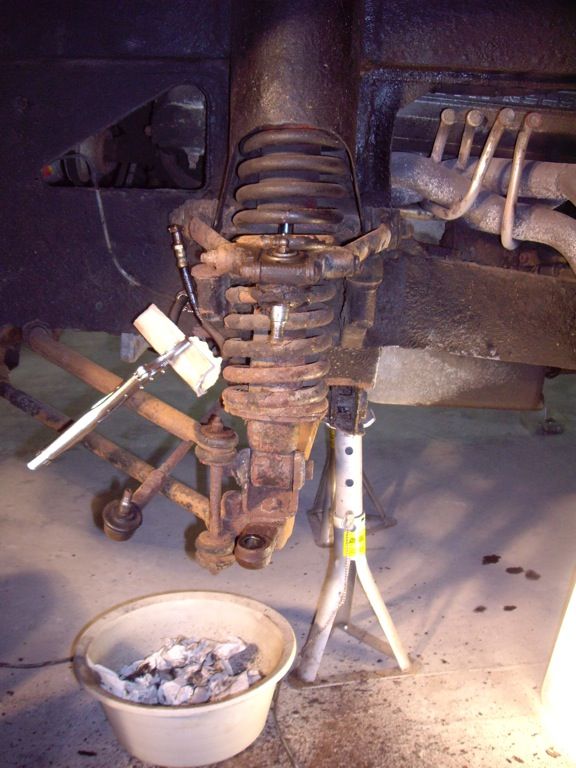
I decided to give it all a clean, de-rust and a paint as it was a bit crusty.
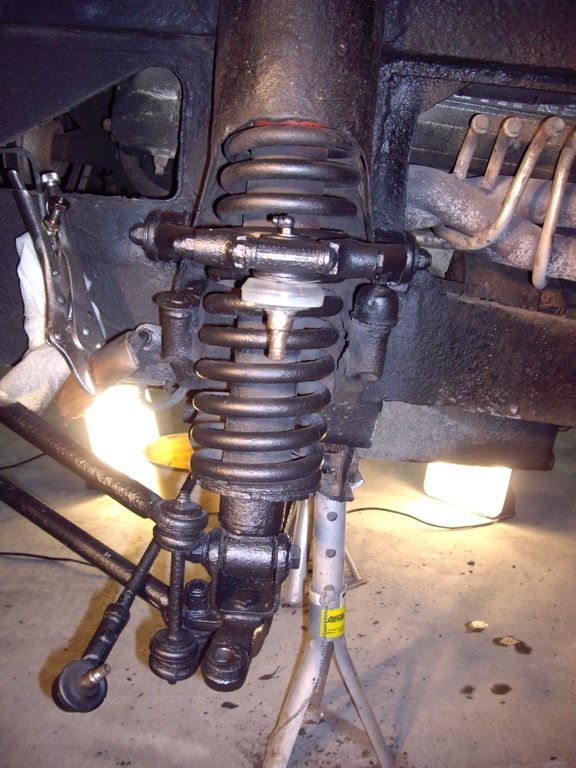
The top ball joint has had the remains of the old gater removed, and it has been cleaned and regreased before the new gater was fitted. These are Jaguar parts and I bought the gaters and their retaining clips. I couldn't work out how the retaining clips worked - they are a thick stainless steel wire and I thought they would twist together at the end. The wire was so hard that this didn't work so I used wire-lock wire - two complete loops and then twisted with the pliers. |
|
| Back to top |
|
 |
jonc
Joined: 21 Sep 2010
Posts: 584
Location: Cheshire, UK
|
 Posted: Sat Jun 30, 2012 9:49 am Post subject: Posted: Sat Jun 30, 2012 9:49 am Post subject: |
 |
|
Bottom ball joint is attached to the vertical link. Did the same with this; the bottom joint can be adjusted by shims but there was no need for adjustment on this low mileage car. Despite the joint being unprotected due to the split gater, it was perfect inside (like the top one).
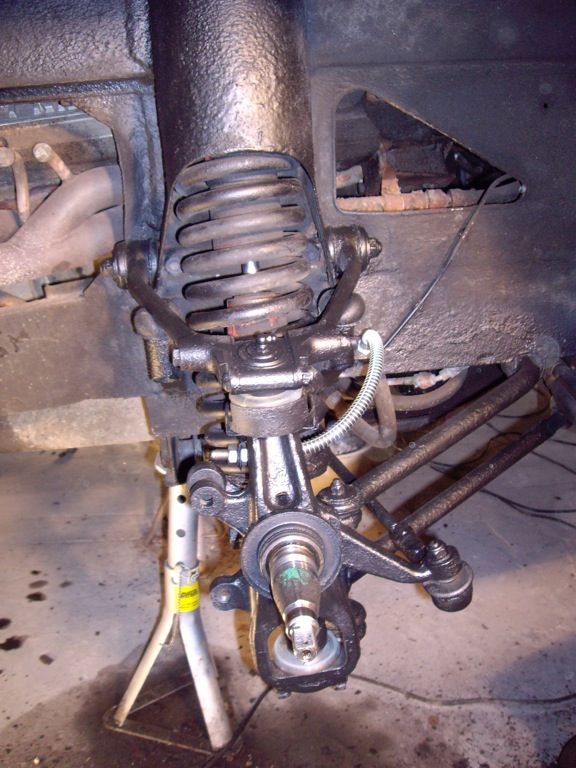
Second side was done exactly the same. I found the securing nut on the flexible hose was seized on this side and had to be cut off. I decided to replace the hoses (and nuts, which are M10 fine).
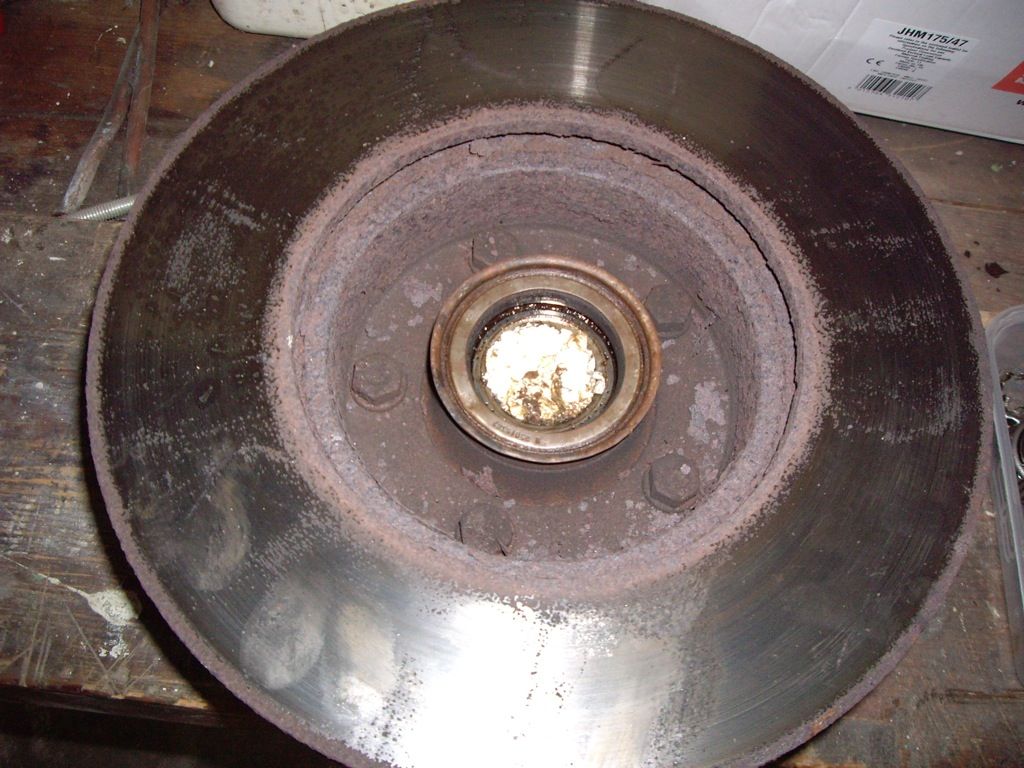
The car was also suffering from some braking unevenness which was due to pitting on the inside of the discs. Its a shame since the discs and pads were basically unworn.
 |
|
| Back to top |
|
 |
jonc
Joined: 21 Sep 2010
Posts: 584
Location: Cheshire, UK
|
 Posted: Sat Jun 30, 2012 9:55 am Post subject: Posted: Sat Jun 30, 2012 9:55 am Post subject: |
 |
|
The calipers were pretty much as new. They even have their cadmium plating on most of them still.
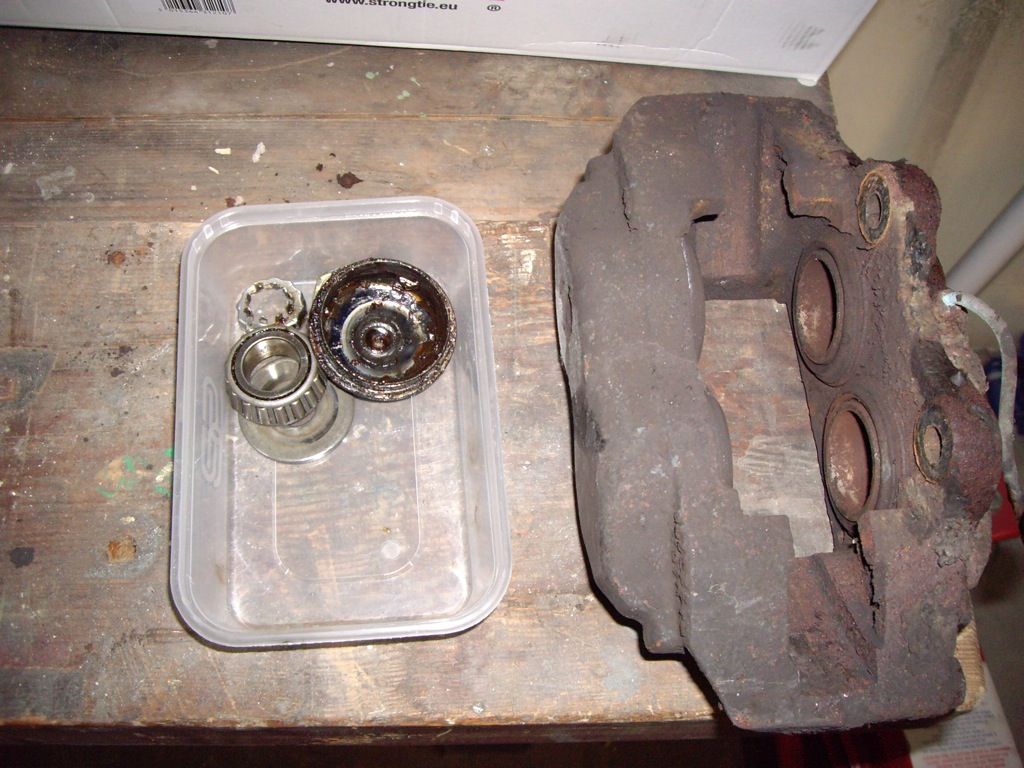
They were given a fresh coat of paint (zinc rich primer with a thin coat of black stone-chip on top) and it all went back together with new discs, pads and pin kit:
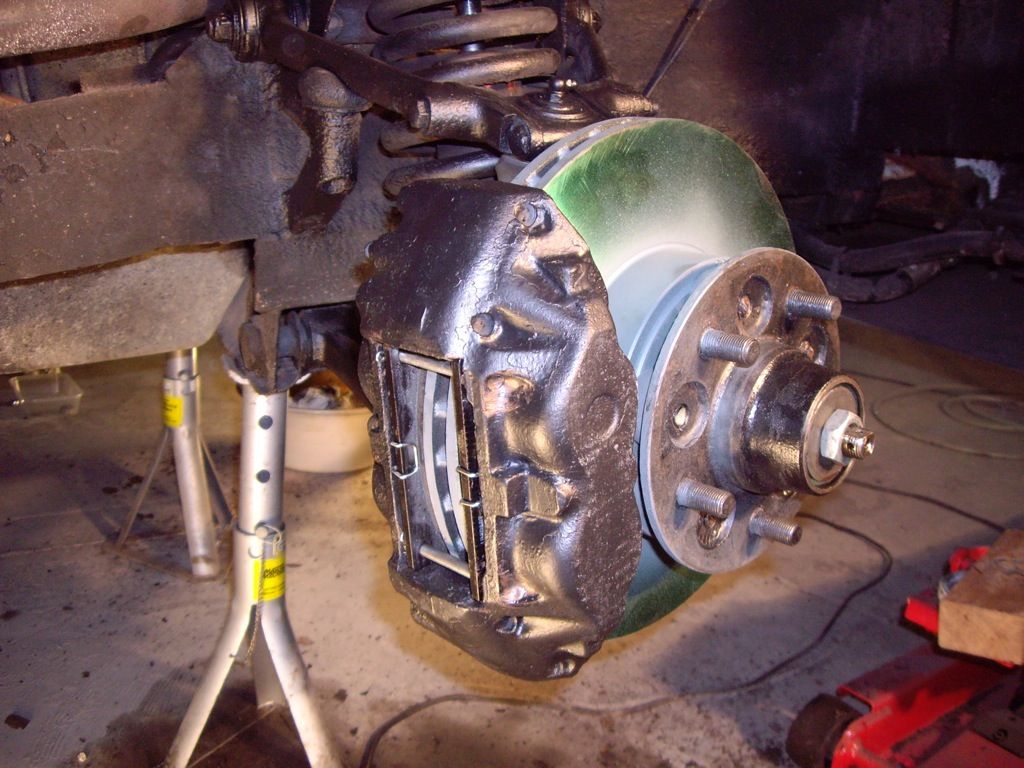
I also put the zinc primer on the discs on the bits which usually rust. The primer has a high temperature resistance so I am hoping it will stay on.
Brakes were blead and I flushed through the fluid so the front has all clean new fluid in it. Final step was to adjust the wheel bearings which you do with the wheels fitted.
The car went for its MOT and passed with no advisories. |
|
| Back to top |
|
 |
jonc
Joined: 21 Sep 2010
Posts: 584
Location: Cheshire, UK
|
 Posted: Sat Jun 30, 2012 12:21 pm Post subject: Posted: Sat Jun 30, 2012 12:21 pm Post subject: |
 |
|
I have found that the heater fan has been a bit intermittent so I have finally got round to looking at this. I thought this was caused by the engine temp switch, which only allows the fan to operate when the engine warms up (unless the cabin is really hot) but moving the heater control fully to the right for defrost should override this.. which it didn't.
First I checked the engine temp switch anyway. This has been bypassed with a ground wire plugged into it. So, I tested the connection at the heater switch. It should show continuity to ground but it seemed a bit intermittent. I sprayed the contacts with DeoxIT D5 but this made no difference so I removed the crimp from the plug to check it:
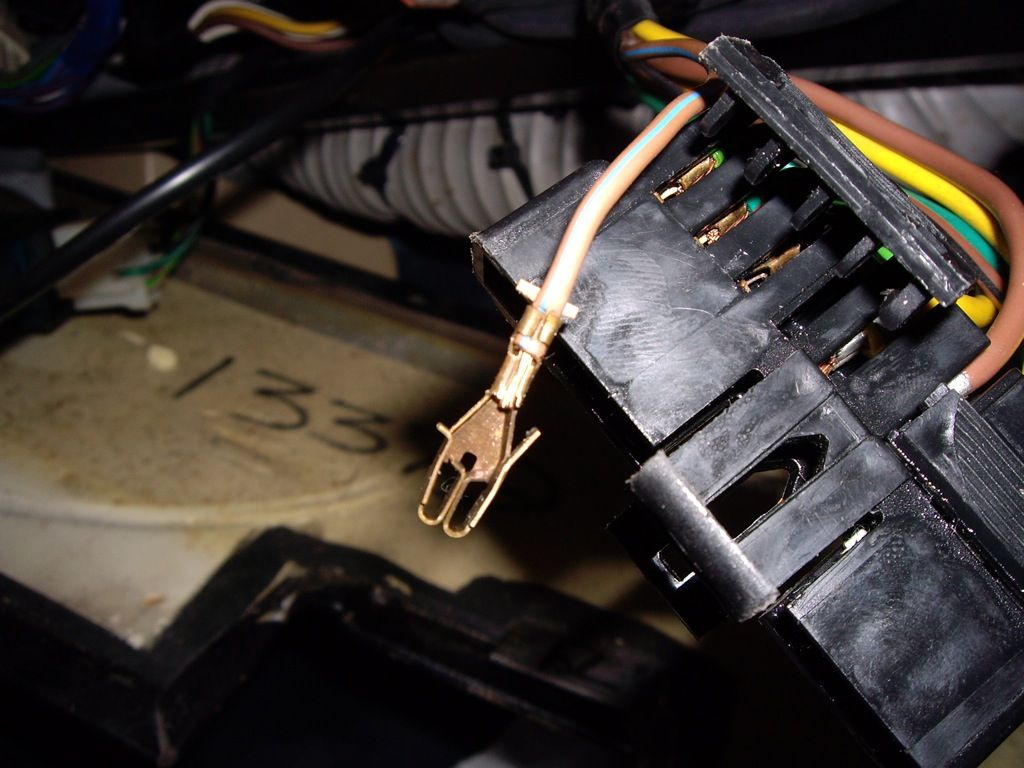
It is not that obvious, but it has not been crimped properly! I recrimped it and the connection was good and it showed continuity to ground.
You should be able to see the difference here:
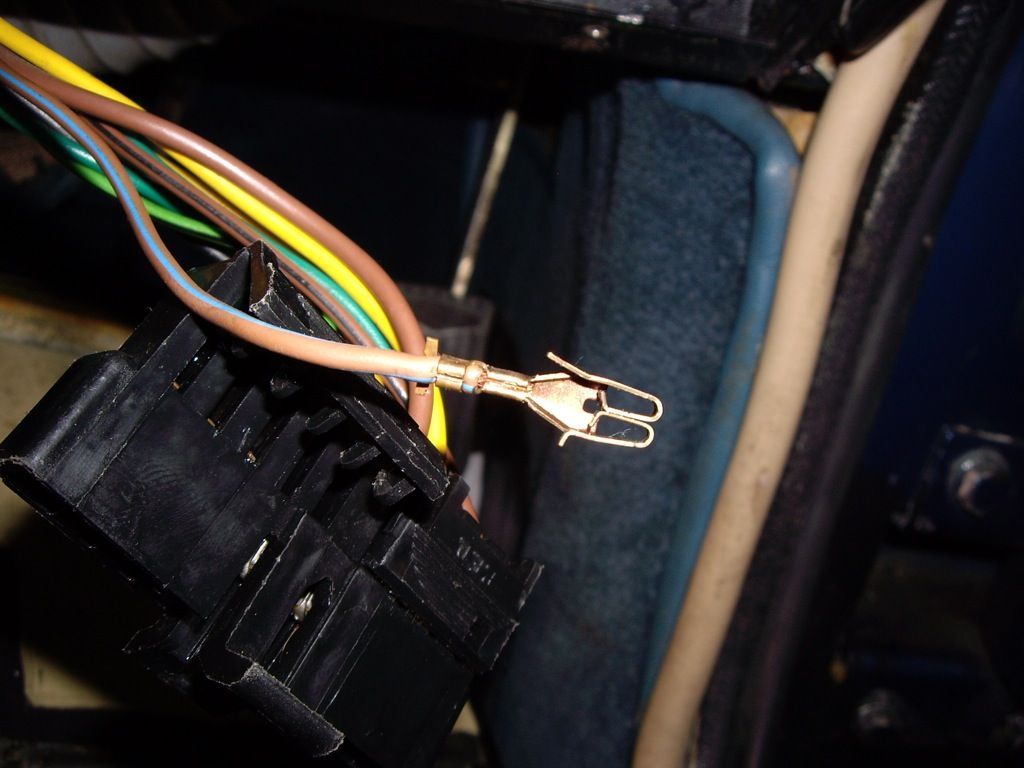
I plugged the connector back in and checked the fan again. Nothing. Except that when moving the plug back and forth I could hear a click from behind the dash - another bad connection.
I checked all the crimps and found that all the small gauge wires were badly crimped. I suspect that whoever made the loom had used the larger crimp tool (which was for the fatter wires) for all the crimps. All the small ones needed to be recrimped. I refitted the plug and tested again -and again nothing.
Consulting the wiring diagram showed that fuse 10 under the bonnet feeds the fan relay (which is what the engine temp switch/cabin temp switch/defrost switch operate), and that if the relay is energised, there will be power on the yellow wire in the aircon loom at the bullet connector where it splits to feed the heater control and heater 'brain'. I tested at the fuse (ok) and at the bullet (not ok). So, this meant either the relay was not operating, or was faulty.
The relay is inside the under-bonnet fusebox with a bunch of other relays. To get at it, you have to remove the top panel with the fuse boxes. It is the bottom one nearest the wing, removed here:
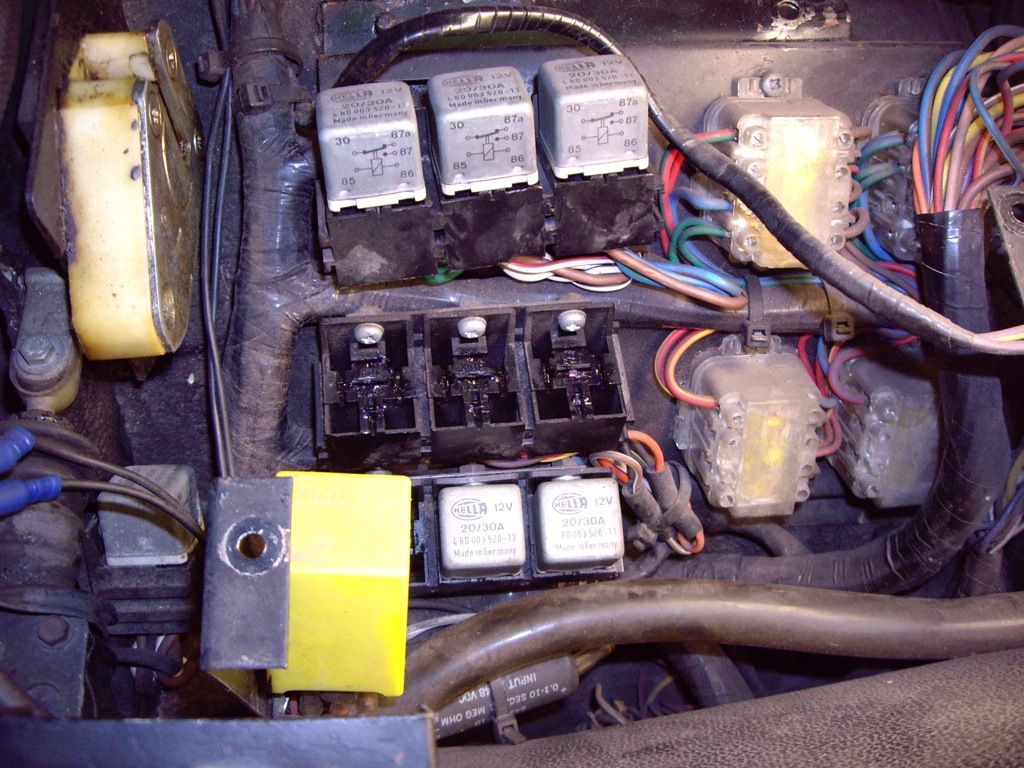
So, with the relay removed, I checked power in from the fuse (ok), ground from the temp and defrost switches to the relay coil (ok), and permanent power feed to the other side of the relay coil (ok).
Last edited by jonc on Sat Jun 30, 2012 12:42 pm; edited 1 time in total |
|
| Back to top |
|
 |
jonc
Joined: 21 Sep 2010
Posts: 584
Location: Cheshire, UK
|
 Posted: Sat Jun 30, 2012 12:33 pm Post subject: Posted: Sat Jun 30, 2012 12:33 pm Post subject: |
 |
|
How odd. If the relay coil has 12V then it should operate, and if there is a power feed to the relay switch, then the fan should operate too. So, it must be a faulty relay. But, I recently removed all relays, cleaned their contacts and put them back in with contact lube, and I bet they didn't go back in the same order..
I have a replacement relay with a removable cover so I can operate it manually. I dug this out and plugged it in. When I manually operated the contacts, the fan came on. But, when it should have been energised, it wasn't..
I checked the voltage across the relay coil and found it was zero. So.. 12V when it was not plugged in, zero when it was. This would indicate significant resistance in the relay coil power feed.
I looked at my wiring diagram and the coil feed comes from another relay - the heated front glass one on the next row up. Except that my wiring diagram is wrong in this case - there was a change from MY82 to MY83 and the feed now comes via a timer - its the black cylindrical thing at the bottom of the picture above, underneath the drain tube.
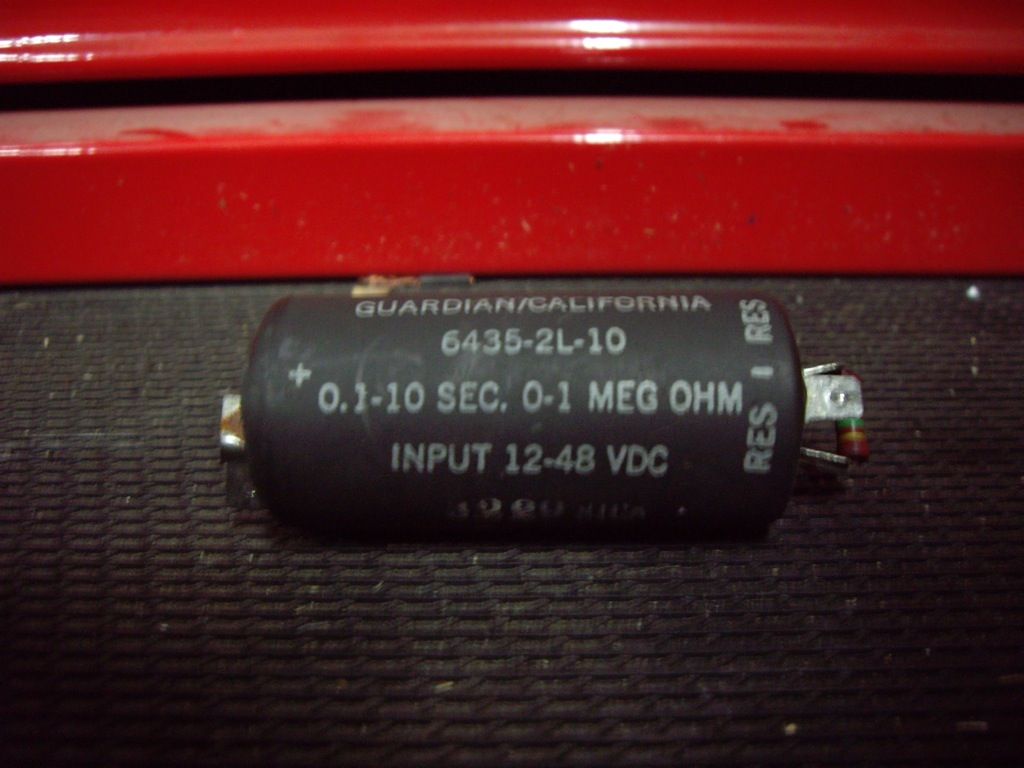 |
|
| Back to top |
|
 |
jonc
Joined: 21 Sep 2010
Posts: 584
Location: Cheshire, UK
|
 Posted: Sat Jun 30, 2012 12:39 pm Post subject: Posted: Sat Jun 30, 2012 12:39 pm Post subject: |
 |
|
When I removed it, I found that one of the contacts was loose. In fact it fell off. Here is the unit dismantled, which I did by cutting the outer plastic tube, which is a piece of heat-shrink:
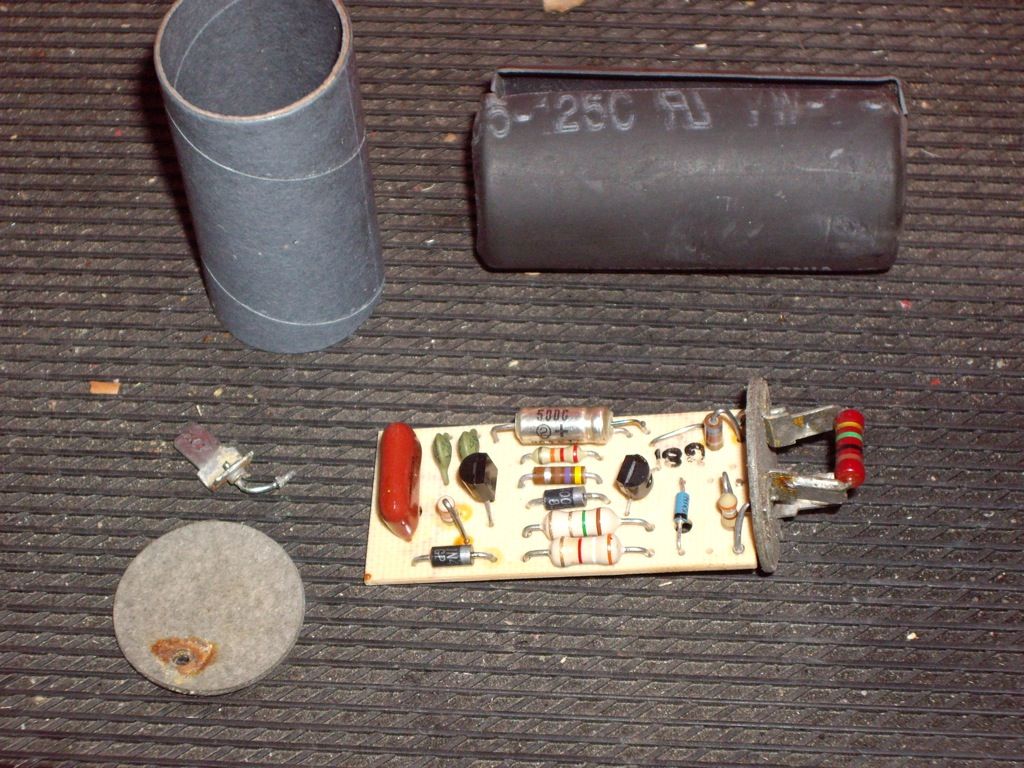
It is a small circuit board inside a cardboard tube, with cardboard ends, all held together with heat-shrink.
I re-soldered all the outside joints, secured them with contact adhesive for good measure, and put it back together. I glued the outer plastic tubing back in place so it looks the same. It is marked with a (+) at one end and a (-) at the other. These go with the (-) to the single wire (which goes to the relay) and the (+) to the double one (which is the power feed).
All back together and the fan now works  |
|
| Back to top |
|
 |
Lagondanet
Administrator

Joined: 03 Jan 2007
Posts: 3110
Location: UK
|
 Posted: Sat Jun 30, 2012 1:26 pm Post subject: Posted: Sat Jun 30, 2012 1:26 pm Post subject: |
 |
|
Jonathan
Brilliant as usual!
 |
|
| Back to top |
|
 |
jonc
Joined: 21 Sep 2010
Posts: 584
Location: Cheshire, UK
|
 Posted: Sat Jun 30, 2012 7:22 pm Post subject: Posted: Sat Jun 30, 2012 7:22 pm Post subject: |
 |
|
Thanks Roger.
I forgot to say - it is worth having new nyloc nuts for the ball joints and track rod ends. Ball joints were UNF - 1/2" and 9/16" and the track rod end was M10 fine. I also found that a UNF thread file worked wonders on cleaning up the threads prior to reassembly.
Also, the grease for the ball joints is different to the hubs. Ball joints get a moly grease and the hub bearings were cleaned, inspected and repacked with LM grease.
All this instruction and you will be able to these jobs yourself Roger! |
|
| Back to top |
|
 |
david
Joined: 21 Mar 2008
Posts: 118
Location: Nottingham
|
 Posted: Sun Jul 01, 2012 5:35 am Post subject: Posted: Sun Jul 01, 2012 5:35 am Post subject: |
 |
|
Hello Jon,
Accurate, concise and well written as usual, if only I had the time..........
One tip though:
The ball joints, both upper and lower are, as you say Jaguar items.
However, the design of both the upper and lower joints were changed in about 1986 (with the introduction of the XJ40) to become a more homologous sealed for life unit, produced by Lemfoerder.
Now, sealed for life usually means failure at short notice but these joints (the Lemfoerder ones, not the cheap copies that now abound), as long as the gaiters are not mechanically damaged, will last for well over 100,000 miles.
They cost around £35.00 each from most Jaguar parts suppliers (maybe less from EBay??) and fit straight in with no shimming or tie wiring of the gaiters (and yes, you are correct about the locking wire provided in the kits, we discard that too when using this system).
The top one is a direct replacement and the lower one requires just a small amount of extra work:
Remove the lower part of the joint, extract the ball socket and gaiter.
Clean up the area reasonably.
Invert the ball socket and fit it in from the top down.
Srike the end of the ball socket sharply and the upper ball race will come out of the upright.
Clean up the area properly and fit the new ball joint with the appropriate length 5/16 unf bolts - we thread lock them in place and use a lock washer, dispence with the old lock tabs that should have been there previously.
The new joints have no shims and no grease nipples.
Also, it is quite easy to remove the upright and disc/caliper assembly as one piece (assuming that you are going to do just the ball joint) and work on it still attached by the brake flexi hose as long as you have a suitable means of support to lay the assembly alongside the chassis rail etc.
David |
|
| Back to top |
|
 |
jonc
Joined: 21 Sep 2010
Posts: 584
Location: Cheshire, UK
|
 Posted: Tue Mar 05, 2013 12:17 pm Post subject: Posted: Tue Mar 05, 2013 12:17 pm Post subject: |
 |
|
Thanks David, that is really useful information. 
Right. Here is a job I started in September, but then got really busy with work and only picked it up again recently.
The driver and passenger seats are a bit saggy when you sit in them. This is the same as 277 - it feels a bit like you are sitting on a toilet seat! On top of this, there is some unevenness and lumps in a few places where I was told the thin 'scrim foam' underneath the leather was not in the right place. There was also the 'old mans car' smell which I hadn't yet traced - I had tried some aircon disinfectant on the interior which had no effect.
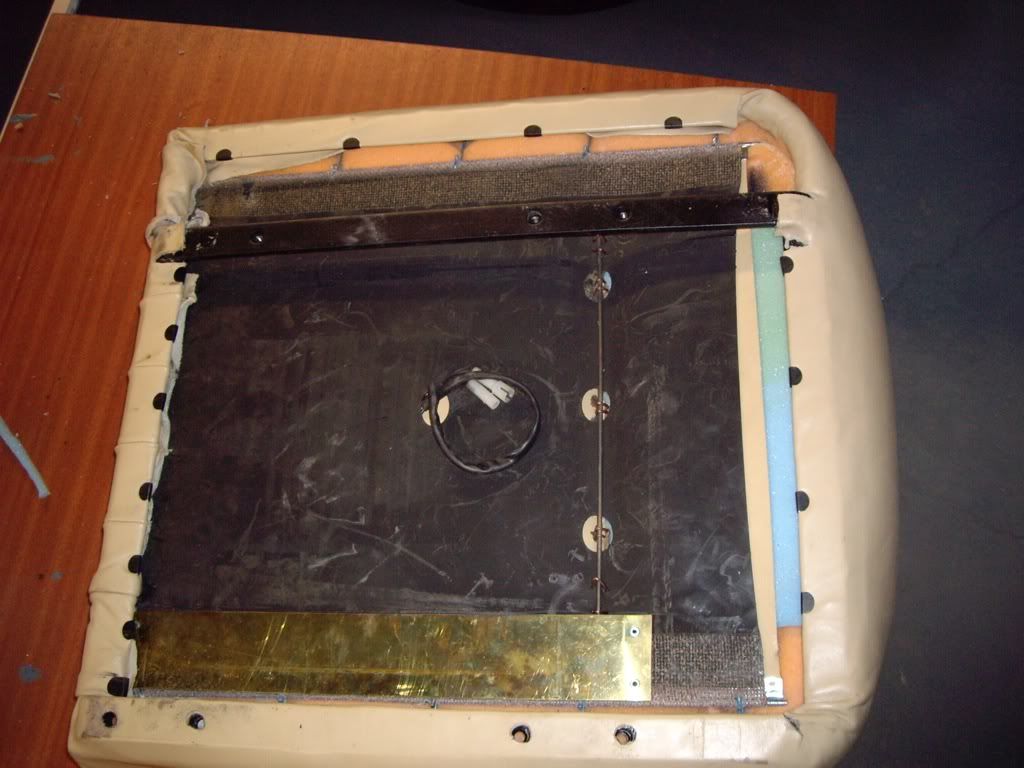
So, I am stripping the driver and passenger seats to see if I can sort all this out. Here is the underside of the drivers seat with the mechanism removed and the leather detached around the base.
There is a large rubber sheet which provides the springing which I am pretty sure is a Recaro part. Which most likely means it is a Recaro seat frame (there is a 'Gerpruft' sticker on one of them which indicates German origin). Recaro make very similar replacement part which I see is available via eBay for £45 each. There is also someone in the USA making a replacement.
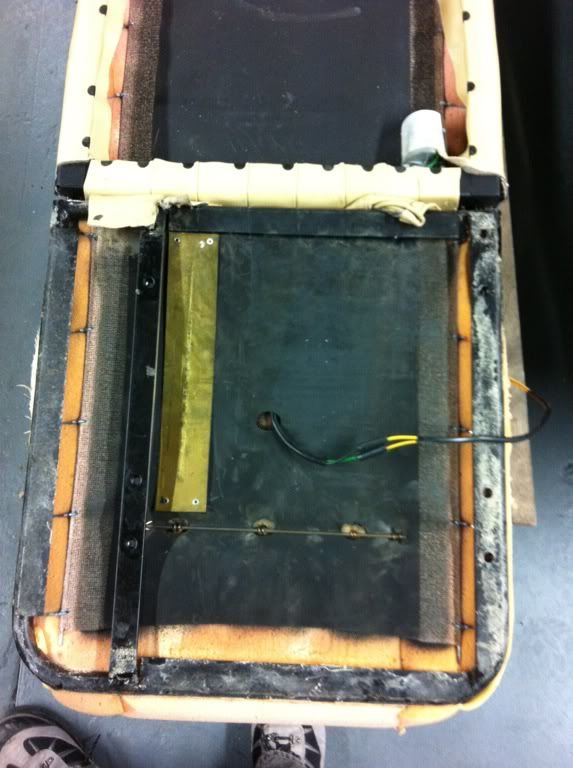
As I stripped the seat, I saw why there were lumps and bumps. The scrim foam is disintegrating and the mesh backing is torn in places.
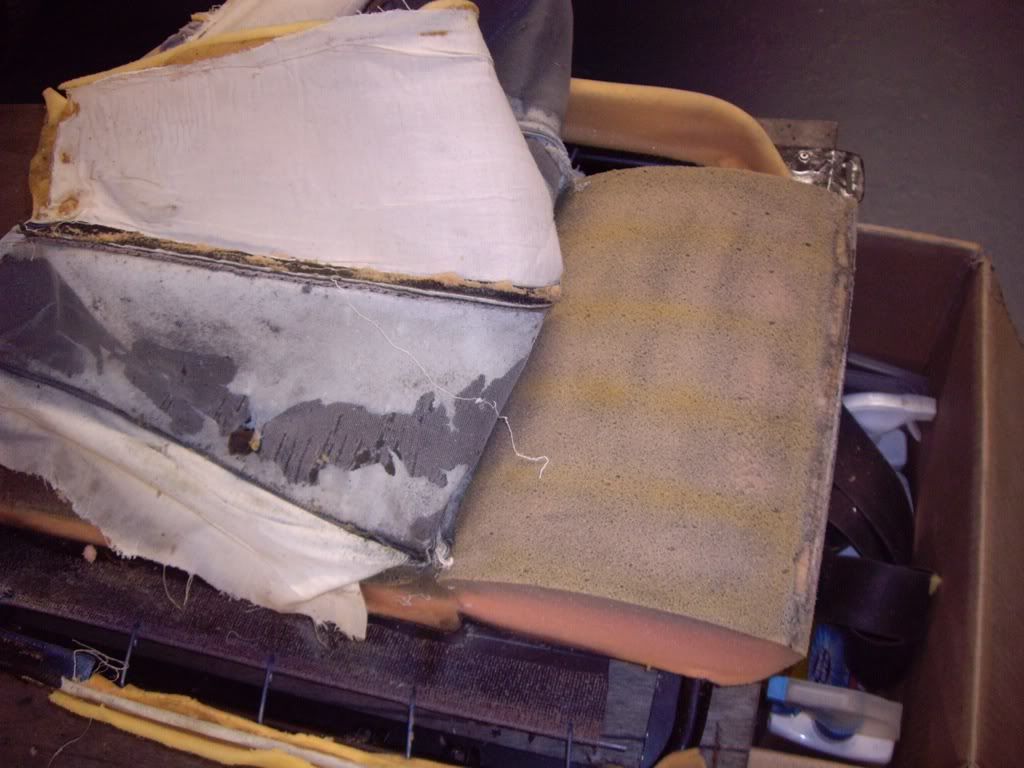
The orange foam is so dark mostly because of the remains of the scrim foam.
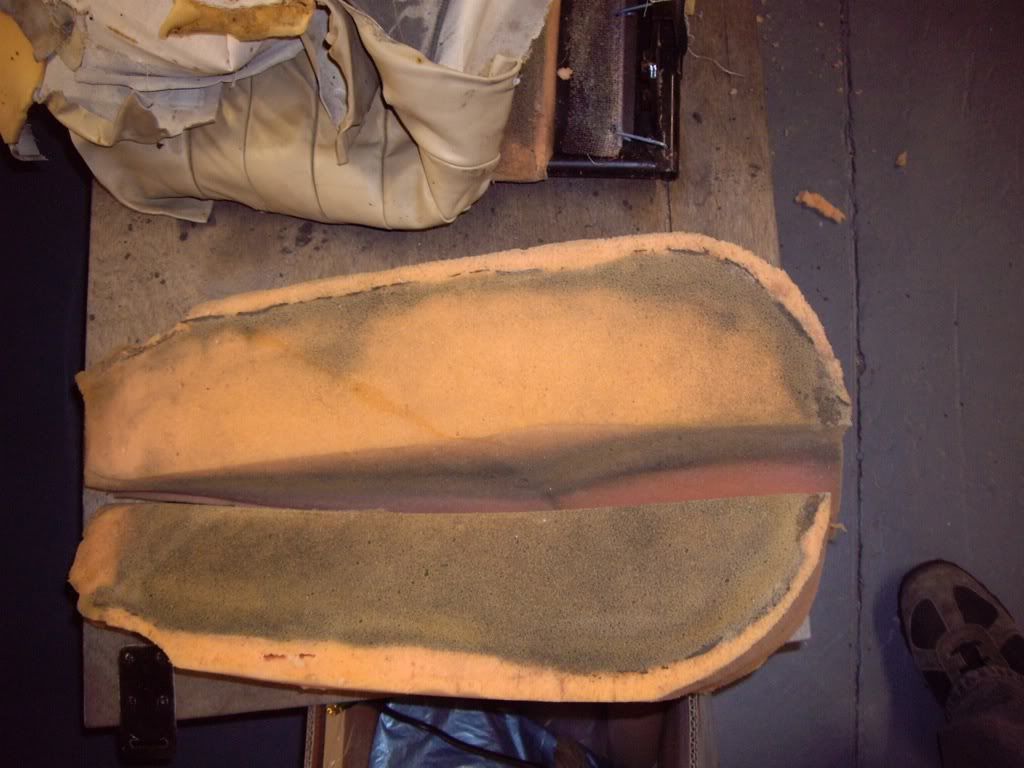
Last edited by jonc on Tue Mar 05, 2013 12:23 pm; edited 1 time in total |
|
| Back to top |
|
 |
jonc
Joined: 21 Sep 2010
Posts: 584
Location: Cheshire, UK
|
 Posted: Tue Mar 05, 2013 12:22 pm Post subject: Posted: Tue Mar 05, 2013 12:22 pm Post subject: |
 |
|
I have decided to improve the springing by assisting the rubber diaphragm rather than replacing it. I am using 2 inch Pirelli rubber which is used mostly for domestic upholstery, but in some classic cars. It can be cut to length and you then fit metal ends which you crimp on in a vice.
After some trial and error, I found the correct length is 35cm which means they are in a fairly stretched position when installed.
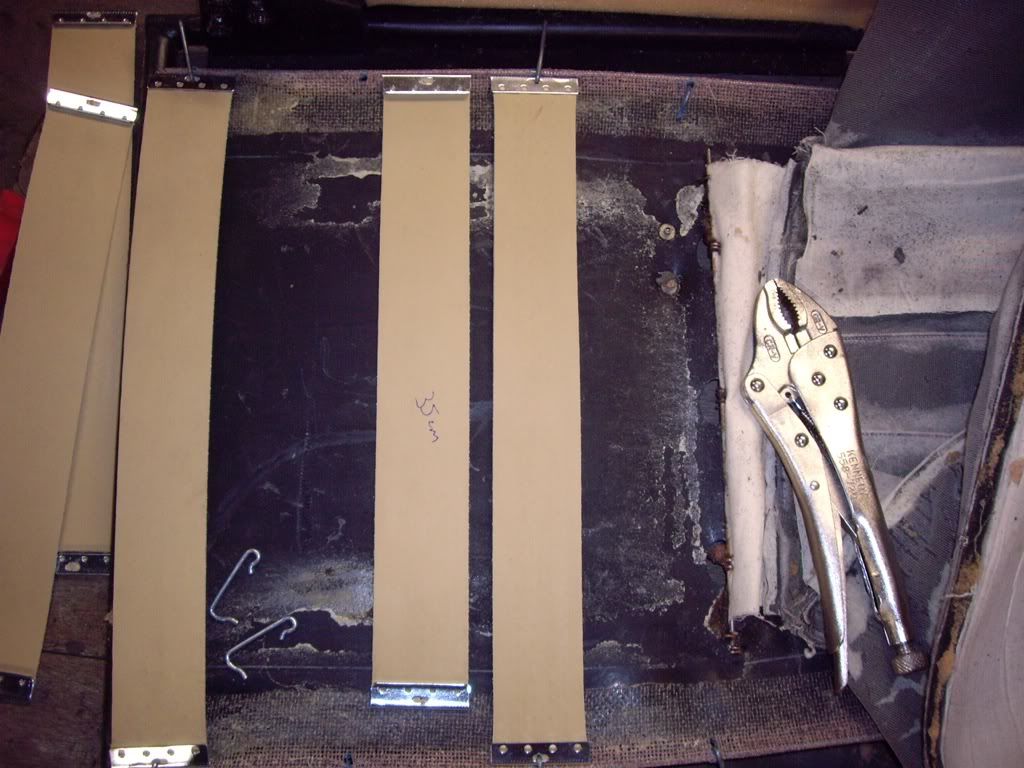
They fit above the rubber, which means they are not really visible from underneath. Each crimped end needs to be drilled through the rubber so they can be clipped in place.
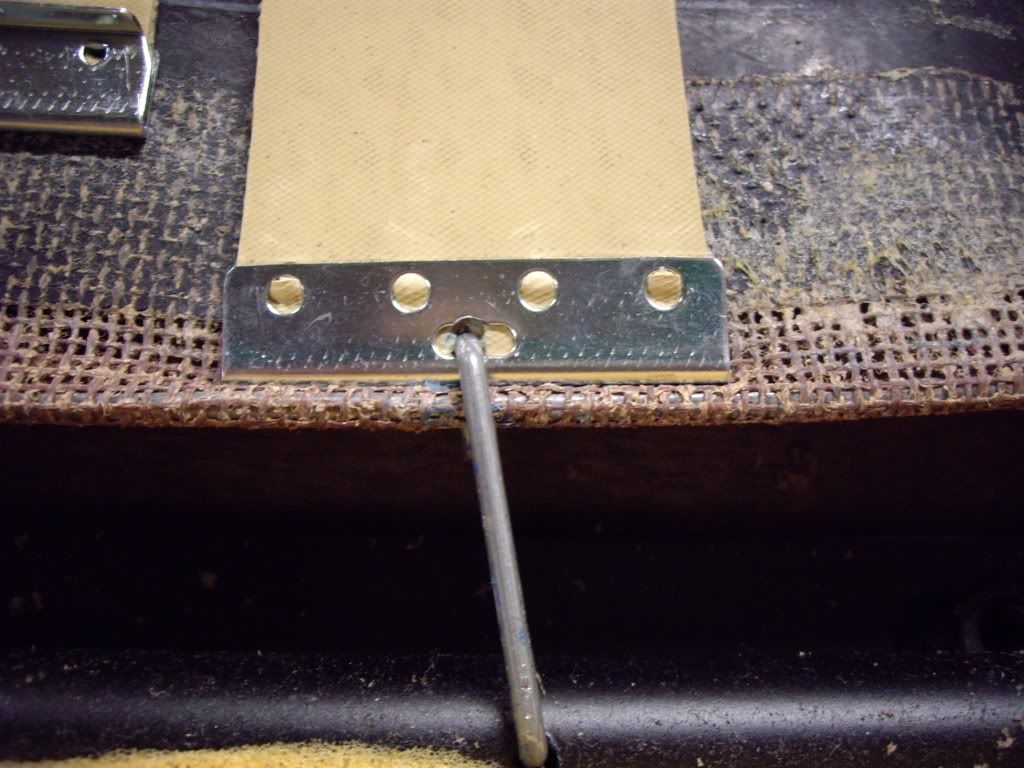
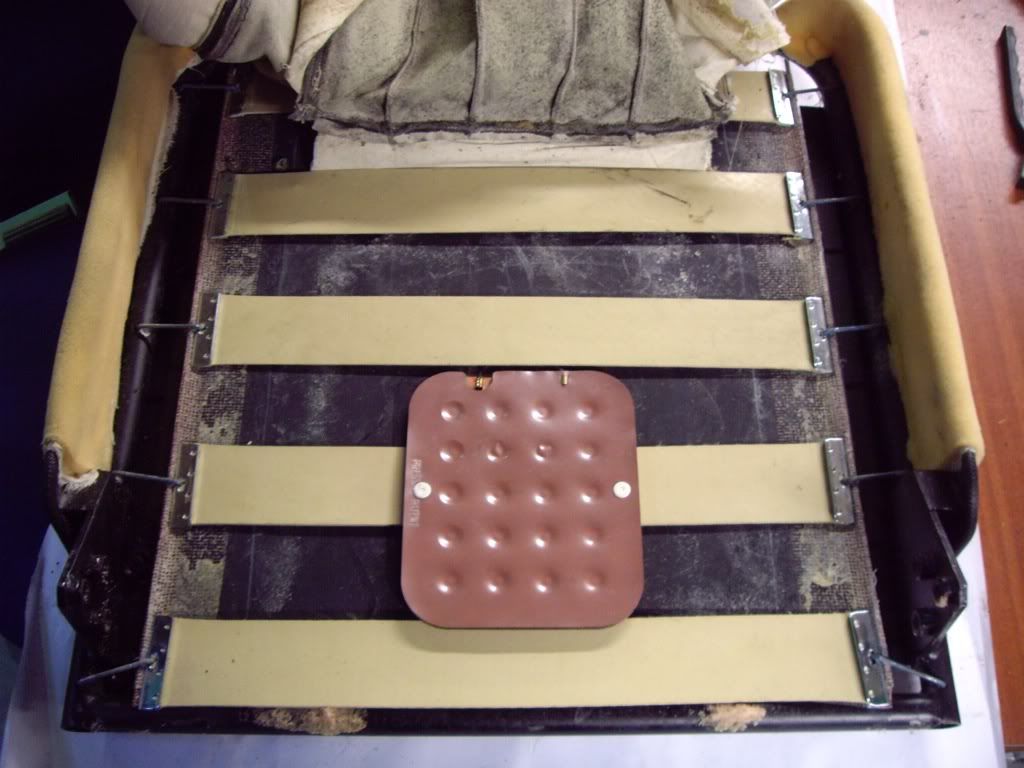
There are five to fit per seat. |
|
| Back to top |
|
 |
Lagondanet
Administrator

Joined: 03 Jan 2007
Posts: 3110
Location: UK
|
 Posted: Tue Mar 05, 2013 1:37 pm Post subject: Posted: Tue Mar 05, 2013 1:37 pm Post subject: |
 |
|
Quote from Jonc:
All this instruction and you will be able to do these jobs yourself Roger!
I think not! |
|
| Back to top |
|
 |
jonc
Joined: 21 Sep 2010
Posts: 584
Location: Cheshire, UK
|
 Posted: Tue Mar 05, 2013 4:04 pm Post subject: Posted: Tue Mar 05, 2013 4:04 pm Post subject: |
 |
|
Actually, I have never tackled upholstery before..
The passenger seat base has a sensor pad for the seat belt light, and so this is now glued on top of the new webbing:
All the foams have been washed and are in a pretty good state. The scrim which is stitched into the underside of the leather (and was disintegrating) has all been removed.
The center foams have squashed down a bit so I am adding a bit of height to them with some new foam - a layer on the bottom, and strips on the top to leave gaps for the stitching in the panels to sit in.
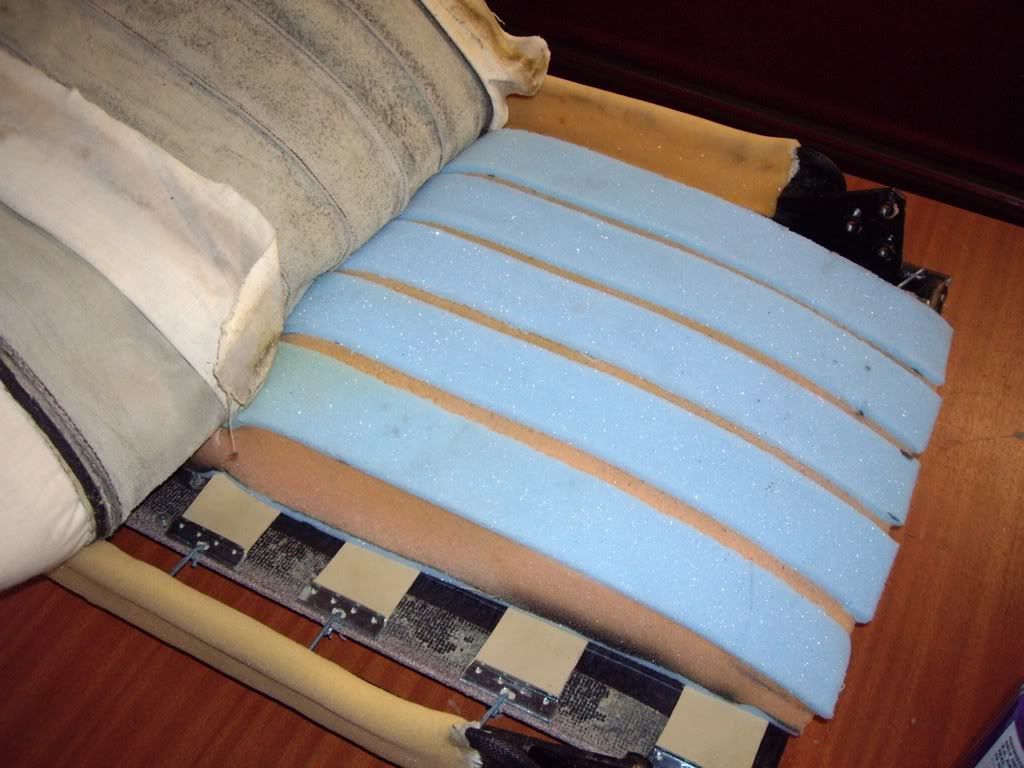
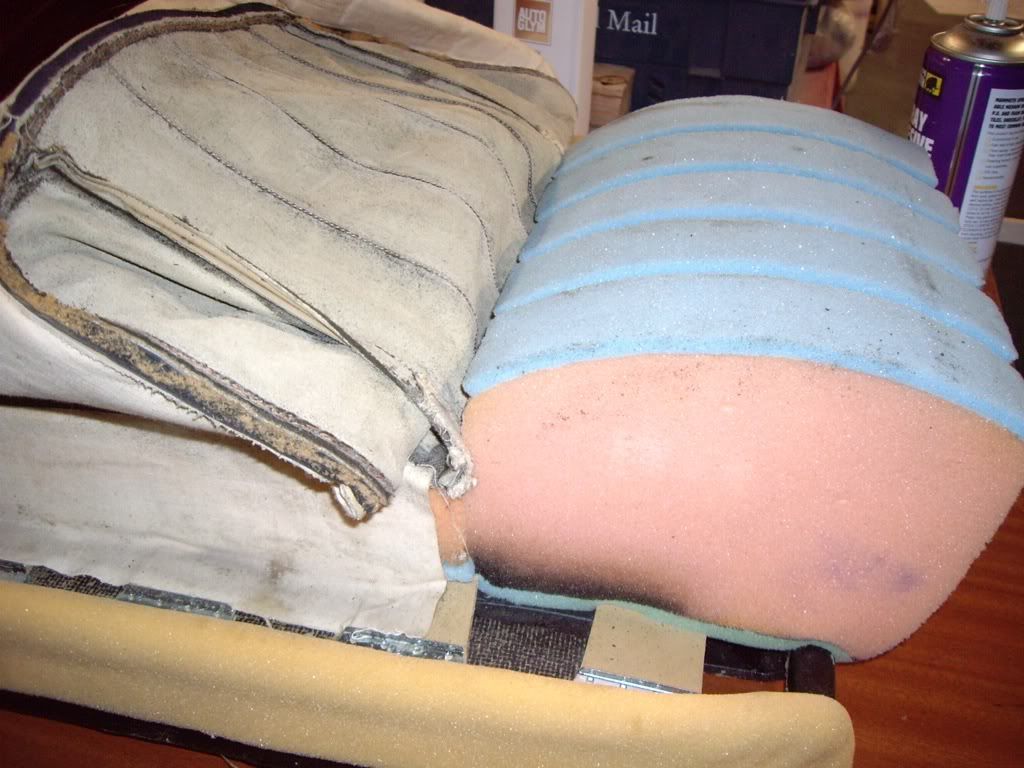
You can see on the photo above how the sides of the main center panel you sit on are fixed - there is a piece of cloth stitched to them and then glued onto the side of the foam and the base. There is one on each side. It is important that this is correct as it holds the center panel leather tight, but also the bolsters. |
|
| Back to top |
|
 |
jonc
Joined: 21 Sep 2010
Posts: 584
Location: Cheshire, UK
|
 Posted: Tue Mar 05, 2013 4:18 pm Post subject: Posted: Tue Mar 05, 2013 4:18 pm Post subject: |
 |
|
Now the bolster foams go in:
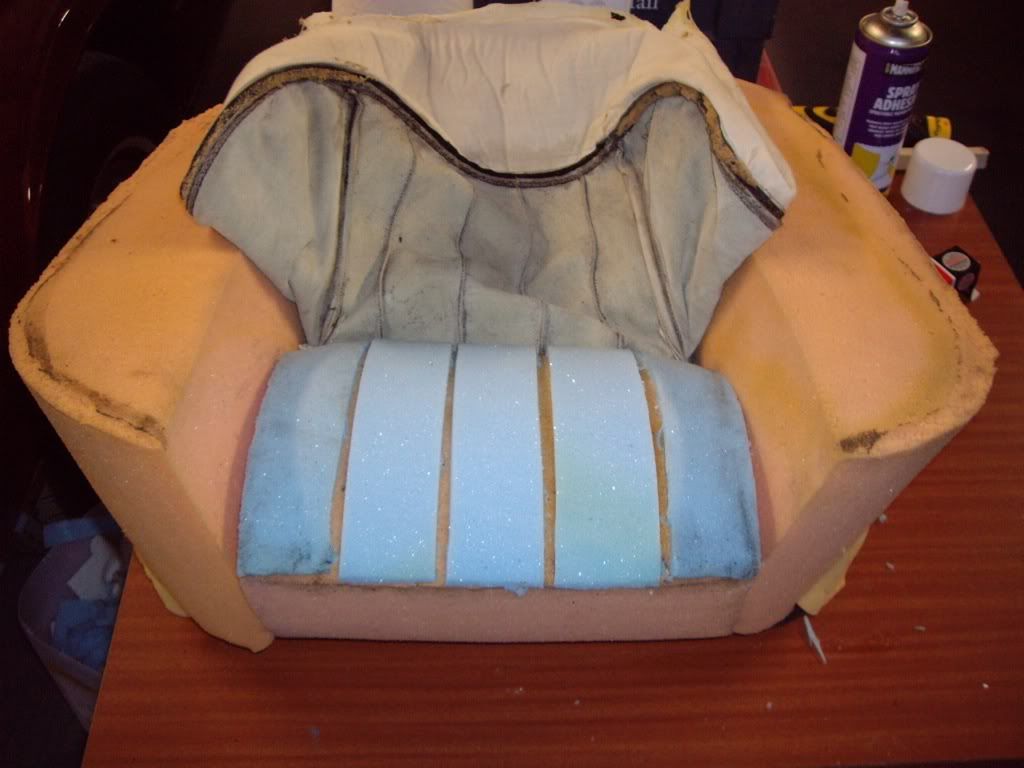
..and on to the most critical part. The piped edge has to be glued to the edge of the foams. This must be straight all the way round as it affects the shape of the base. If it is not glued it will be extremely difficult to get (and keep) a good shape, and if it is not glued in the right place it will never look right.
It needs to be done with contact adhesive all along the edge, but also needs to be help in place while the glue sticks as the force from flexing the foam tries to tear it apart.
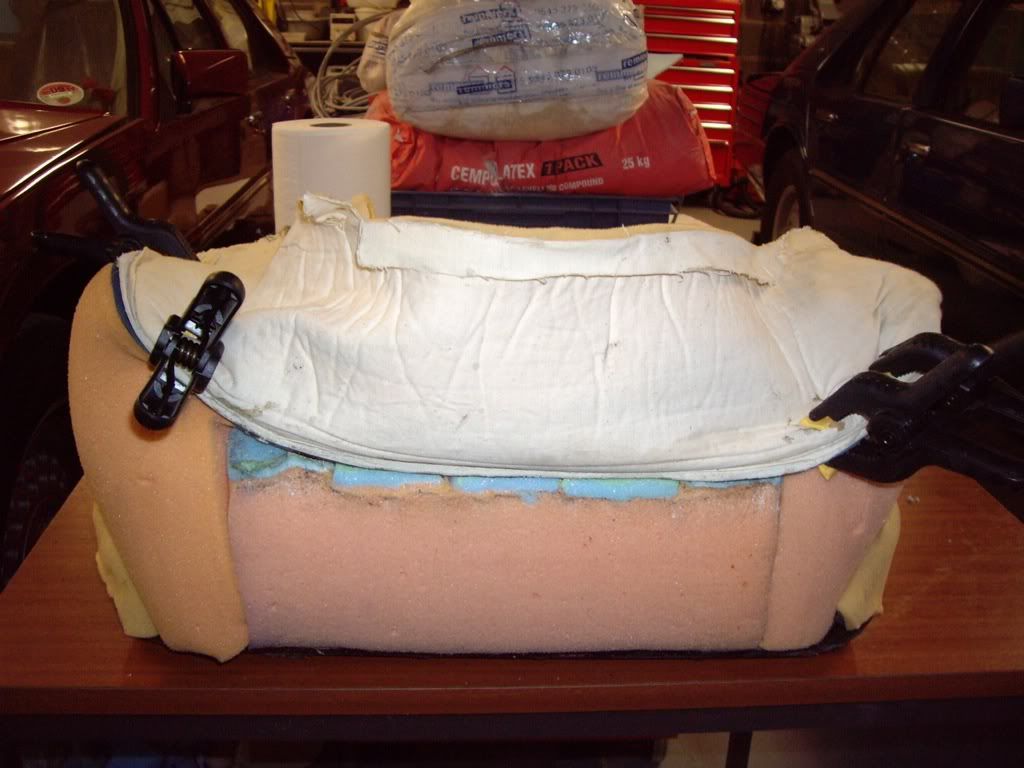
I used these clamps to hold it together for a few minutes. After it is secure, the whole of the side leather is pulled down over the side.
Before it can be fixed underneath, there is a layer of foam and cloth under this side leather which has to be fixed in place. It is pulled tight and then glued to the chassis. Here it is from when I took the seat apart:
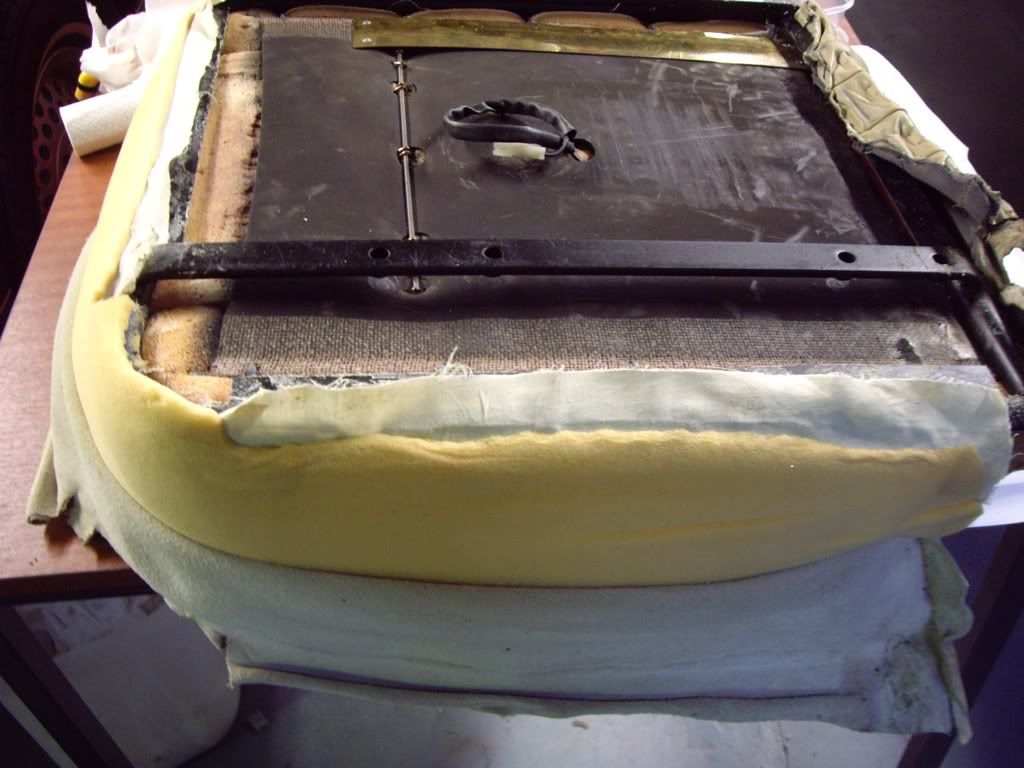
This stage is easy to forget, but needs to be done as if it is uneven, there will be lumps in the side.
You can now turn it over and fix the edges, which are a combination of clips and gluing:
Finished result looks symmetrical with smooth sides and more plump center panels:
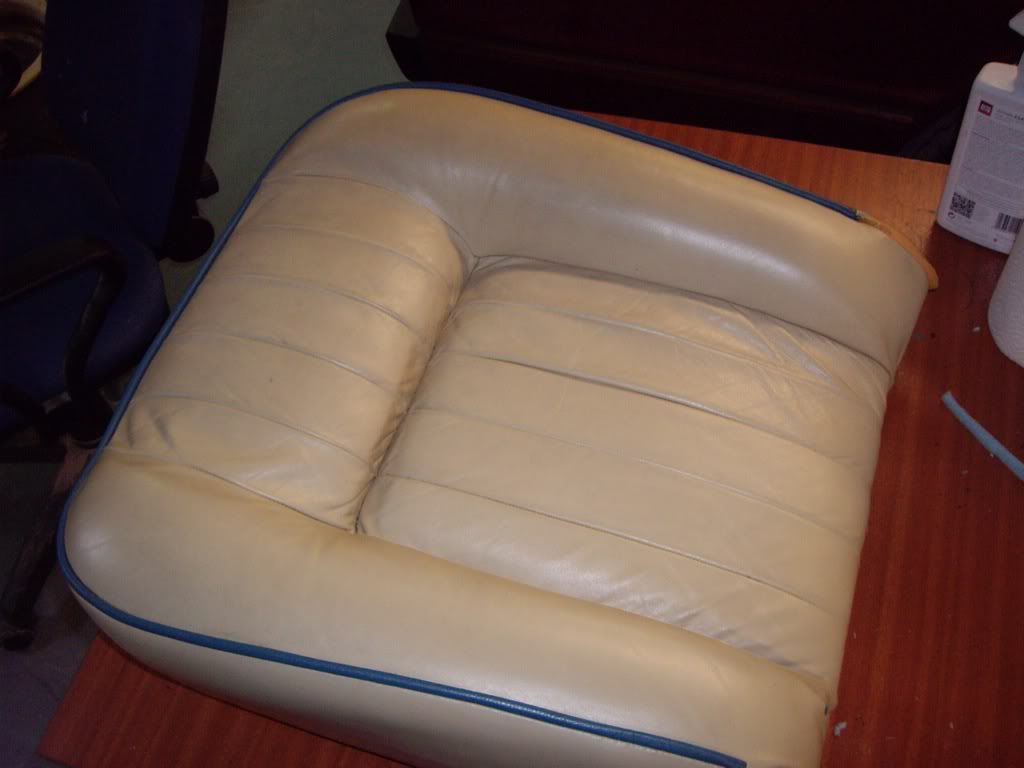
I took this picture straight after putting the seat back together, so the leather has yet to settle and so some of the wrinkles will disappear.
The front seats have had some colour put on them in the past where it has worn thin but I am not happy with the finish (most of the leather on the car is like new - well, dirty-new) and so I have just dropped off the front seats at a renovators to correct this.
In the meantime I am cleaning the rest. Out of the car, that is. |
|
| Back to top |
|
 |
|
|
You cannot post new topics in this forum
You cannot reply to topics in this forum
You cannot edit your posts in this forum
You cannot delete your posts in this forum
You cannot vote in polls in this forum
|
|


