| View previous topic :: View next topic |
| Author |
Message |
jonc
Joined: 21 Sep 2010
Posts: 584
Location: Cheshire, UK
|
 Posted: Thu Aug 20, 2015 12:55 pm Post subject: Posted: Thu Aug 20, 2015 12:55 pm Post subject: |
 |
|
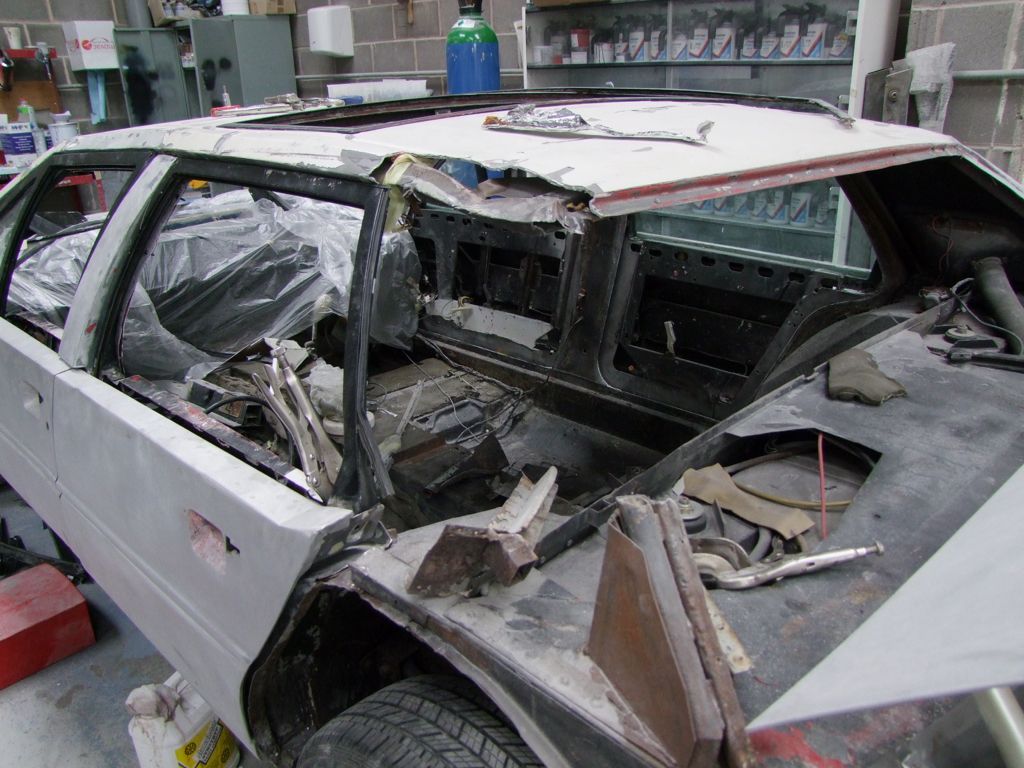
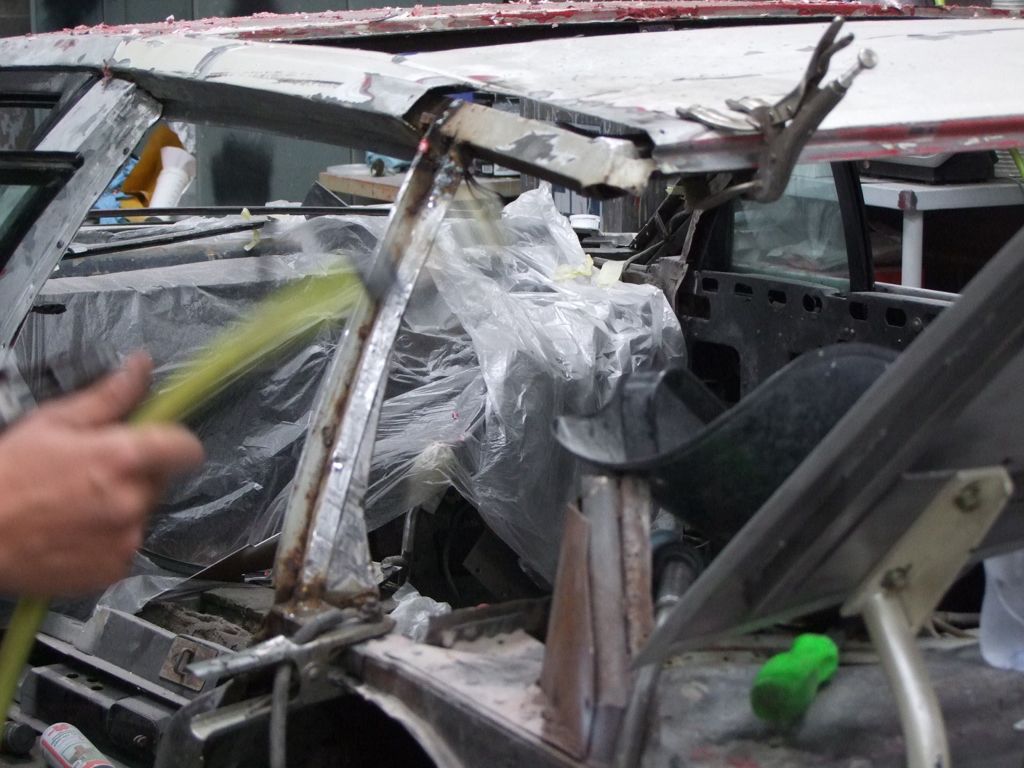
Time for an update. De-squashing is well underway; I am merely a by-stander to this marvel of craftsmanship but at least it gives me the time to report on it.
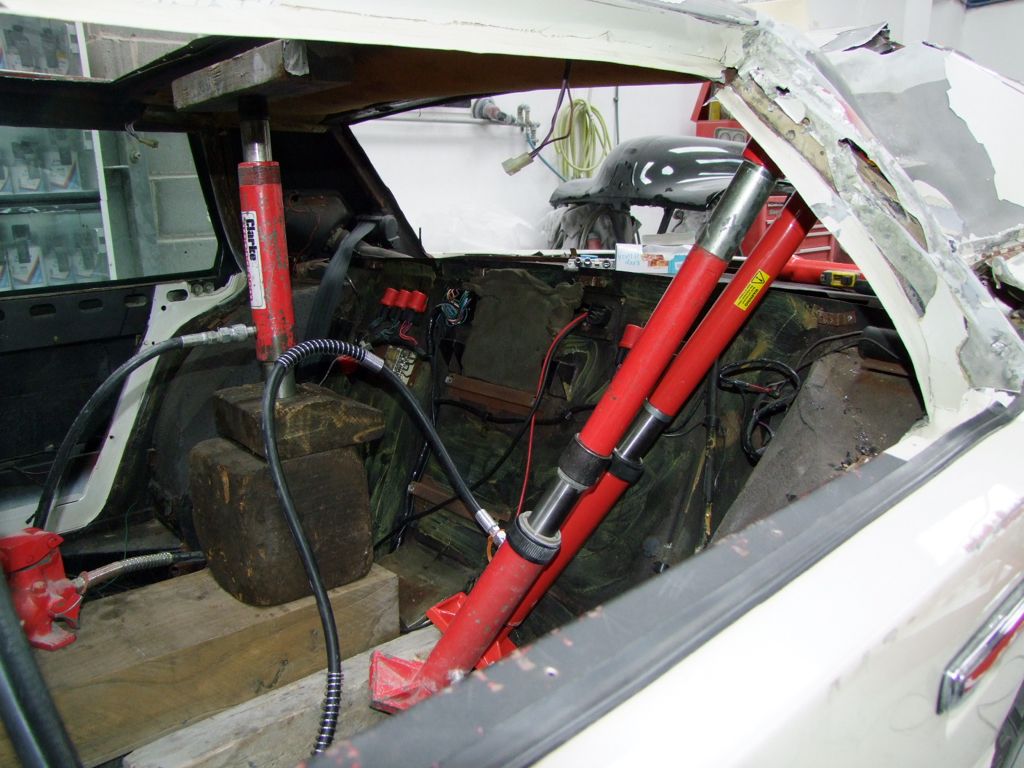
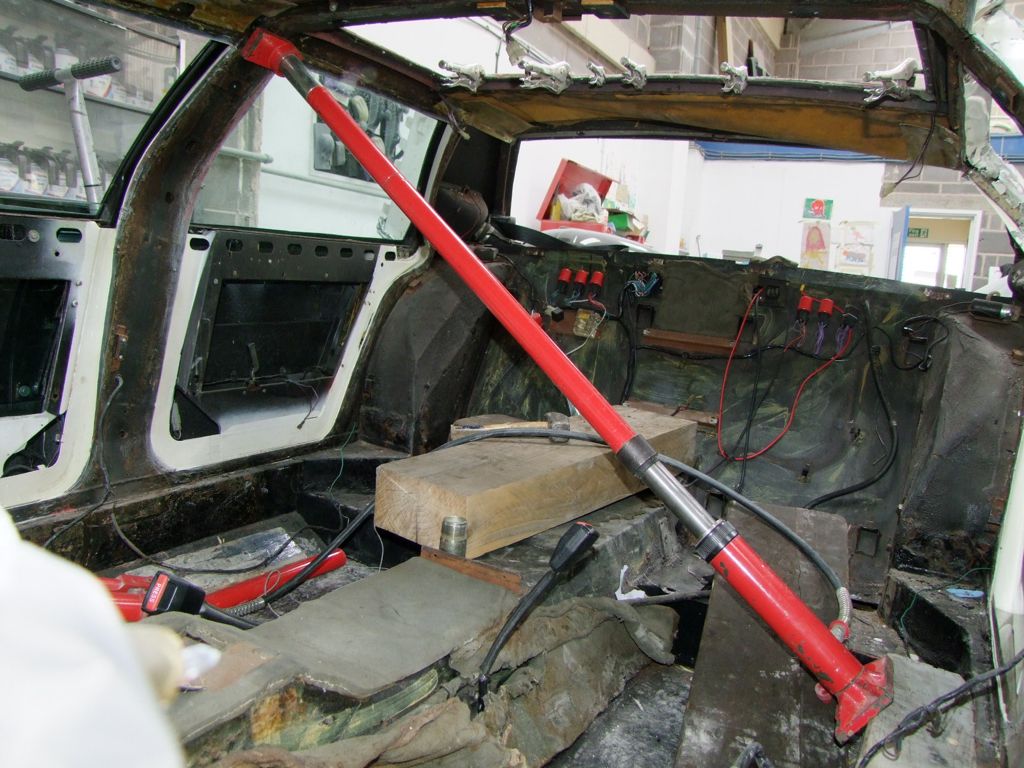
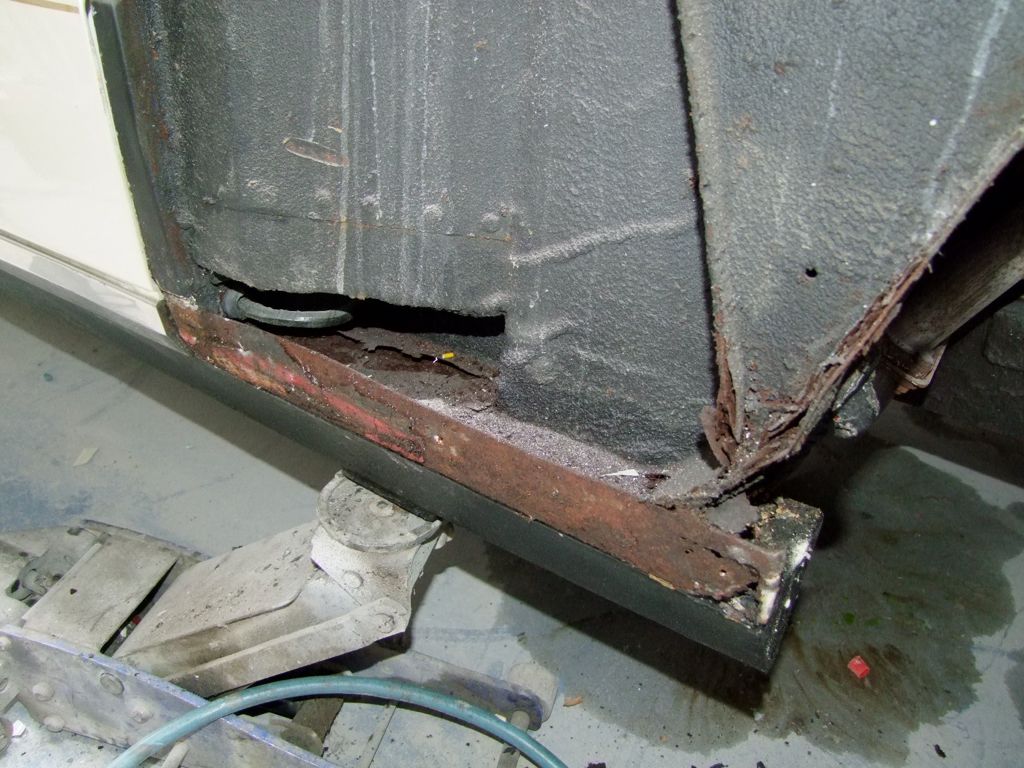
Here is the worst area of the car - the back-left corner of the roof, and a good place to start.
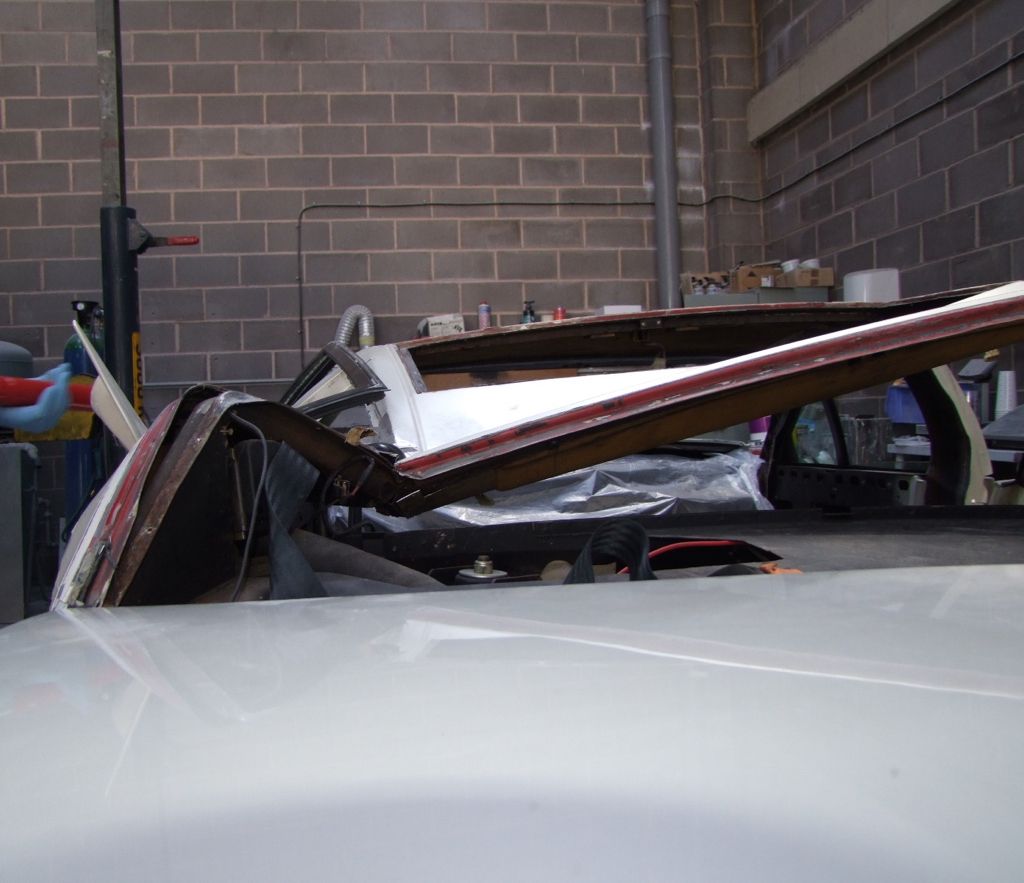
David pointed out to me that the removal of the interior was particularly difficult as both of the left doors are stuck shut. Everything had to come out of right side of the car, including the left seats and door cards. If you have ever felt the weight of one of the front seats up you will appreciate what a pain that would be. And this was with restricted height!
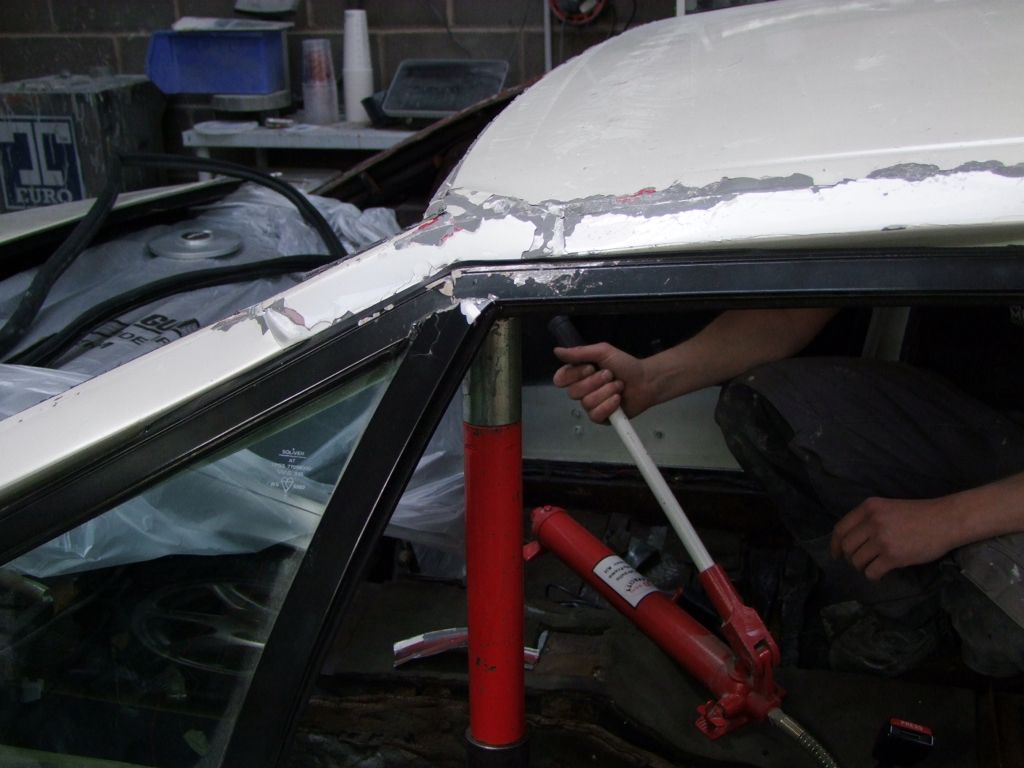
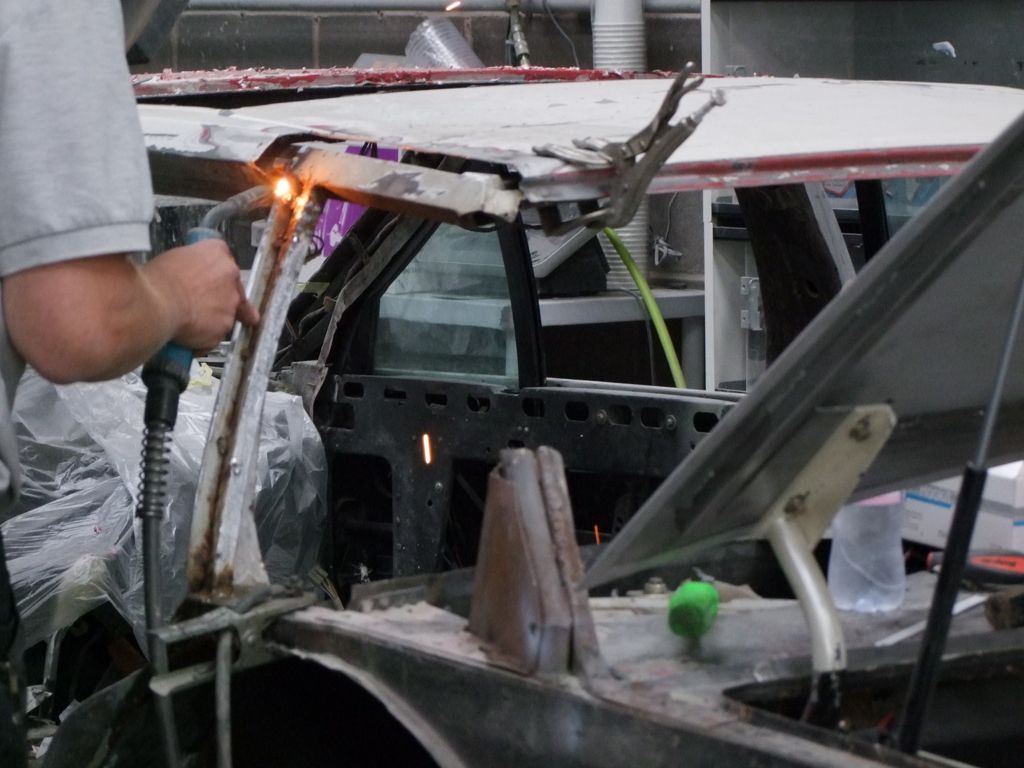
The corner is eased up by jacking against the backbone of the car, a particularly strong section of steel which runs from the front of the car either side of the engine, right back to support the differential under the petrol tank.
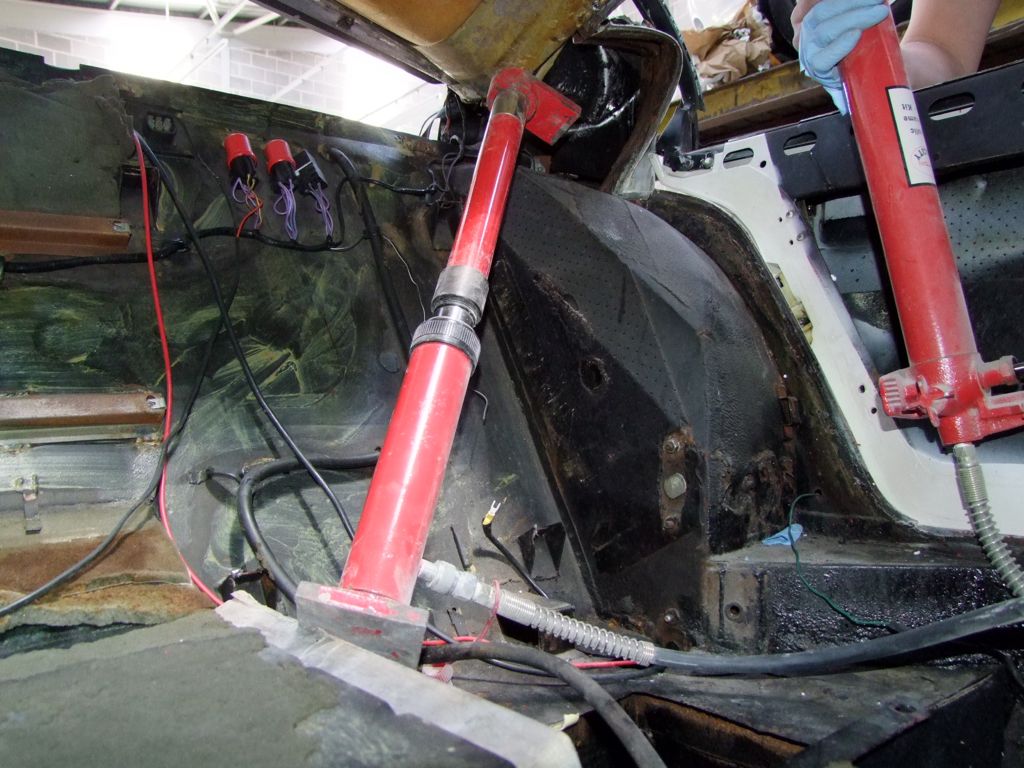
And slowly but surely, the corner rises..
 |
|
| Back to top |
|
 |
jonc
Joined: 21 Sep 2010
Posts: 584
Location: Cheshire, UK
|
| Posted: Thu Aug 20, 2015 1:14 pm Post subject: |
|
|
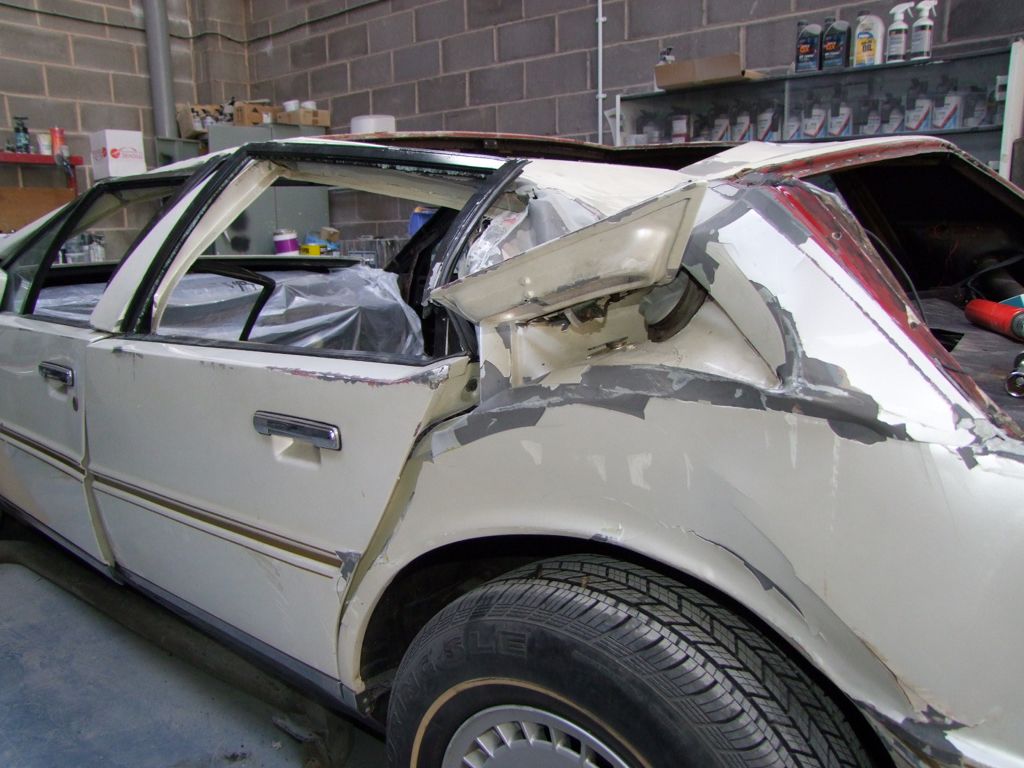
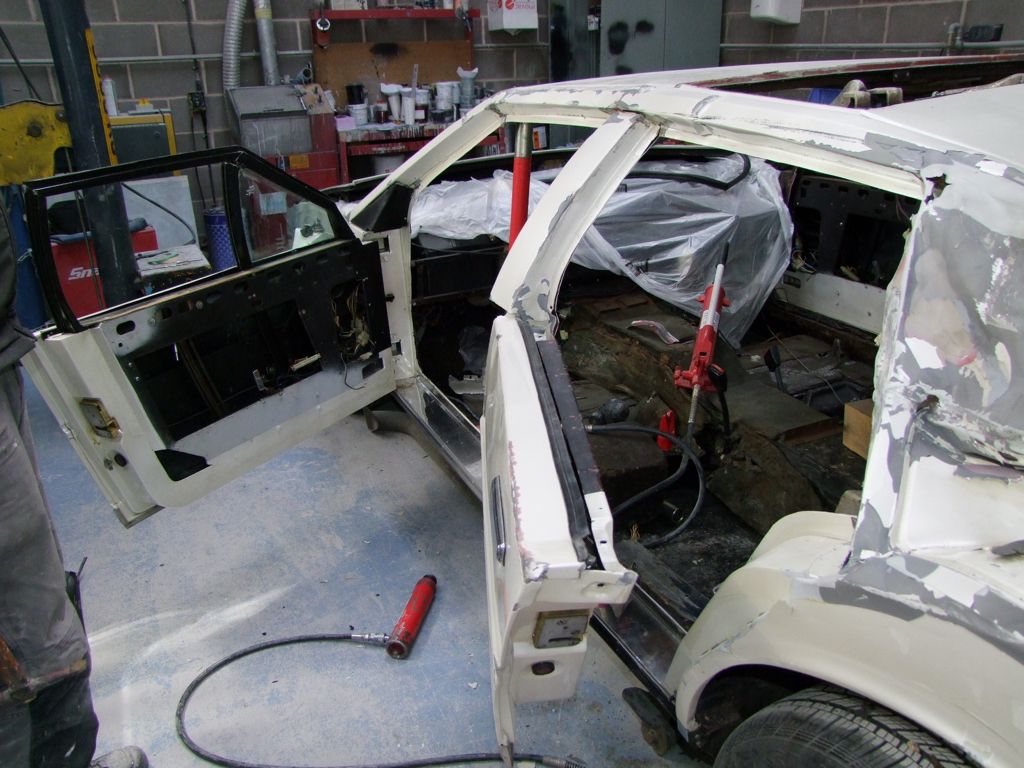
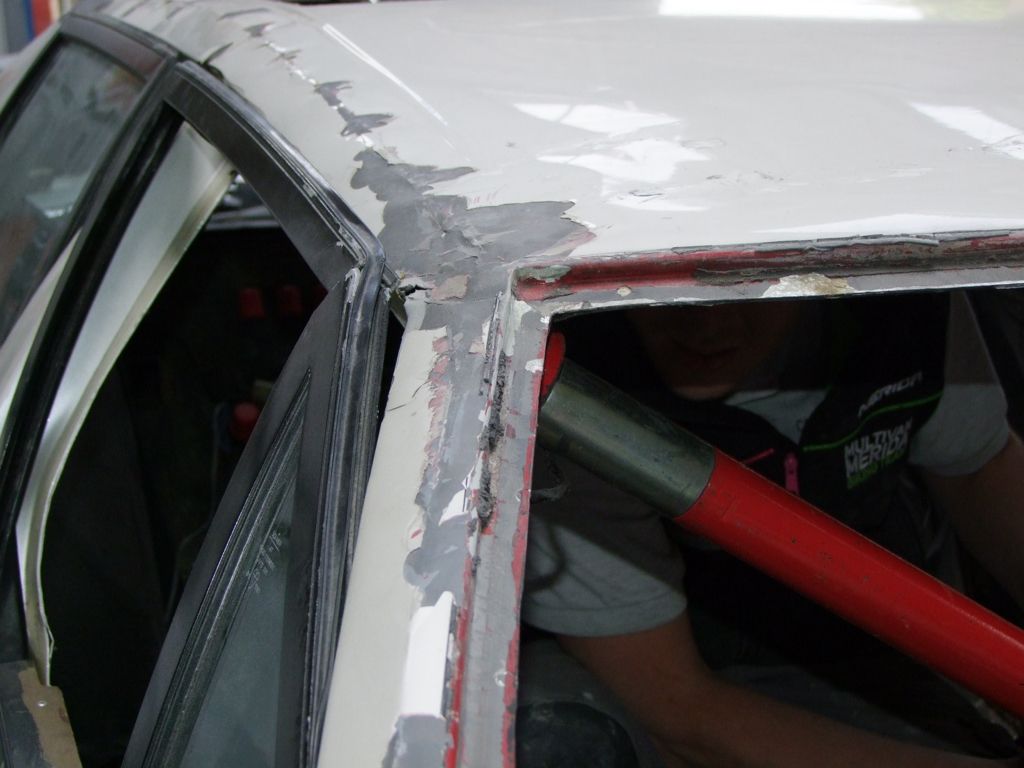
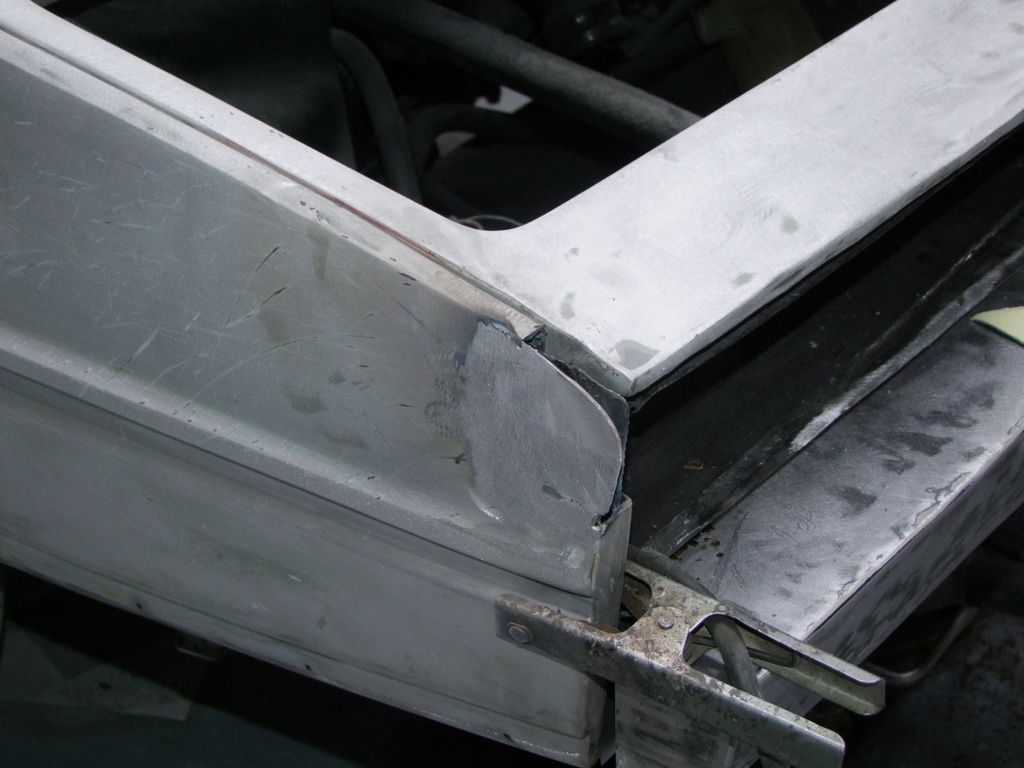
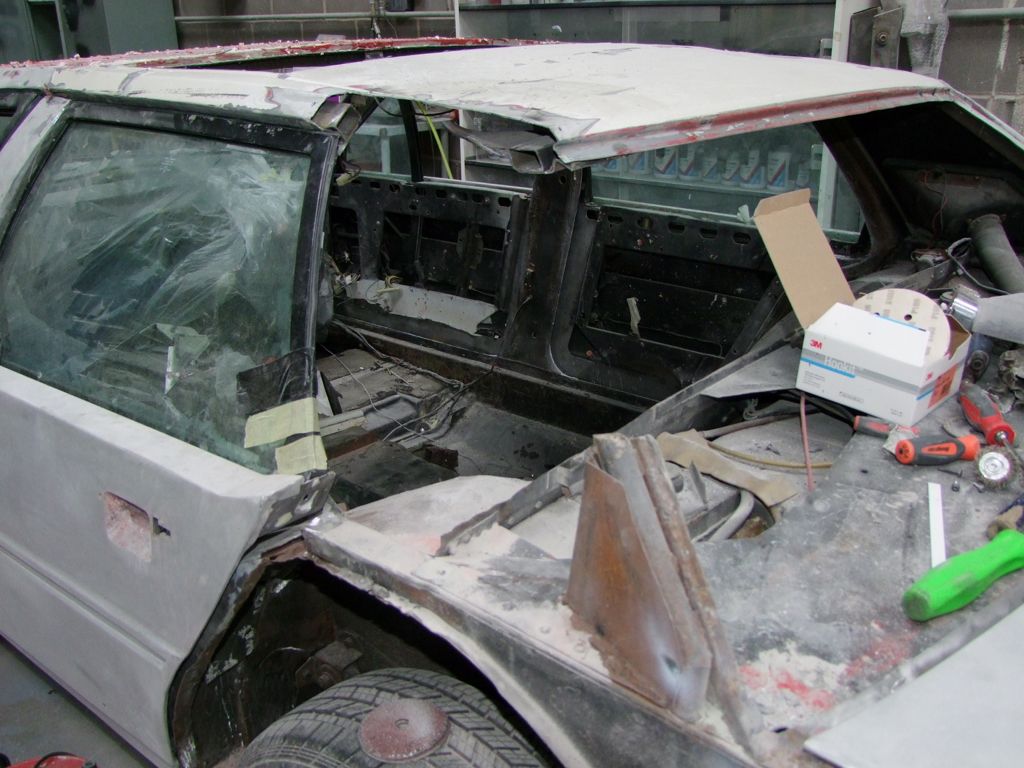
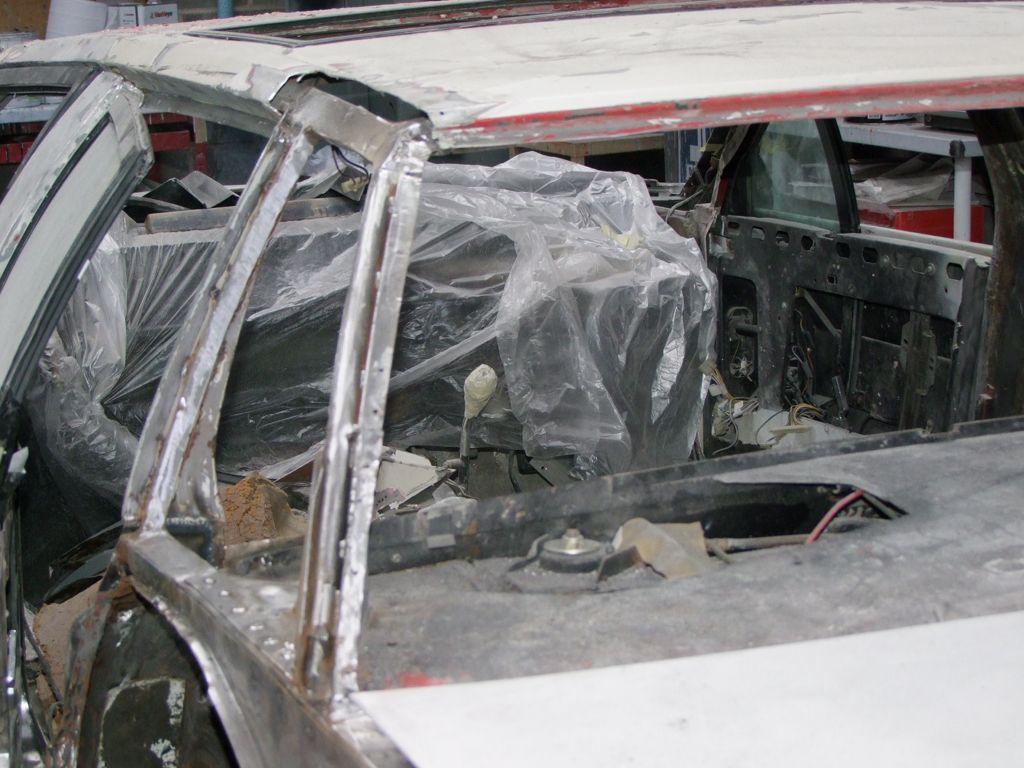
The other corners of the roof also need attention. Front left, where you can also see the breaks to the window surround They are all cracked on the welded joins:
and finally the doors can be opened:
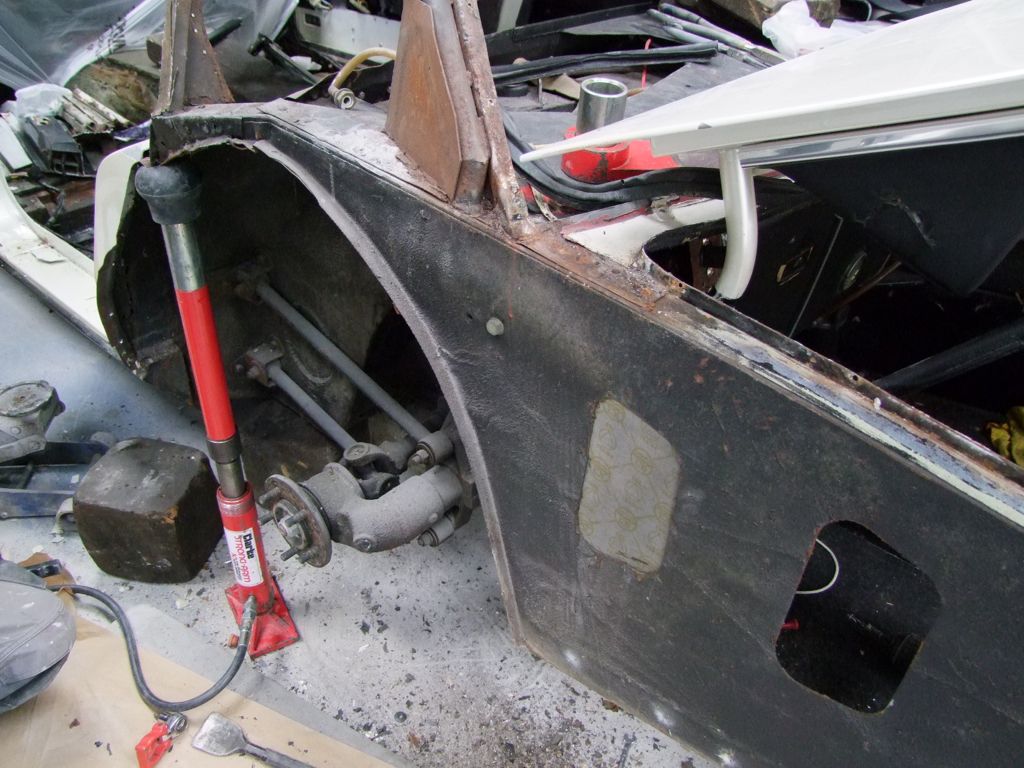
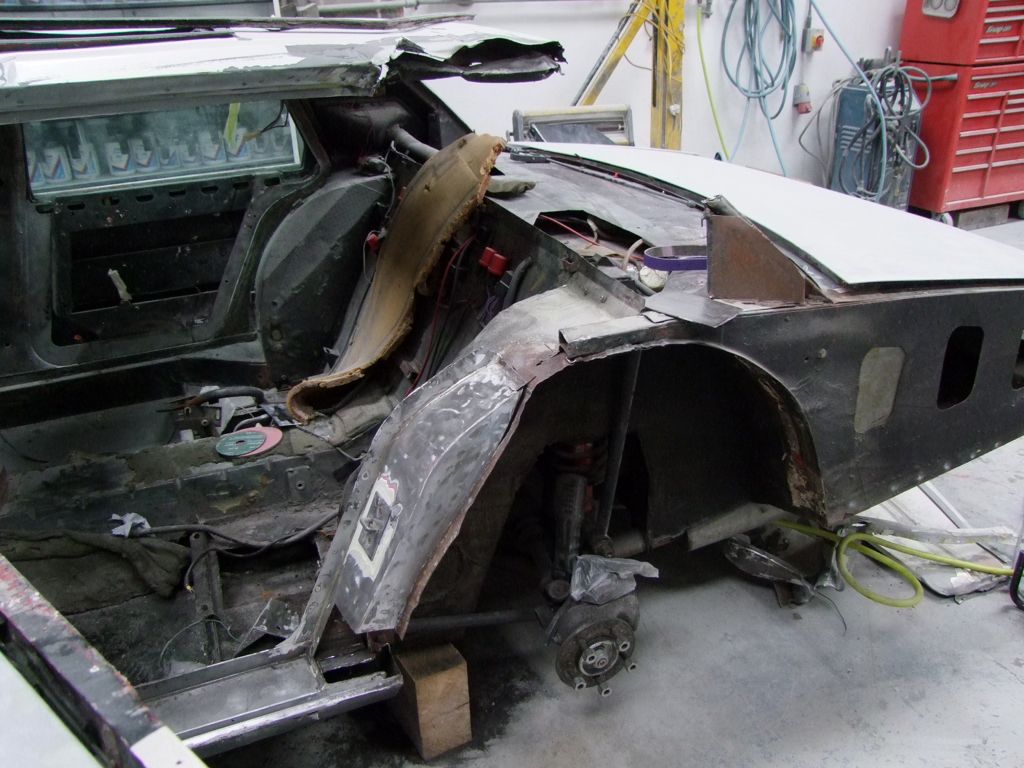
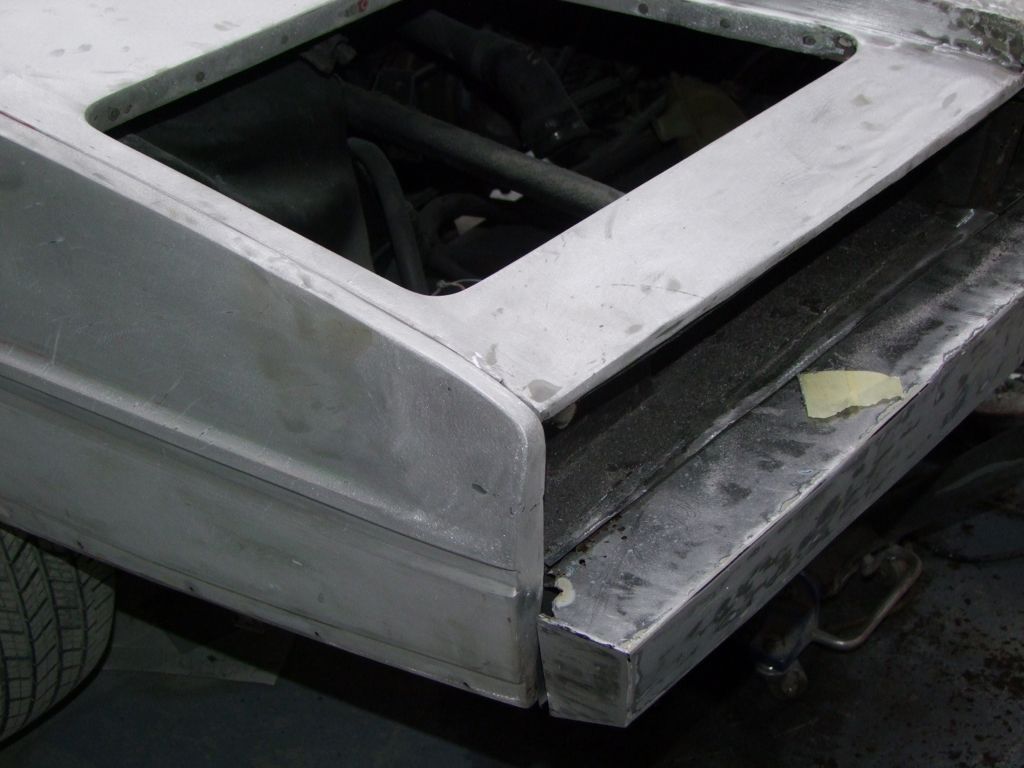
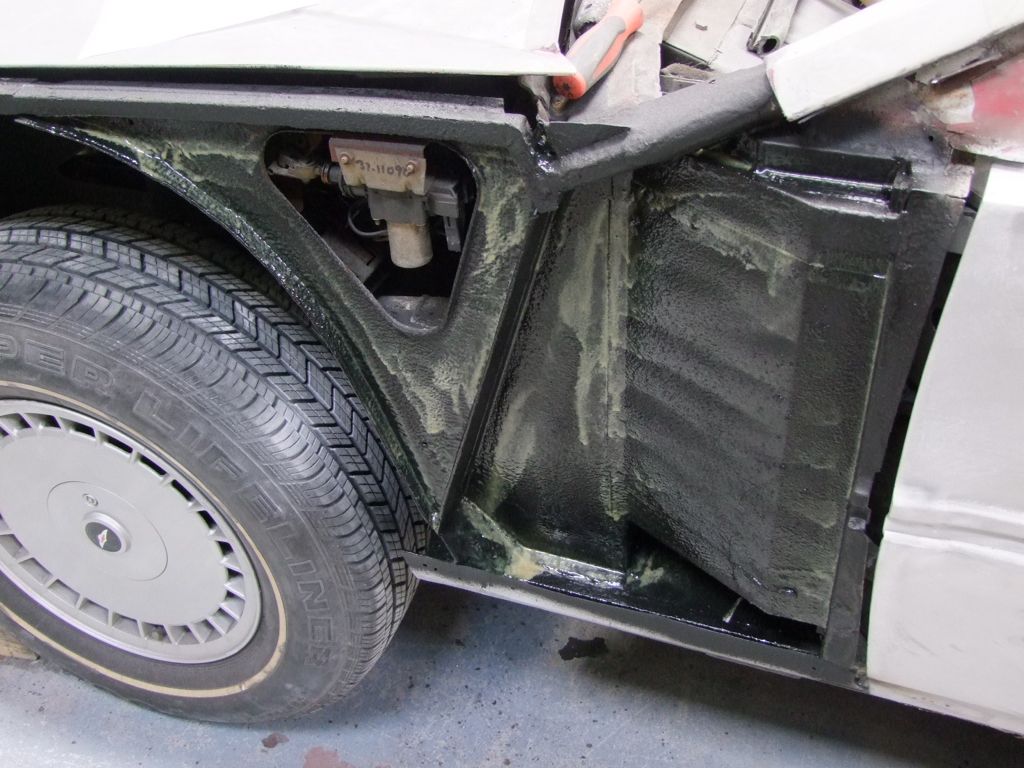
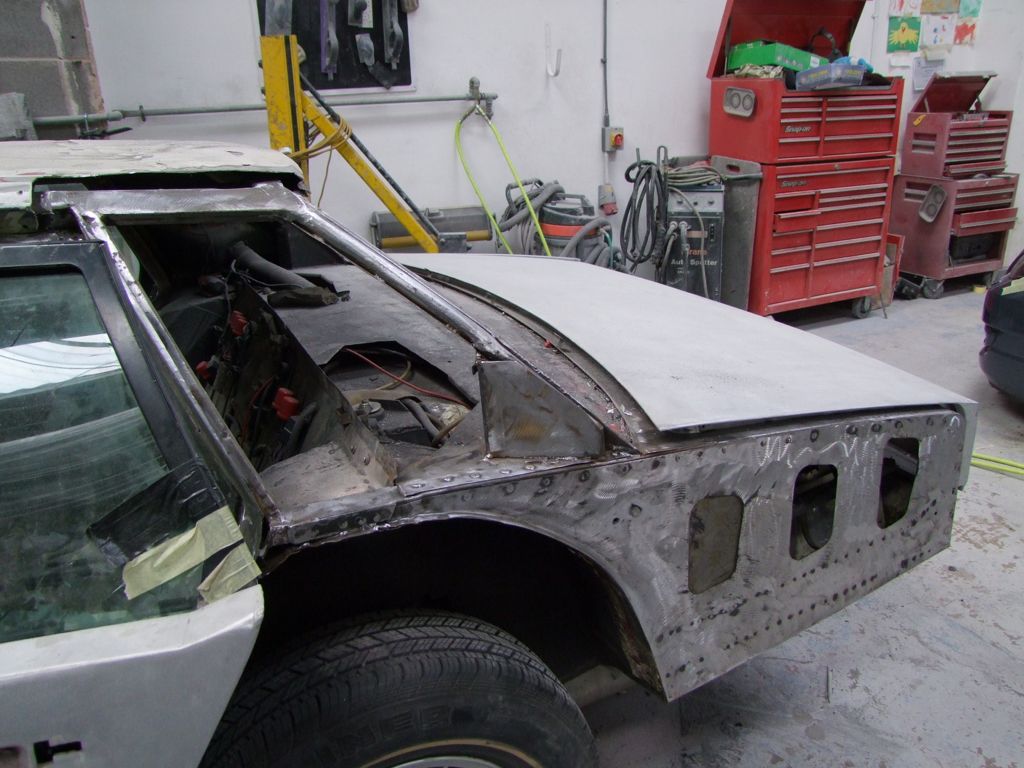
And now for some more correction of the rear quarter. First the rear wing has to come off. The condition underneath the rear is good.
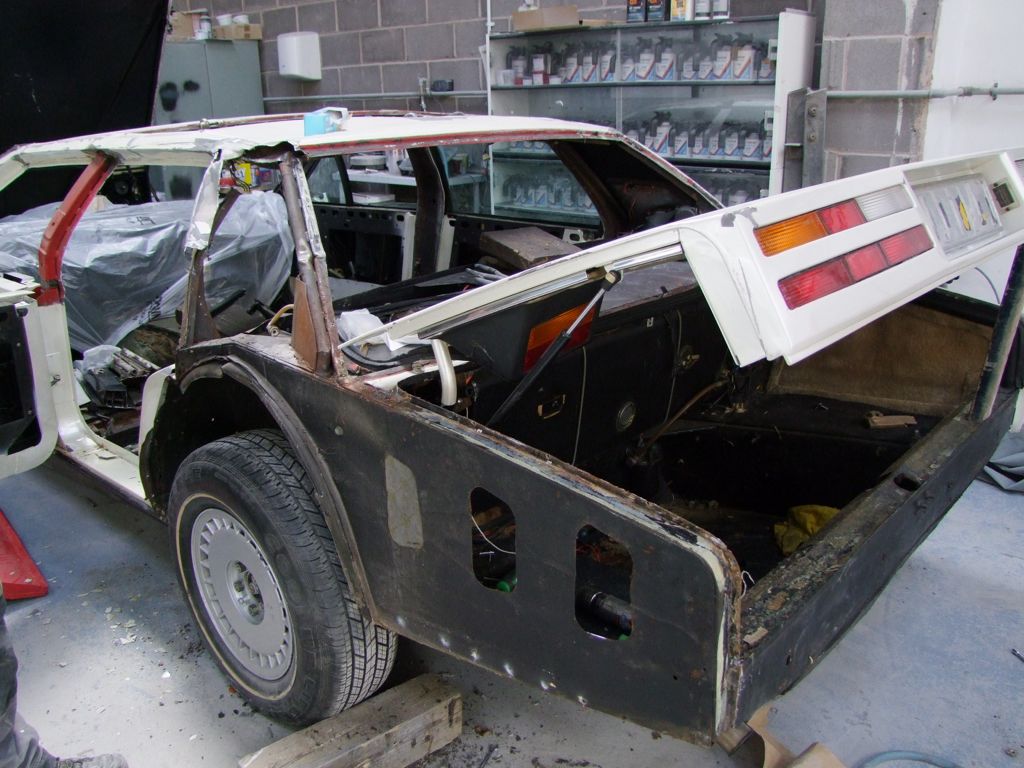
The wheel arch needs more work:
And finally the replacement rear wing can be trial fitted:
One problem is now evident though. The rear edge is different to the standard production cars. It has a widening taper instead of a straight rear edge. Back to that later.

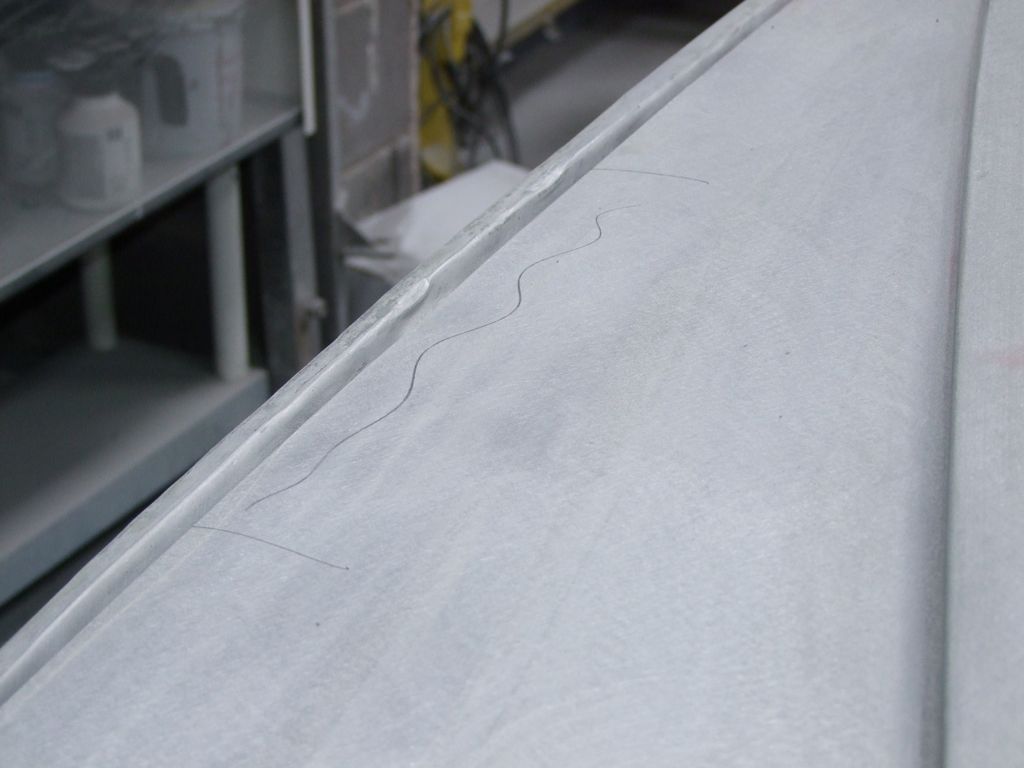
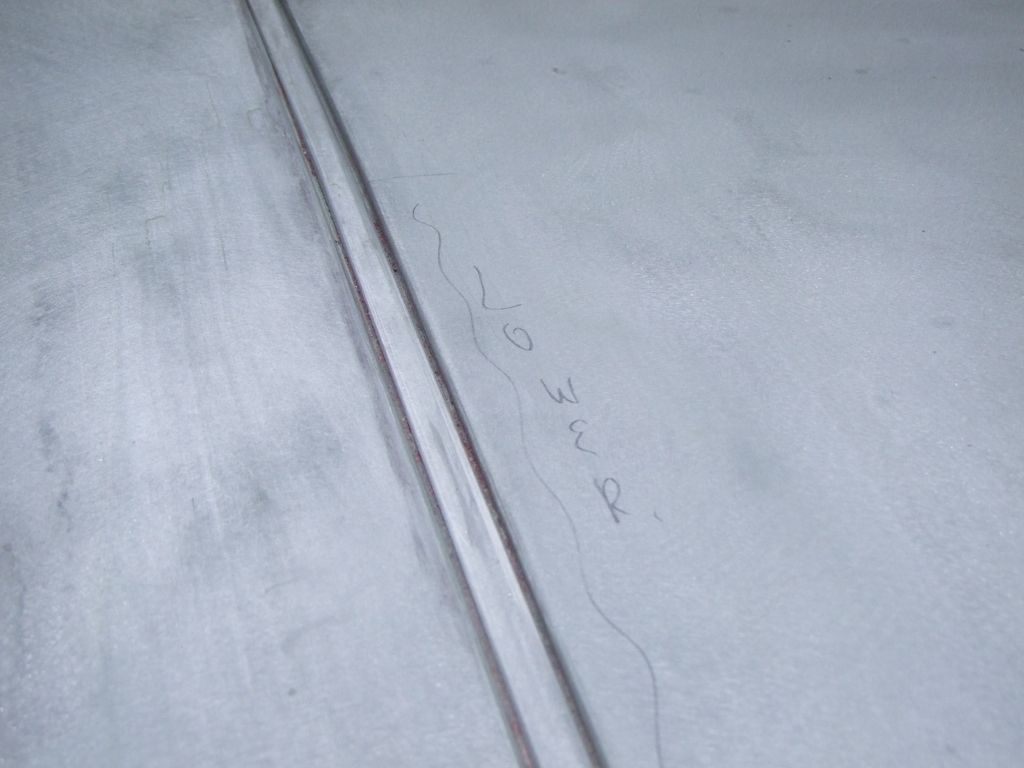
Because of the swage lines in the roof, it is being fixed rather than replaced. Plenty of fettling required though:
 |
|
| Back to top |
|
|
jonc
Joined: 21 Sep 2010
Posts: 584
Location: Cheshire, UK
|
| Posted: Thu Aug 20, 2015 1:23 pm Post subject: |
|
|
Another corner:
Not too bad underneath, but a bit of work required to the steel.

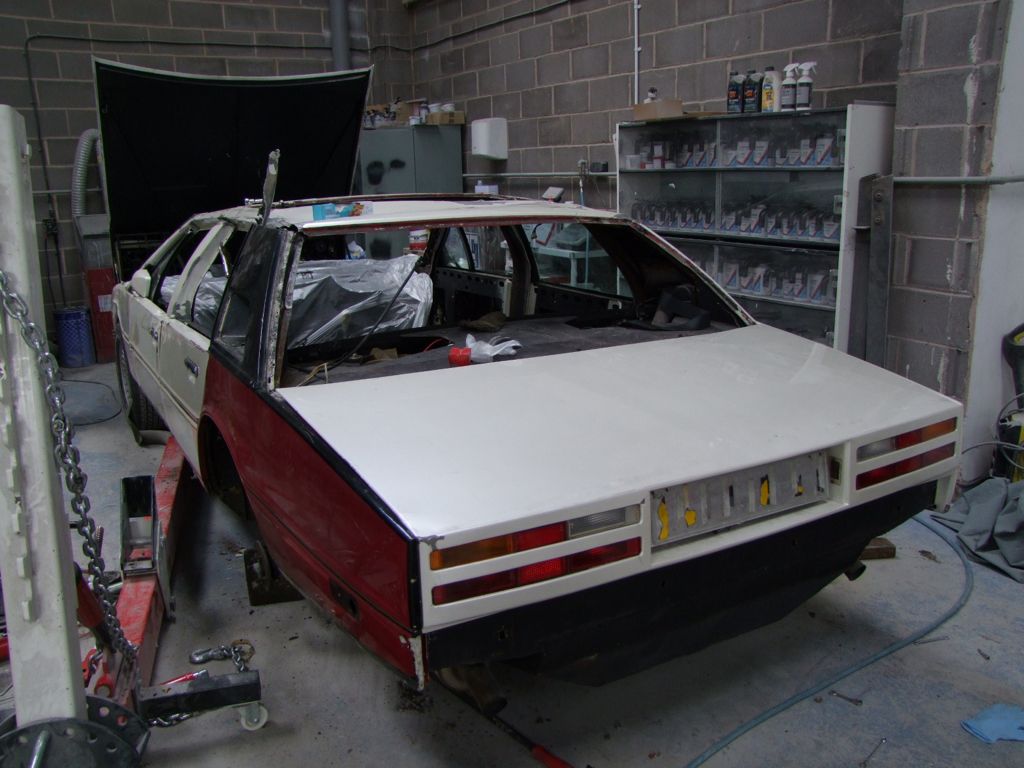
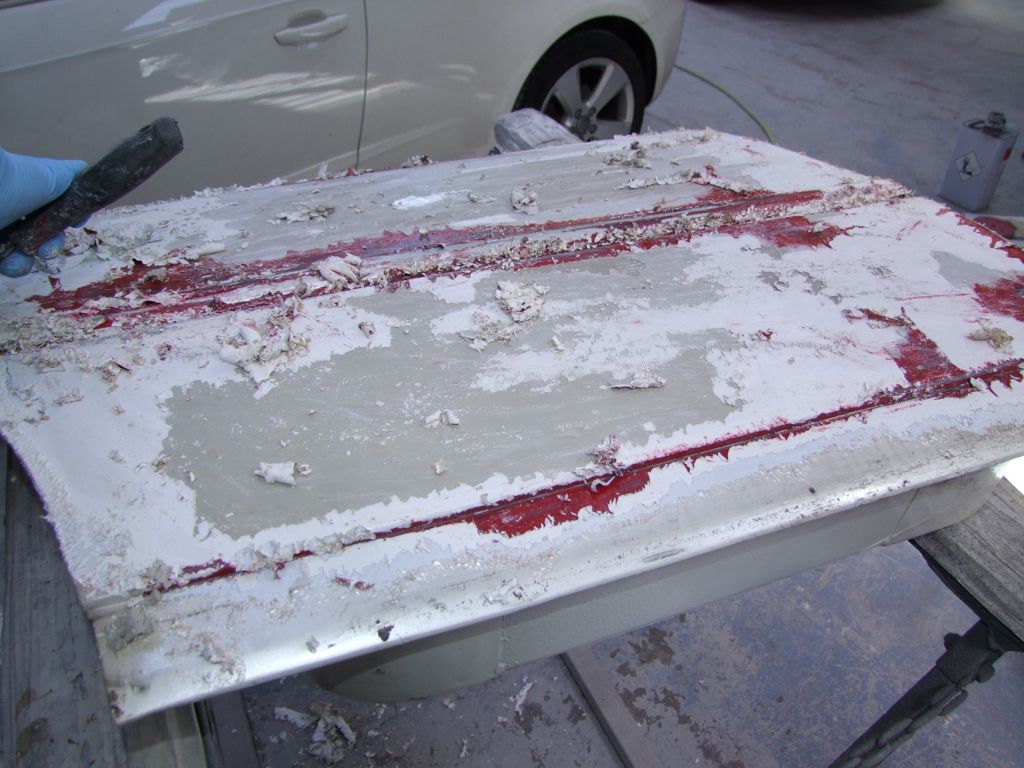
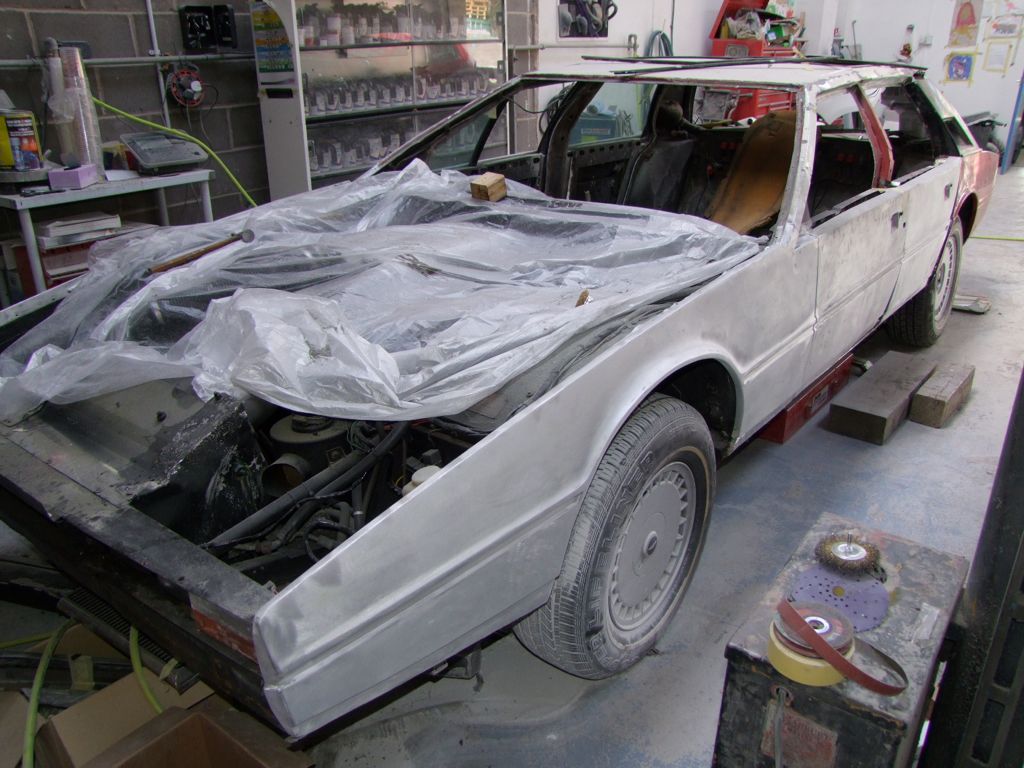
The paint on the car is thick. There are two white resprays on top of the original red. Before any panel aligning can be done, it has to come off.
Paint stripper is the most gentle way of doing this.
 |
|
| Back to top |
|
|
jonc
Joined: 21 Sep 2010
Posts: 584
Location: Cheshire, UK
|
| Posted: Thu Aug 20, 2015 3:51 pm Post subject: |
|
|
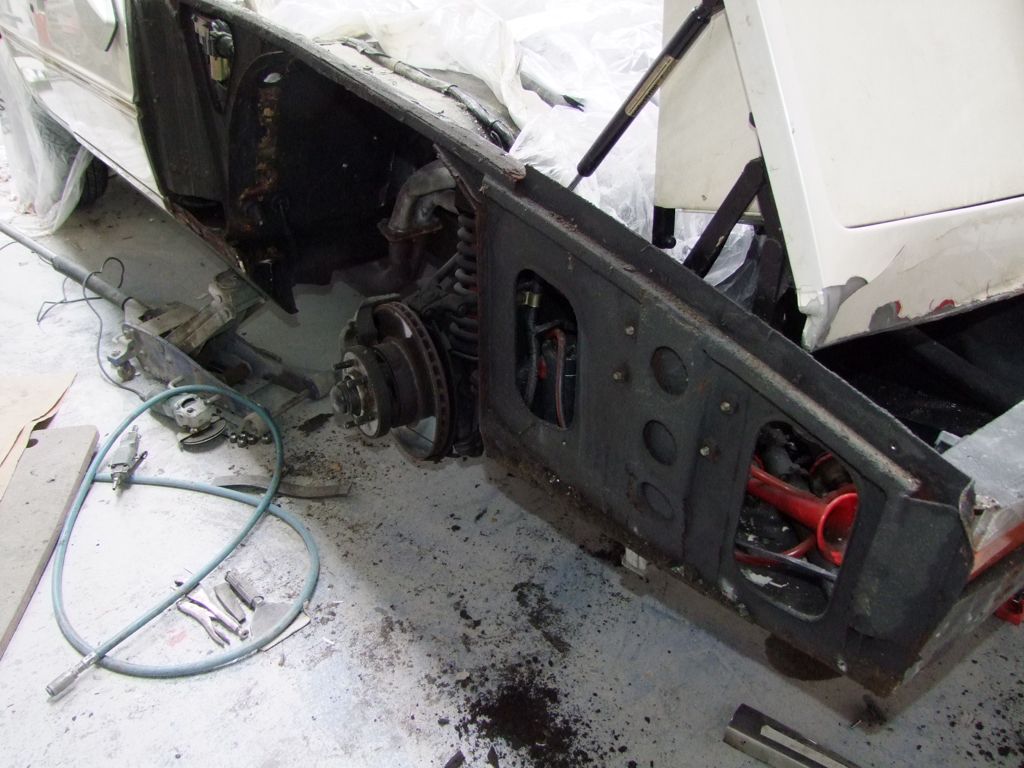
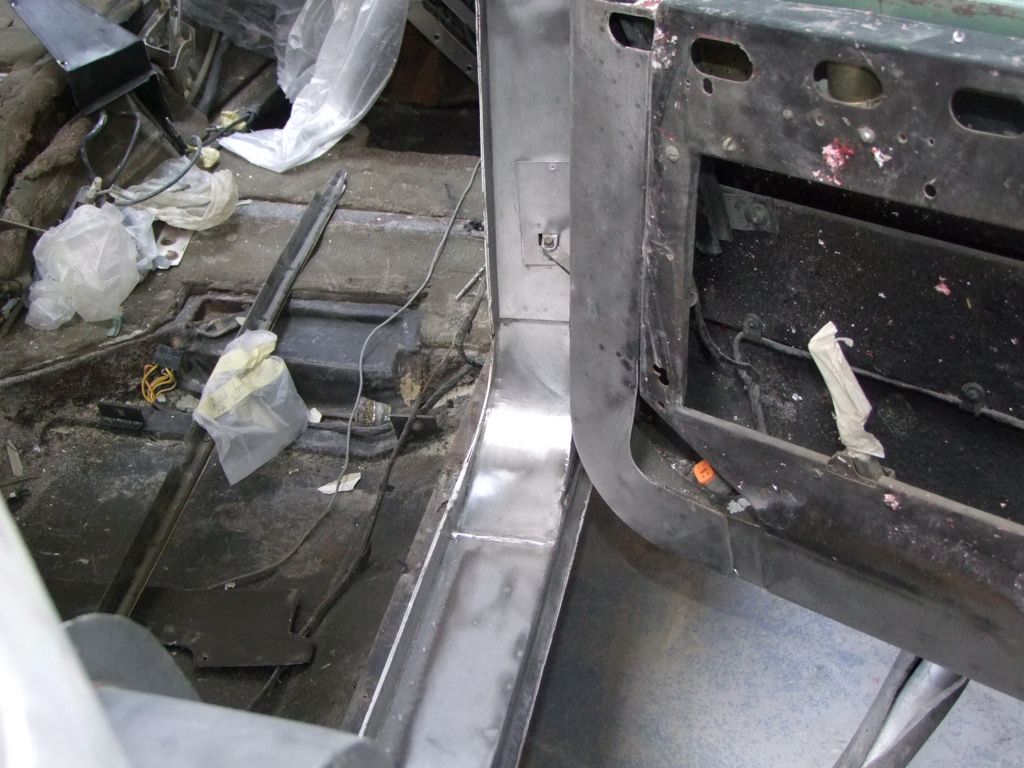
Now a spot of steelwork repair in another corner. On this photo you can also see six or seven unused non-production relay brackets. There are a load more on the other side.
You can also see a previous good quality repair here. I think this was done by WS in 1997. This part is steel and there is no aluminium cover.
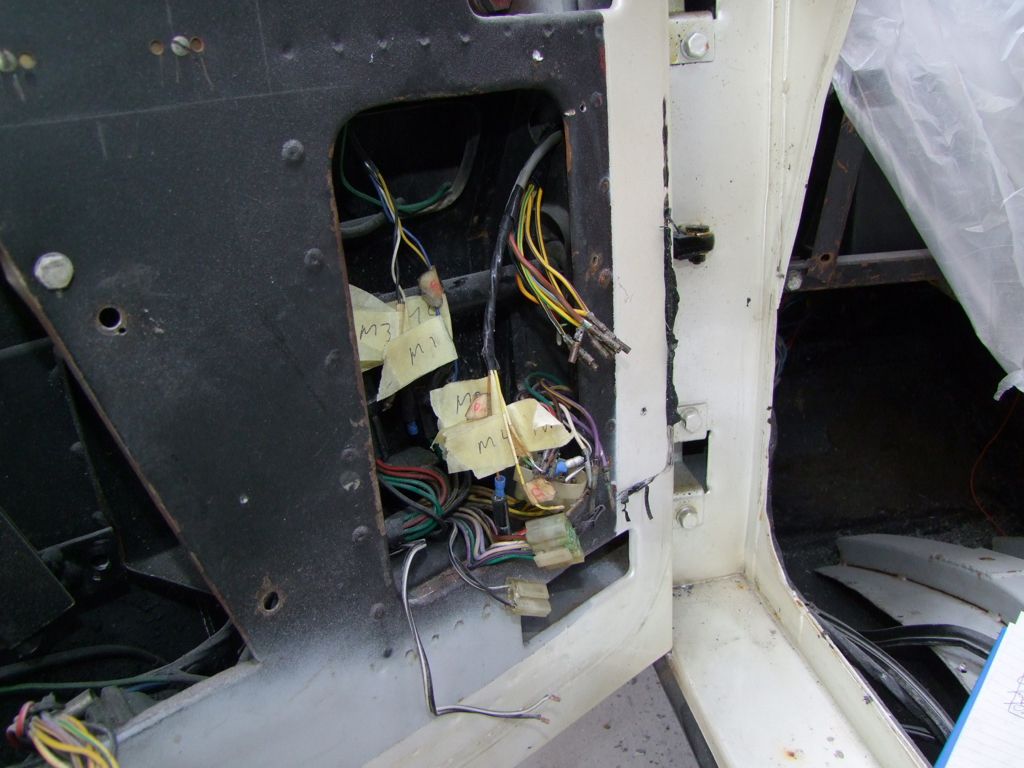
Now the doors are coming off. In order to do this, each wiring loom has to be removed from them. This is a slow process as the loom won't fit out through the hole with the connector body on it. Each pin has to be removed from the housing.
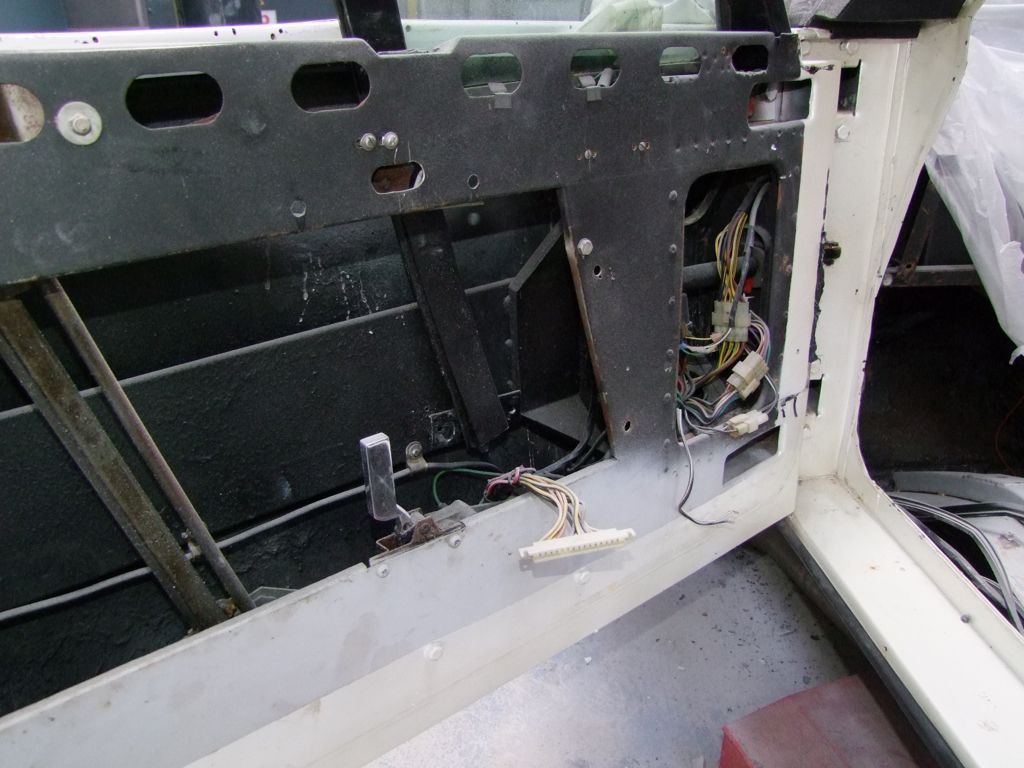
The previous owner complained of electrical problems when the car was wet. He put this down to the car being an 'engineering car' with no proper wiring loom. This may actually have been the cause:
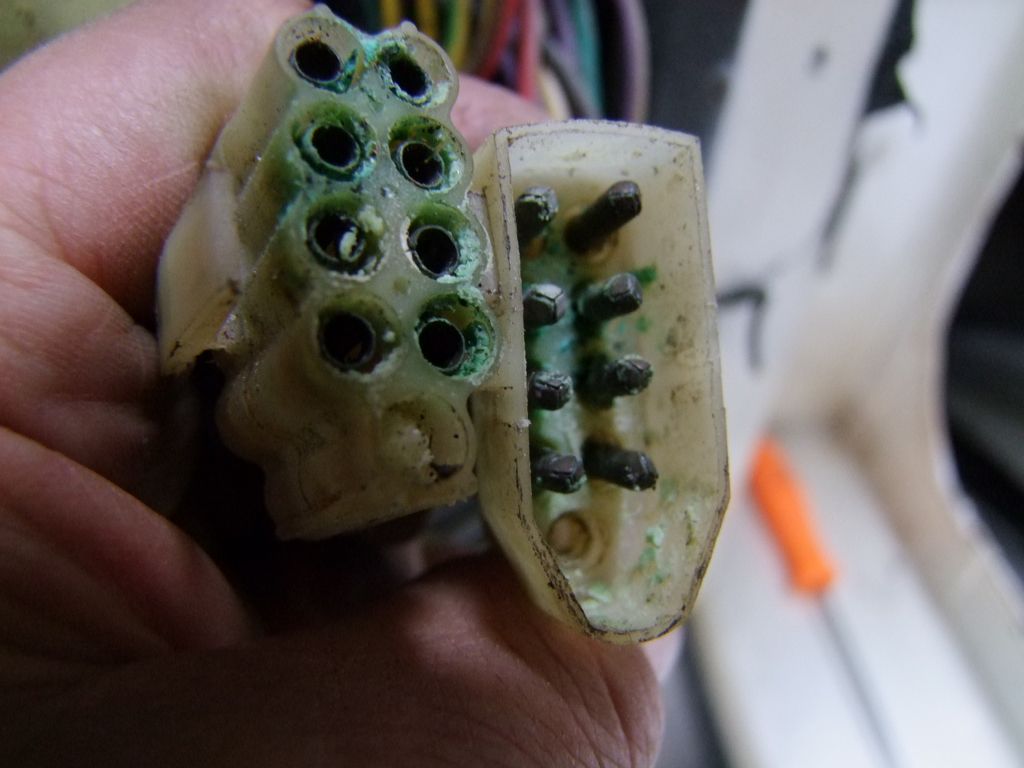
These connectors sit directly below the quarter light and water drips through the bottom seal directly into them. I had the same problem on 277.
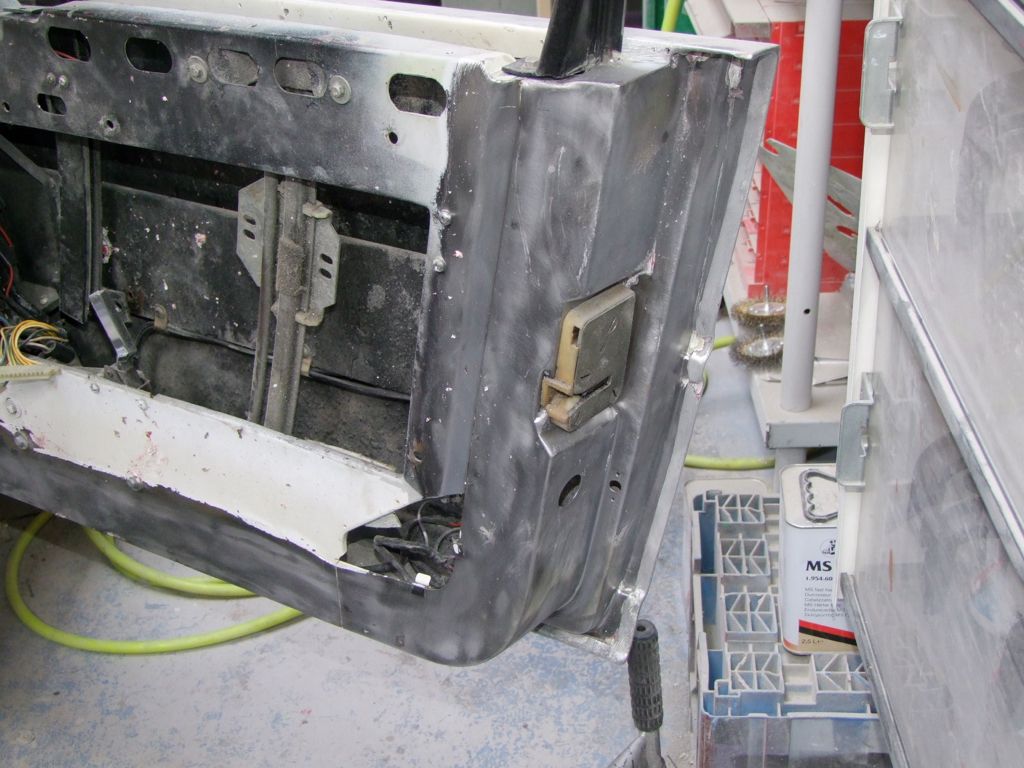
You can see the unusual gas strut for the door stay here. The car was advertised with 'anti-slam' doors in the initial brochures.
With the doors removable, much more paint stripping:
 |
|
| Back to top |
|
|
jonc
Joined: 21 Sep 2010
Posts: 584
Location: Cheshire, UK
|
| Posted: Thu Aug 20, 2015 6:13 pm Post subject: |
|
|
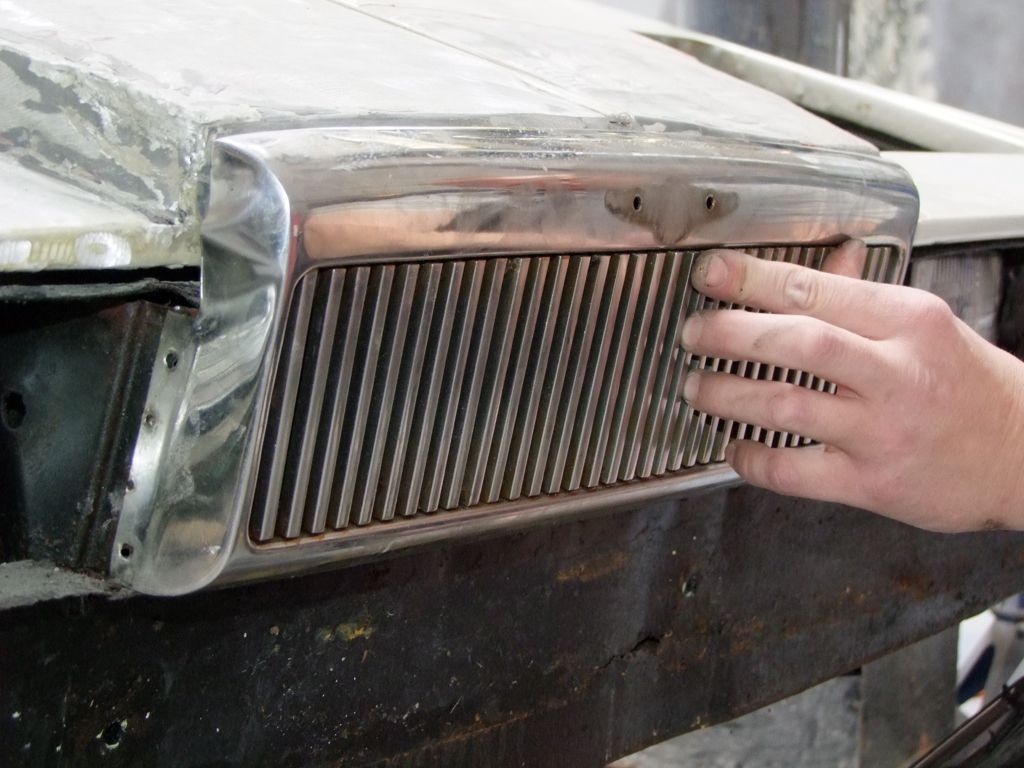
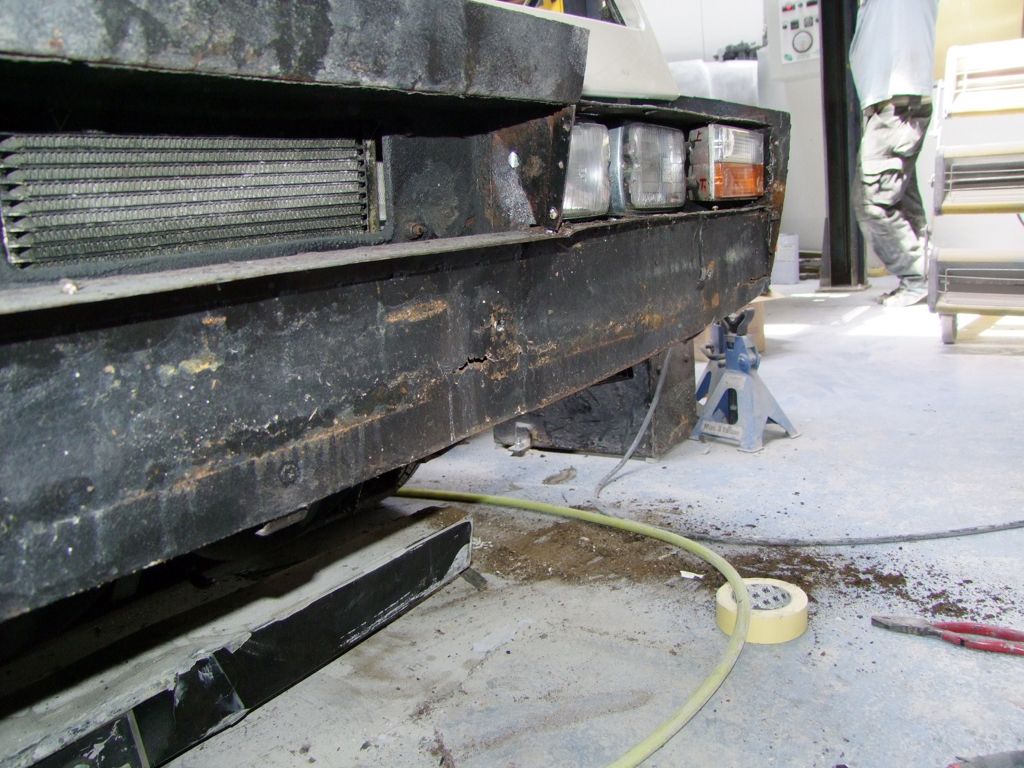
The grille has taken a bit of a battering too. It is a standard early one, but hopefully we can keep it by straightening it anyway.
Still needs some work, but not bad for a first pass.
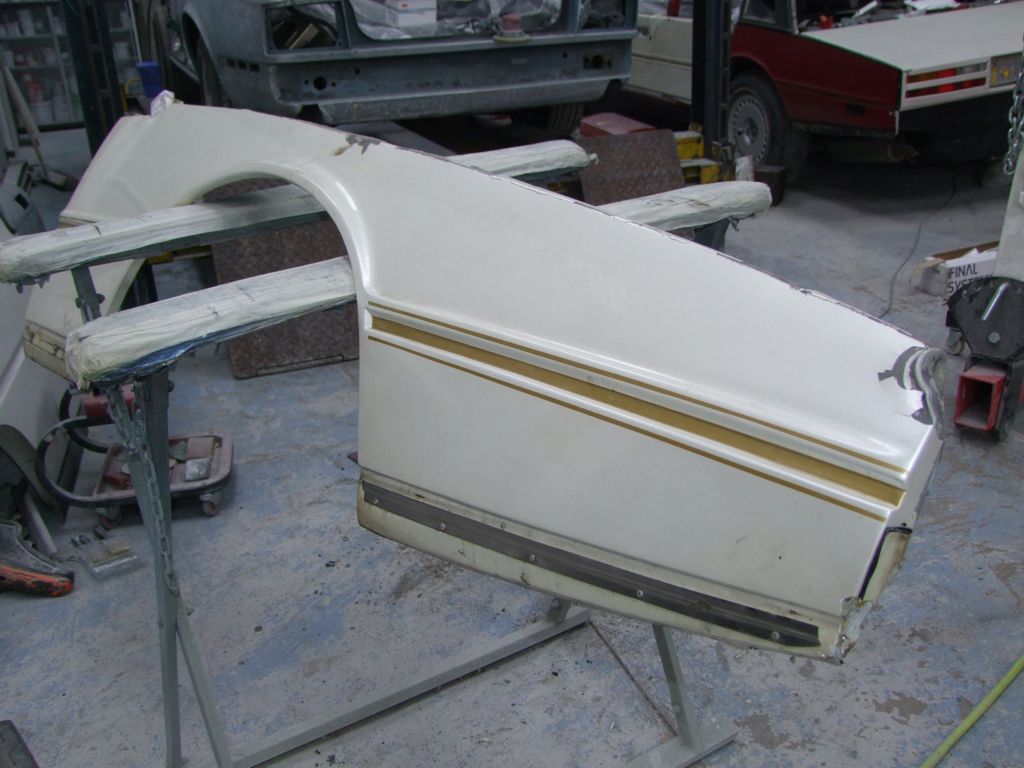
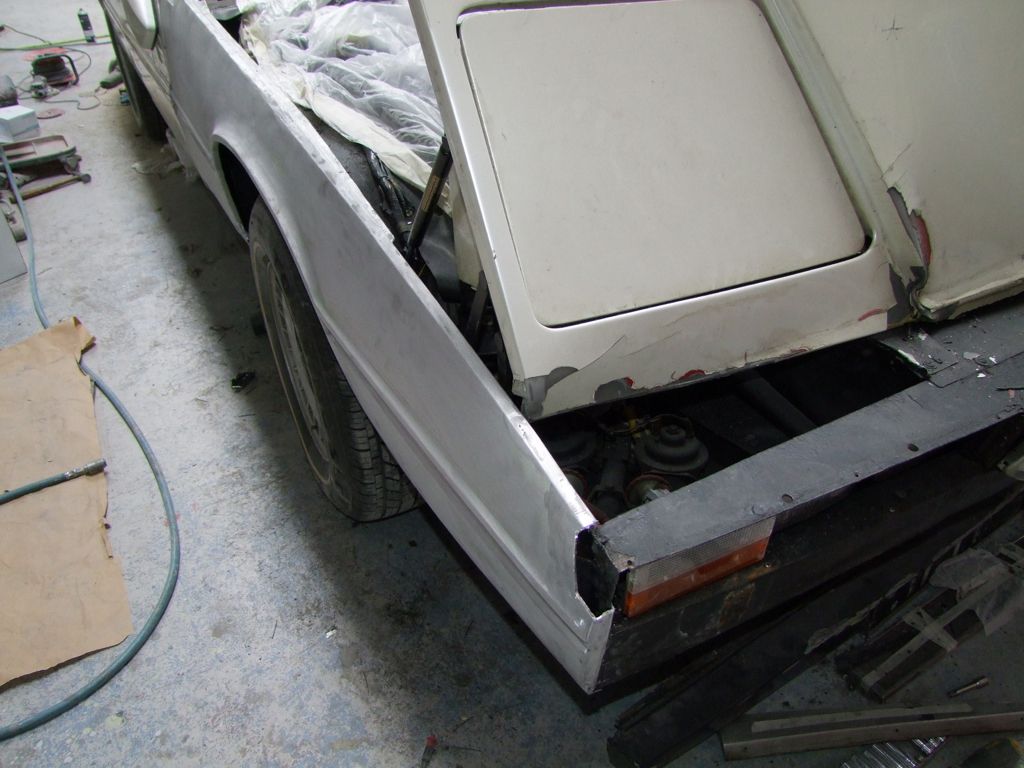
This front wing is in bad shape and we have a replacement.
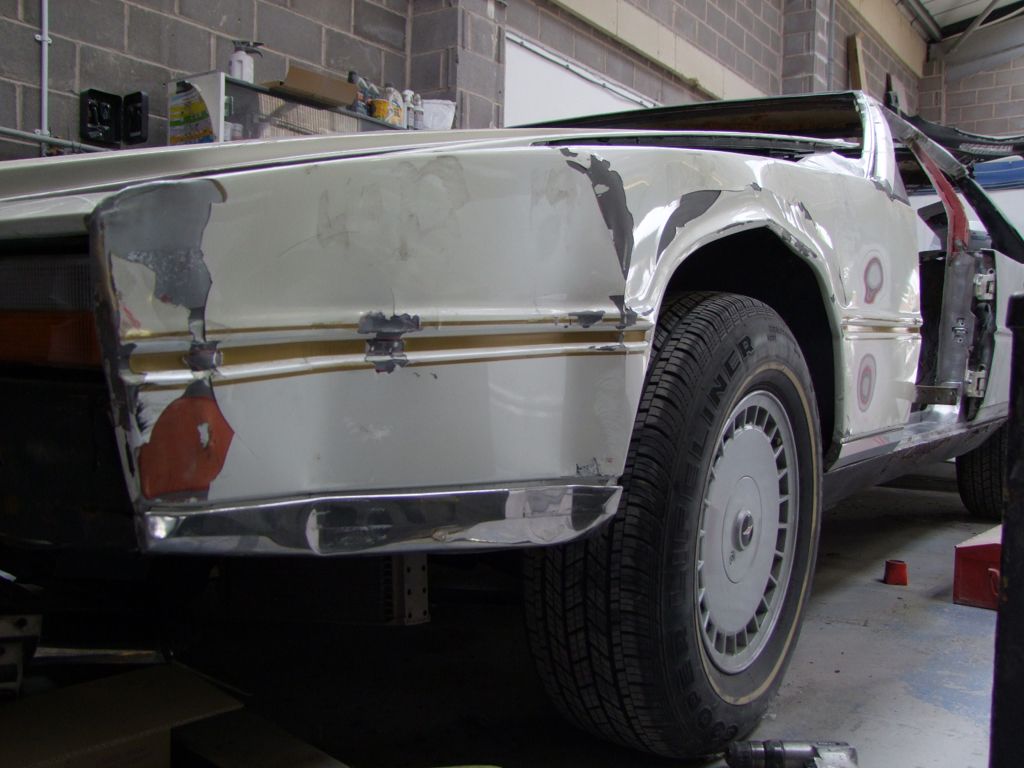
Again, decent condition underneath.
The replacement is from Puddleduck. Light blue metallic over telford grey? Hmm..

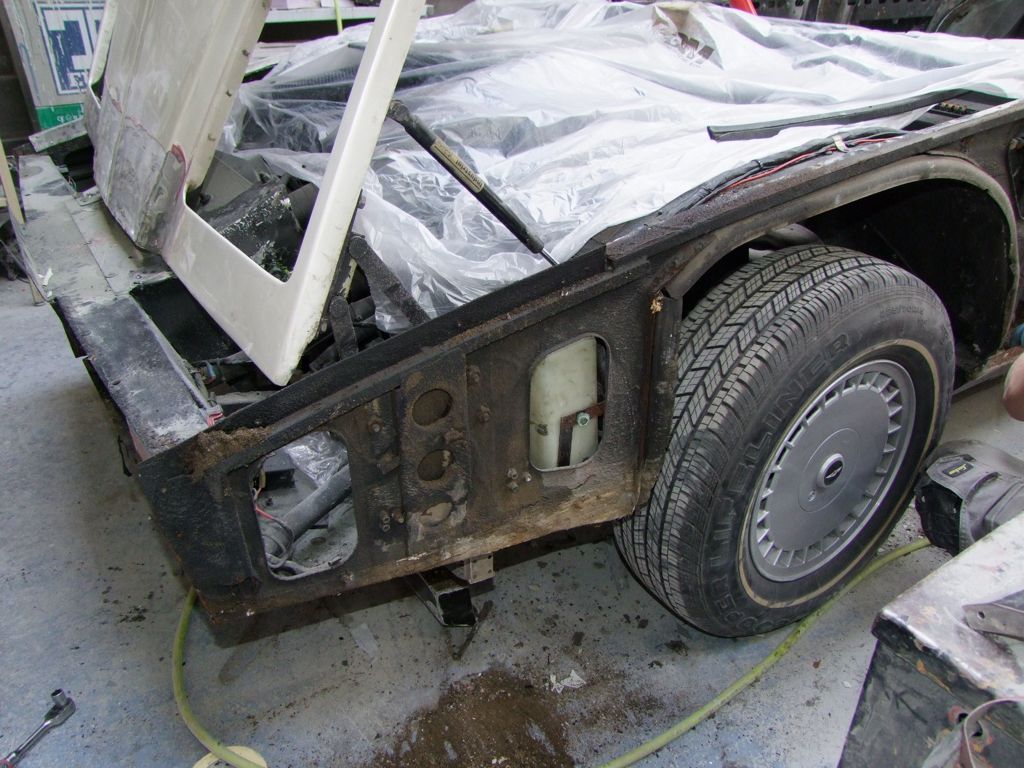
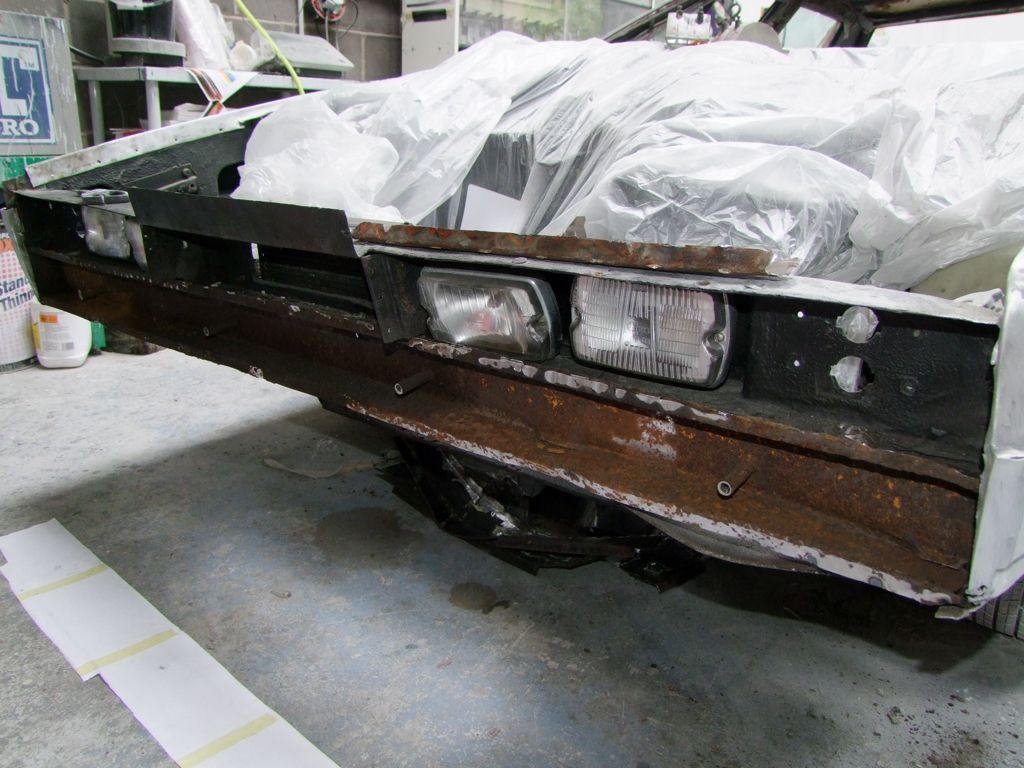
With the front bumper off, there is more work revealed..
Last edited by jonc on Sat Aug 22, 2015 7:51 am; edited 1 time in total |
|
| Back to top |
|
|
Lagondanet
Administrator

Joined: 03 Jan 2007
Posts: 3108
Location: UK
|
| Posted: Fri Aug 21, 2015 7:50 am Post subject: |
|
|
| Truly marvellous work so far. I saw the car a couple of weeks ago and it has certainly come a long way. |
|
| Back to top |
|
|
Vincent

Joined: 20 Nov 2007
Posts: 1055
Location: Belgium
|
|
| Back to top |
|
|
jonc
Joined: 21 Sep 2010
Posts: 584
Location: Cheshire, UK
|
| Posted: Fri Aug 21, 2015 4:01 pm Post subject: |
|
|
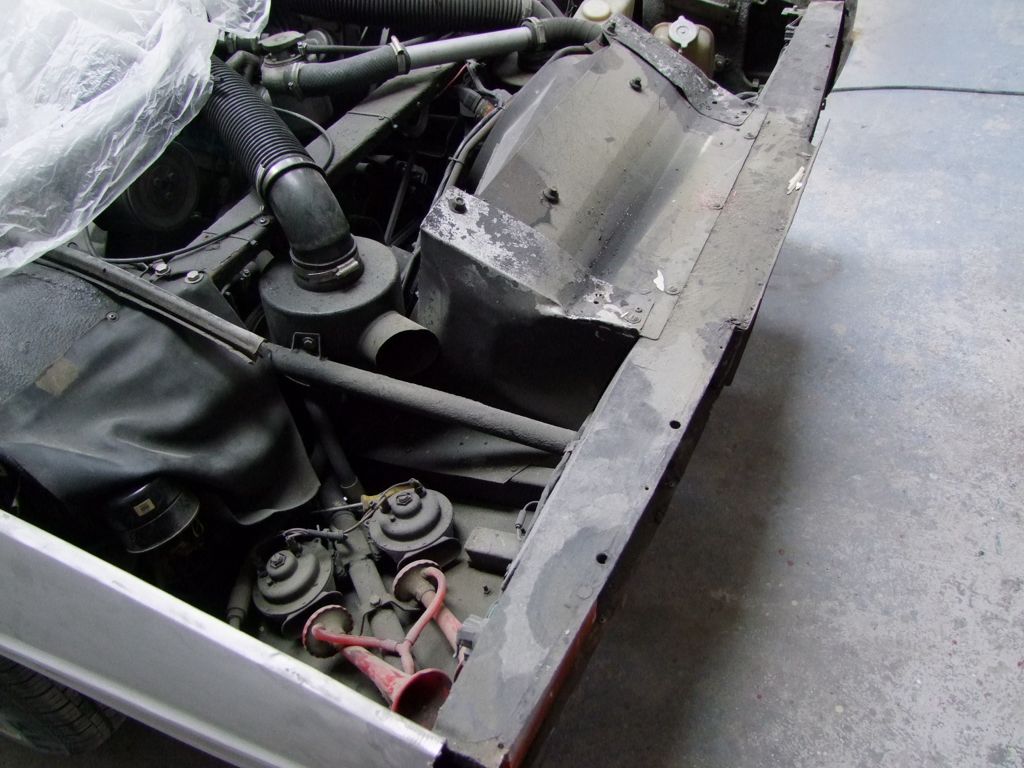
All praise should be directed at David 
The bonnet is off, and you can see there are some additional panels on the side of the radiators. These are too crude for WS. I think they were added when the additional electric fans were added to the front of the radiators. The previous owner was never happy with the performance of the aircon, which he required to cope with Hong Kong traffic jams. As he put it, 'several hours, moving at no more than 2mph'. These extra panels, and the extra fans are staying off.
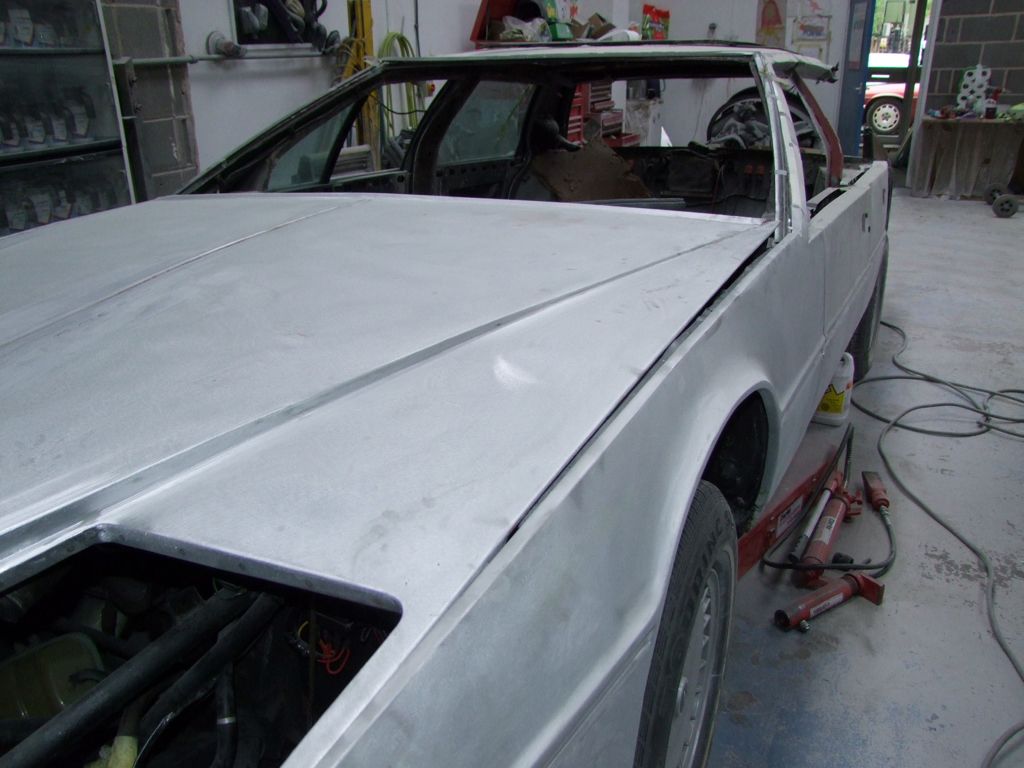
Now the bulk of the car is stripped, it is possible to check the overall alignment of the panels and confirm that things are basically the right shape. This includes trial fitting of front and rear screens.
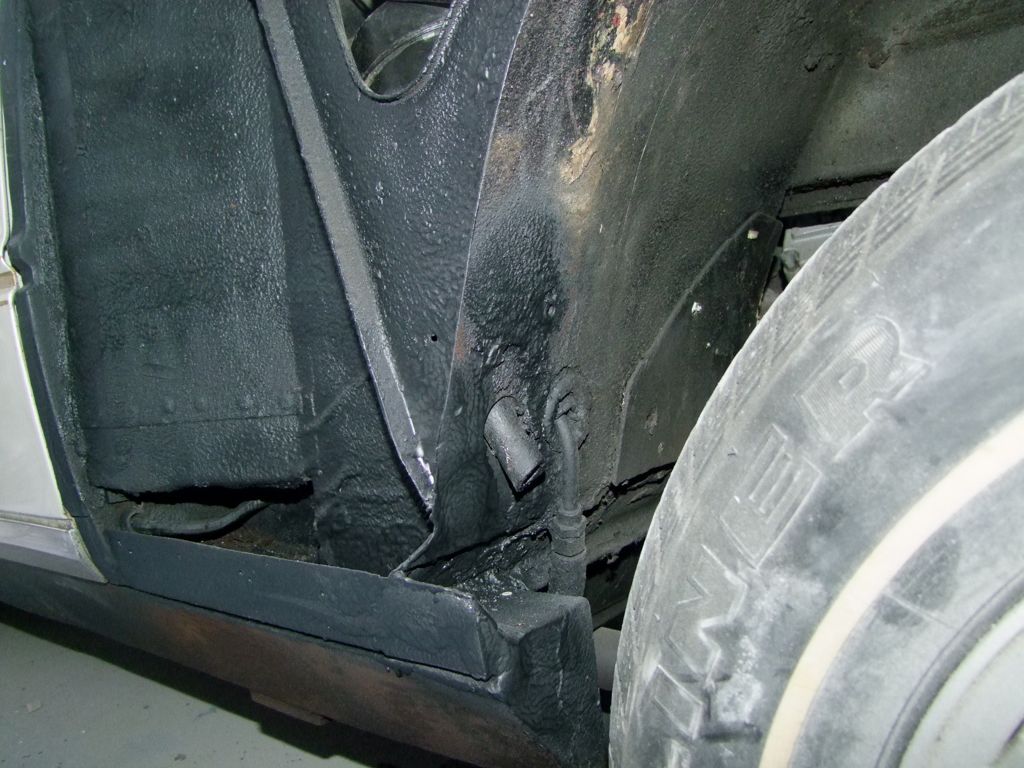
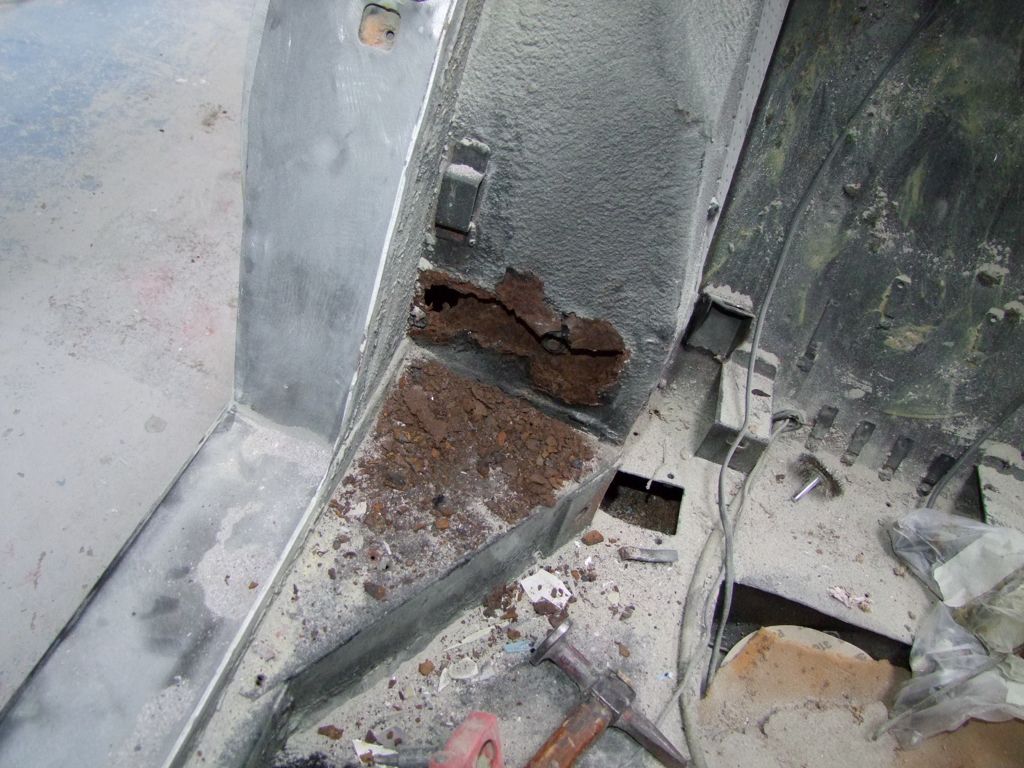
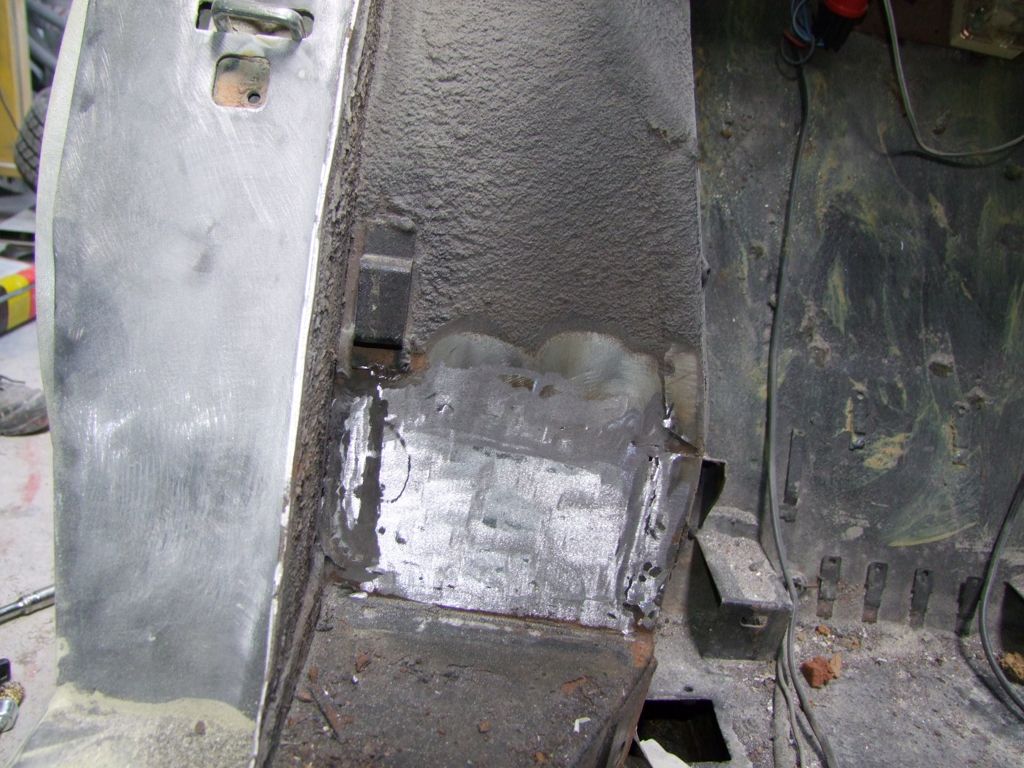
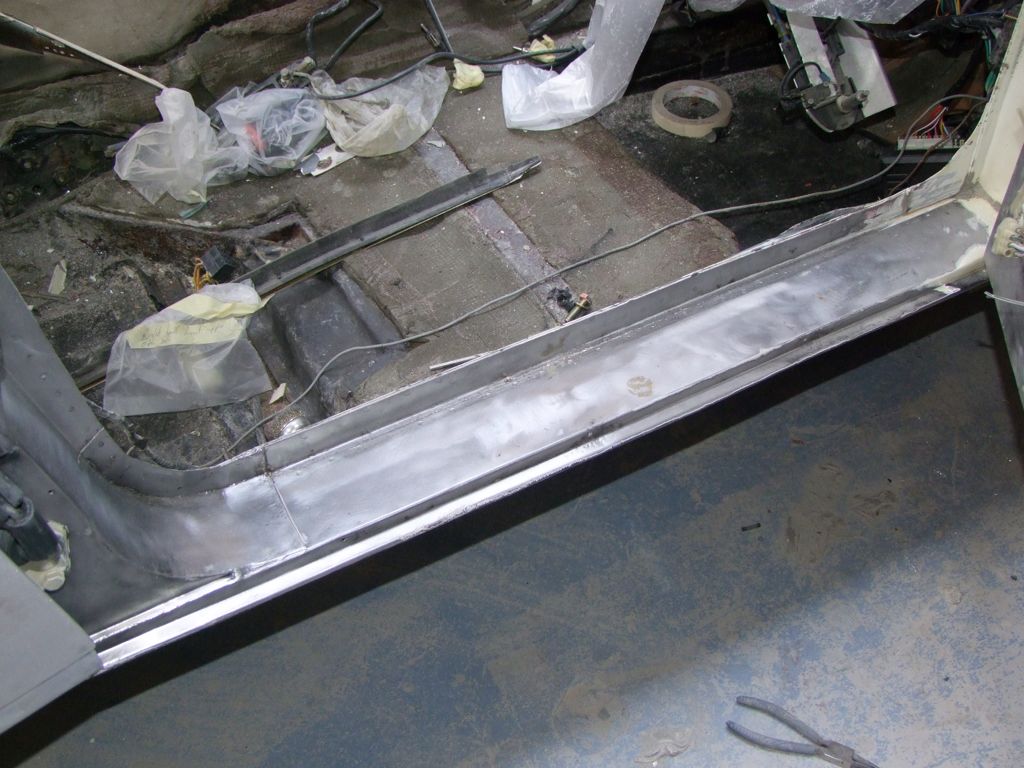
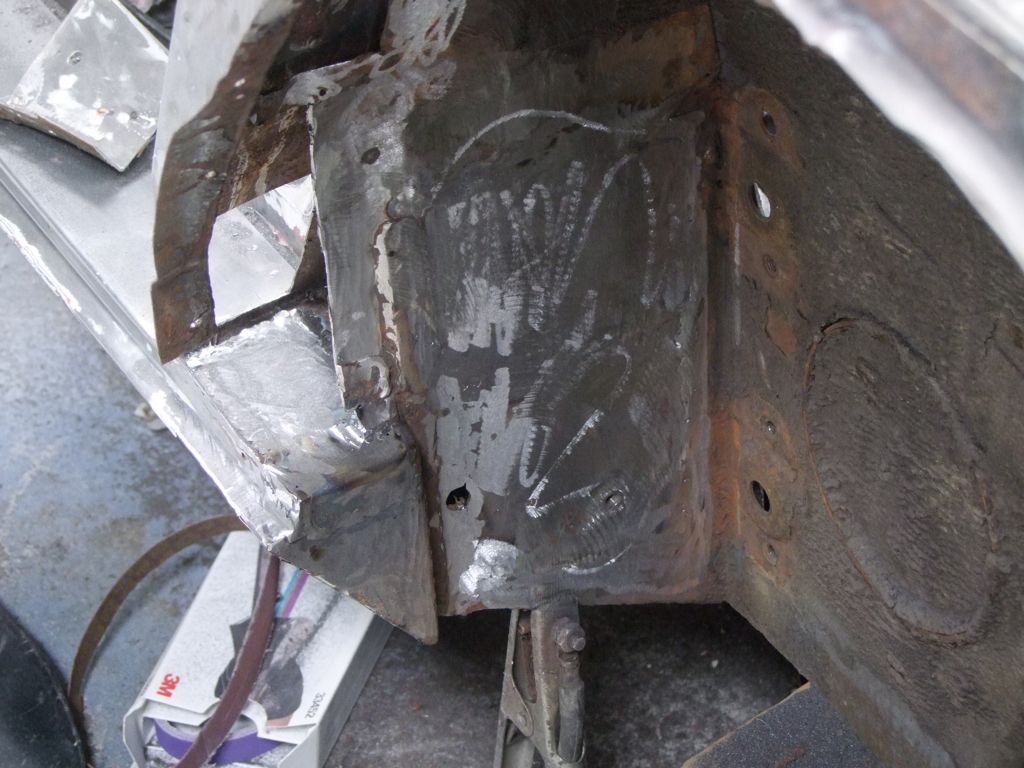
Which means the rust in the structural area at the left rear can now be dealt with.
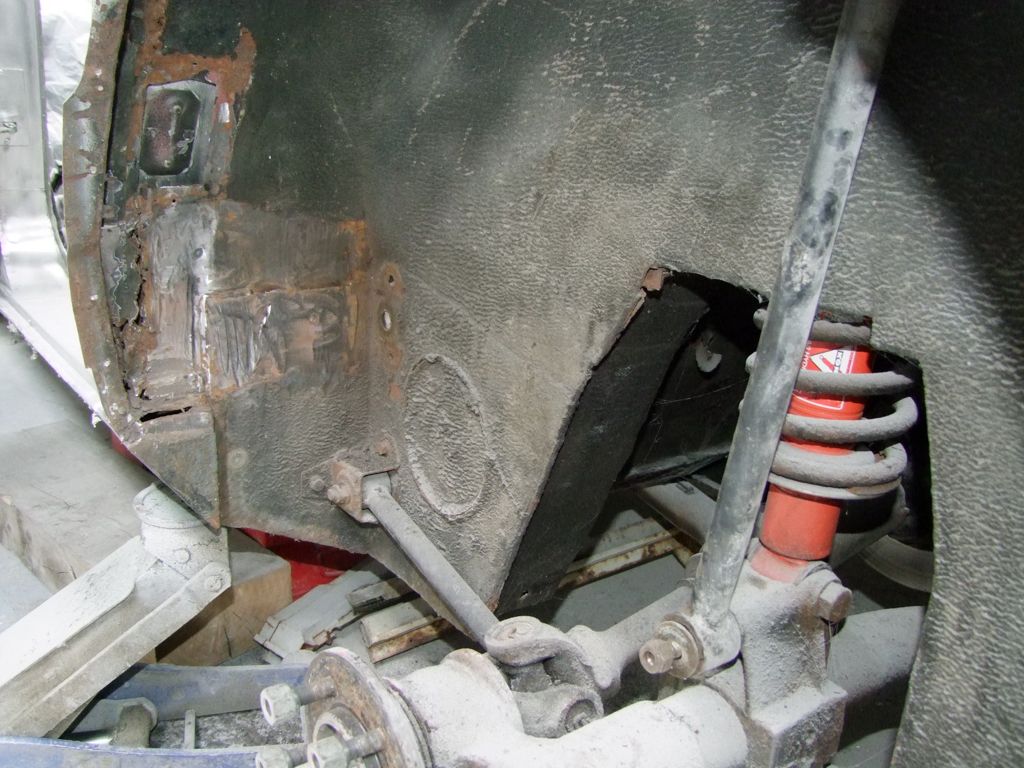
Of course, with a Lagonda, the job you start with always gets bigger..

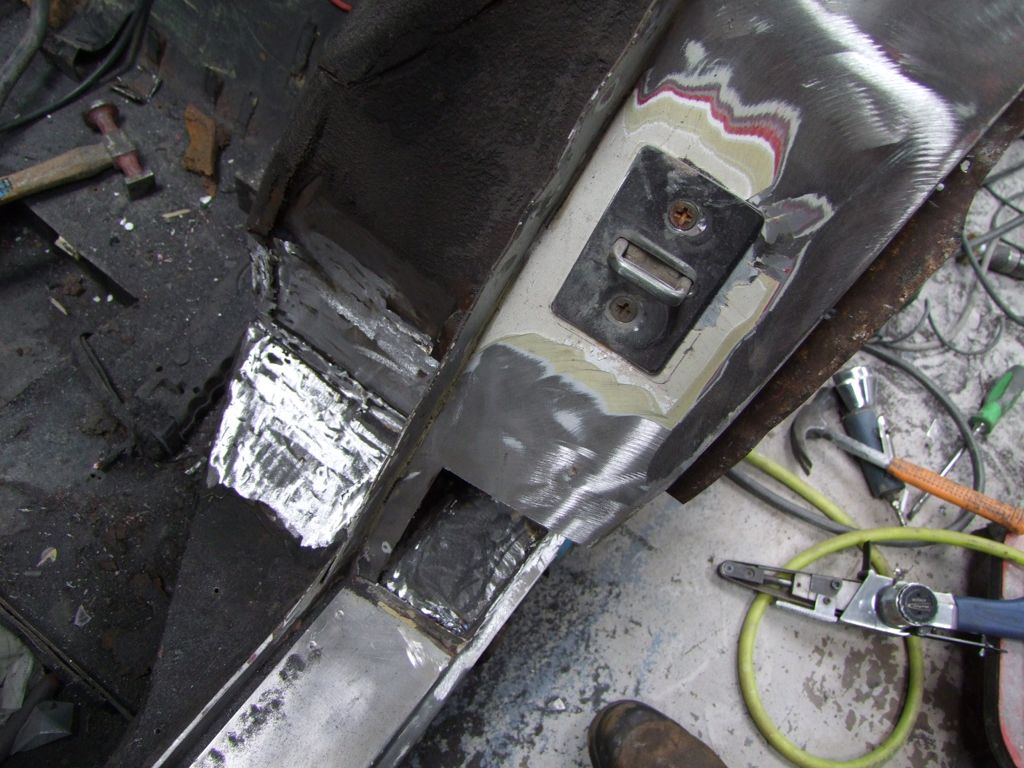
This at least allowed the inspection of the inners, which look in good shape. Now to put some steel back in:
 |
|
| Back to top |
|
|
jonc
Joined: 21 Sep 2010
Posts: 584
Location: Cheshire, UK
|
| Posted: Fri Aug 21, 2015 4:51 pm Post subject: |
|
|
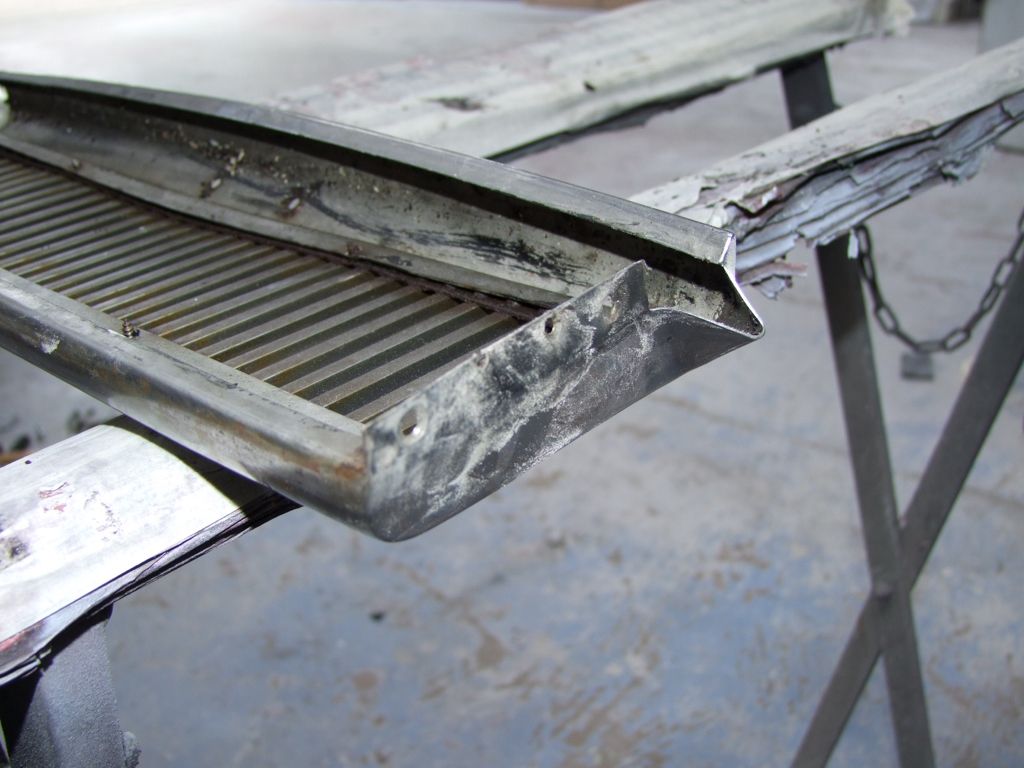
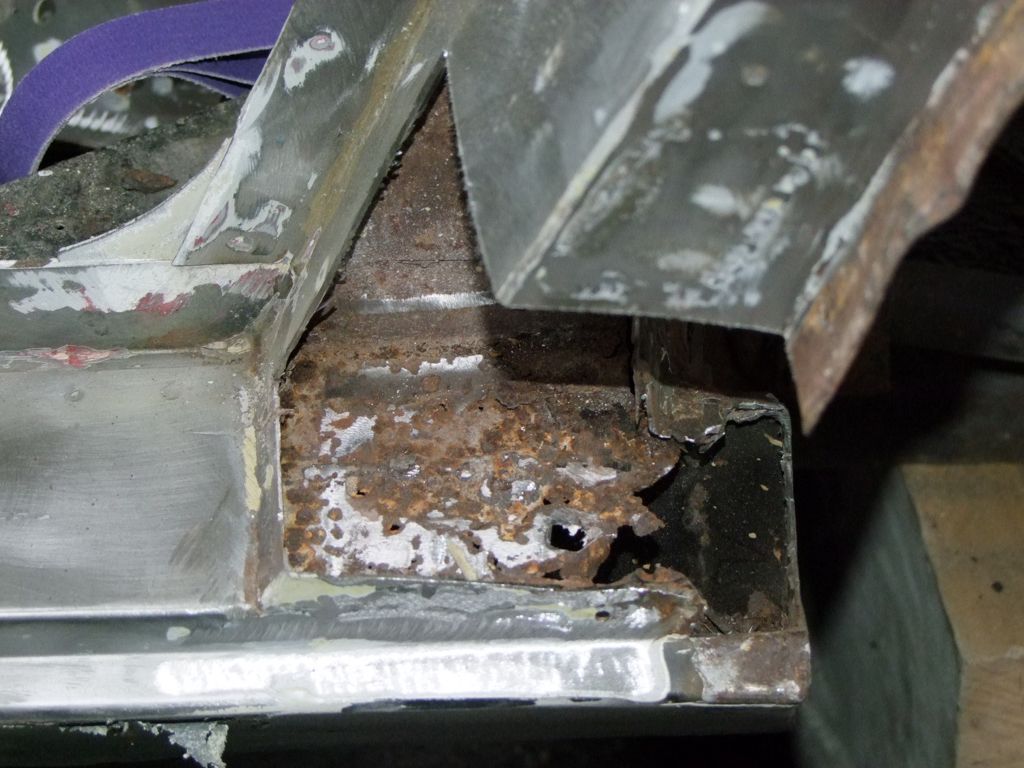
On to some non-structural work. Both the bumpers are steel on this car - possibly unique now. The back one is in perfect shape, but the front one is damaged. And with the paint off, we can see it is a bit rusty in one corner.
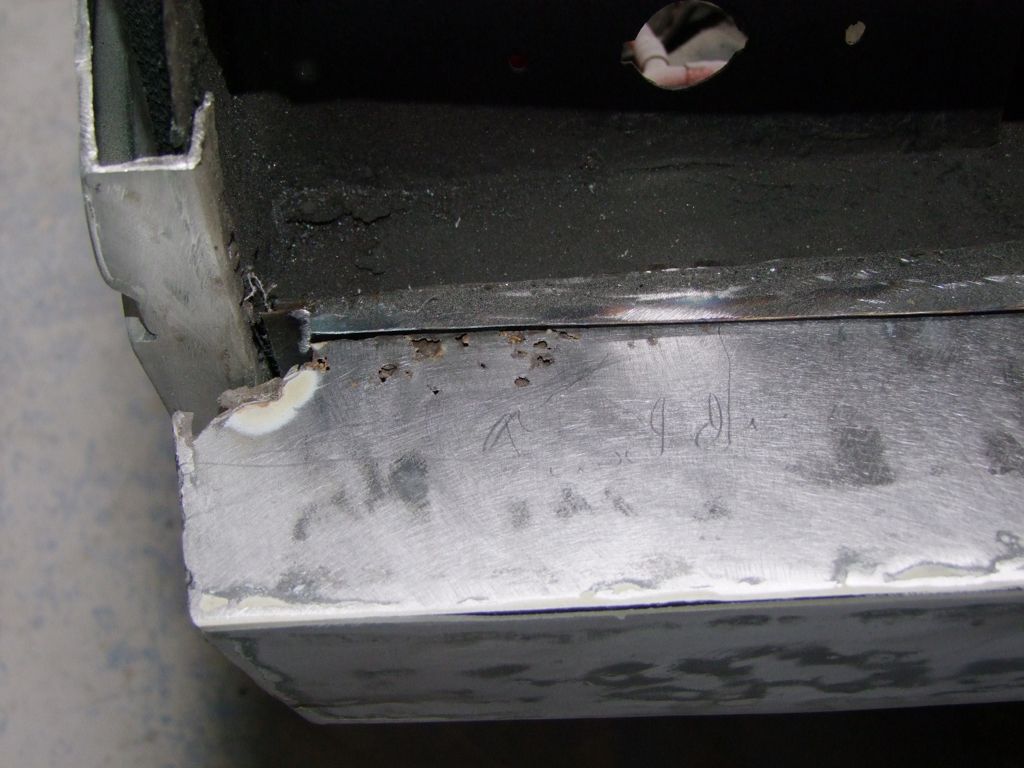
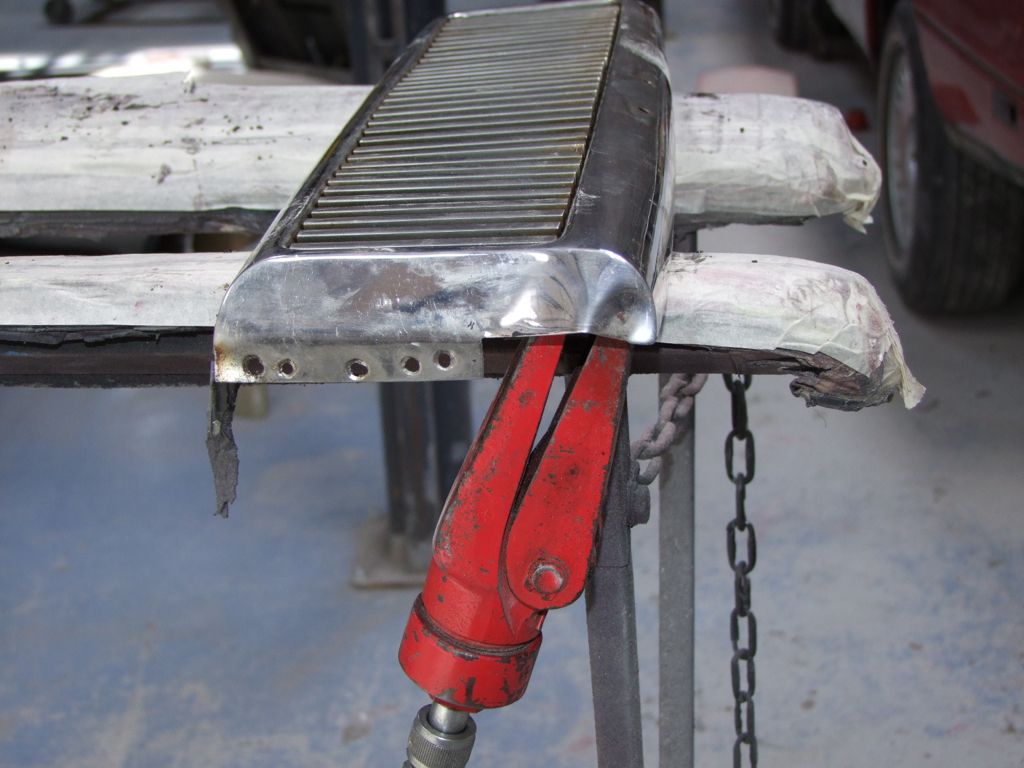
The inside of the bumper is filled with foam which we thought about removing to knock out the bumps from the rear, but there is a better way:
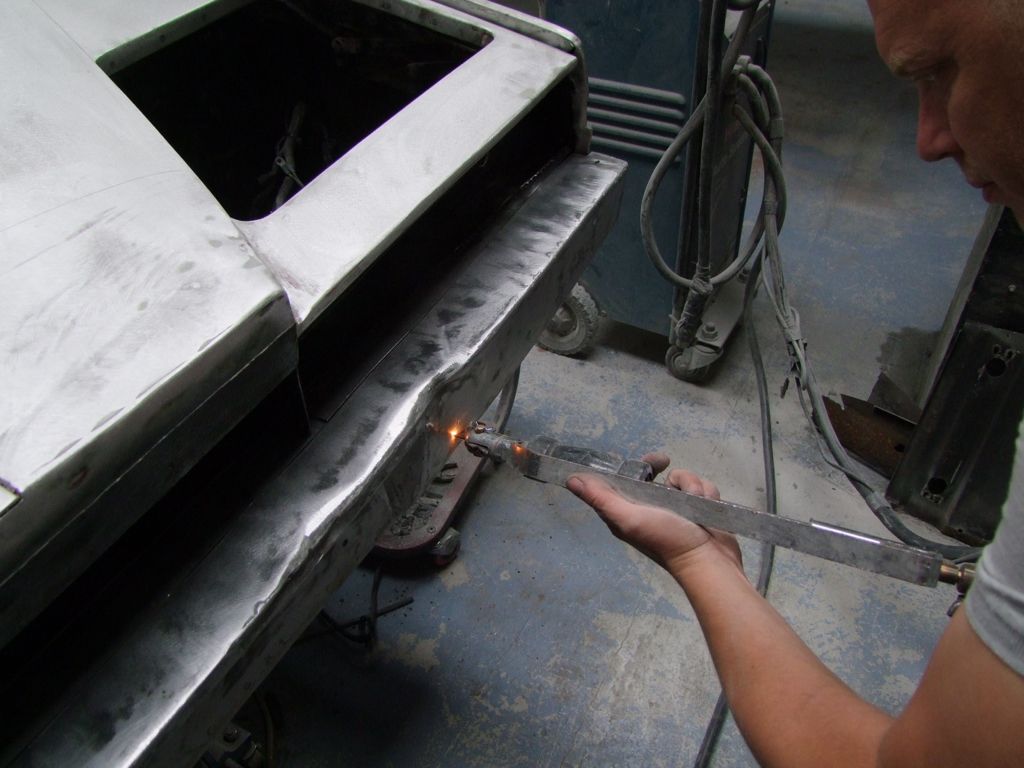
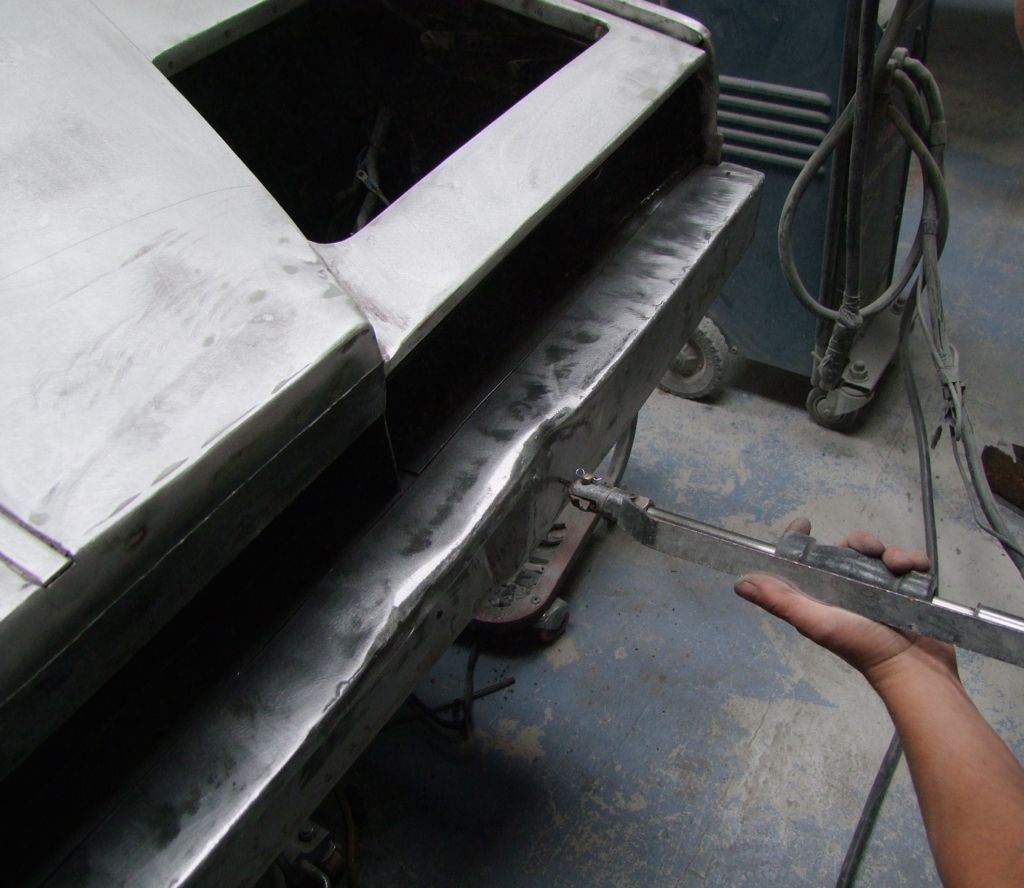
A special tool spot-welds a steel pin on, which is then used to pull out the metal with a slide-hammer. The pins are then ground off.
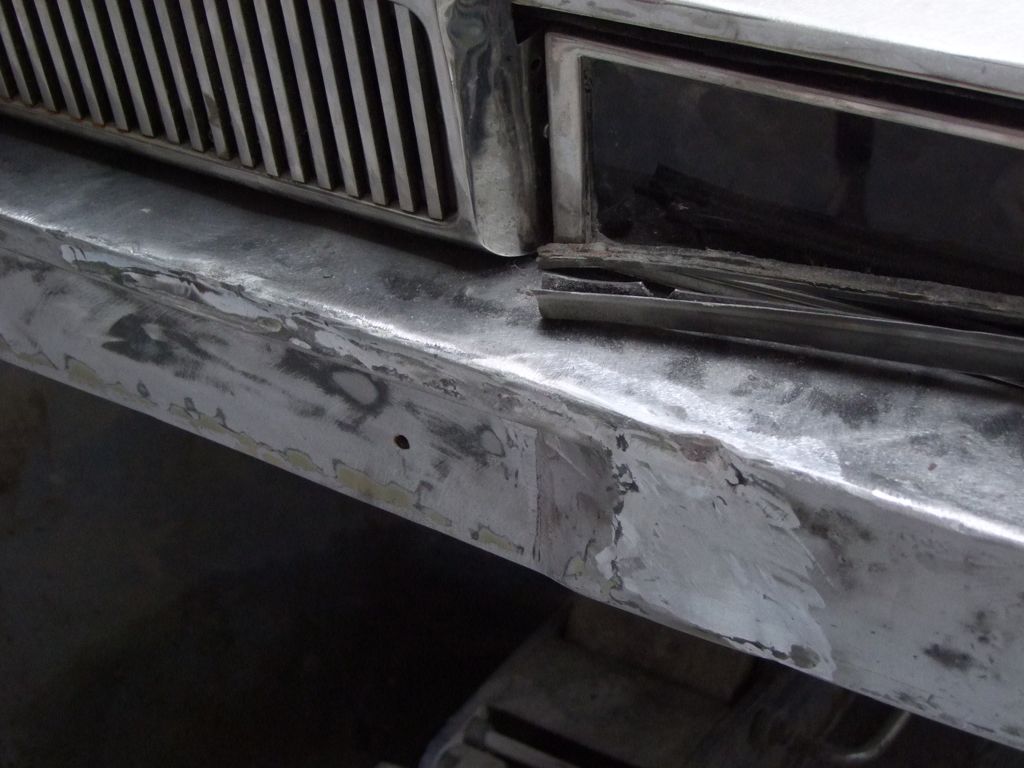
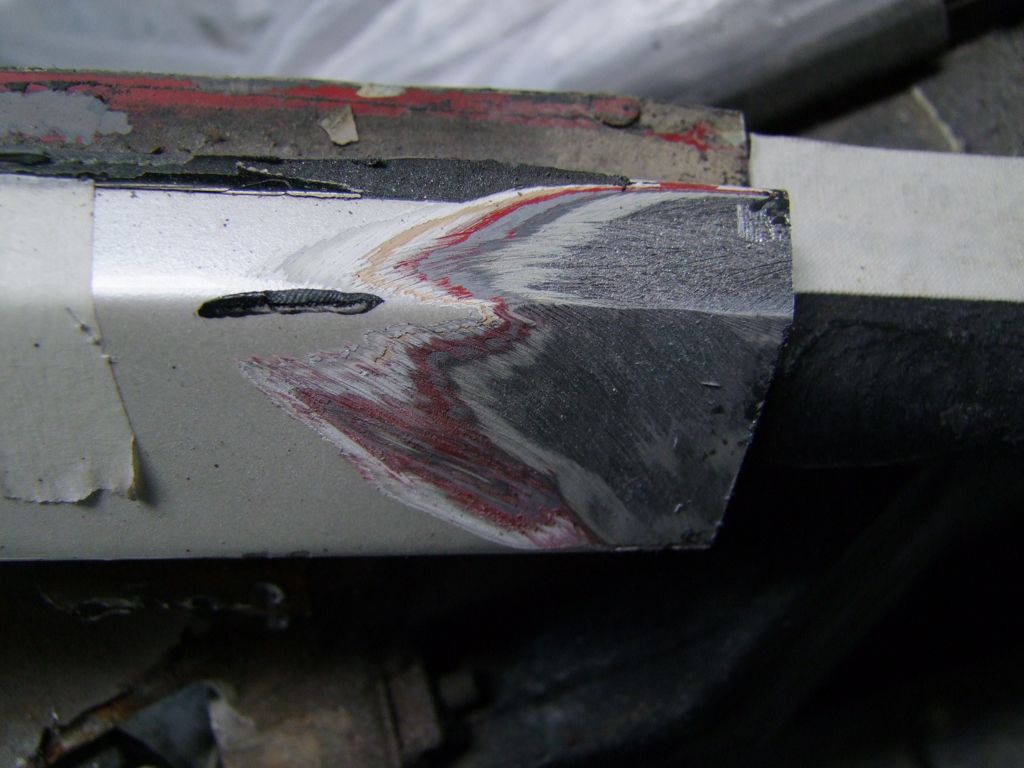
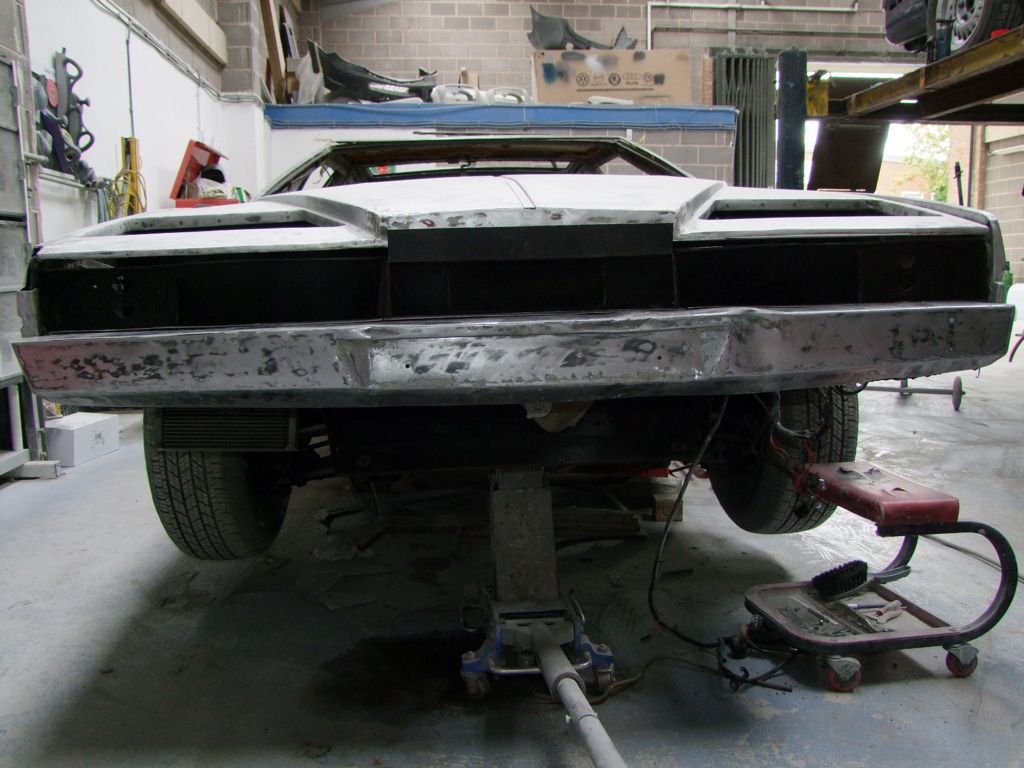
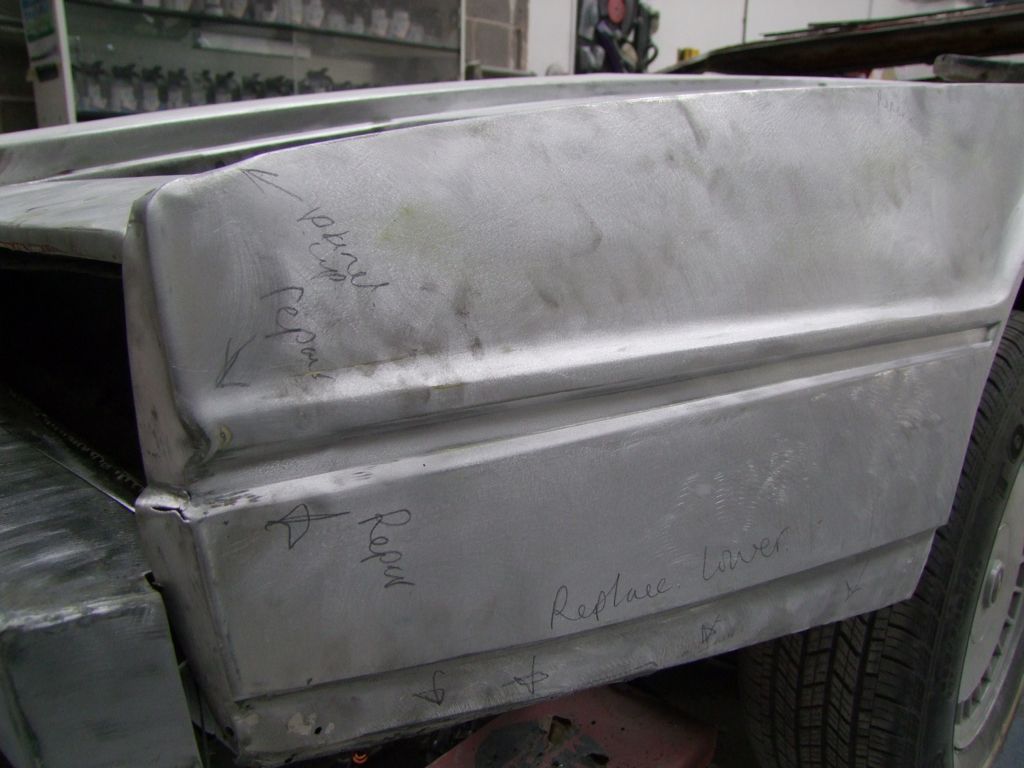
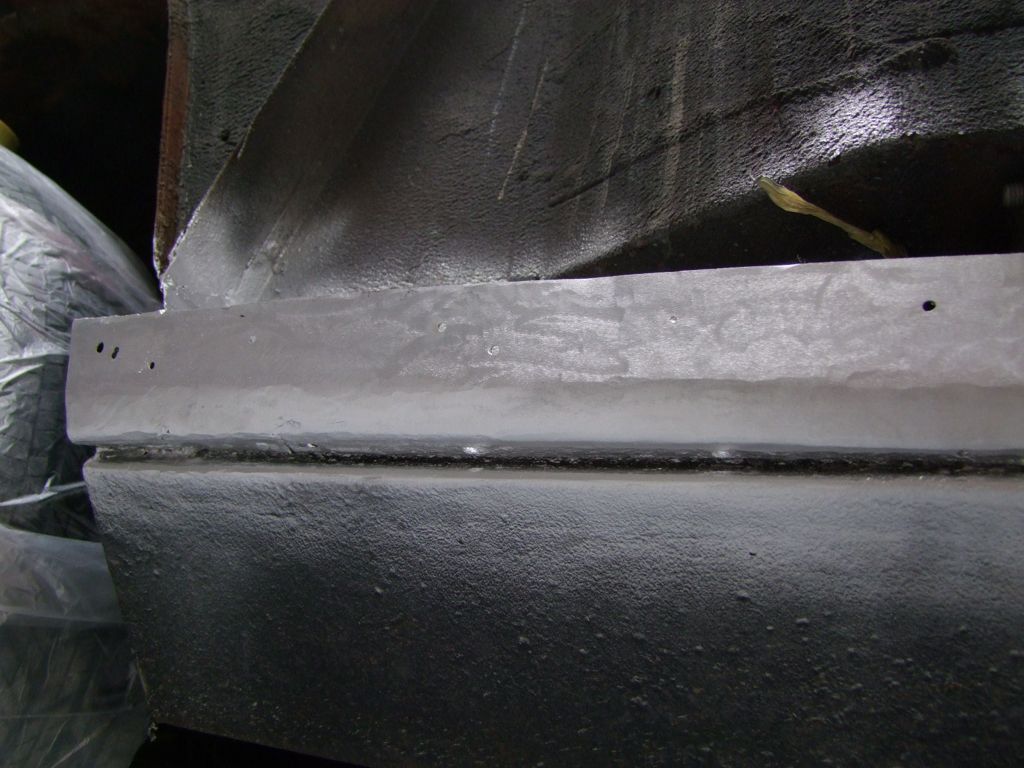
Still at the front, now some aluminium. Before:
During:
After
So far on, but so much still to do..
Last edited by jonc on Wed Sep 16, 2015 8:39 am; edited 1 time in total |
|
| Back to top |
|
|
Lagondanet
Administrator
Joined: 03 Jan 2007
Posts: 3108
Location: UK
|
| Posted: Sat Aug 22, 2015 4:20 pm Post subject: |
|
|
| Fascinating stuff & a damn good job!. Craftsmen at work. |
|
| Back to top |
|
|
Lagonda87
Joined: 18 Dec 2007
Posts: 315
|
| Posted: Sun Aug 23, 2015 8:22 pm Post subject: |
|
|
Looking good!
- Great project. Keep posting! |
|
| Back to top |
|
|
jonc
Joined: 21 Sep 2010
Posts: 584
Location: Cheshire, UK
|
| Posted: Wed Sep 16, 2015 9:09 am Post subject: |
|
|
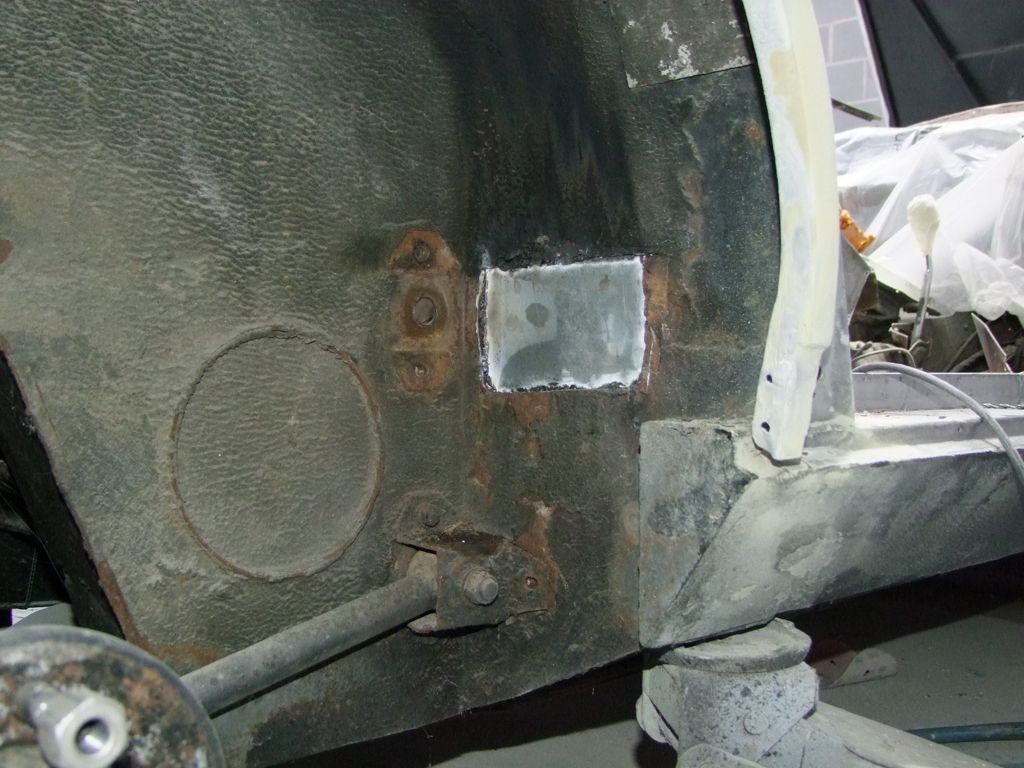
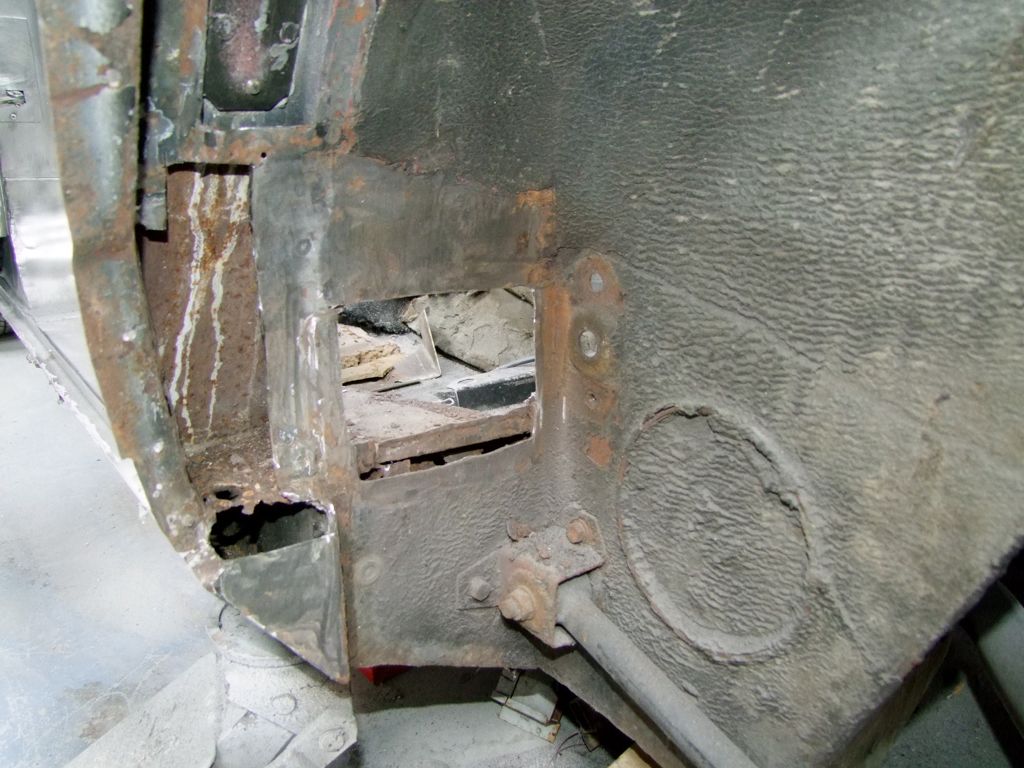
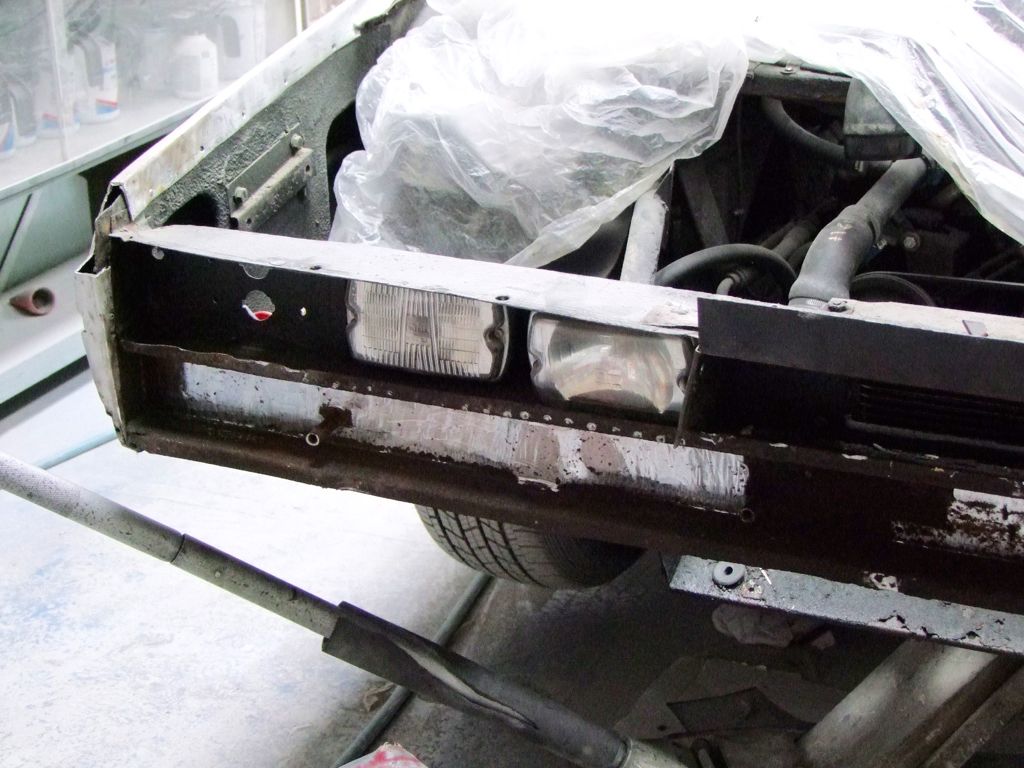
I mentioned a bit ago about the rust behind the front bumper:
The outer skin was removed and it was mostly just surface rust inside.
This was cleaned up..
..painted and then a new front welded on:

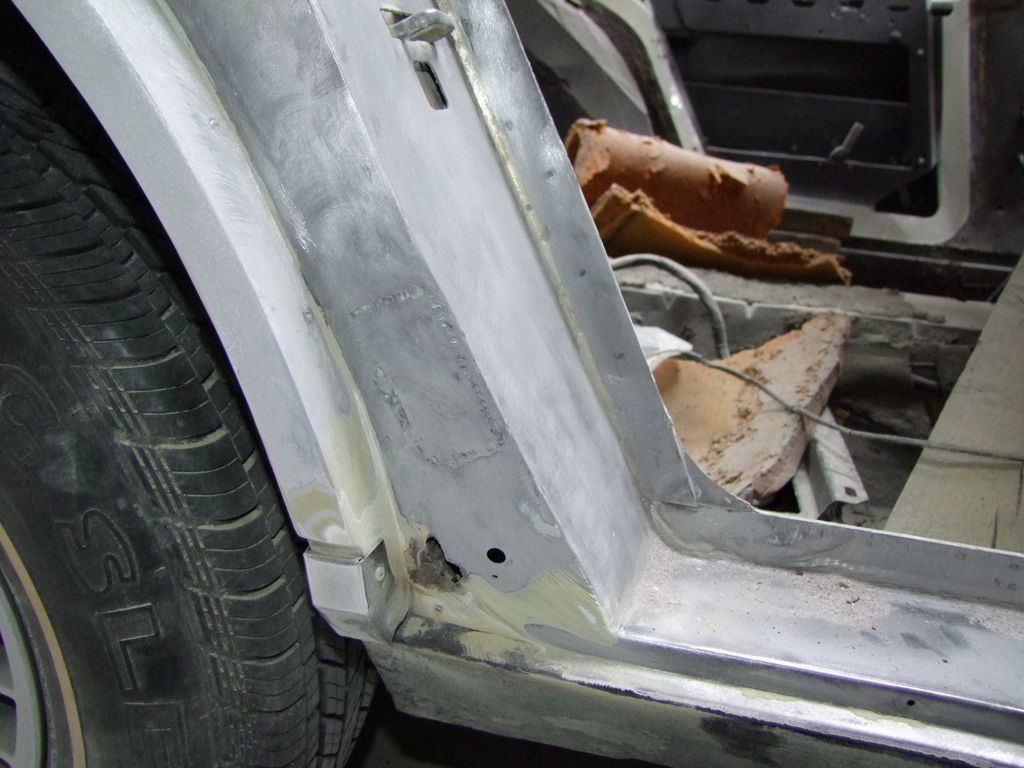
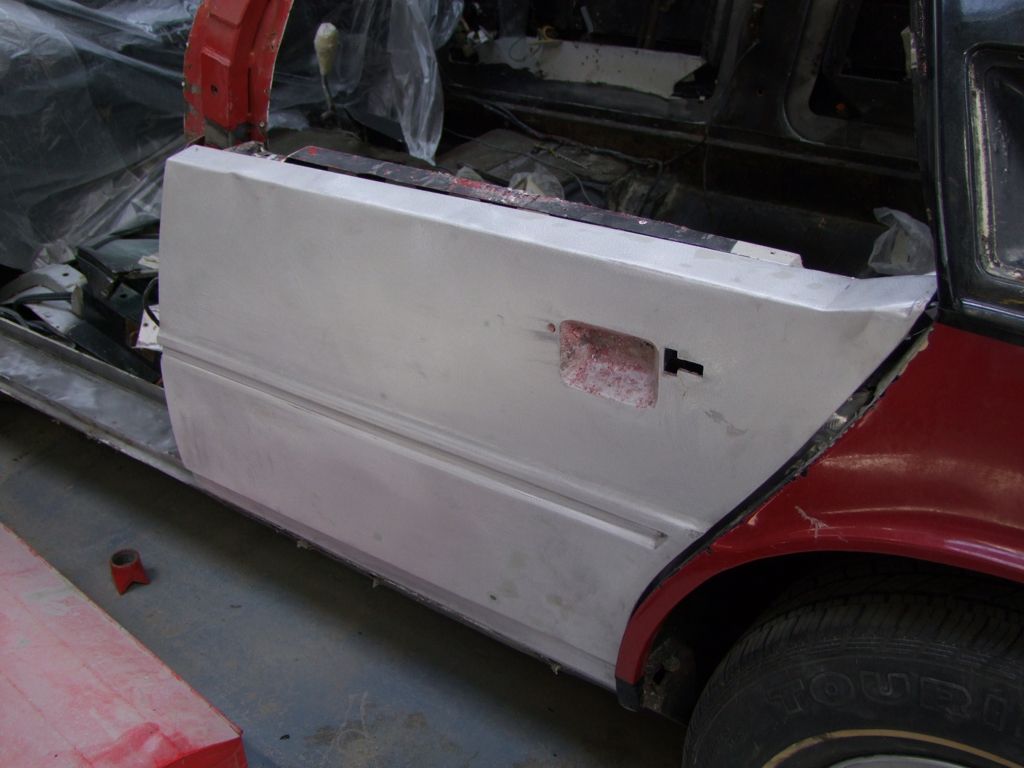
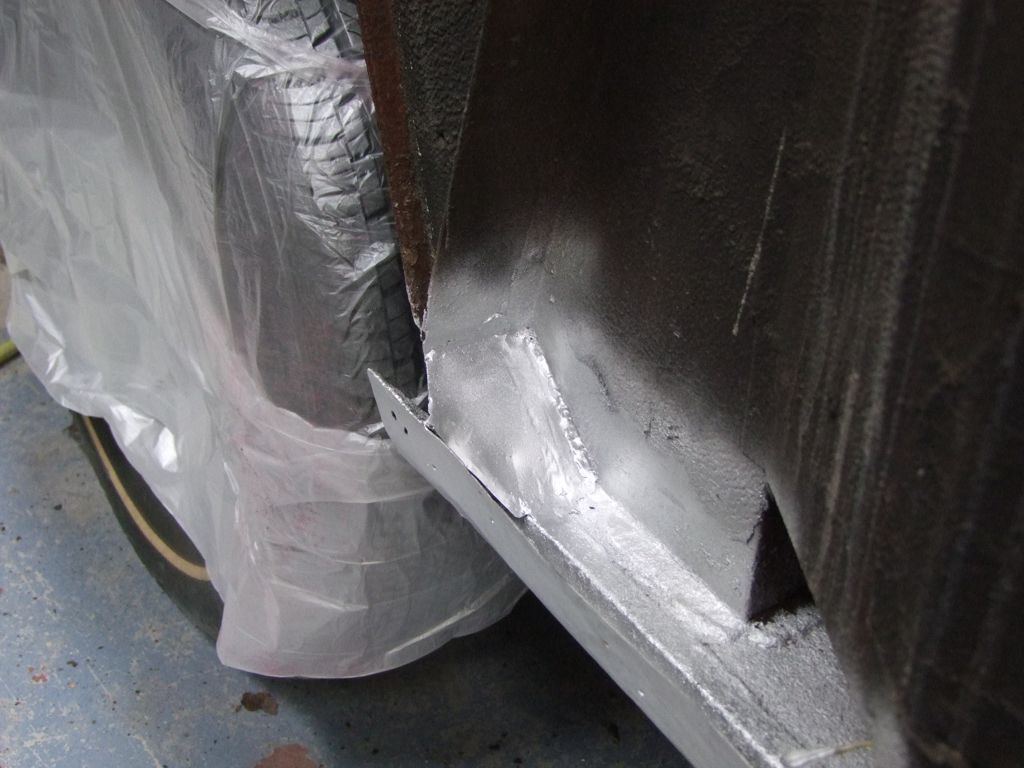
Now to finish the front left. At the front edge, there has been a previous repair:
You can see there is unpainted new metal, but the work was done without removing the wing, and so it is not so good where they couldn't get to it:
And as it should be:
A few other minor repairs at the back of this wing:

And here is how it is finished, ready to be hidden away by the new wing:
 |
|
| Back to top |
|
|
jonc
Joined: 21 Sep 2010
Posts: 584
Location: Cheshire, UK
|
| Posted: Wed Sep 16, 2015 9:33 am Post subject: |
|
|
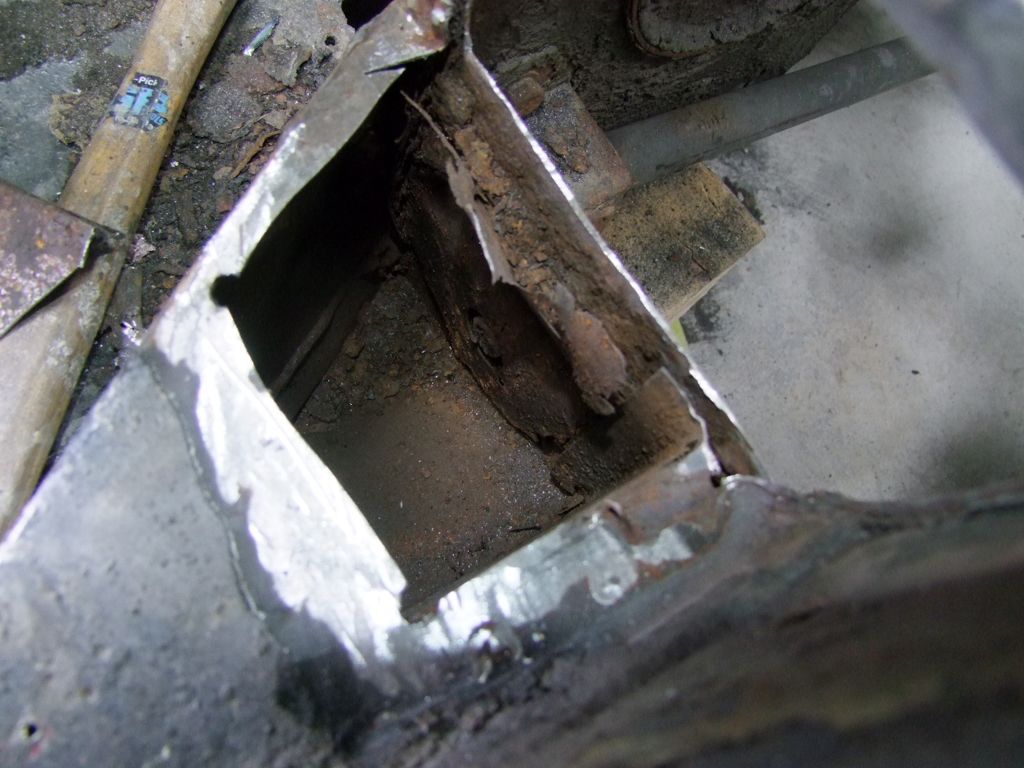
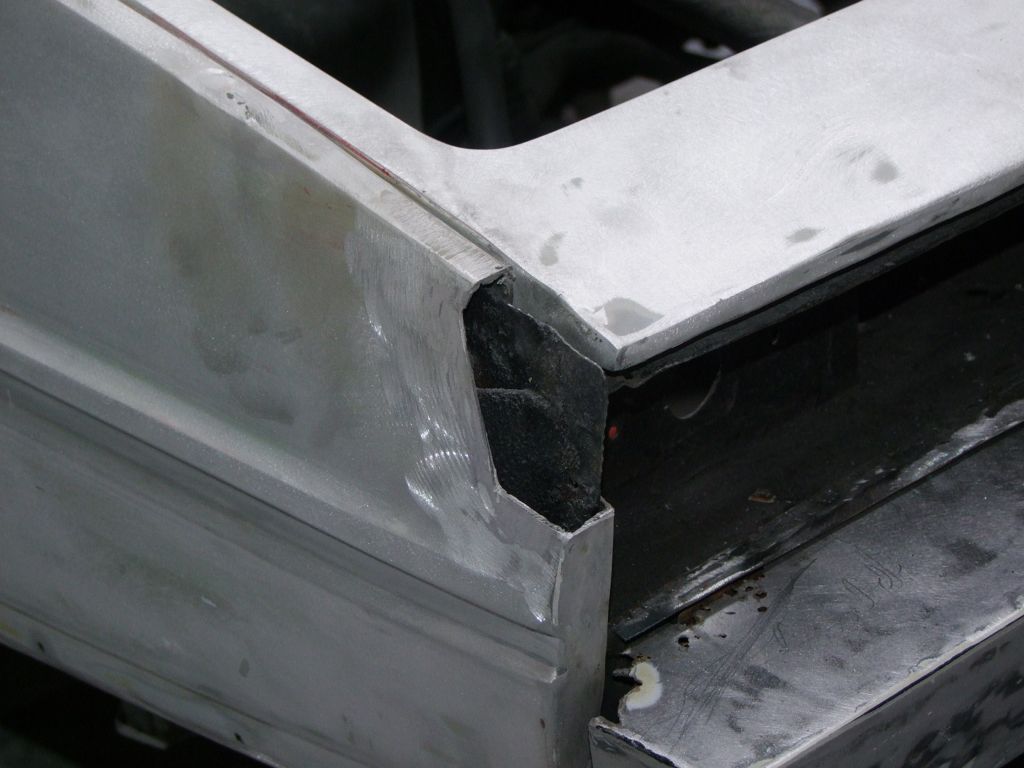
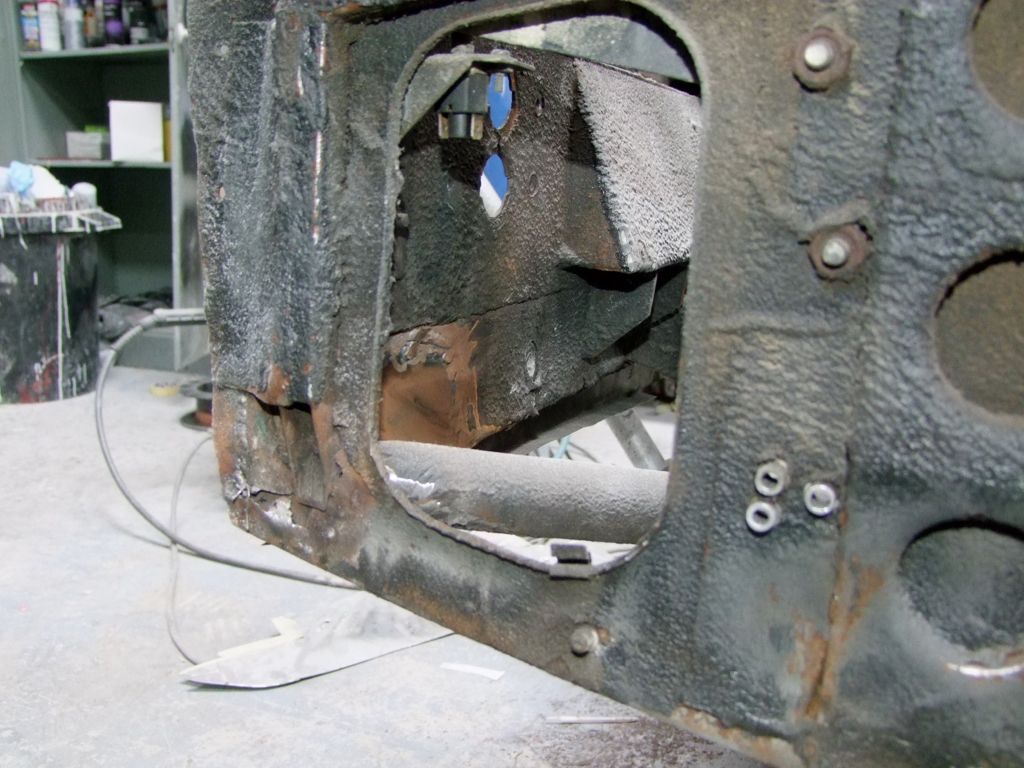
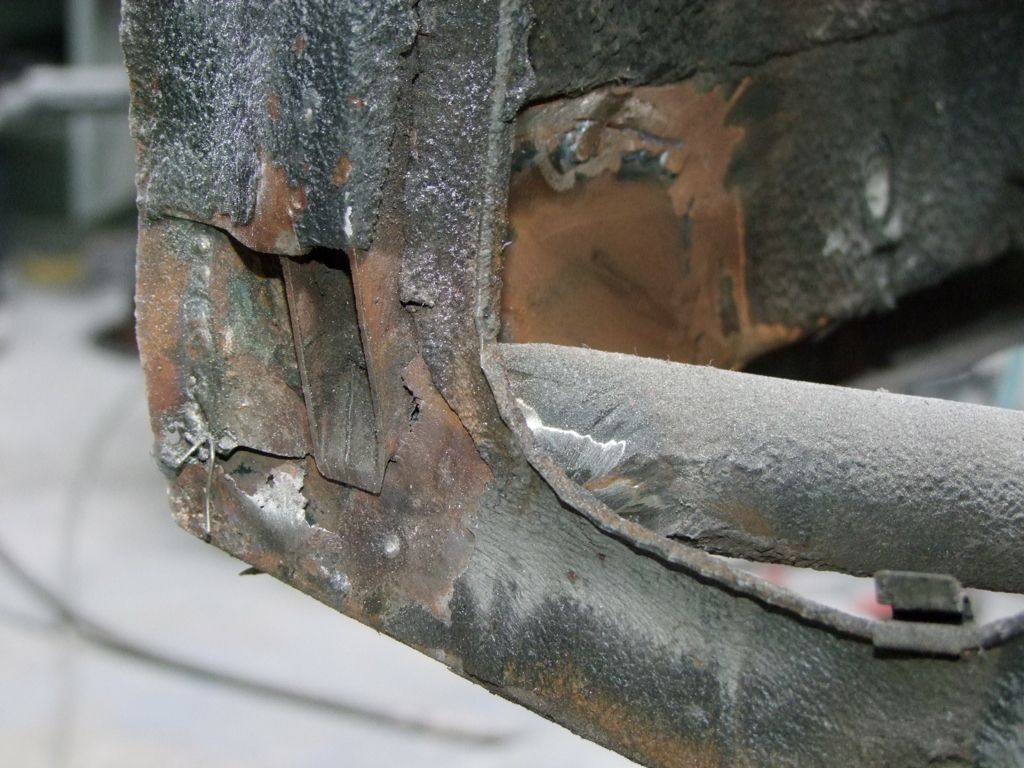
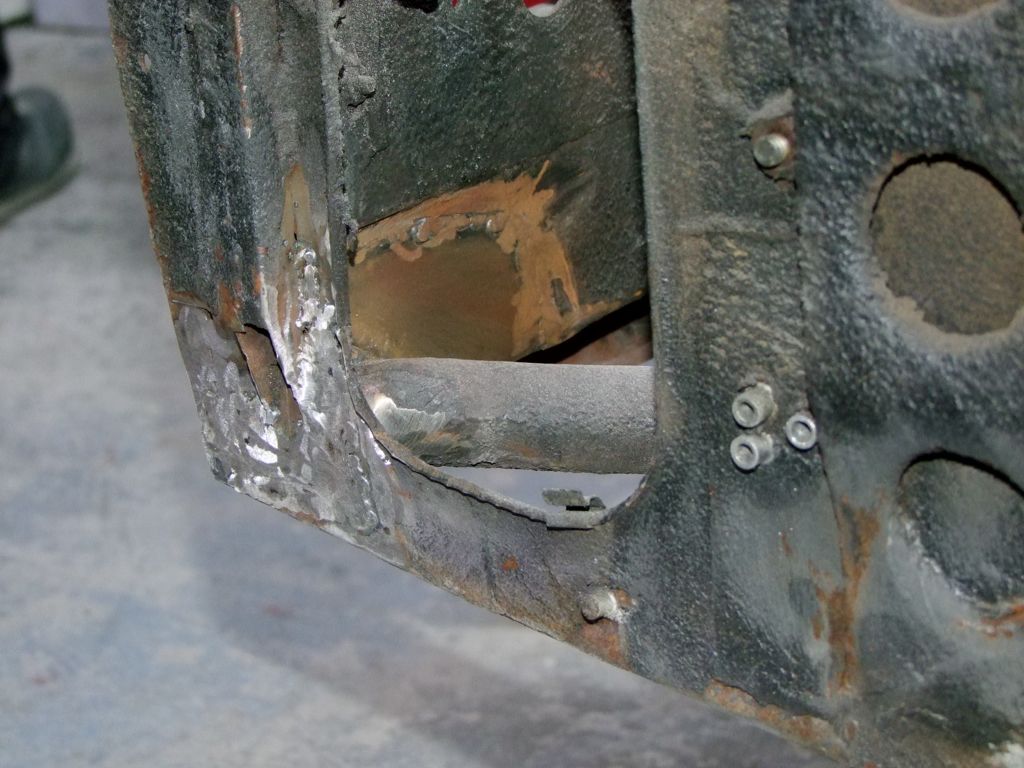
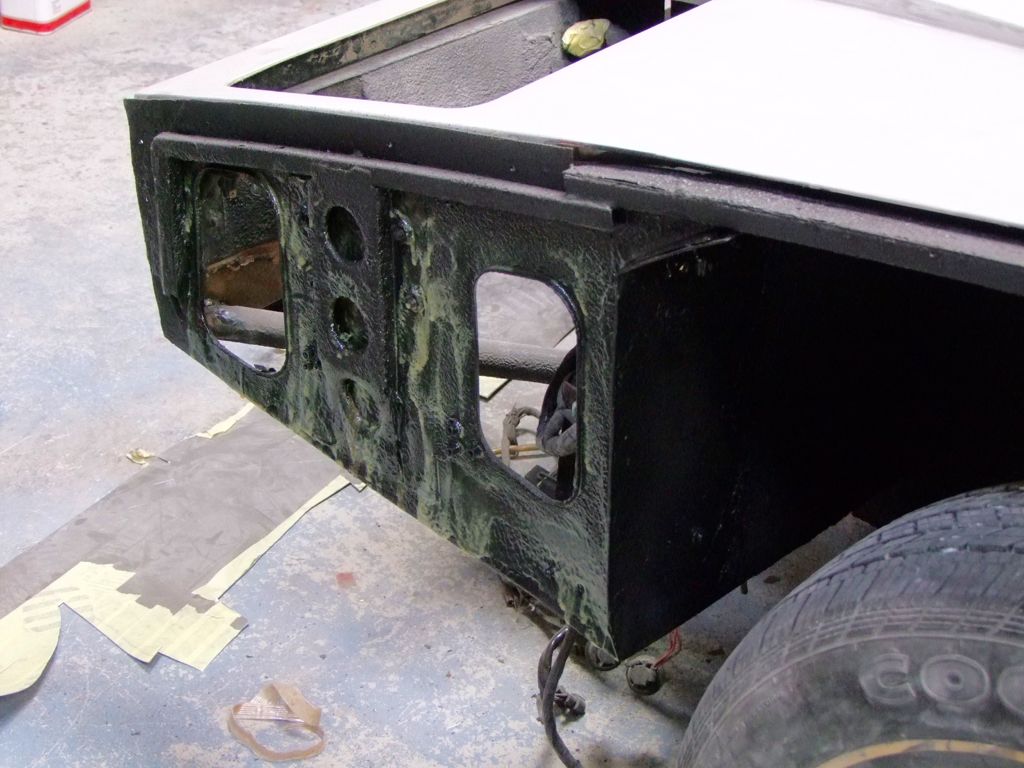
One section of steel to sort out - the structure of the rear pillar. When we last saw it, it looked like this:
It is reasonably straight, but the kinks in the tubes make it far less strong than it should be. It is being replaced.
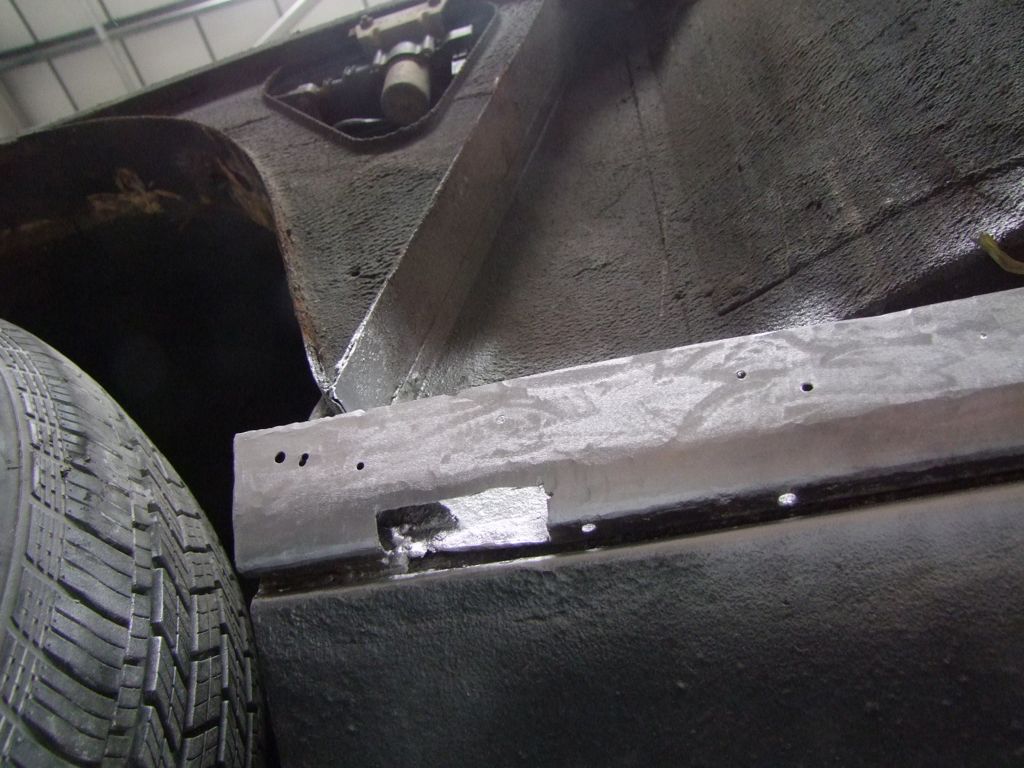
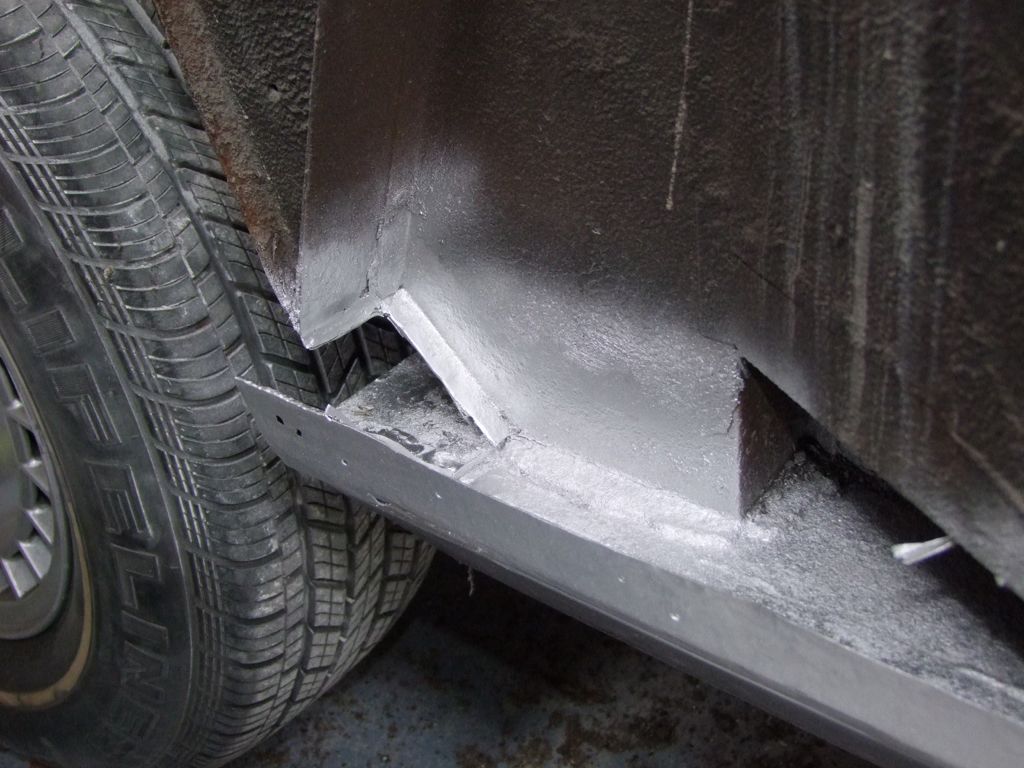
But we are lucky enough to have a roof structure:
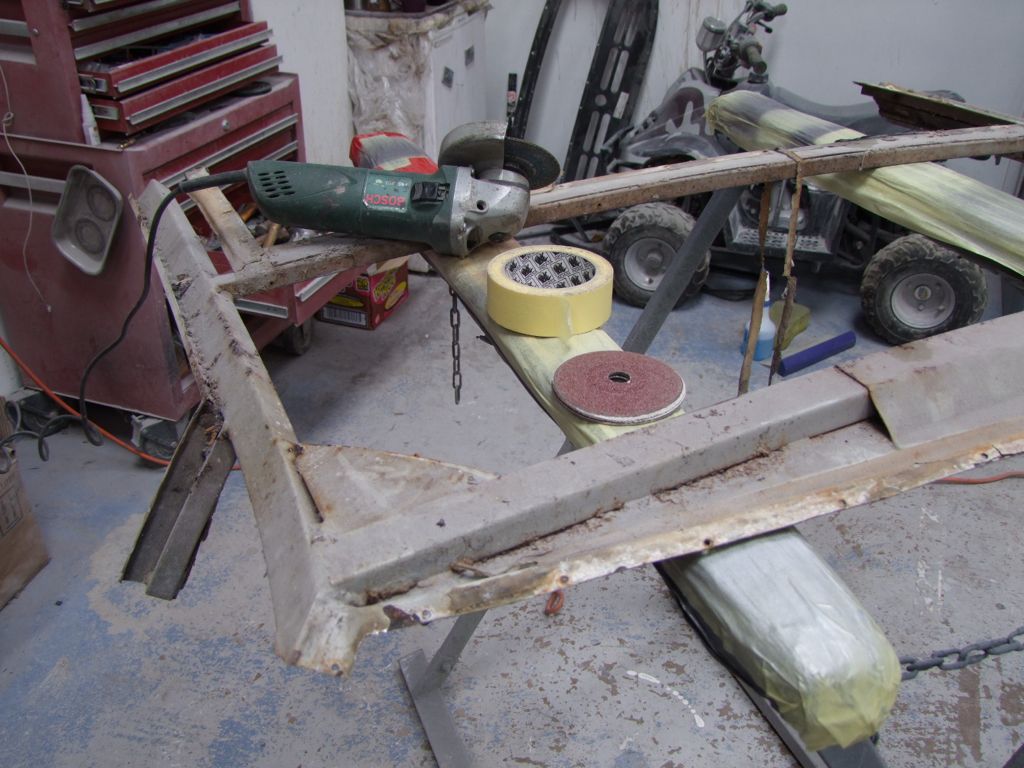
All cleaned up:
and painted:
 |
|
| Back to top |
|
|
Lagondanet
Administrator
Joined: 03 Jan 2007
Posts: 3108
Location: UK
|
| Posted: Wed Sep 16, 2015 1:11 pm Post subject: |
|
|
| A fine job & good progress. |
|
| Back to top |
|
|
Rodolphe

Joined: 29 Nov 2007
Posts: 66
Location: Paris
|
| Posted: Thu Oct 08, 2015 6:59 am Post subject: |
|
|
 |
|
| Back to top |
|
|
|