| View previous topic :: View next topic |
| Author |
Message |
AML_Canada
Joined: 22 Jul 2011
Posts: 15
|
 Posted: Mon Apr 29, 2013 3:13 am Post subject: PopUp Headlight Question/Request Posted: Mon Apr 29, 2013 3:13 am Post subject: PopUp Headlight Question/Request |
 |
|
Greetings Everyone,
I've noticed that the headlamp pods on mine, when activated, initially dip _down_ into the bonnet about 1.5cm before rising to the correct height. When turned off they come down and rest flush as they should.
Yet, I've seen on various online vids that this doesn't happen to other Lagondas - the headlamps start flush, rise and then come back down flush - no initial dip down.
There also is no way to "clock" the lift crank on the (TR7) headlamp motors to accomplish this. So I am thinking that perhaps the lift cranks may be different. My motors as well as the lift cranks come from a TR7 (they were missing when I bought the car).
It would be real helpful if someone could post a pic of the position on the lift arm with the headlamp pod in the retracted and upright position.
Or take the measurement of the centerline distance of the crank arm from the nut to the lifting arm.
Thank You!
Cheers,
Harjeet |
|
| Back to top |
|
 |
jonc
Joined: 21 Sep 2010
Posts: 584
Location: Cheshire, UK
|
 Posted: Mon Apr 29, 2013 9:01 am Post subject: Posted: Mon Apr 29, 2013 9:01 am Post subject: |
 |
|
These are photos of the right headlight of 13277.
First, in the down position. This is as it last came to rest after being electrically operated.
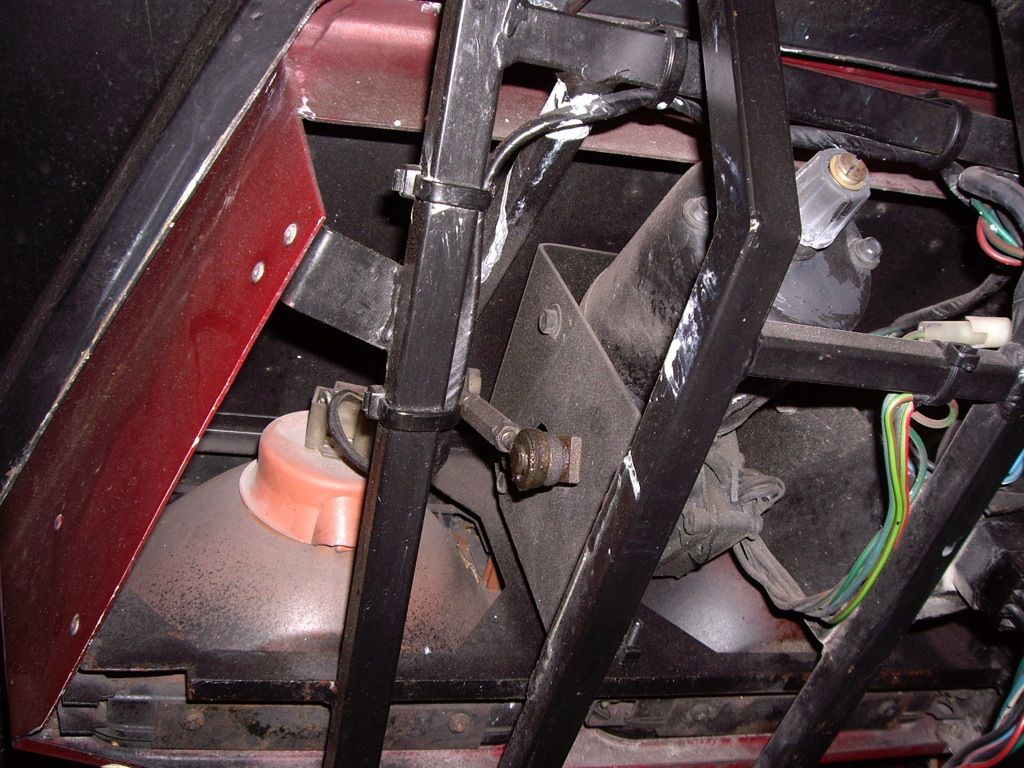
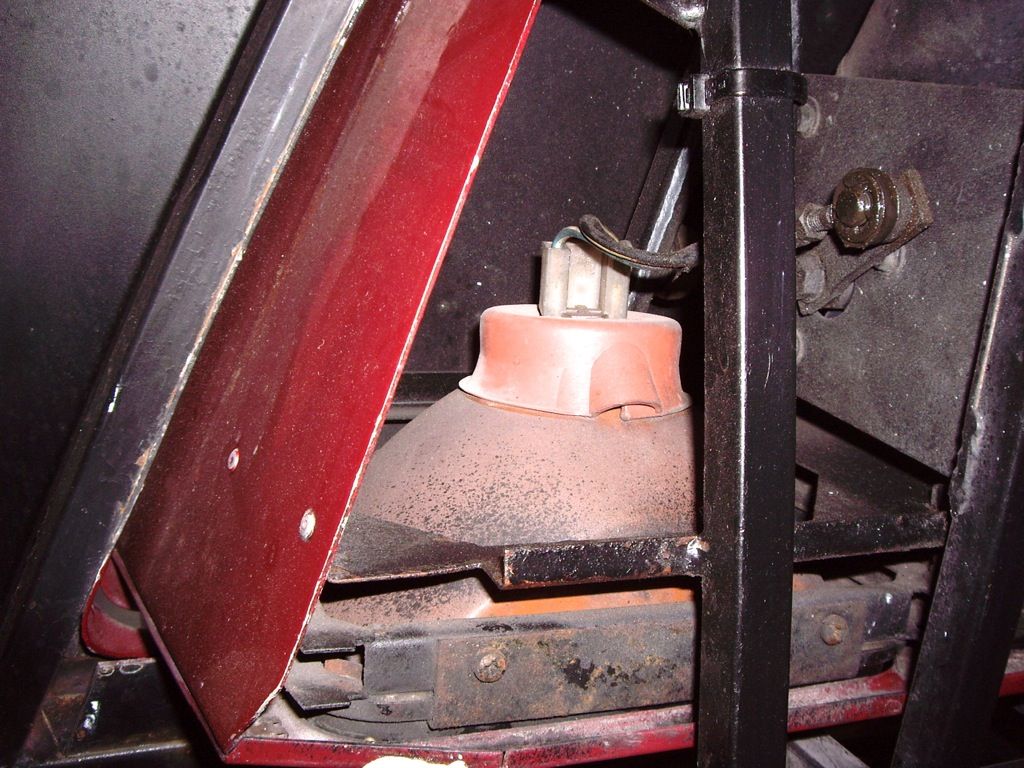
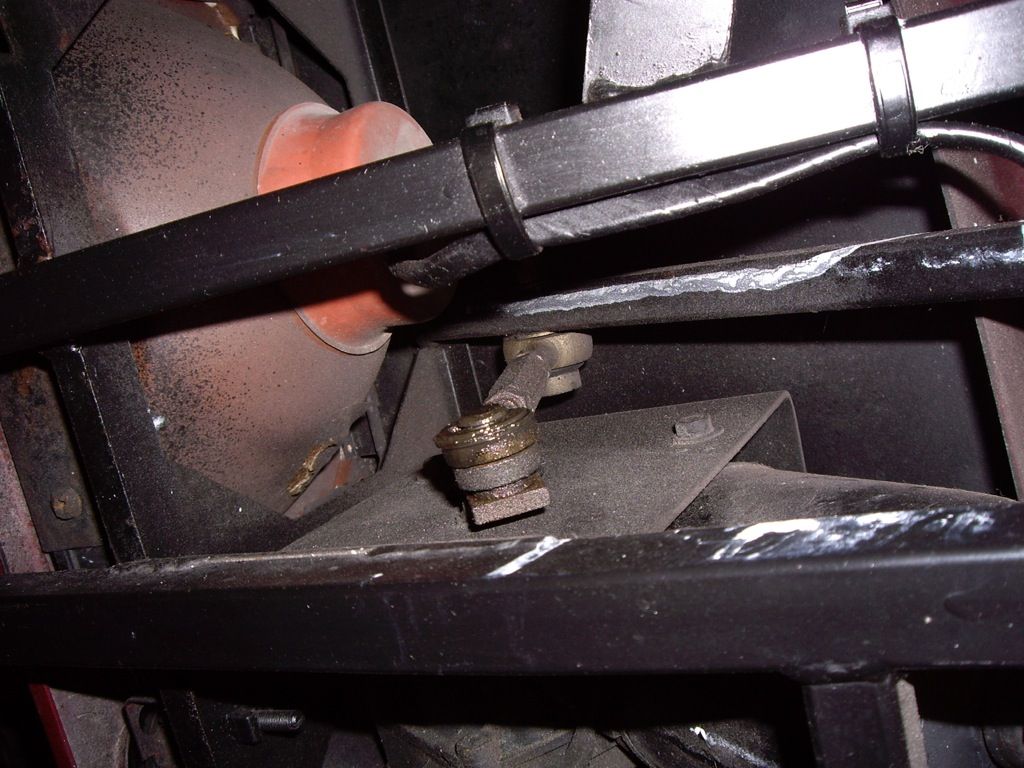
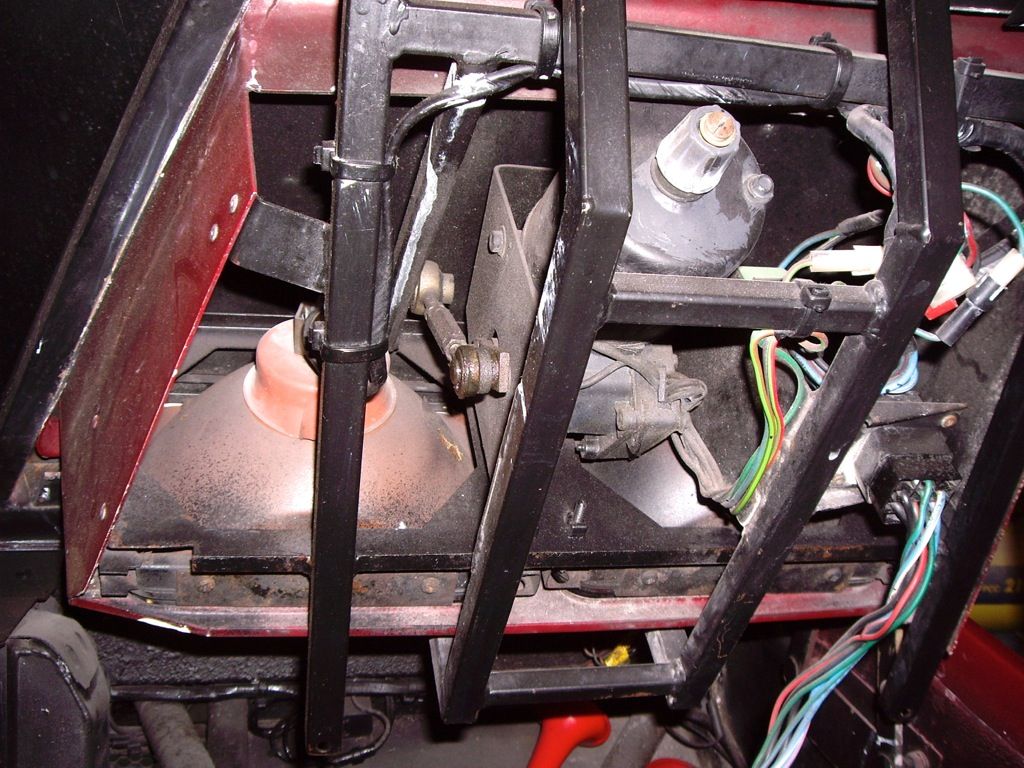
And then I hand-wound it to the up position and so the crank position will not be correct (as I didn't have the keys to hand):
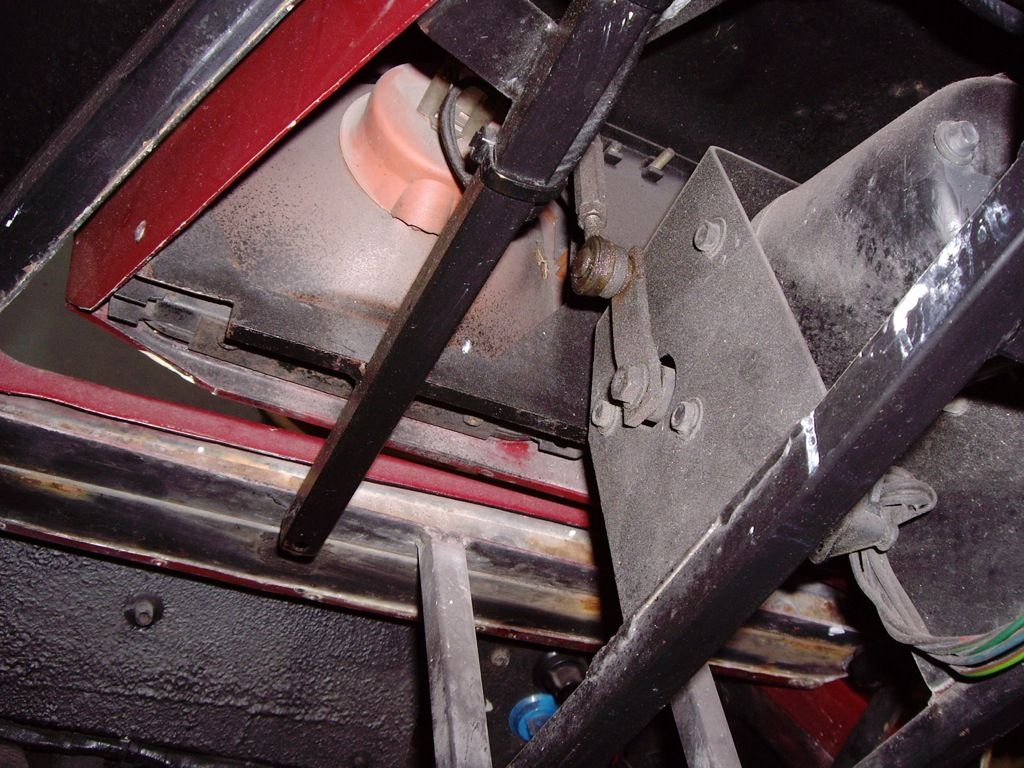
As you rightly say, the motor is from a TR7. My notes say: Lucas 75945 / 75857 Triumph TR7 / TR8 / TVR 350 - motor plus adjustable link (RTC 1992)
Refer here for the diagram: http://www.rimmerbros.co.uk/Item--i-GRID006224
If you need any other photos, please let me know.
Jonathan |
|
| Back to top |
|
 |
AML_Canada
Joined: 22 Jul 2011
Posts: 15
|
 Posted: Mon Apr 29, 2013 11:08 pm Post subject: Posted: Mon Apr 29, 2013 11:08 pm Post subject: |
 |
|
Thank you Jonathan for the detailed pics! Much appreciated and very helpful!
Ah hah!! There is a difference! My motors are mounted/clocked differently. I attempted to rotate them to match yours, but the main centre hole doesn’t line up as the top of the gear housing contacts the metal bracket. And as both sides are identical and have factory holes, I must assume they were done this way on earlier cars (13153)?
Btw, the extra holes and mutilation visible on the brackets were from the previous owner having fitted Pontiac Firebird headlamp motors (unsuccessfully I might add)!! <sigh...>
So I think I can accomplish the same thing by clocking the arm. Could you please do me one more favour and measure the center to center distance of the motor crank and lift arm? The motor crank on mine measures 4.5cm and the adjustable lift arm about 8.9cm. Want ensure everything is the same ballpark before starting.
Thank you again!
Cheers,
Harjeet
Initial Dip into Bonnet when turning on:

Off/Resting Position:

On/Extended Position:

Cause of Dip when turning on:

Motor Position:

Motor Crank ~ 4.5cm CC

Adjustable Lift Arm ~ 8.9cm CC
  
Last edited by AML_Canada on Tue Apr 30, 2013 3:39 pm; edited 1 time in total |
|
| Back to top |
|
 |
jonc
Joined: 21 Sep 2010
Posts: 584
Location: Cheshire, UK
|
 Posted: Tue Apr 30, 2013 3:07 pm Post subject: Posted: Tue Apr 30, 2013 3:07 pm Post subject: |
 |
|
My crank looks very similar, although they look hand-made. I took mine off and gave it a clean so you could see the angle of the keying onto the motor. This is from the right hand light as sat in the car.
Its overall length is 62mm, 16mm wide, and 4mm thick. Center to center is approx 45mm (I think you made a typo in your measurement).
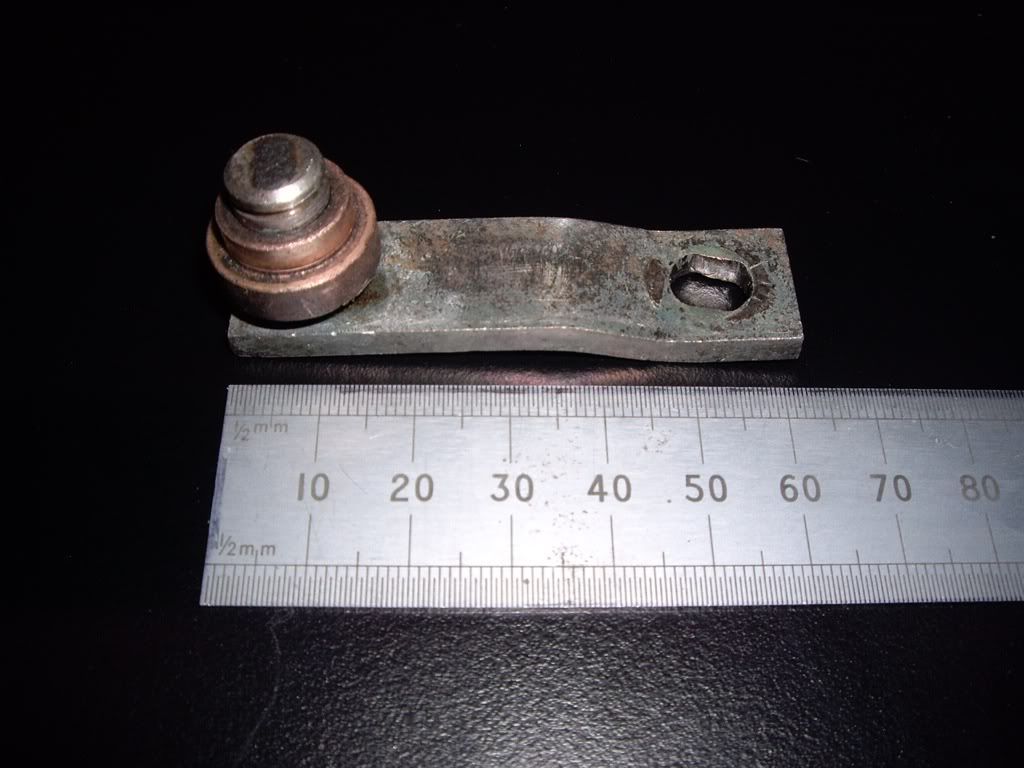
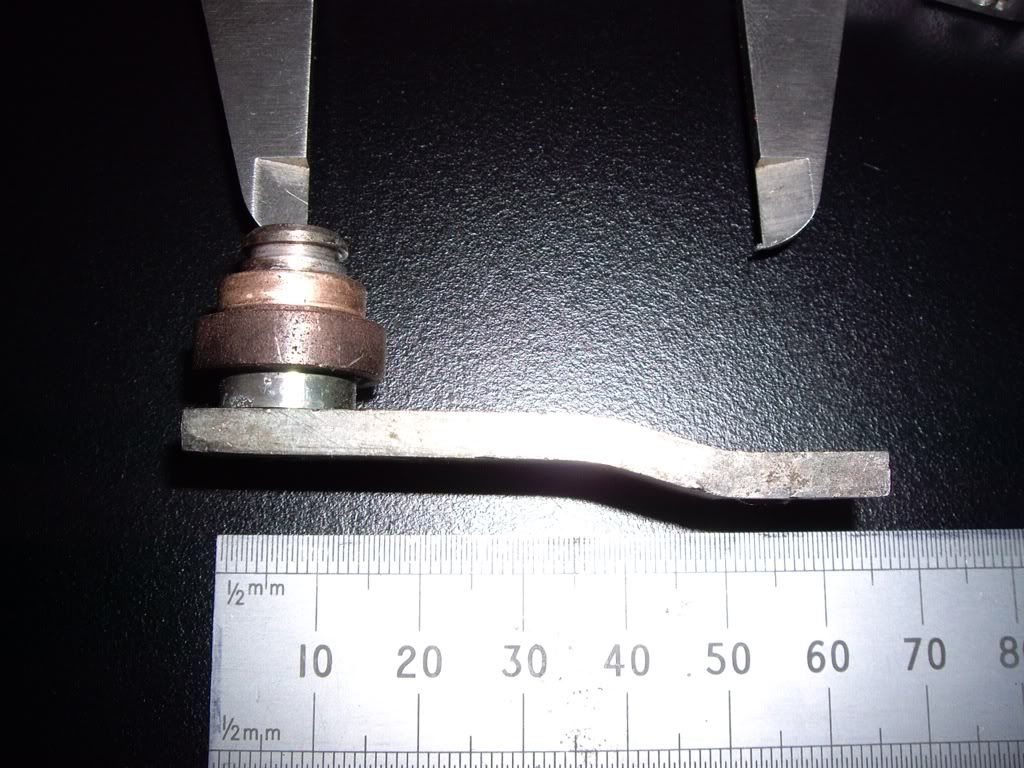
Center to center, my lift arm is 99mm.
Hope this helps!
Jonathan. |
|
| Back to top |
|
 |
AML_Canada
Joined: 22 Jul 2011
Posts: 15
|
 Posted: Tue Apr 30, 2013 5:25 pm Post subject: Posted: Tue Apr 30, 2013 5:25 pm Post subject: |
 |
|
Thanks again Jonathan! 
Fortunately the cranks appear the same length (I corrected the typo). However definitely my clocking slot is messed up - probably when the previous owner fitted these to the Firebird motors.
You photo helped a lot as it confirms what I though should have been the angle of the slot.
Think I'll fill weld in the hole and then re-machine the correct slot angle on the mill.
Really appreciate the trouble you went through to answer my question. Hope I can return the favour at some point!
Cheers,
Harjeet
 |
|
| Back to top |
|
 |
jonc
Joined: 21 Sep 2010
Posts: 584
Location: Cheshire, UK
|
 Posted: Tue Apr 30, 2013 6:20 pm Post subject: Posted: Tue Apr 30, 2013 6:20 pm Post subject: |
 |
|
Hi Harjeet,
No problem. This one may help with getting the correct angle:
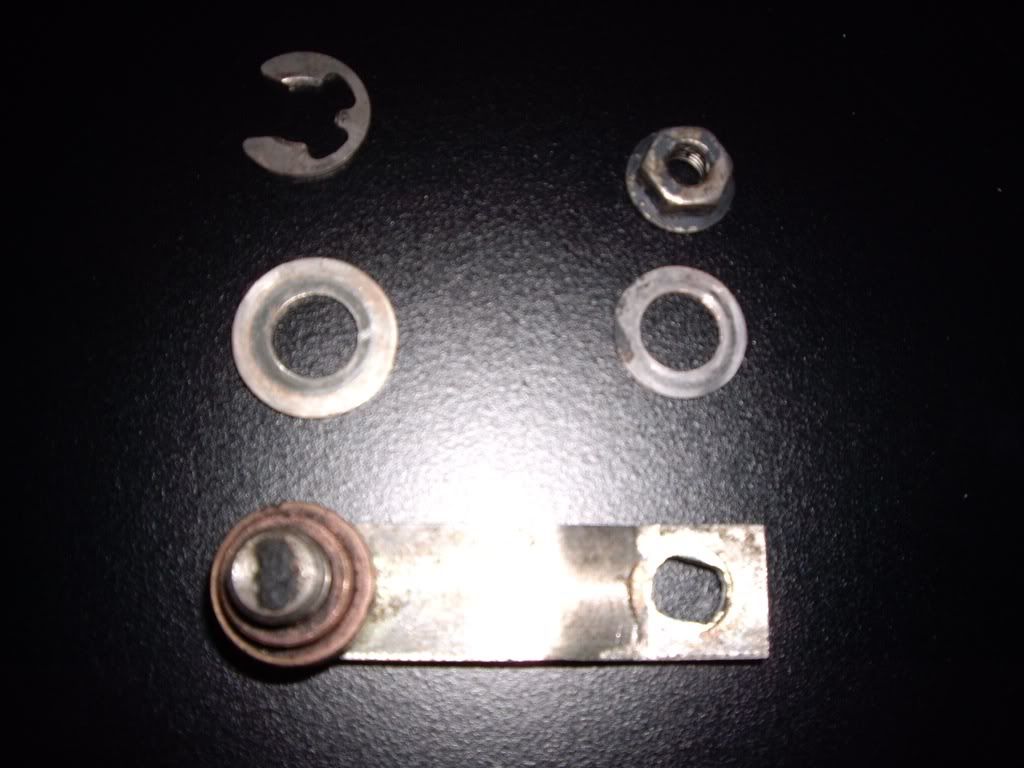
Jonathan |
|
| Back to top |
|
 |
AML_Canada
Joined: 22 Jul 2011
Posts: 15
|
 Posted: Tue Apr 30, 2013 8:52 pm Post subject: Posted: Tue Apr 30, 2013 8:52 pm Post subject: |
 |
|
That's great! Thanks again!  |
|
| Back to top |
|
 |
|


